Google Nest Cam Error Message
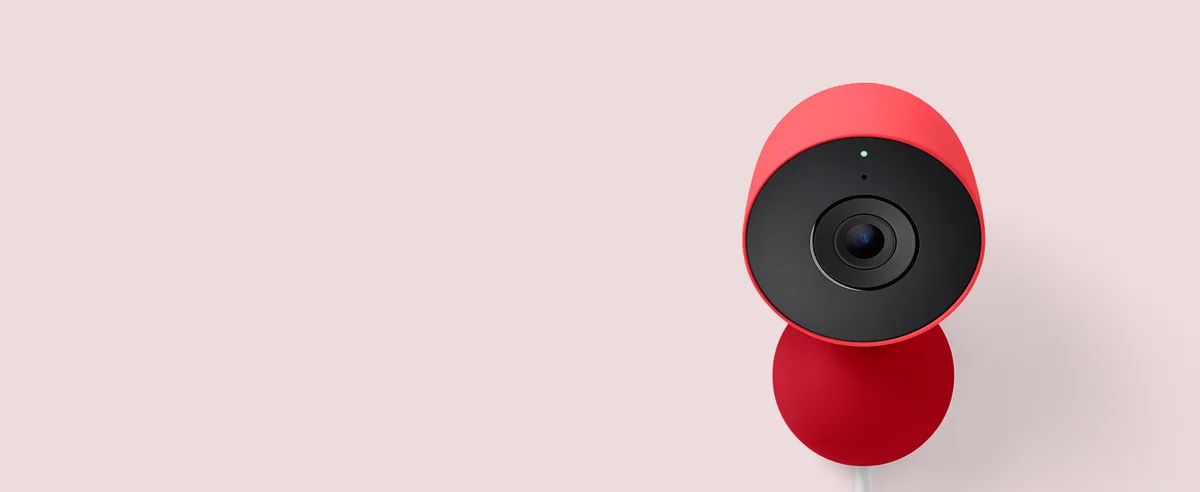
That blinking red light on your Google Nest Cam is never a good sign. You've probably seen a "Google Nest Cam error message" pop up in the Google Home app, and now you're wondering what went wrong. Whether it's "Camera Offline" or "Poor Connection," these messages can be frustrating when you're trying to keep an eye on your home.
As of 2026, Nest Cams rely on a 2.4 GHz Wi-Fi connection for setup. Signal strength is measured in RSSI (Received Signal Strength Indicator). A reading of -60 dBm or better is what you need for a stable feed.
If your signal drops below that, you'll see errors. Let's start by figuring out what your camera is trying to tell you.
Quick Answer
A Google Nest Cam error message means the camera can't communicate with the app. The most common causes are weak Wi-Fi, power issues, or outdated firmware. Fix it by checking your signal strength, restarting the camera, and rebooting your router.
If the error persists, a factory reset usually solves it.
Quick Diagnostic: What Your Error Message Actually Means
Every error message tells you something specific. The trick is knowing what to look for.
"Camera Offline" or "Not Available"
The camera can't reach the Google Home app. It's the most common error, and it usually points to a Wi-Fi problem. The camera might still be recording locally, but it can't stream to your phone.
"Poor Connection"
The camera is connected, but the signal is weak. You'll see buffering, lag, or pixelated video. This happens when the Wi-Fi signal drops below -60 dBm.
"QR Code Not Recognized"
This happens during setup. The camera's lens can't read the QR code from your phone screen. Glare or brightness is usually the culprit.
"Camera Busy"
Another user or device is already viewing the live stream. This is common in households with multiple phones on the same account.
"Unable to Update Firmware"
The camera can't download the latest software. This usually means the Wi-Fi is too slow or the connection drops mid-update.
Image source: Bing (Web (fair-use with source credit))
Here's a quick reference table for the most common errors:
| Error Message | What It Means | Likely Cause |
|---|---|---|
| Camera Offline | No connection to app | Wi-Fi or power issue |
| Not Available | Camera unreachable | Router or signal problem |
| Poor Connection | Weak signal | Distance from router |
| QR Code Not Recognized | Setup failure | Screen glare or brightness |
| Camera Busy | Already in use | Another device streaming |
| Firmware Update Failed | Update interrupted | Unstable Wi-Fi |
Most errors fall into one of three categories: network, power, or software. If you know which one you're dealing with, you're already halfway to a fix.
The Usual Suspects: Why Nest Cams Lose Their Connection
Before we dive into specific fixes, it helps to understand what causes these errors. Nest Cams are smart devices, but they're also simple. They need three things: power, Wi-Fi, and a clear path to Google's servers.
Weak Wi-Fi Signal
This is the number one cause of errors. The Nest Cam communicates over 2.4 GHz Wi-Fi. That band travels farther than 5 GHz, but it's also more prone to interference from walls, appliances, and your neighbor's network.
If your camera is more than 50 feet from the router, you're likely to see "Poor Connection" errors. Google's official documentation confirms that a stable 2.4 GHz connection is required for reliable streaming.
Power Problems
The Battery model needs a charge above 10% to maintain a stable connection. The Wired model needs a steady 5V, 1.5A from the USB adapter. A dying battery or a cheap third-party charger can cause intermittent disconnects.
Router Issues
Your router is the middleman. If it's overloaded, outdated, or due for a reboot, the camera will show "Offline" even when everything else works fine. Many routers need a restart every few weeks to clear their cache.
Firmware Glitches
Sometimes the camera itself has a bug. Google pushes updates automatically. If the update fails mid-install, the camera can get stuck in a broken state.
This often shows up as "Camera Not Available" with no obvious network problem.
Interference from Other Devices
Microwaves, baby monitors, and even Christmas lights can disrupt the 2.4 GHz band. If your camera is in the kitchen, test it during a quiet time. You might find the error only happens when the microwave is running.
Account or App Problems
Less common, but worth checking. If you're signed into the wrong Google account or the app needs an update, the camera won't show up. Make sure you're using the latest version of the Google Home app.
If you've already set up other smart cameras, you might notice similar patterns. The same steps used to restore a Wyze Cam V4 apply to the Nest Cam too.
Decision Tree: Camera Offline or Not Available
This is the most common error you'll see. The camera shows "Offline" or "Not Available" in the app. Let's walk through the steps in order.
Step 1: Check the power
Is the camera on? Look at the LED light. A solid green light means it's powered and connected.
A blinking red light means it's on but not connected to Wi-Fi. No light at all means it's not getting power.
If the light is off:
- Unplug the camera and plug it back in.
- Try a different USB cable and adapter.
- For the Battery model, check the charge level. If it's below 10%, charge it for at least two hours.
Step 2: Check the Wi-Fi
If the camera has power but shows offline, the problem is likely the network. Open the Google Home app and check your router's status.
If other devices in your home are working fine:
- Reboot your router. Unplug it, wait 30 seconds, and plug it back in.
- Wait two minutes for the network to come back up.
- Check if the camera reconnects.
If the camera still shows offline:
- Move the camera closer to the router temporarily.
- If it connects, the issue is range. You may need a Wi-Fi extender or a mesh system.
Step 3: Restart the camera
A simple restart fixes many errors. Unplug the camera for 10 seconds, then plug it back in. Wait up to two minutes for it to reconnect.
Step 4: Check for firmware issues
If the restart didn't work, the firmware might be stuck. Open the Google Home app, tap the camera, and look for a firmware update option. If the camera can't update, you'll need to do a factory reset.
Step 5: Factory reset
Press and hold the reset button on the back of the camera for 10 seconds. The LED will blink yellow, then green. You'll need to set up the camera again from scratch.
The factory reset procedure for a Ring Spotlight Cam works much the same way.
Decision Tree: Poor Connection, Buffering, or Lag
A "Poor Connection" error means the camera is online, but the video is choppy or won't load. This is almost always a Wi-Fi signal strength issue.
Check the signal strength
Open the Google Home app. Tap the camera, then tap the settings gear icon. Look for "Wi-Fi signal strength" or "RSSI." A reading of -60 dBm or better is good.
Between -60 and -70 dBm is borderline. Below -70 dBm means the signal is too weak for reliable streaming.
If the signal is weak:
- Move the camera closer to the router.
- Remove obstacles between the camera and router. Walls, metal, and water (like fish tanks) block Wi-Fi.
- Change the camera's position. Sometimes moving it just a few feet helps.
Check for interference
Other electronics can cause problems. If your camera is near a microwave, cordless phone, or baby monitor, try moving it. Even a nearby Christmas tree with LED lights can cause interference during the holidays.
Reduce bandwidth usage
If multiple devices are streaming video, your network might be overloaded. A Nest Cam needs about 2 Mbps for smooth streaming. If someone in your house is gaming or watching 4K video, the camera will struggle.
- Pause other streams temporarily.
- Check your internet speed. You need at least 5 Mbps upload speed for reliable camera performance.
- If your upload speed is below 1 Mbps, call your ISP.
Router placement matters
Your router's position affects every device on your network. If it's in a corner of the basement, the signal will struggle to reach the second floor. Try moving the router to a central location, elevated off the floor.
Try a different band
Nest Cams only support 2.4 GHz Wi-Fi. But if your router broadcasts both 2.4 GHz and 5 GHz, make sure the camera is connecting to the 2.4 GHz band. Some routers let you split the bands into separate network names (SSIDs).
If yours does, connect the camera to the 2.4 GHz network specifically.
This is the same kind of troubleshooting you'd use to get a Reolink Argus 4 online. The principle is the same. Get the camera closer to the router and reduce interference.
Decision Tree: QR Code Not Recognized or Setup Failed
This error happens during the initial setup. You scan the QR code on your phone screen, but the camera doesn't recognize it. It's frustrating, but it's usually an easy fix.
Why it happens
The camera's lens reads the QR code like a barcode. If the screen is too bright, too dim, or if there's glare, the camera can't read it. The same thing happens if the code is too small or if the camera lens is dirty.
Step 1: Adjust the screen brightness
Turn your phone's brightness up to maximum. Hold the phone about 6 to 8 inches from the camera lens. Make sure the code fills the camera's viewfinder.
Step 2: Reduce glare
Glare is the most common cause of this error. If you're in a bright room, move to a darker spot. Or turn your phone slightly away from direct light.
You can also tilt the phone so the screen faces the camera at a slight angle.
Step 3: Clean the lens
A dirty camera lens can't read the QR code. Wipe the lens with a soft, dry cloth. A microfiber cloth works best.
Step 4: Restart the setup
If the code still won't scan, close the Google Home app and start over. Delete the camera from the app if it was partially added. Then try again.
Step 5: Try a different device
If you have another phone or tablet, install the Google Home app on that device and try the setup from there. Sometimes the screen on your primary phone just doesn't work well with the camera's sensor.
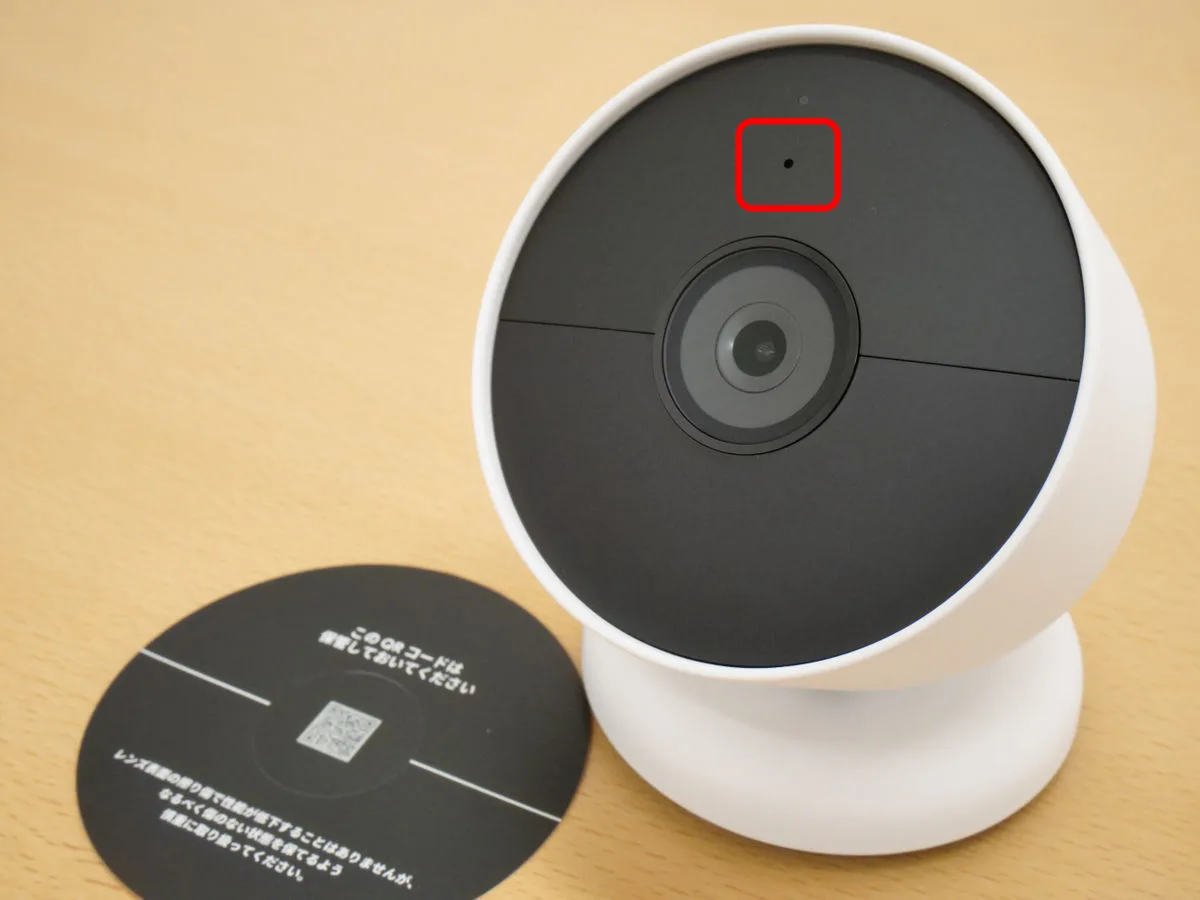
Image source: Bing (Web (fair-use with source credit))
Step 6: Use the manual setup option
If the QR code won't scan at all, look for a manual setup option in the app. You'll see a prompt to enter a code instead of scanning. The code is printed on the back of the camera or on the packaging.
This error is common across many smart cameras. The same approach works for getting a EufyCam 3 connected or pairing a Blink Outdoor camera. The QR code is a convenience, not a necessity.
Decision Tree: Camera Busy, Audio Issues, or Firmware Stuck
What does "Camera Busy" actually mean?
It means someone else is already watching the live feed. Nest Cams allow only one stream at a time per camera. If you share your Google Home with family members, someone else might be viewing the camera.
Check who else has access. Open the Google Home app. Tap the camera.
Go to settings and look for "Household" or "Shared users." Ask others to close the live view.
If no one else is watching, the app might have a stuck session. Force close the Google Home app and reopen it. That clears the orphaned stream.
What about two-way audio that won't work?
Audio issues usually come from one of three places. The microphone, the speaker, or the network.
First, check the camera's microphone. Make sure nothing is blocking it. The microphone is a small hole on the camera body.
Dust or debris can muffle it.
Second, check the app permissions. The Google Home app needs microphone access on your phone. If you denied it during setup, audio won't work.
Third, check for feedback loops. If the camera speaker is too loud, the microphone picks up the sound and creates echo. Lower the speaker volume in the app.
Firmware stuck mid-update
This is a tricky one. The camera shows "Updating" but never finishes. Or it shows an error message about the update failing.
Do not unplug the camera during an update. That can corrupt the firmware. Wait at least 15 minutes.
If nothing changes, force restart the camera by unplugging it.
After the restart, check the firmware version in the app. If it's still on the old version, try the update again. Make sure the Wi-Fi signal is strong before starting.
If the update keeps failing, a factory reset is your only option. The camera will need to download the latest firmware from scratch during setup.
Other devices handle firmware updates in similar ways. Updating a Canon EOS R50 follows the same principles.
The Nuclear Options: Restart, Reset, and Re-Pair
When nothing else works, it's time for the nuclear options. These are the final steps before you call support. Use them in order.
Restart: The gentle approach
This is the simplest fix. Unplug the camera for 10 seconds. Plug it back in.
Wait two minutes for it to reconnect.
A restart clears temporary glitches. It does not erase your settings. Think of it like rebooting your computer.
It fixes most transient errors.
Factory reset: The full wipe
A factory reset erases everything. Your settings, your Wi-Fi credentials, your activity zones. The camera goes back to the state it was in when you opened the box.
To reset a Nest Cam (Battery or Wired):
- Locate the reset button on the back of the camera.
- Press and hold it for 10 seconds.
- The LED will blink yellow, then green.
- Release the button when the light turns green.
The camera chimes and restarts. You'll need to set it up again from scratch.
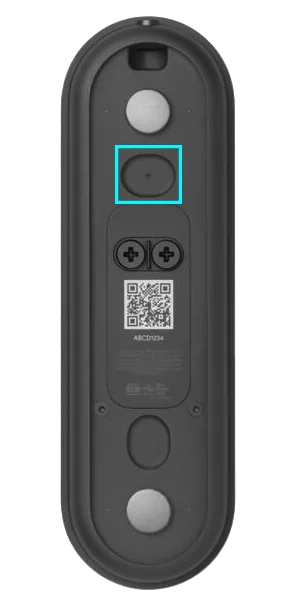
Image source: Bing (Web (fair-use with source credit))
For the Nest Cam IQ, the reset button is under the magnetic base. You need a paperclip to press it.
Re-pair: Starting over
After the factory reset, open the Google Home app. Tap "Add" and scan the QR code on the camera. If the code won't scan, use the manual code printed on the camera body.
This is the same process you followed during the first setup. The camera will connect to your Wi-Fi and download the latest firmware.
When to use each option
Use a restart for minor errors. Use a factory reset when the camera won't connect at all. Use re-pair only after a reset.
Skipping straight to a factory reset is tempting but unnecessary. It takes longer and forces you to redo all your settings. Try the restart first.
Resetting other smart cameras works the same way. You can follow similar steps to get a Wyze Cam V4 back online or recover a Ring Spotlight Cam.
Common Mistakes That Make Errors Worse
Some fixes seem logical but actually make things worse. Here are the mistakes people make most often.
Using a third-party charger
The Nest Cam needs 5V, 1.5A. A cheap phone charger might deliver less power. The camera might turn on but not connect reliably.
Google warns against using uncertified accessories.
Stick with the charger that came in the box. If you lost it, buy a replacement from Google or a certified retailer.
Ignoring firmware updates
When the camera prompts you to update, do it. Delaying updates leaves you vulnerable to bugs that Google has already fixed. An outdated camera is more likely to show errors.
Set the app to auto-update overnight. The camera updates when it's not in use.
Moving the router without testing
People move the router and assume the camera will adjust. Routers have different coverage patterns. If you move the router, check the camera's signal strength again.
Restarting the camera too many times
Restarting the camera 10 times in a row doesn't help. It just wears out the internal components. If a restart didn't fix it the first time, move to the next step.
Skipping the reboot order
Always reboot the router before the camera. If you reboot the camera first, it tries to reconnect to a router that's still down. The camera shows "Offline" and you think it's broken.
Using the wrong band
Nest Cams only work on 2.4 GHz Wi-Fi. If your router is set to 5 GHz only, the camera won't connect. Some routers automatically switch bands.
That can confuse the camera.
Split your Wi-Fi bands into separate network names. Connect the camera to the 2.4 GHz network specifically.
Not checking the app version
The Google Home app updates regularly. An old version can have bugs that cause errors. Open the app store and check for updates.
Frequently Asked Questions
Why does my Nest Cam keep going offline at night?
Nighttime disconnects often point to interference. Holiday lights, outdoor transformers, and even your neighbor's security lights can disrupt the 2.4 GHz band. Check if the error happens at the same time every night.
If so, look for a timer-based device nearby.
Can a power outage damage my Nest Cam?
A power outage won't damage the camera. But it can corrupt the firmware if the camera was mid-update. After the power comes back, restart the camera.
If it won't connect, do a factory reset.
How do I check my Nest Cam's Wi-Fi signal strength?
Open the Google Home app. Tap the camera. Tap the settings gear icon.
Look for "Wi-Fi signal strength" or "RSSI." A reading of -60 dBm or better is good. Below -70 dBm means you need to move the camera or add a Wi-Fi extender.
What does a blinking red light mean on my Nest Cam?
A blinking red light means the camera is powered but not connected to Wi-Fi. It's broadcasting a signal but can't reach the router. Check your network and restart the router.
Why won't my Nest Cam scan the QR code?
The screen is too bright, too dim, or has glare. Turn your phone brightness to maximum. Move to a darker room.
Clean the camera lens. If it still won't scan, use the manual code printed on the camera.
Can I use a Wi-Fi extender with my Nest Cam?
Yes. A Wi-Fi extender can help if the camera is far from the router. Place the extender halfway between the router and the camera.
Make sure the extender supports 2.4 GHz. Some extenders create a separate network name that works better than the main one.
When to Call Google Support (and What to Tell Them)
Most errors are fixable at home. But sometimes you need help from Google. Call support when you've tried everything and the camera still won't work.
When to escalate
Call if the camera shows no LED light after trying different cables and adapters. That means the hardware is dead.
Call if the factory reset didn't work. If the camera won't enter setup mode after a reset, the firmware is corrupted beyond repair.
Call if the camera works but the app won't find it. This is a rare account issue that Google can fix on their end.
Call if the error is new and spreading. If multiple cameras show the same error at the same time, Google's servers might be down. Check the Google Nest status page first.
What to have ready
Before you call, gather this information. It saves time and gets you a faster resolution.
- The exact error message. Copy it word for word.
- The camera model and generation. It's printed on the bottom of the camera.
- The firmware version. Find it in the app settings.
- Your Wi-Fi network name and signal strength.
- The steps you've already tried.
Google support can be reached through the app or the Nest Help Center. The official support documentation confirms that hardware replacements are available for units under warranty.
What to expect
Google will ask you to repeat the troubleshooting steps. Be patient. They need to verify that you've done the basics.
If the camera is under warranty, they'll send a replacement. If it's out of warranty, they'll offer a discount on a new one. The replacement process takes about a week.
For persistent firmware issues, Google can sometimes push a manual update to your camera. This fixes bugs that the automatic update missed.
One last tip
If you're calling about a Nest Cam that's still in its first year, mention the warranty early. Many callers forget and get charged for support that should be free. The standard warranty is one year from the date of purchase.

Similar Posts