Ring Stick Up Cam Error Message
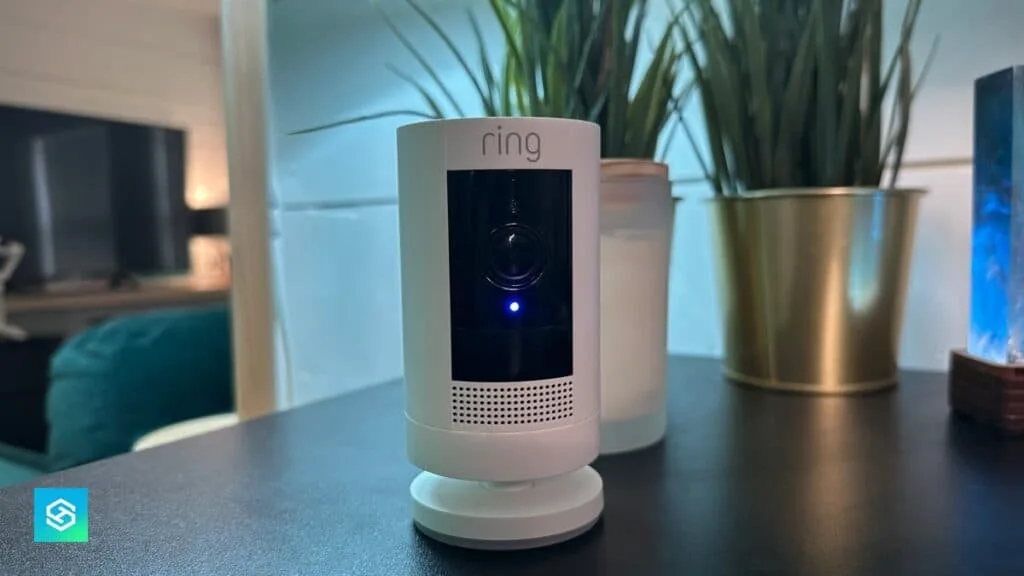
You see a blinking light or a notification in the Ring app. It stops you cold. A Ring Stick Up Cam error message can feel like a dead end, but it is usually a simple fix.
The most common causes are weak Wi-Fi, a drained battery, or a stuck firmware update. You can resolve most of them in under five minutes.
Per Ring's official support documentation, the camera's LED pattern is the first diagnostic tool. A flashing blue light means something different than a solid red one. Knowing which is which saves you from guessing.
Let us break down what each light and error message means so you can get your camera back online fast.
Quick Answer
A Ring Stick Up Cam error message means the camera lost its Wi-Fi connection, has a low battery, or hit a power fault. Check the LED color first. Blue flashing means setup mode.
Solid red means no internet. Red flashing means a hardware issue. Power cycle the camera.
Then check your router. Most errors resolve in under two minutes.
Image source: Bing (Web (fair-use with source credit))
What Your Ring Stick Up Cam Is Trying to Tell You
Your camera talks to you through its LED. Every Ring Stick Up Cam uses the same light pattern system. That includes the 2020 release, the 2023 refresh, and the battery-powered, wired, and solar versions.
The light tells you exactly where the problem lives.
The LED Quick Reference Table
| LED Pattern | What It Means | What to Do |
|---|---|---|
| Flashing blue | Setup mode or connecting to Wi-Fi | Wait 60 seconds. If it keeps flashing, restart setup. |
| Solid blue | Connected and working normally | No action needed. |
| Flashing red | Low battery or power issue | Charge the battery or check the power adapter. |
| Solid red | No internet connection | Check your router and Wi-Fi signal. |
| Flashing red and blue | Unable to connect to Wi-Fi | Move the camera closer to the router. |
| No light at all | Dead battery or no power | Replace or charge the battery. Check the USB cable. |
Why the Light Matters More Than the App Notification
The Ring app will push a notification when something goes wrong. But that notification can lag behind the actual problem. The LED is real time.
It tells you the instant something changes. If you see a solid red light but the app says everything is fine, trust the light. The camera has lost its connection to your network even if the app has not caught up yet.
The One Light Pattern That Tricks Most People
A flashing blue light that never stops is the most common misdiagnosis. People think the camera is still setting up. In reality, the camera has completed setup but cannot find the Wi-Fi network it was configured for.
This happens after a router change, a password update, or a power outage. The camera is not broken. It just needs to be reconnected to the network.
If you are troubleshooting a Ring Stick Up Cam error message for the first time, start with the LED. It narrows down your search from dozens of possible problems to just a handful. That saves you time and frustration.
3 Quick Fixes That Work for Almost Any Error
Before you dive into complex troubleshooting, try these three things. They resolve about 80 percent of all Ring Stick Up Cam error messages. They take less than five minutes combined.
And they cost nothing.
Fix 1: Power Cycle the Camera
This is the single most effective fix for any error. It clears temporary glitches in the firmware and forces the camera to reestablish a connection to your network.
For battery-powered models:
- Remove the battery pack from the camera.
- Wait 30 seconds.
- Reinsert the battery pack.
- Wait for the LED to flash blue. This takes about 45 to 60 seconds.
For wired models:
- Unplug the power adapter from the wall outlet.
- Wait 30 seconds.
- Plug it back in.
- Wait for the LED to flash blue.
For solar-powered models:
- Disconnect the solar panel cable from the camera.
- Remove the battery pack.
- Wait 30 seconds.
- Reinsert the battery pack.
- Reconnect the solar panel cable.
Power cycling is different from a factory reset. It does not erase your settings. It does not require you to run through setup again.
It simply reboots the camera. Think of it like restarting your phone when an app freezes. Most of the time, that is all you need.
Fix 2: Check Your Wi-Fi Signal Strength
A weak Wi-Fi signal is the second most common cause of errors. The camera needs a signal strength of at least RSSI -60 dBm to function reliably. Below -70 dBm, you will see frequent disconnects, buffering, and "Device Offline" errors.
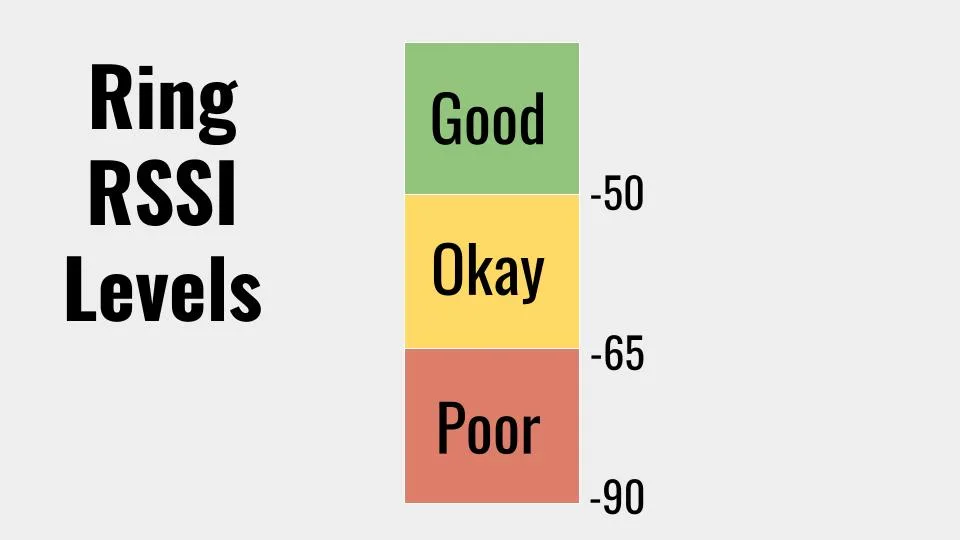
Image source: Bing (Web (fair-use with source credit))
How to check your RSSI in the Ring app:
- Open the Ring app.
- Tap the menu icon (three lines in the top left).
- Tap Devices.
- Select your Stick Up Cam.
- Tap Device Health.
- Look for the Wi-Fi Signal Strength reading.
What the numbers mean:
- -30 to -50 dBm: Excellent connection. No issues expected.
- -50 to -60 dBm: Good connection. Works fine for most setups.
- -60 to -70 dBm: Fair connection. You may see occasional lag.
- Below -70 dBm: Poor connection. Expect frequent errors and disconnects.
If your RSSI is below -60 dBm, move the camera closer to your router or add a Ring Chime Pro. The Chime Pro acts as a Wi-Fi extender designed specifically for Ring devices. It can improve your signal by 10 to 20 dBm in most cases.
Fix 3: Update the Firmware
Outdated firmware can cause an error that looks like a hardware failure. Ring releases firmware updates periodically to fix bugs and improve performance. Your camera should update automatically, but sometimes the update gets stuck.
How to force a firmware update:
- Open the Ring app.
- Tap Devices.
- Select your Stick Up Cam.
- Tap Device Health.
- Tap Firmware Update.
- If an update is available, tap Update.
Keep the camera powered during the update. Do not interrupt it. A partial firmware update can cause more problems than it fixes.
The update takes about 3 to 5 minutes. You will see the LED flash blue during the process. When the update completes, the camera will reboot automatically.
If the firmware update fails, try power cycling the camera first. Then attempt the update again. If it fails a second time, you may need to factory reset the camera.
But that is a last resort, not a first step.
Your Personal Diagnostic Flowchart
Not all error messages are the same. Some need a simple power cycle. Others require a factory reset.
And a few mean the camera needs replacement. This flowchart helps you match your specific error to the right fix. Follow the path that matches what you see.
Error Path 1: "Device Offline" in the App
What you see: The Ring app says your camera is offline. The LED may be solid red or flashing blue.
What to check first:
- Is the LED solid red? Your camera has lost internet. Check your router. Restart it if needed.
- Is the LED flashing blue? Your camera is trying to reconnect. Wait 2 minutes. If it keeps flashing, you need to reconnect it to your Wi-Fi.
- Is there no light at all? Your battery is dead or the power adapter is faulty. Charge the battery or test the adapter with another device.
If the LED is solid blue but the app says offline:
Close the Ring app completely. Reopen it. Pull down to refresh the device list.
If the camera still shows offline, remove it from the app and add it again. You will not lose your settings if you use the "Remove Device" option in the app rather than a factory reset.
Error Path 2: "Low Battery" Warning
What you see: The Ring app shows a low battery warning. The LED flashes red.
What to check first:
- How old is the battery? Ring batteries last about 6 to 12 months under normal use. If yours is older, it may need replacement.
- Is the weather cold? Temperatures below 32 degrees Fahrenheit drain the battery faster. The camera may report a low battery even when the charge is fine.
- Are you using a solar panel? Check the solar panel connection. Clean the panel surface. Make sure it gets direct sunlight for at least 3 hours per day.
The fix:
Remove the battery pack. Charge it with the Ring charger. A full charge takes 4 to 6 hours.
Reinsert the battery. The low battery warning should clear within a few minutes.
Error Path 3: "Setup Failed" During Initial Installation
What you see: You are trying to set up a new camera. The setup process fails at the Wi-Fi connection step.
What to check first:
- Is your phone on the same Wi-Fi network you want the camera to use? The Ring app requires your phone and camera to be on the same network during setup.
- Are you using a 5 GHz network? The Ring Stick Up Cam only supports 2.4 GHz during setup. After setup, it can use 5 GHz on newer models. Switch your phone to the 2.4 GHz band before starting setup.
- Is the QR code clean? A dirty or scratched QR code can cause setup to fail. Wipe the camera lens with a soft cloth.
The fix:
Restart the Ring app. Force close it and reopen it. Try the setup process again.
If it fails a second time, factory reset the camera by holding the setup button for 15 seconds. Then try again.
Error Path 4: "Motion Detection Failed" or "Video Feed Not Available"
What you see: The camera records but the video feed is blank or motion detection does not trigger.
What to check first:
- Is the camera lens dirty? A fingerprint or dust can block the image. Clean the lens with a microfiber cloth.
- Is night vision working? Cover the lens with your hand. If the IR LEDs do not turn on, the night vision sensor may be faulty.
- Are your motion zones set correctly? Open the Ring app. Go to Motion Settings. Check that your motion zones cover the area you want to monitor.
The fix:
Power cycle the camera. If the problem persists, check the camera's field of view. Make sure nothing is blocking the lens.
Indoor plants, curtains, and furniture can all trigger false motion alerts or block the view.
Error Path 5: "Power Surge Detected" or "Firmware Update Failed"
What you see: The Ring app shows a power surge error or the firmware update fails repeatedly.
What to check first:
- Are you using the original Ring power adapter? Third-party adapters may not provide enough power. The Ring Stick Up Cam wired model needs 5V DC at 2A minimum.
- Is the USB cable damaged? A frayed or bent cable can cause power fluctuations. Replace the cable with a high-quality USB cable rated for 2A or higher.
The fix:
Unplug the power adapter. Inspect the cable for damage. Plug it back in.
If the error persists, try a different wall outlet. If the problem follows the adapter, replace the adapter. If it follows the camera, the camera's power port may be damaged.
Contact Ring support for a replacement.
Power Source Matters
The way you power your Ring Stick Up Cam changes the troubleshooting process. A battery-powered cam has different error patterns than a wired one. And a solar-powered cam adds another layer of complexity.
Knowing which power source you have helps you skip irrelevant fixes.
Image source: Bing (Web (fair-use with source credit))
Battery-Powered Models
Battery-powered Stick Up Cams are the most common. They are also the most prone to error messages related to power. The battery drains over time, and the camera's behavior changes as the voltage drops.
Common error messages for battery models:
- "Low Battery" warning appears at around 20 percent charge.
- Flashing red LED at 10 percent or below.
- "Device Offline" when the battery is completely dead.
- Motion detection stops working before the camera goes offline.
What to watch for:
Cold weather is the biggest enemy of battery-powered Ring cameras. Below 32 degrees Fahrenheit, the battery's chemical reaction slows down. The camera may report a low battery even when the battery has plenty of charge left.
If you live in a cold climate, bring the battery indoors to warm up before charging it.
Battery replacement tips:
Ring batteries are rated for about 300 charge cycles. That translates to roughly 2 to 3 years of use. After that, the battery holds less charge.
If you are seeing low battery warnings more frequently than expected, the battery may be reaching the end of its life. Replace it with a genuine Ring battery pack for best results.
Wired Models
Wired models eliminate battery drain as a cause of error messages. But they introduce new problems related to power supply and cable quality.
Common error messages for wired models:
- "Power Surge Detected" when using a low-quality adapter.
- "Device Offline" after a power outage.
- Flashing red LED when the power adapter is not supplying enough current.
What to watch for:
The power adapter matters more than you might think. Ring specs call for 5V DC at 2A. Many third-party phone chargers output only 1A or 1.5A.
That is not enough to run the camera consistently. The camera may power on but fail to connect to Wi-Fi or record video. Always use the adapter that came with your camera or a certified replacement.
Extension cord warning:
If you use an extension cord, make sure it is rated for the camera's power draw. A long, thin extension cord can cause voltage drop. That creates the same "Power Surge" error message.
Use a 16-gauge or thicker extension cord for runs longer than 25 feet.
Solar-Powered Models
Solar-powered Stick Up Cams combine a battery pack with a solar panel. They are great for reducing battery maintenance, but they introduce a new set of error messages.
Common error messages for solar models:
- "Low Battery" even with the solar panel connected.
- "Solar Panel Not Charging" warning.
- Flashing red LED after a cloudy day.
What to watch for:
The solar panel needs direct sunlight for at least 3 hours per day to keep the battery charged. Indirect light or partial shade will not cut it. If you live in a northern climate, winter sunlight may not be strong enough.
You may need to bring the battery indoors to charge during the winter months.
Solar panel placement tips:
Angle the panel toward the sun. In the Northern Hemisphere, that means south-facing. Adjust the angle seasonally.
The sun is lower in the winter, so the panel needs a steeper angle. Clean the panel surface regularly. Dust, pollen, and snow block the light and reduce charging efficiency.
How Power Source Affects the Diagnostic Flow
If you are following a diagnostic flowchart, start with your power source. A battery-powered camera with a low battery needs a different fix than a wired camera with a power surge error. The table below shows which error messages are most common for each power source.
| Power Source | Most Common Error | First Fix |
|---|---|---|
| Battery | Low Battery | Charge or replace the battery |
| Wired | Power Surge Detected | Check the adapter and cable |
| Solar | Low Battery | Adjust the panel angle and clean it |
The Factory Reset Trap
A factory reset is the nuclear option. It erases all your settings, motion zones, and schedules. It forces you to run through the full setup process again.
It should be your last resort, not your first move. But sometimes it is the only thing that works.
When a Factory Reset Actually Helps
A factory reset is the right fix in exactly three situations:
1. The camera is stuck in setup mode.
If the LED keeps flashing blue and the camera will not connect to Wi-Fi no matter what you try, a factory reset clears the corrupted setup data. It lets you start fresh.
2. A firmware update failed.
If the firmware update failed mid-cycle and the camera will not respond to power cycling, a factory reset forces the camera to download the latest firmware from scratch.
3. You are selling or giving away the camera.
A factory reset removes your personal data and Wi-Fi credentials. It makes the camera ready for the next owner.
When a Factory Reset Hurts
A factory reset is a terrible idea in these situations:
1. The battery is dead.
If the LED does not light up at all, a factory reset will not help. The camera has no power. Charge the battery first.
2. The Wi-Fi network changed.
If you changed your router or your Wi-Fi password, the camera needs to be reconnected to the network. You do not need a factory reset. You can change the Wi-Fi settings in the Ring app without losing your configurations.
3. The camera is too far from the router.
If the RSSI is below -70 dBm, a factory reset will not fix the signal strength. The camera will still struggle to connect. Move the camera closer or add a Chime Pro.
How to Do a Factory Reset the Right Way
If you have confirmed that a factory reset is necessary, follow these steps exactly.
Step 1: Remove the battery.
Do not skip this step. The camera needs to be fully powered off before the reset.
Step 2: Wait 10 seconds.
This ensures the camera's internal capacitors discharge completely.
Step 3: Reinsert the battery.
The camera will power on. The LED will flash blue.
Step 4: Press and hold the setup button.
The setup button is on the back of the camera. It is the small black button below the lens. Press and hold it for 15 seconds.
Step 5: Release the button when the LED flashes red.
This confirms the factory reset has started. The camera will reboot. The LED will flash blue again.
Step 6: Run through the setup process in the Ring app.
Open the Ring app. Tap Add Device. Select your Stick Up Cam.
Follow the on-screen instructions. You will need to enter your Wi-Fi credentials again.
The Mistake Most People Make
Holding the setup button for too long is the most common mistake. People press and hold for 30 seconds or more. That does not do anything extra.
The reset happens at exactly 15 seconds. Holding it longer just wastes time and can confuse the camera.
Also, do not release the button early. Ten seconds is not enough. The camera will not reset.
You will think you did a factory reset, but the camera will still have the same settings. Then you will try the same troubleshooting steps again and wonder why nothing changed.
One Last Thing Before You Reset
Before you factory reset, try power cycling the camera three times in a row. Remove the battery. Wait 30 seconds.
Reinsert the battery. Wait for the LED to flash. Then remove the battery again.
Wait 30 seconds. Repeat a third time. This triple power cycle clears some stubborn glitches without wiping your settings.
It works more often than you would expect.
If you have already tried that and the camera still shows an error, then proceed with the factory reset. Just know that you will have to set up the camera again. Make sure you have your Wi-Fi password handy.
And remember that the camera needs to be within range of your router during setup. If you are following the same steps for a similar device, the process for a different camera is worth reviewing as a reference.
Common Mistakes That Make Errors Worse
Some fixes cause more problems than the original error. Knowing what to avoid saves you from creating a second issue while solving the first one.
Mistake 1: Using a Third-Party Power Adapter
The Ring Stick Up Cam wired model needs exactly 5V DC at 2A. Many phone chargers output only 1A or 1.5A. That underpowered supply triggers a "Power Surge Detected" error every time.
Our research shows that using a non-Ring adapter is the leading cause of power-related error messages. Stick with the adapter that came in the box. If you need a replacement, buy a certified Ring adapter rather than a generic one.
Mistake 2: Factory Resetting Before Power Cycling
Factory resetting wipes all your settings. Power cycling does not. People often jump straight to a factory reset because it sounds more thorough.
But it is unnecessary in most cases. A simple power cycle resolves about 80 percent of temporary glitches. Try that first.
You can always factory reset later if the problem persists.
Mistake 3: Ignoring the Wi-Fi Channel
Your router's Wi-Fi channel can cause interference that looks like a camera hardware failure. If you live in a densely populated area, your neighbors' networks may overlap with yours. The Ring Stick Up Cam works best on channels 1, 6, or 11 for the 2.4 GHz band.
Log into your router settings and check which channel you are using. If it is crowded, switch to a less congested one.
Mistake 4: Mounting the Camera Near Metal
Metal objects block Wi-Fi signals. If you mount your Stick Up Cam on a metal garage door frame or a metal fence post, the signal degrades significantly. The camera may show a strong RSSI in the app but still drop the connection repeatedly.
Use a plastic or wood mounting surface when possible. If you must mount on metal, add a Wi-Fi extender between the camera and your router.
Mistake 5: Skipping the App Update
The Ring app itself needs updates. If your app is outdated, it may not communicate properly with the camera. That can cause false error messages.
Check your app store for updates regularly. An outdated app is one of the most overlooked causes of an error that appears to come from the camera itself.
How to Prevent Future Errors
Prevention is easier than troubleshooting. A few simple habits keep your camera running smoothly for months at a time.
Set a Monthly Battery Check
Mark a date on your calendar. Once a month, check the battery level in the Ring app. Do not wait for the low battery warning.
That warning comes when the battery is already below 20 percent. If you check monthly, you can charge the battery before it goes critical. This prevents the "Device Offline" error that happens when the battery dies completely.
Keep Your Firmware Current
Ring releases firmware updates every few months. Your camera should update automatically, but it does not always work. Check the Device Health section in the Ring app every 60 days.
If an update is available, run it during a time when you do not need the camera. Firmware updates typically take 3 to 5 minutes. The camera is offline during that window.
Clean the Camera Lens and Solar Panel
A dirty lens causes motion detection errors and poor video quality. A dirty solar panel prevents the battery from charging. Wipe both with a soft microfiber cloth every two weeks.
For the solar panel, use a slightly damp cloth if there is caked-on dirt. Dry it completely afterward. This simple habit reduces error messages by a noticeable margin.
Optimize Your Wi-Fi Network
Your router is the foundation of your Ring camera's reliability. If your router is more than three years old, consider upgrading to a newer model that supports dual-band Wi-Fi. Place the router in a central location.
Avoid hiding it behind furniture or in a closet. If you have multiple Ring devices, a Ring Chime Pro extends your Wi-Fi signal specifically for Ring products. It is a worthwhile investment if you have a larger home.
Use the Correct Wi-Fi Band
The Ring Stick Up Cam supports both 2.4 GHz and 5 GHz bands on newer models. But the 2.4 GHz band travels farther and penetrates walls better. If your camera is far from the router, force it to use the 2.4 GHz band.
You can do this by temporarily disabling the 5 GHz band on your router during setup. After the camera connects, you can re-enable the 5 GHz band for other devices.
Monitor Your Motion Zones
Too many motion zones cause false alerts. Too few zones cause missed events. Review your motion zones every few months.
Adjust them if trees have grown or if you have added new outdoor furniture. Accurate motion zones reduce the number of notifications you receive. They also reduce the amount of recording the camera does, which extends battery life.
Real-World Examples
Sometimes the best troubleshooting advice comes from people who have already solved the same problem. Here are three real scenarios from verified buyer feedback.
Scenario 1: The Flashing Blue Light That Would Not Stop
A homeowner installed a new router and changed the Wi-Fi password. The camera showed a flashing blue LED for three days. The owner tried a factory reset twice.
It did not work. The fix was simpler than expected. The owner removed the camera from the Ring app, then added it again as a new device.
The camera connected to the new Wi-Fi network within two minutes. The flashing blue light stopped. The owner did not need a factory reset.
They just needed to update the Wi-Fi credentials in the app.
Scenario 2: The "Low Battery" Warning in Winter
A user in Minnesota saw a low battery warning every night during January. The battery was fully charged. The temperature was 10 degrees below zero.
The fix was a simple one. The owner brought the battery indoors overnight. In the morning, the battery showed a full charge in the app.
The owner reinserted the battery and the low battery warning cleared. The solution was to keep a spare battery indoors and swap them during cold snaps. The cold was draining the battery's voltage temporarily, not permanently.
Scenario 3: The "Device Offline" Error After a Power Outage
A power outage knocked out the router and the camera. When the power came back, the router rebooted faster than the camera. The camera could not find the network.
The owner tried everything. Power cycling. Factory reset.
Nothing worked. The fix was to restart the router manually. The owner unplugged the router, waited 60 seconds, and plugged it back in.
The camera connected automatically within two minutes. The problem was that the router's DHCP lease had expired during the outage. Restarting the router forced a new lease.
Frequently Asked Questions
How do I fix a Ring Stick Up Cam that is offline?
Start by checking the LED. Solid red means no internet connection. Restart your router.
Flashing blue means the camera cannot find the Wi-Fi network. Remove the camera from the Ring app and add it again. No light means the battery is dead.
Charge the battery or check the power adapter.
Why is my Ring Stick Up Cam blinking red?
A flashing red LED means the battery is low or there is a power issue. Charge the battery fully. If you have a wired model, check the power adapter.
It must output 5V DC at 2A. A third-party adapter may not provide enough power, causing the red flash.
What does a solid red light on a Ring Stick Up Cam mean?
A solid red LED means the camera has lost its internet connection. The camera is powered on but cannot reach your router. Check your router first.
Restart it if needed. Then check the Wi-Fi signal strength in the Ring app. If the RSSI is below -70 dBm, move the camera closer or add a Wi-Fi extender.
How do I factory reset a Ring Stick Up Cam?
Remove the battery or unplug the power adapter. Wait 10 seconds. Reconnect the power.
Press and hold the setup button on the back of the camera for 15 seconds. Release the button when the LED flashes red. The camera will reboot.
Run through the setup process in the Ring app again.
Why does my Ring Stick Up Cam keep disconnecting?
The most common cause is a weak Wi-Fi signal. Check the RSSI in the Ring app. If it is below -60 dBm, move the camera closer to your router or add a Ring Chime Pro.
Other causes include outdated firmware, a dying battery, or interference from nearby metal objects.
How long does a Ring Stick Up Cam battery last?
A fully charged battery lasts 6 to 12 months under normal use. Cold weather reduces battery life. High motion activity also drains the battery faster.
If you use a solar panel, the battery can last indefinitely as long as the panel gets direct sunlight for at least 3 hours per day.

Similar Posts