VIOFO A229 Pro Parking Mode Settings
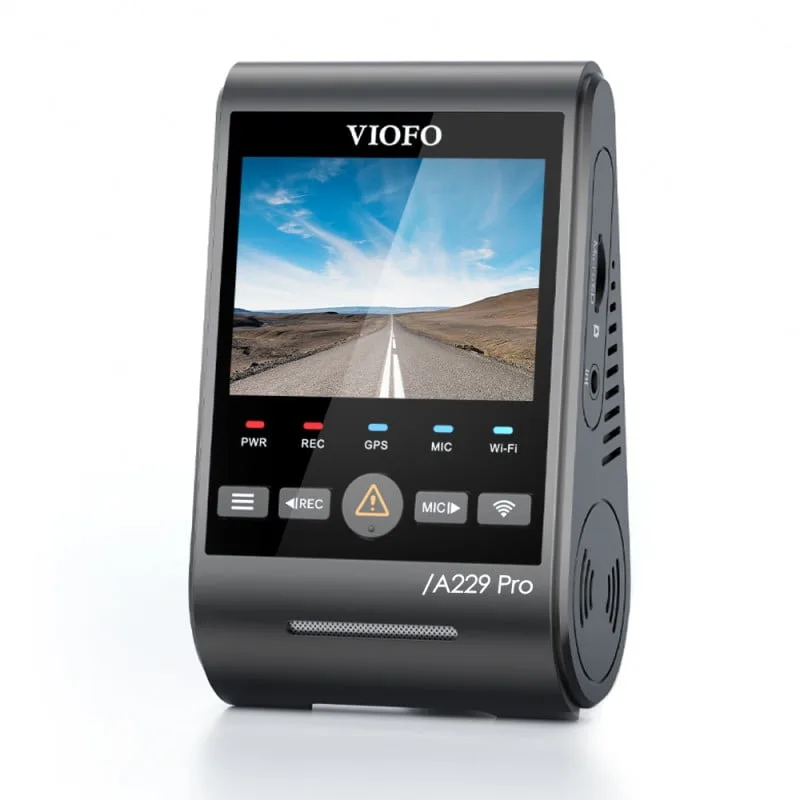
You park your car, lock the doors, and walk away. But what happens to your VIOFO A229 Pro while you are gone? Getting the VIOFO A229 Pro parking mode settings right is the difference between capturing a hit-and-run and coming back to a dead battery.
The A229 Pro offers three distinct parking recording modes. The best one depends on your power source, parking environment, and how long you leave your car. Per VIOFO's official specs, the camera needs a hardwire kit or external battery pack to run these features safely.
Let's walk through each mode and how to pick the one that fits your situation.
Image source: Web (Bing) / walmart.com (Web image (fair-use with source credit))
Quick Answer
The VIOFO A229 Pro has three parking modes. Low Bitrate compresses video continuously. Time-Lapse takes one frame per second.
Buffered mode sleeps until an event triggers it. The best choice depends on your power source and parking risk.
The Problem with One Size Fits All Settings
Generic advice for parking mode often fails. Many people select the highest sensitivity or longest recording time. This drains the car battery and fills the memory card with false triggers.
The A229 Pro is a capable tool. But the wrong setting can leave you with a dead battery in a few hours. You might miss a real hit-and-run because the camera overwrote the data.
Or you might find your car won't start in the morning.
Different parking scenarios require different strategies. Street parking in a busy city is not the same as a locked garage. Your car's battery health and the type of hardwire kit you use also play a huge role.
Our research shows that many users stick with default settings. This is a mistake. The default voltage cutoff might be too low for your car.
The motion sensitivity might be too high.
You need a solution that fits your specific situation. That is what we are building here.
The Three Parking Modes and How They Actually Work
The A229 Pro gives you three distinct ways to record while parked. Each one has a clear trade-off between storage, detail, and battery drain.
Low Bitrate Recording
This mode continuously records video at a much lower bitrate than normal driving mode. File sizes are smaller, so you can store more hours of footage. The quality is still good enough to see license plates and faces.
Best for: Long-term parking where you want a continuous record. It uses more power than Time-Lapse but less than normal recording.
Time-Lapse Recording
This mode takes a single frame every second or two. It stitches these frames into a smooth fast-forward video. A 24-hour period compresses into just a few minutes of watchable footage.
Best for: Very long parking sessions like airport parking. It uses the least power and storage space.
Buffered Event-Triggered Recording
This is the most energy-efficient mode. The camera sleeps until the G-sensor detects an impact or the motion sensor detects movement. When triggered, it wakes up and records a short clip.
This includes a few seconds before the event.
Best for: Street parking where you only want to capture incidents. It saves storage space and battery power.
Image source: Bing (Web (fair-use with source credit))
| Feature | Low Bitrate | Time-Lapse | Buffered (Event) |
|---|---|---|---|
| Recording Style | Continuous, compressed | Frame-by-frame | Sleep until triggered |
| Storage Usage | Low | Very Low | Very Low |
| Power Consumption | Medium | Low | Very Low |
| Best Use Case | Continuous surveillance | Long-term parking | Incident-only capture |
| Catches Pre-Event | No | No | Yes (buffer) |
What Determines the Right Setting
Choosing the right mode is not a guessing game. It is a decision based on three clear variables.
Your Power Source
This is the most important factor. With a hardwire kit like the VIOFO HK4, you have steady power from your car battery. The voltage cutoff setting is critical.
Set it too low at 11.8V, and you risk a dead battery. Set it too high at 12.4V, and the camera stops recording early.
With an external battery pack, you have dedicated power. You can use more intensive modes like Low Bitrate without worrying about draining your starter battery. If you have not installed the hardwire kit yet, check out our guide on the full installation process.
| Voltage Cutoff | Battery Protection | Recording Time | Best For |
|---|---|---|---|
| 11.8V | Low | Longest | AGM batteries |
| 12.0V | Medium | Long | New lead-acid |
| 12.2V | High | Moderate | Most cars |
| 12.4V | Very High | Short | Older batteries |
Your Parking Risk
Where do you park? A busy street with pedestrians and traffic has a high risk of incidents. A locked garage has a low risk.
High risk: Use Buffered mode with high G-sensor sensitivity. This catches every door ding and bump.
Low risk: Use Time-Lapse or Low Bitrate for general oversight.
No risk: Turn parking mode off.
Your Parking Duration
How long do you leave the car?
Short stops under 1 hour: Any mode works. Buffered is most efficient.
Work day 8 to 10 hours: Low Bitrate or Time-Lapse. Make sure your voltage cutoff is set correctly.
Multi-day airport parking: Time-Lapse is the safest bet. It uses the least power.
| Mode | Power Draw (12V) | Storage Per Day (256GB) | Best For |
|---|---|---|---|
| Low Bitrate | ~5W | ~15GB | Continuous coverage |
| Time-Lapse | ~3W | ~5GB | Multi-day parking |
| Buffered (Event) | ~1W (idle) | ~2GB | Incident-only capture |
The Decision Tree: Choosing Your Mode Step by Step
Follow these steps to build your specific setting.
Step 1: Identify your power source.
- Hardwire kit: Go to Step 2A.
- Battery pack: Go to Step 2B.
- OBD-II cable: Go to Step 2A.
Step 2A: Hardwire Kit User
- Set voltage cutoff to 12.2V for most cars. Use 12.4V for older batteries.
- Parking risk:
, High (street): Buffered mode. G-sensor High. Motion On.
, Medium (lot): Low Bitrate. G-sensor Medium. Motion On.
, Low (garage): Time-Lapse. G-sensor Low. Motion Off.
Step 2B: Battery Pack User
- You have more freedom.
- Parking risk:
, High (street): Low Bitrate. G-sensor High. Motion On.
, Medium (lot): Low Bitrate or Buffered. G-sensor Medium. Motion On.
, Low (garage): Time-Lapse. G-sensor Low. Motion Off.
Step 3: Set the timer.
- The A229 Pro offers 6 hours, 12 hours, 24 hours, or infinite.
- With a battery pack, set to infinite.
- With a hardwire kit, set to 24 hours. This prevents the camera from running all weekend.
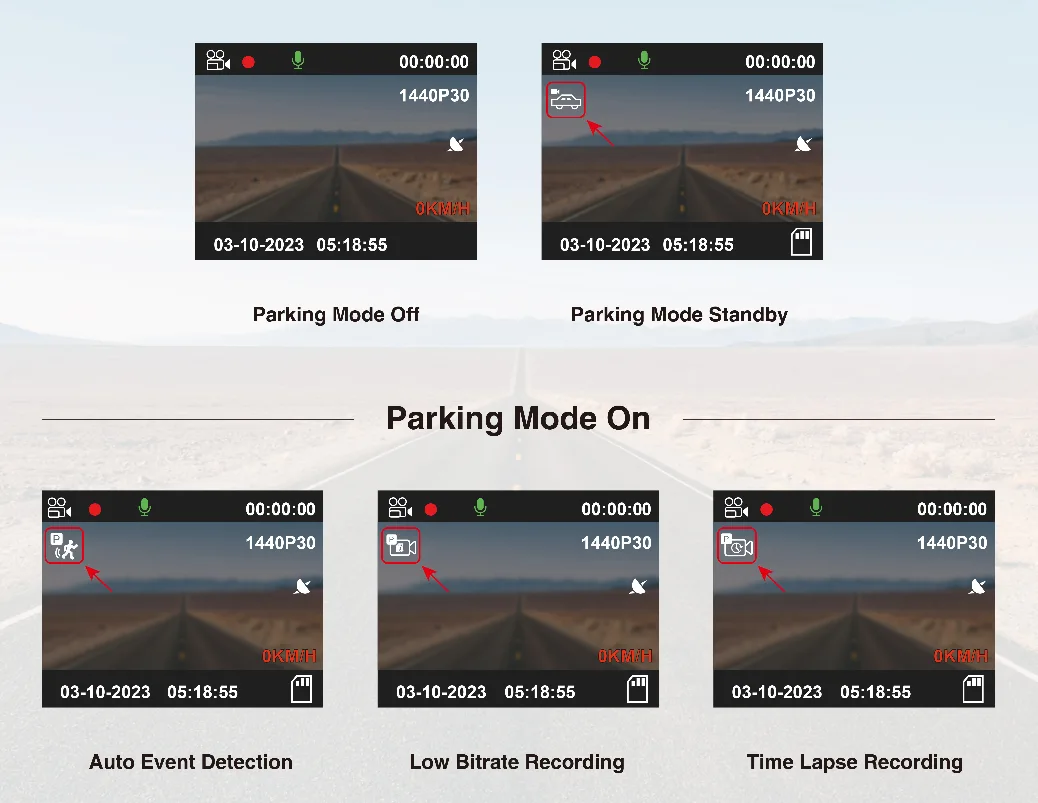
Image source: Bing (Web (fair-use with source credit))
This decision tree removes the guesswork. The goal is to maximize coverage while protecting your battery. If you drive a car with a smaller battery, use a higher voltage cutoff.
If you have a hybrid, an external battery pack is almost mandatory.
Use a genuine VIOFO HK4 kit. Third-party kits can cause voltage issues. Per the official VIOFO website, the HK4 kit is designed specifically for the A229 Pro.
Recommended Settings for Common Scenarios
Here are five common parking scenarios with the exact settings you should use.
Street Parking in a Busy City
You live in an apartment with street parking. The risk of a hit-and-run or vandalism is high.
Settings: Buffered mode. G-sensor High. Motion Detection On.
Timer 24 hours. Voltage Cutoff 12.2V.
Why it works: Buffered mode keeps the camera asleep most of the time. This saves battery power. When a car bumps your bumper, the camera wakes up and captures the event plus a few seconds before it.
The high G-sensor catches minor impacts like shopping cart rolls.
Office Parking Lot 8 to 10 Hours
You park in a large lot every workday. The risk is moderate. You want to catch door dings and minor collisions.
Settings: Low Bitrate mode. G-sensor Medium. Motion Detection On.
Timer 12 hours. Voltage Cutoff 12.2V.
Why it works: Low Bitrate gives you a continuous record of the entire workday. The medium G-sensor avoids false triggers from wind or passing trucks. The 12-hour timer covers a full workday plus some buffer.
Airport Parking Multiple Days
You are flying out for a long weekend or a full week. The car will sit untouched for days.
Settings: Time-Lapse mode. G-sensor Low. Motion Detection Off.
Timer Infinite. Voltage Cutoff 12.4V.
Why it works: Time-Lapse uses the least power and storage. A 256GB card can hold weeks of footage. The low G-sensor prevents false triggers from wind or temperature changes.
The high voltage cutoff protects your battery.
Locked Garage
You park in a private garage. The risk is very low, but you want some coverage.
Settings: Time-Lapse mode. G-sensor Low. Motion Detection Off.
Timer 24 hours. Voltage Cutoff 12.2V.
Why it works: Time-Lapse provides a continuous record without using much power. The low G-sensor avoids false triggers from the garage door opening. You can also turn parking mode off entirely if you prefer.
Ride-Hail or Delivery Driver
You are constantly in and out of the car. The vehicle idles frequently. Parking mode needs to run between trips.
Settings: Low Bitrate mode. G-sensor Medium. Motion Detection On.
Timer 6 hours. Voltage Cutoff 12.0V.
Why it works: This is the most demanding scenario. Low Bitrate gives you continuous coverage during short stops. The medium G-sensor catches events without being too sensitive.
A battery pack is strongly recommended for this use case.
Mistakes That Drain Your Battery or Miss the Action
Small mistakes can ruin your parking mode experience. Here are the most common ones.
Setting the Voltage Cutoff Too Low
Many users set the voltage cutoff to 11.8V to get the longest recording time. This is dangerous. A standard lead-acid battery at 11.8V is almost completely drained.
Your car may not start.
The fix: Use 12.2V for most cars. Use 12.4V for older batteries. Use 12.0V for AGM batteries.
Using the Wrong SD Card
The A229 Pro requires a high-endurance card. Consumer-grade cards can overheat and fail in parking mode. Constant writing can corrupt the card.
The fix: Use a card rated for high endurance like the Samsung Pro Endurance or SanDisk High Endurance. A 256GB card is a good balance of capacity and cost.
Forgetting to Format the Card
The A229 Pro needs a freshly formatted card to work reliably. Old files and fragmented data can cause errors.
The fix: Format the card inside the camera every few weeks. The camera has a built-in format function. This clears old data and resets the file system.
Ignoring the Temperature Cutoff
The A229 Pro has a temperature cutoff setting. If the camera gets too hot, it shuts down to protect itself. Many users disable this setting.
The fix: Leave the temperature cutoff enabled at the default setting of around 45°C or 113°F. Forcing the camera to run in extreme heat can damage internal components.
Not Testing the Setup
Many users set their parking mode and assume it works. They never test it.
The fix: Park your car for a few hours after setup. Then check the footage. Did the camera record?
Did it trigger on motion? A simple test saves frustration later.
How to Navigate the Settings Menu
The A229 Pro menu system is straightforward once you know where to look. Parking mode settings are spread across a few submenus.
Entering the Parking Mode Menu
Press the Menu button. Use the arrow keys to scroll to the gear icon. This is the System Settings menu.
Scroll down to Parking Mode and press OK.
The first option is Parking Mode itself. Set it to On. The camera will automatically switch to your chosen mode when the car is off.
Setting the Recording Mode
Inside the Parking Mode menu, select Parking Mode Type. Choose between Low Bitrate, Time-Lapse, and Buffered mode. Below that is Parking Mode Timer.
Choose based on your typical parking duration.
Adjusting the G-Sensor Sensitivity
The G-sensor is in the main settings menu, not the parking mode submenu. Press Menu twice to return to the main menu. Scroll to the G-sensor option.
You will see four levels: Off, Low, Medium, and High. Medium is a good starting point. High is best for street parking.
Low is for garages.
Configuring the Voltage Cutoff
The voltage cutoff is also in the main settings menu. Look for Voltage Cutoff or Battery Protection. You will see 11.8V, 12.0V, 12.2V, and 12.4V.
Select the value that matches your battery type. For most users, 12.2V is the safest choice.
Setting Motion Detection
Motion detection is in the Parking Mode submenu. Set it to On. This triggers recording when the camera detects movement.
A sensitivity setting of Medium works well for most environments.
Final Checks
After you set all the options, do a quick test. Park your car. Wait for the camera to switch to parking mode.
The LED indicator will change to a slow blink.
Walk in front of the camera. Check the footage later to confirm it recorded. This test takes five minutes and gives you total confidence.
Frequently Asked Questions
How do I turn on parking mode on the VIOFO A229 Pro?
Parking mode activates automatically when the camera detects the car is off. You need a hardwire kit or battery pack for continuous power. The camera switches from driving mode to parking mode after a few seconds of inactivity.
Which parking mode is best for battery life?
Time-Lapse mode uses the least power. It takes one frame per second. A 24-hour period compresses into a few minutes of video.
This is the best option for long parking sessions.
What voltage cutoff should I use for my car?
Use 12.2V for most cars. This protects your battery while allowing several hours of recording. Use 12.4V for older batteries or cold climates.
Use 12.0V for AGM batteries. Never go below 11.8V.
Can I use parking mode with the OBD-II cable?
Yes, the OBD-II cable provides continuous power. It does not have voltage cutoff protection. You rely on the camera's built-in settings.
The OBD-II option is fine for short parking sessions.
How long does parking mode last on battery?
A standard 50Ah battery with Low Bitrate mode can run about 12 hours before hitting the voltage cutoff. Time-Lapse can run 24 hours or more. A dedicated battery pack extends this significantly.
Does parking mode overwrite old footage?
Yes, the camera uses loop recording. When the card is full, it overwrites the oldest unprotected footage. Locked files from events or manual locking are not overwritten.
This ensures you always have the latest footage while preserving important clips.

Similar Posts