Hayward Pool Vacuum Troubleshooting
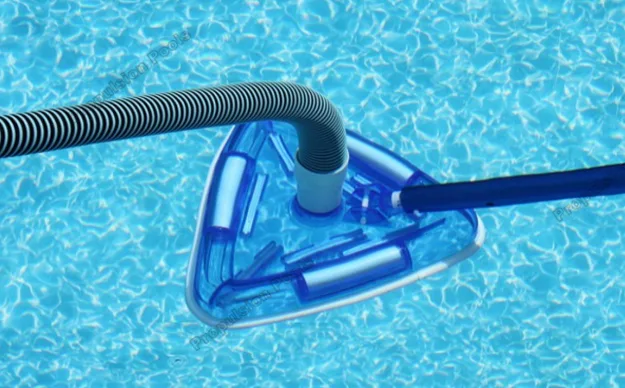
If your Hayward pool vacuum is sitting at the bottom of the pool doing absolutely nothing, you've come to the right place. Hayward Pool Vacuum troubleshooting almost always comes down to a handful of simple issues you can fix yourself in under an hour. Most of the time, it's not a broken cleaner.
It's a flow problem, a clogged filter, or a worn rubber part that costs less than twenty dollars to replace.
Manufacturer specifications show these cleaners need a flow rate of 25 to 35 gallons per minute to move properly. If anything in the pump, filter, skimmer, or hose path restricts that flow, the vacuum simply won't work. Let's walk through the diagnosis step by step, starting with the most likely culprit.
Quick Answer
Hayward Pool Vacuum troubleshooting starts with the flow rate. Check the pump basket and skimmer basket first. Backwash or clean the filter if pressure is high.
Inspect the hose for air leaks. Most Hayward vacuums stop working because of low flow, not mechanical failure.
Image source: Bing (Web (fair-use with source credit))
The #1 Reason Your Hayward Vacuum Isn't Moving (And How to Fix It)
If your Hayward cleaner sits motionless, it's almost always a flow problem. These vacuums have no electric motor. They use the force of water moving through them to drive the wheels and turbine.
No flow means no motion.
Check This Before You Tear Anything Apart
Here's the diagnostic path we recommend. It follows the same order of checks a pool service tech would use.
| Symptom | Likely Cause | First Check |
|---|---|---|
| Cleaner sits in one spot | Low flow through the cleaner | Pump basket and filter pressure |
| Cleaner twitches but won't crawl | Not enough GPM reaching cleaner | Flow control valve setting |
| Cleaner moves then stops | Air leak in hose or swivel | Hose sections and O-rings |
| Cleaner crawls but won't climb | Worn foot skirt or diaphragm | Foot pad edge thickness |
Start with the most obvious check. Turn off the pump. Pull the pump basket out and look at it.
If it's packed with leaves, pine needles, or debris, that's your problem. Empty it, replace it, and turn the pump back on.
If the pump basket is clean, move to the filter pressure gauge. A clean filter runs at a baseline pressure you can note when the system is new. When the gauge reads 8 to 10 psi above that baseline, the filter is restricting flow.
As of 2026, that threshold still holds true across all Hayward filter types.
If both checks pass, the issue sits deeper in the system. Check the skimmer weir door. If it's stuck closed, the skimmer can't pull water in.
Hayward's official support documentation confirms that flow problems are the leading cause of suction-side cleaner failures.
Finally, verify the pool water level. If it sits below the middle of the skimmer opening, the pump sucks air instead of water. Add water until it reaches the recommended level.
Low Suction? Start With the Filter and Pump Basket
Most Hayward vacuums that seem to have "lost suction" haven't lost anything. The pump basket is full. The skimmer is clogged.
The filter is dirty. All three restrict the water flow your cleaner needs to move.
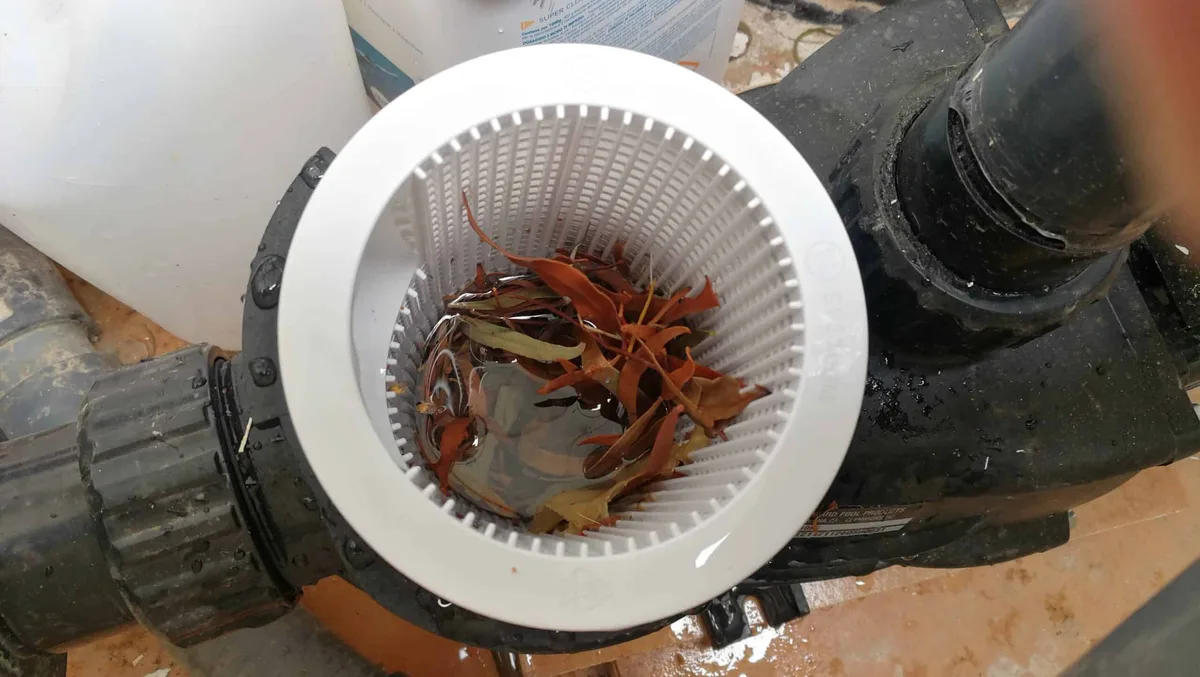
Image source: Bing (Web (fair-use with source credit)
The Most Overlooked Cause of a Dead Cleaner
The pump basket is the transparent chamber with a clear lid on the front of your pool pump. Inside, a mesh basket catches debris before it reaches the impeller. When that basket fills up, water flow drops fast.
The cleaner slows down, stutters, and eventually stops.
Aggregate user reviews across pool forums report the same pattern. Clean the pump basket. The cleaner starts moving again.
It's that simple.
Here's the step-by-step for a full suction check:
- Turn off the pump at the breaker.
- Remove the clear pump basket lid by twisting it counterclockwise.
- Pull the basket out and dump debris into a trash bag.
- Rinse the basket with a garden hose to clear the mesh holes.
- Reinsert the basket, replace the lid, and turn the pump back on.
Check the skimmer basket next. This is the basket you see when you lift the skimmer lid on the pool deck. Leaves whoosh into it constantly.
When it's full, water barely flows through the skimmer opening.
If both baskets are clean, look at the filter pressure gauge. Most pool filters have a gauge on top. Typical clean baselines are 10 to 15 psi for sand, 5 to 10 psi for cartridge, and 8 to 12 psi for DE filters.
When pressure reads 8 to 10 psi above that baseline, the filter is your bottleneck.
| Filter Type | Typical Clean Baseline | Clean or Backwash At |
|---|---|---|
| Sand | 10-15 psi | +8 to +10 psi |
| Cartridge | 5-10 psi | +8 to +10 psi |
| DE | 8-12 psi | +8 to +10 psi |
If you hear the pump whining louder than usual, that's another sign of restricted flow. Address it before you run the cleaner. Pump cavitation can damage the impeller.
Hose and Swivel Joint — The Hidden Air Leak
If the baskets and filter are clean but the vacuum still won't move, the problem is probably air. A tiny crack in a hose section lets air into the system. The suction drops, the cleaner stops, and you're back to staring at a motionless vacuum at the bottom of the pool.
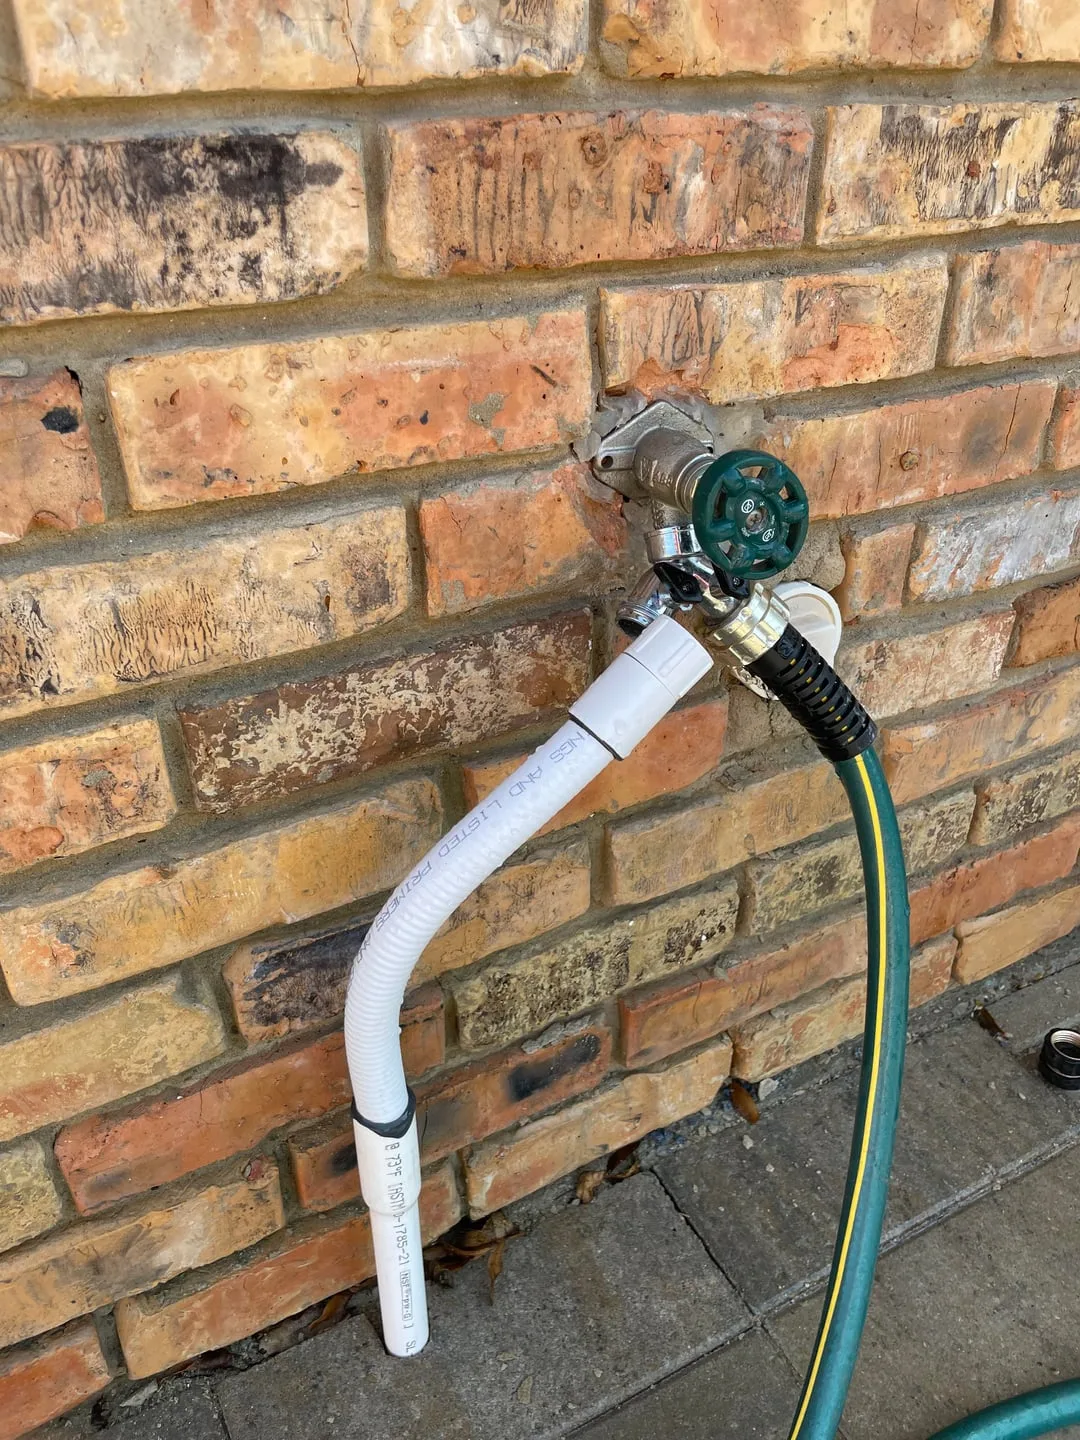
Image source: Bing (Web (fair-use with source credit))
How to Find a Cracked Hose or a Stuck Swivel in 5 Minutes
Start with a visual inspection. Lay the hose flat on the pool deck in a straight line. Look for cracks, kinks, and swollen sections.
Pay special attention to the first two inches at each end of every hose section, because that's where wear concentrates.
If the hose looks fine, try the bubble test. With the pump running and the cleaner connected, watch the hose underwater. If you see a steady stream of small bubbles rising from one spot, that's your leak.
Look closely at the swivel joints and the cuffs that connect each section.
Here's another practical check. Disconnect the hose from the skimmer wall fitting. Hold your hand near the opening with the pump running.
You should feel a strong pull. If you don't, the suction problem is upstream, not in the hose.
Now check the swivel joint. The swivel lets the hose rotate so the cleaner can turn. When sand and grit get inside, it stiffens up.
The cleaner then drags the hose sideways instead of moving forward. It circles in one area or gets stuck on the steps.
To test the swivel, detach it from the hose and spin it between your thumb and index finger. A healthy swivel spins freely. A stiff one clicks or resists.
Rinse it under a faucet and apply silicone pool lube to the O-ring. If it's still stiff, replace it. They cost between eight and fifteen dollars.
Also inspect the O-ring on the wall fitting where the hose plugs in. A cracked or flattened O-ring is one of the easiest air leaks to fix. A standard replacement costs about two dollars.
Never use petroleum-based lubricants on pool parts. Per pool industry standards, they degrade rubber and cause exactly the swelling you're trying to fix.
Diaphragm and Turbine Check (Navigator Models Only)
If your Hayward Navigator hops instead of crawling, the diaphragm is the first suspect. This rubber disc sits inside the cleaner body. It flexes with water pressure and creates the pulsing motion that drives the cleaner forward.
Why Your Cleaner Hops but Doesn't Crawl
Think of the diaphragm as the cleaner's footsteps. Each flex is a step. When the rubber is fresh, the steps are strong and uniform.
When it tears or stretches, the cleaner stutters. It may vibrate in place, hop on the floor, or crawl in circles.
Opening the cleaner is straightforward. Remove the top cover by releasing the two side clips. The diaphragm sits directly below.
Pull it out and hold it up to the light.
In our research, the most common failure is a small V-shaped tear where the diaphragm flexes. Pinholes and worn edges rank second. If you spot any of those, replace the diaphragm.
A replacement diaphragm costs between fifteen and thirty dollars depending on your Navigator model. It takes about ten minutes to swap. You don't need special tools.
A flathead screwdriver and your hands are sufficient.
Per Hayward's maintenance guidance, diaphragms should be replaced every one to two seasons. Pools that run their cleaners daily need the more frequent end of that range.
While you're inside the cleaner, check the turbine and drive gears. Sand and grit can jam the turbine wheel. Gently rotate it with your finger.
If it doesn't spin smoothly, remove it and rinse it under clean water. Check the gear teeth for visible chips. Damaged teeth mean the cleaner will skip and stutter on the floor.
One more Navigator-specific issue: the feed tube. This small hose inside the cleaner routes water to the diaphragm. If it's disconnected or blocked, the diaphragm won't flex at all.
Reseat it and retest the cleaner.
This check applies to the Navigator and Navigator Pro series. The PoolVac and AquaNaut lines use a different wheel-based drive system. Their primary issues are the foot skirt and debris bag, which we cover next.
Debris Bag and Foot Skirt — When to Replace vs. Repair
Here's a scenario we've seen repeatedly across reviews and pool forums. The cleaner moves, but it leaves a trail of debris behind. Or it crawls over leaves without picking them up.
The problem is almost always the foot skirt or the debris bag.
The $15 Fix That Solves 90% of Suction Problems
The foot skirt is the rubber apron around the bottom edge of the cleaner. It seals the cleaner against the pool surface and creates the suction force that picks up debris. When the skirt wears thin, there's no seal left.
Run your hand along the edge of the skirt. A healthy skirt feels flat and flexible. A worn skirt feels wavy, curled, or brittle.
If the skirt no longer sits flat on the pool floor, replace it.
Here's why this qualifies as the $15 fix. Replacement skirts for most Hayward models cost between ten and twenty-five dollars. A pool tech will charge you hundreds for the same diagnosis and swap.
You'll spend fifteen dollars and about ten minutes.
The debris bag is just as important. The mesh bag collects everything the cleaner picks up. When the mesh is torn, debris flows right back into the water.
When the mesh is clogged with silt or fine sand, water can't pass through, and the cleaner drags like it's pulling a parachute.
How do you know which problem you have? Check the bag for visible holes. If it looks grey, stiff, or stained, it's clogged.
A torn bag needs replacement. A clogged bag can often be cleaned.
To clean a fabric bag, remove it from the cleaner and turn it inside out. Rinse it with a strong garden hose. For buildup that won't shift, soak the bag in a bucket with mild dish soap for twenty minutes.
Don't put it in a washing machine. Don't use bleach.
Here's a handy replacement reference:
| Part | Typical Lifespan | Cost Range |
|---|---|---|
| Foot skirt | 6 to 12 months | $10 to $25 |
| Debris bag | 2 to 3 seasons | $15 to $40 |
| Swivel joint | 1 to 2 seasons | $8 to $15 |
| Diaphragm (Navigator) | 1 to 2 seasons | $15 to $30 |
A torn bag isn't worth repairing. Mesh fabric degrades from UV and chlorine exposure over time. As of 2026, replacement bags remain inexpensive and widely available from any pool supply retailer.
Cleaner Moves But Wrong — Too Fast, Too Slow, or Stuck
A Hayward cleaner that moves but moves oddly is more common than a dead one. The fix is usually adjustable. You just need to know which dial to turn.
Adjusting the Flow Control Valve and Return Eyeballs
The flow control valve is a small plastic dial on the hose near the cleaner. It lets you fine-tune how much water goes through the cleaner versus bypassing it back to the pool.
If the cleaner moves too fast, it skips over debris. It may also pop up to the surface or climb walls too aggressively. Turn the dial toward the "min" marking.
That restricts flow. The cleaner slows down and settles into a steady crawl.
If the cleaner moves too slow or barely inches along, turn the dial toward "max." That sends more water through the cleaner. Aim for a crawl speed of about one foot every two to three seconds. That's the sweet spot for cleaning without skipping.
Now check the return eyeballs. These are the adjustable fittings in the pool walls where water jets back into the pool. The position of each eyeball affects circulation.
If all three point downward, the bottom currents are strong and your cleaner drags sideways.
Rotate each eyeball slightly upward and toward a midpoint direction. That pushes water across the surface and improves overall circulation. The cleaner doesn't fight current as much.
You may need to experiment over a few hours for the best result.
Why the Cleaner Gets Stuck on Steps or Main Drain
If your Hayward vacuum repeatedly climbs the pool steps or parks on the main drain, the flow is too high at the drain. The cleaner follows the path of least resistance toward the strongest suction.
The main drain usually sits at the deep end. If too many return lines are closed or underwater, the main drain pulls disproportionately. Open the return lines fully and adjust the valve to balance flow between the skimmer and the drain.
For steps, a tether kit helps. A tether is a short weighted line that connects the cleaner to a fixed point on the pool deck. It prevents the cleaner from wandering into the shallow steps.
Tether kits cost around twenty dollars and install in minutes.
When your Hayward vacuum moves too fast, check the return jets. When it crawls, check the flow control valve. When it sticks, adjust the drain valve.
All three are simple tweaks that take less than a minute.
When to Clean or Backwash Your Filter
We touched on filter pressure earlier. Now let's be specific about when you need to clean or backwash. This step saves you from buying a new cleaner when the old one is perfectly fine.
Reading Your Pressure Gauge the Right Way
The pressure gauge on your filter tells you everything. The number itself is less important than the change from baseline.
Establish your baseline the day you install a new filter or after a thorough cleaning. Write it down. Most people skip this step and then have no reference point.
Here's the decision rule. If the gauge reads 8 to 10 psi above baseline, clean or backwash the filter. This applies to sand, cartridge, and DE filters equally.
At that pressure, flow through the filter is restricted enough to starve your cleaner.
For sand filters, turn the multiport valve to "backwash." Run the pump for two minutes or until the sight glass runs clear. Then rinse for thirty seconds. Return to "filter." Done.
For cartridge filters, remove the cartridges and spray them with a garden hose. If the material is deeply stained, soak them in a filter cleaner for eight hours before rinsing.
For DE filters, backwash first. Then add fresh DE powder through the skimmer. The amount depends on your filter size.
Check the manual. Too little DE means the grids get dirty fast. Too much clogs them.
Check the gauge after cleaning. It should drop back to baseline. If it doesn't, there's a blockage or the gauge is faulty.
Replace the gauge if it reads far from baseline even with a clean filter.
One more point. Never backwash immediately after running the cleaner. The debris bag holds material that can clog the filter if you switch modes.
Run the pump in filter mode for a few minutes first.
Maintenance That Prevents 80% of Future Breakdowns
A little maintenance goes a long way with Hayward vacuums. They're simple machines. Simple care keeps them running for years.
Seasonal Checks and Part Replacement Schedule
Follow this schedule to catch problems before they stop the cleaner.
| Frequency | Task |
|---|---|
| Every week | Empty debris bag. Check for tears. |
| Every month | Inspect foot skirt for wear. Clean pump basket. |
| Every 3 months | Remove and rinse swivel joint. Lubricate O-rings. |
| Every 6 months | Replace foot skirt. Check hose for cracks. |
| Every 12 months | Replace diaphragm (Navigator). Inspect gears. |
Inspect the hose every time you store the cleaner. Pool hose degrades from UV and chlorine. A brittle hose cracks at the cuffs first.
Replace any section that shows white stress marks or cracks.
Lubricate O-rings with silicone pool lube. Do not use petroleum jelly or WD-40. Those products break down rubber.
A tube of silicone lube costs five dollars and lasts multiple seasons.
Store the cleaner out of direct sun when not in use. UV light degrades rubber parts faster than chlorine does. A shaded spot near the equipment pad works well.
Saltwater pools require more frequent part replacement. Saltwater accelerates wear on rubber and plastic. Plan to replace foot skirts every six months and diaphragms annually in salt pools.
Troubleshooting Flowchart — Your Quick Diagnostic Path
This flowchart walks you through the diagnosis from start to finish. Follow the path that matches your symptom.
Walk Through These Steps Before Calling a Pro
Symptom: Cleaner doesn't move at all
- Check pump basket. Is it full? Empty it. Test again.
- Check skimmer basket. Full? Empty it. Test again.
- Check filter pressure. 8 to 10 psi above baseline? Backwash or clean. Test again.
- Check water level. Below middle of skimmer? Add water. Test again.
- Check hose for air bubbles. Leak present? Replace O-ring or hose section. Test again.
- Check swivel joint. Stuck? Lubricate or replace. Test again.
- Check diaphragm (Navigator). Torn? Replace. Test again.
- Check turbine and gears. Jammed or damaged? Clean or replace. Test again.
Symptom: Cleaner moves but skips debris
- Check flow control valve. Set between minimum and maximum. Adjust toward max. Test again.
- Check foot skirt. Worn or curled? Replace. Test again.
- Check debris bag. Torn or clogged? Replace or clean. Test again.
Symptom: Cleaner climbs walls but not floor
- Adjust flow control valve. Reduce flow slightly to slow wall climb. Test again.
- Check foot skirt. Worn edges reduce floor seal. Replace. Test again.
Symptom: Cleaner gets stuck
- Adjust return eyeballs. Point upward to reduce bottom currents. Test again.
- Adjust main drain valve. Reduce drain flow. Test again.
- Install tether kit for steps. Test again.
If you've gone through the entire path and the cleaner still won't move, you may have a cracked cleaner body or a failed internal part that requires replacement. Compare costs. A new Hayward suction cleaner costs between $250 and $600.
A service call plus repair part may approach the same amount.
Frequently Asked Questions
Why does my Hayward pool vacuum keep stopping?
The most common cause is low water flow. Check the pump basket, skimmer basket, and filter pressure. If those are clear, look for an air leak in the hose or a worn foot skirt that's breaking the vacuum seal.
How often should I replace the foot skirt on my Hayward vacuum?
Replace it every six to twelve months. Pools with rough plaster surfaces wear skirts faster. If the skirt edge looks wavy or curled, replace it immediately.
A worn skirt kills suction.
What does the flow control valve on my Hayward vacuum do?
The flow control valve adjusts how much water goes through the cleaner. Turn it toward "max" for more suction and speed. Turn it toward "min" to slow down.
Find the sweet spot where the cleaner crawls steadily.
Why does my Hayward vacuum climb the walls but not the floor?
The foot skirt is probably worn. A worn skirt can't seal against the floor. Replace the skirt.
Also check the flow control valve. Too much flow can cause the cleaner to skip over the floor.
How do I clean the debris bag on my Hayward vacuum?
Remove the bag and turn it inside out. Rinse thoroughly with a garden hose. For stubborn buildup, soak in mild dish soap for twenty minutes.
Don't use bleach or a washing machine. Replace the bag if it's torn.
How long does a Hayward pool vacuum typically last?
With regular maintenance, most Hayward suction cleaners last three to five seasons. Saltwater pools and year-round operation shorten that lifespan. Replace worn parts immediately, and you can extend the life significantly.

Similar Posts