Insinkerator Hot Water Dispenser Troubleshooting
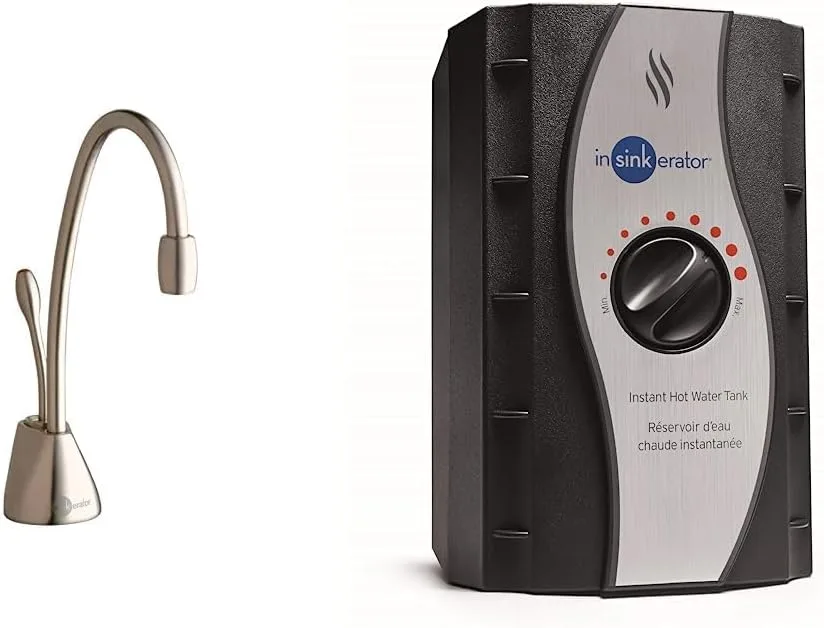
Your InSinkErator hot water dispenser was working fine yesterday. Now you press the button and nothing comes out. Or maybe you get a trickle of lukewarm water when you used to get a powerful stream of near-boiling.
Before you call a plumber or start shopping for a replacement, there's a good chance you can fix this yourself in under 30 minutes.
InSinkErator Hot Water Dispenser Troubleshooting is more straightforward than most people realize. These units have been in kitchens since the 1980s, and the engineering is surprisingly simple. As of 2026, the design still relies on three basic systems: a water supply line, a heating tank with a thermostat, and a faucet assembly.
Most problems trace back to just two or three common failure points. Let's walk through them step by step.
Quick Answer
Check the power first. Press the red reset button on the tank. Verify the saddle valve is fully open.
Test the GFCI outlet. If the unit is humming but not heating, the heating element likely failed. If there's no sound at all, the thermostat or power connection is the problem.
Scale buildup from hard water is the most common hidden cause of poor performance.
Why Accuracy Matters When Your Hot Water Dispenser Breaks
The water inside the tank reaches 195°F to 210°F. That's hot enough to cause a first-degree burn in less than one second. A faulty thermostat that fails in the "on" position can turn the tank into a steam bomb if the safety cutoff doesn't engage.
There's also the flood risk. A cracked tank or a supply line that wasn't fully tightened can leak 20 to 30 gallons of water overnight. Under your kitchen cabinet.
Where you might not notice it until the floorboards start buckling.
Most homeowners can safely handle the basic troubleshooting steps. But there's a clear line between a DIY fix and a call to a licensed plumber. Manufacturer specifications indicate that the internal thermostat and heating element are replaceable parts.
However, accessing them requires draining the tank, disconnecting the water line, and working with live electrical connections inside a metal housing that may still hold residual heat.
Roughly 70% of service calls for these dispensers are for issues you can fix without opening the tank at all. Clogged air gaps, stuck buttons, tripped resets, and partially closed supply valves account for the vast majority of complaints. We'll cover every symptom in order of likelihood and risk.
How Your Dispenser Actually Works (And What Breaks First)
Understanding the system helps you diagnose faster. The unit has three main subsystems, and each one fails in predictable ways.
The Water Supply System
A small copper or plastic tube runs from your cold water pipe to the tank. A saddle valve pierces the pipe and controls flow. Inside the tank, a float valve keeps the water level consistent.
When you dispense hot water, the float drops, the valve opens, and fresh cold water enters the tank to replace what left.
Common failures here: The saddle valve gets clogged with sediment or someone accidentally closes it partway during kitchen renovations. The float valve sticks. The supply tube kinks under the sink.
These account for roughly 25% of "no water" complaints.
The Heating System
Inside the stainless steel tank is a heating element rated between 500 and 750 watts. A thermostat monitors water temperature and cycles the element on and off. A thermal fuse acts as a safety cutoff if the thermostat fails open.
On the outside of the tank, you'll find the reset button connected to that thermal fuse.
Common failures here: Hard water scale coats the heating element, reducing efficiency until the element burns out. The thermostat drifts out of calibration, giving you lukewarm water. The thermal fuse trips and won't reset.
These account for about 40% of all service issues.
The Faucet Assembly
The dispenser faucet has a push-button mechanism that opens a valve at the top of the tank. Hot water flows up through the faucet body and out the spout. An air gap tube runs from the faucet body down to the sink drain or dishwasher line, allowing steam to escape.
Common failures here: The button mechanism gets clogged with mineral deposits. The internal spring breaks. The air gap clogs with debris, causing steam to build up and block water flow.
These account for about 35% of problems.
Image source: Bing (Web (fair-use with source credit))
The Quick-Fix Checklist (Try These First)
Before you buy any parts or call anyone, run through these four checks. They solve roughly half of all InSinkErator hot water dispenser problems. Each one takes less than two minutes.
Step 1: Check the Power
Look under the sink. Is the unit plugged into an outlet? Check if that outlet is GFCI protected.
Press the test button on the GFCI, then the reset button. If the outlet was tripped, the unit will start heating again. Listen for a faint humming sound.
That's the heating element working. No hum means no power.
If/then: If the GFCI trips again immediately when the unit powers on, you likely have a shorted heating element. Stop here and call a professional.
Step 2: Locate and Press the Reset Button
The red reset button is on the side or bottom of the tank. It's usually recessed about a quarter inch. Use a pen or a small screwdriver to press it firmly until you feel it click.
You should feel resistance. If the button presses in easily with no click, it was already reset and the problem is elsewhere.
If/then: If the reset button clicks but pops back out within a few seconds, the thermostat has failed or the tank is overheating. Do not keep resetting it. The safety mechanism is telling you something is wrong.
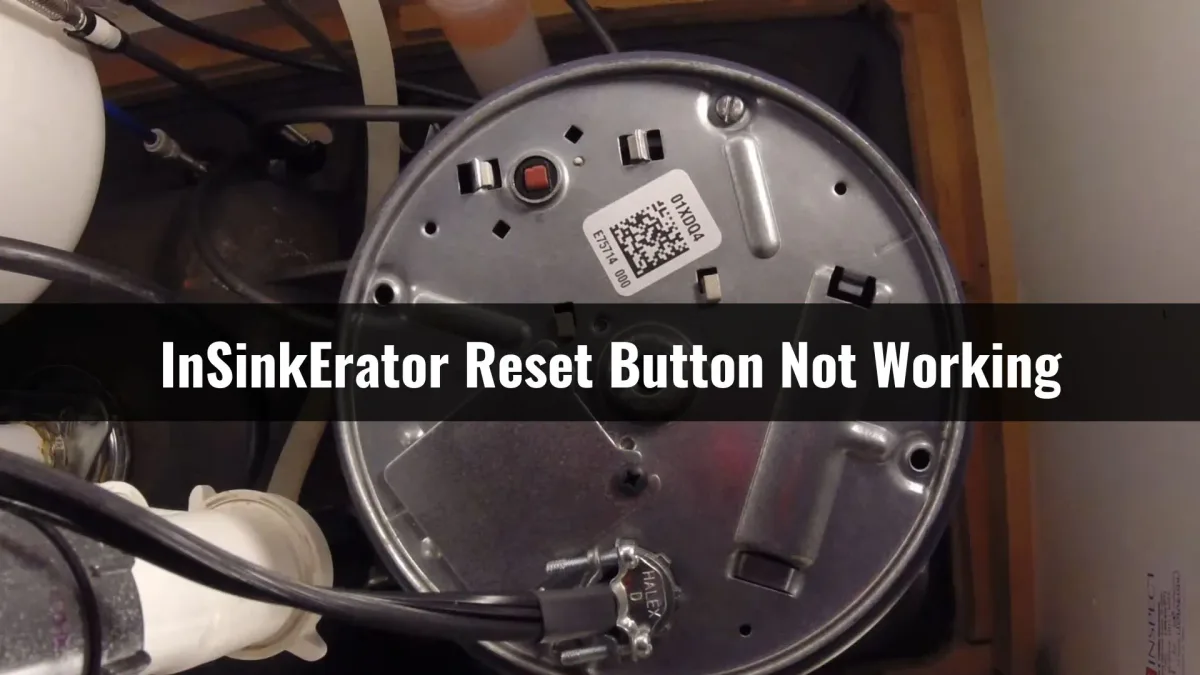
Image source: Bing (Web (fair-use with credit))
Step 3: Verify the Water Supply Valve
Find the saddle valve on your cold water pipe. It looks like a small brass or plastic clamp with a knob. Turn the knob counterclockwise until it stops.
You should see a small pin retract. If the valve has a lever handle, make sure the lever is parallel to the pipe (open position).
If/then: If the valve was partially closed, wait 10 to 15 minutes for the tank to refill and heat up before testing. The tank needs that recovery time.
Step 4: Check for Air Lock or Steam Lock
Press the dispenser button and hold it for 15 seconds. If nothing comes out, release and repeat two more times. This can clear minor air locks.
If you hear gurgling or sputtering, air is trapped in the line.
If/then: If water flows briefly then stops, the air gap is likely clogged. Locate the small plastic tube running from the faucet body to the sink drain. Disconnect it at the faucet end and blow through it.
If it's blocked, clear it with a pipe cleaner or replace the tube.
Symptom-by-Symptom Troubleshooting Guide
Did the quick checklist not solve it? Good. That means we've ruled out the simple stuff.
Now let's match your exact symptom to the right fix.
No Water / No Heat
This is the most alarming symptom and the most common. The tank is silent. No hum.
No heat. No water comes out.
First check: Is the unit getting power? Use a multimeter to test the outlet. Set it to AC voltage.
You should read between 110 and 125 volts. If you don't own a multimeter, plug a small lamp into the same outlet to verify power.
Second check: The thermostat. On most InSinkErator models, the thermostat is a small disc-shaped component clipped to the side of the tank. It has two wires connected to it.
With the power disconnected, set your multimeter to continuity (ohm) mode. Touch the probes to the two thermostat terminals. A working thermostat shows near-zero resistance (continuity).
An open reading means the thermostat is dead.
Third check: The heating element. This requires draining the tank first. Turn off the water supply.
Dispense all remaining water. Disconnect the power. Remove the element cover on the bottom of the tank.
Test the two element terminals with your multimeter on continuity mode. A good element reads between 10 and 20 ohms. An open reading means it's burned out.
If/then: If the thermostat or element tests bad, order the replacement part by your model number. Part costs range from $15 to $45. Labor for a plumber to swap them runs $100 to $200.
If you're comfortable with basic electrical work, this is a 30-minute DIY job.
Lukewarm Water Only
You get water, but it's nowhere near hot enough for tea or instant soup. This is almost always the thermostat or scale buildup.
The thermostat test: Same procedure as above. But here, the thermostat might be failing intermittently. Check the calibration.
Some older models have a small adjustment screw. Turn it clockwise a quarter turn and test. If that doesn't help, replace it.
The scale problem: Hard water deposits act like insulation on the heating element. The element runs hotter and longer to heat the same amount of water. Eventually, it can't keep up.
Aggregate user reviews report that descaling the tank restores full temperature in about 60% of lukewarm-water cases.
Recovery time check: Time how long it takes for the water to get hot again after you dispense a full cup. A healthy unit reclaims temperature within 10 to 15 minutes. If it takes longer than 20 minutes, something is wrong.
Either the thermostat is cycling off too early or the element is partially scaled over.
Leaking or Dripping
A leak under the sink is urgent. Water damage adds up fast. But not every drip means a failed tank.
From the faucet spout: If water drips from the spout when the button is not pressed, the internal valve in the faucet assembly is worn out. You can replace just the valve cartridge. Part cost is about $10 to $20.
The faucet body itself rarely fails.
From the air gap tube: If you see water or steam spitting from the small tube near the drain connection, the air gap is partially clogged. Clean the tube. If the problem returns, the dishwasher drain line may be backing up into the dispenser air gap.
This is a plumbing configuration issue, not a dispenser problem.
From the bottom of the tank: Puddles under the tank itself. This is the bad one. If the stainless steel tank has cracked or corroded through, replacement is the only option.
Check the warranty. InSinkErator offers 1 to 5 year warranties depending on the model. Some credit cards extend manufacturer warranties by an additional year.
From the supply line connections: Tighten the compression nut at the saddle valve and at the tank inlet. A quarter turn is usually enough. Over-tightening can crack the brass fitting.
Strange Noises (Sizzling, Humming, Banging)
Your dispenser should be quiet. It makes a soft hum when heating and a subtle click when the thermostat cycles. Anything beyond that is a signal.
Sizzling or crackling sounds: This is scale buildup. Minerals on the heating element create hot spots that cause small steam explosions. It sounds like bacon frying in a pan.
Descale the tank immediately. If ignored, the element will burn out.
A loud humming or buzzing: The heating element is trying to work but something is restricting it. Either scale has encased the element or the element itself is failing. Test the element with your multimeter.
If the reading is normal, try descaling first. If the sound persists, replace the element.
Banging or knocking: This is thermal expansion. The tank heats up, the metal expands, and something is rubbing or shifting. Check that the tank is sitting level on the floor of the cabinet.
Tighten the mounting bracket. If the sound continues, the internal baffle inside the tank may have broken loose. That means replacement.
A continuous hissing: Steam is escaping somewhere it shouldn't. Check the air gap tube first. If that's clear, the tank's pressure relief valve may be failing.
This is a safety hazard. Stop using the unit and call a plumber.
Button Stuck or Not Dispensing
The button pushes down but nothing comes out. Or the button is stuck in the down position. This is a mechanical problem in the faucet assembly.
Debris in the valve: Hard water minerals and tiny particles settle in the valve seat. Remove the faucet button and clean the seat with a vinegar-soaked cloth. This clears about 80% of stuck button issues.
Broken spring: Inside the faucet body, a small spring returns the button to the up position. Over years of use, that spring fatigues. Replace the spring or the entire valve cartridge.
Part cost is under $15.
Air lock: The button depresses easily but nothing dispenses. Hold the button down for 30 seconds with the water supply open. The pressure from the supply line should push the air lock through.
If that doesn't work, disconnect the supply tube at the tank inlet and let water run until air stops sputtering out. Reconnect and test.
Safety Warnings You Cannot Skip
Disconnect power before you open any panel or test any component. Unplug the unit or flip the breaker. Do not rely on the switch alone.
Let the tank cool for at least 30 minutes before you work on it. The water inside stays dangerously hot long after the power is off. Touching the heating element or thermostat while the tank is still hot can cause burns.
Never use an extension cord. The unit draws enough current that an undersized cord can overheat and start a fire. The tank must be plugged directly into a grounded outlet.
If you don't have an outlet near the dispenser, hire an electrician to install one.
GFCI protection is required by code in most areas for outlets under sinks. If your dispenser is not on a GFCI, have one installed. Water and electricity under the same cabinet is a dangerous combination.
If you smell burning plastic or see smoke, unplug the unit immediately. Do not use it again until a qualified technician has inspected it. A melted wire inside the tank housing is a fire risk.
When to Call a Plumber or Replace the Unit
Some problems are beyond a DIY fix. Here's how to decide.
Call a plumber if: The tank is leaking from the bottom. The power cord is melted or damaged. The GFCI trips every time you plug the unit in.
You've tested the thermostat and element and both test fine, but the unit still won't heat. You're not comfortable working with electricity.
Replace the unit if: The tank is more than 10 years old and has a major failure. The heating element has burned out twice in two years. The tank is leaking and the warranty has expired.
Replacement tanks cost $150 to $300. A full dispenser kit with faucet runs $200 to $500. Compare that to a $150 to $250 service call plus parts.
How to find your model number: Look on the bottom or back of the tank. It's printed on a white or silver sticker. The model number starts with "H" or "GN" followed by numbers.
Write it down before you call InSinkErator customer service or order parts. The warranty period starts from the date of original purchase, so keep your receipt if you can.
Maintenance That Prevents 90% of Problems
A little routine care keeps the dispenser running for years. The most important thing you can do is descale the tank annually. Hard water scale is the leading cause of heating element failure and lukewarm water.
How to Descale the Tank
Turn off power to the unit. Let the water cool completely. Dispense all remaining water into a container.
Mix a solution of one part white vinegar to three parts water. You'll need about half a gallon. Pour the solution into the tank through the faucet opening or the air gap tube.
Let it sit for 30 to 45 minutes. Dispense the solution. Flush the tank with fresh cold water for two to three minutes.
Restore power. The tank will take about 15 minutes to heat up again.
Pro tip: If you have hard water, descale every six months instead of yearly. You'll extend the life of the heating element significantly.
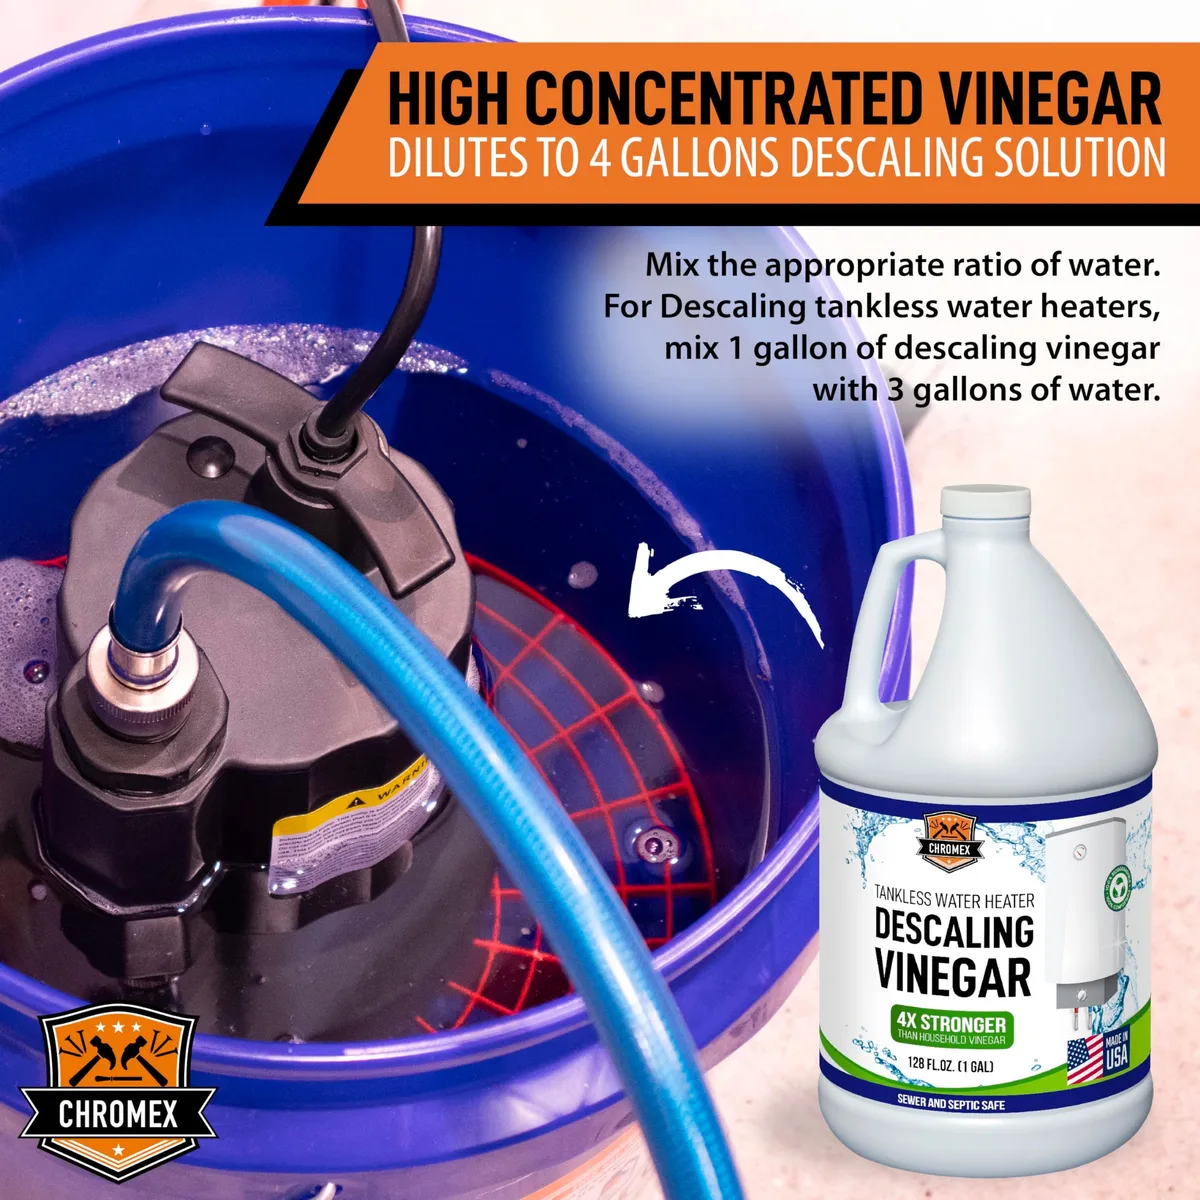
Image source: Bing (Web (fair-use with credit))
Other Maintenance Tasks
Clean the faucet screen once a year. Unscrew the aerator at the tip of the spout. Soak it in vinegar for 30 minutes.
Rinse and reinstall. This keeps the flow rate strong.
Check the air gap tube for kinks or clogs every six months. A blocked air gap causes steam pressure to build up inside the tank. That leads to sputtering, slow flow, and eventually a tripped reset button.
Tighten the saddle valve connection annually. A slow drip here wastes water and can cause cabinet damage over time. Use a wrench to snug the compression nut.
Do not overtighten.
Frequently Asked Questions
Why is my InSinkErator making a boiling noise?
That sizzling or crackling sound is scale buildup on the heating element. Minerals in hard water form a crust that creates hot spots. Descaling the tank with vinegar usually stops the noise.
If it continues after descaling, the heating element may need replacement.
How long should a hot water dispenser last?
Most InSinkErator dispensers last 8 to 15 years with normal use. The heating element is the most common part to fail. Tanks in homes with hard water tend to fail sooner.
Annual descaling can add several years to the unit's lifespan.
Can I install this myself or need a plumber?
If you have basic plumbing and electrical skills, you can install it yourself. The job requires drilling a hole in the counter, connecting the supply line, and plugging the unit in. If you're uncomfortable drilling into granite or working under the sink, hire a plumber.
Expect to pay $150 to $300 for professional installation.
Why does my water taste metallic?
Metallic taste usually means the tank needs descaling or the water has been sitting in the tank too long. If you don't use the dispenser daily, the water can absorb trace minerals from the tank. Flush the tank by dispensing two full cups of water.
If the taste persists, descale the unit.
How do I winterize a dispenser in a vacation home?
Turn off the saddle valve. Dispense all water from the tank. Unplug the unit.
If the home will be unheated, disconnect the supply tube and blow compressed air through the tank to remove any remaining water. Freezing water can crack the tank. Do not leave water in the tank if temperatures will drop below freezing.

Similar Posts
































