Insta360 GO 3S Charging Problems
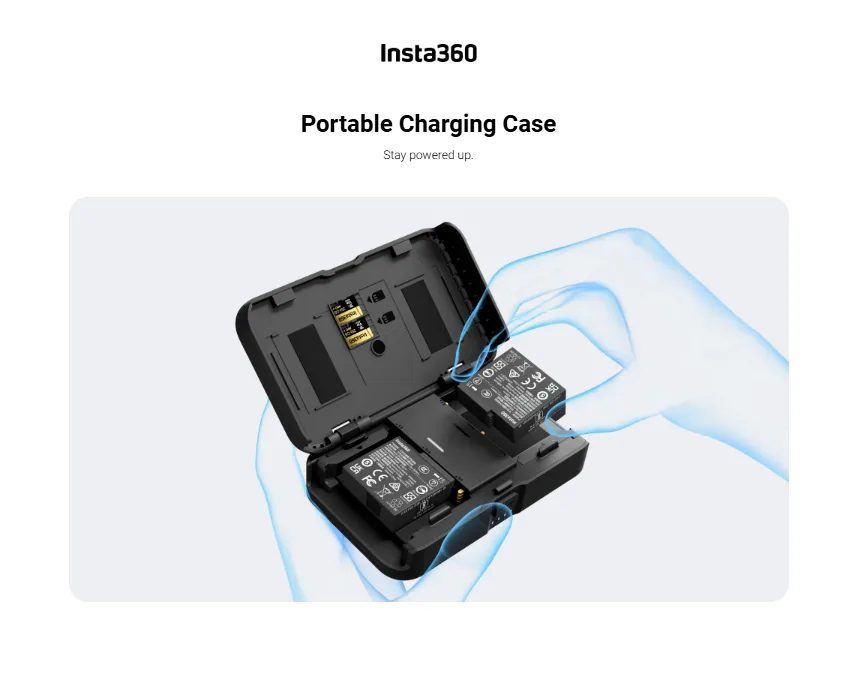
If you've ever popped your Insta360 GO 3S into its charge case only to find it still dead an hour later, you're not alone. Insta360 GO 3S charging problems are one of the most common frustrations owners report. They rarely have a single obvious cause.
Manufacturer specs indicate the camera should reach a full charge in about 60 minutes when connected to a standard 5V/1A adapter. When that doesn't happen, the root cause usually falls into a few predictable categories. Let's walk through them step by step so you can get back to shooting.
Image source: Bing (Web (fair-use with source credit))
Quick Answer
Insta360 GO 3S charging problems usually come from dirty or misaligned magnetic pins. Clean the contacts with a dry cloth. Try a different USB cable and adapter.
Let the case charge fully first. If the red light stays on, reset the camera. Contact support if nothing works.
Why Your GO 3S Won't Charge: What's Actually Going On
Most charging failures on the GO 3S trace back to one of five culprits. The magnetic connection is the weakest link. The camera relies on tiny pogo pins inside the charge case.
Those pins need clean contact and perfect alignment to pass power.
The second common cause is the power source itself. The GO 3S expects a steady 5V supply at 1 amp. Many USB ports on older computers or cheap wall adapters deliver less than that.
The camera simply won't charge.
A third issue is firmware. Insta360 has released updates that improved charging behavior. An older firmware version might still have bugs that prevent the camera from recognizing the charger.
The fourth culprit is the case battery. The charge case has its own internal battery pack. If that pack is completely drained, the case won't charge the camera until the case itself gets some power first.
Finally, environmental factors can play a role. Extreme cold slows lithium-ion charging dramatically. The GO 3S's battery protection circuit may refuse to charge at all below freezing.
How the Magnetic Charging System Really Works
The GO 3S uses a clever but simple charging method. The camera itself has no USB port. All charging happens through four small metal contacts on its side.
Those contacts line up with spring-loaded pins inside the charge case.
When you drop the camera into the case and it clicks into place, those pins connect. The case then acts as a charging dock. Power flows from the case's internal battery or from the USB-C port on the case directly into the camera.
Alignment is critical. If the camera isn't fully seated, the pins won't make solid contact. Even a tiny gap from a piece of lint or a drop of dried water can break the circuit.
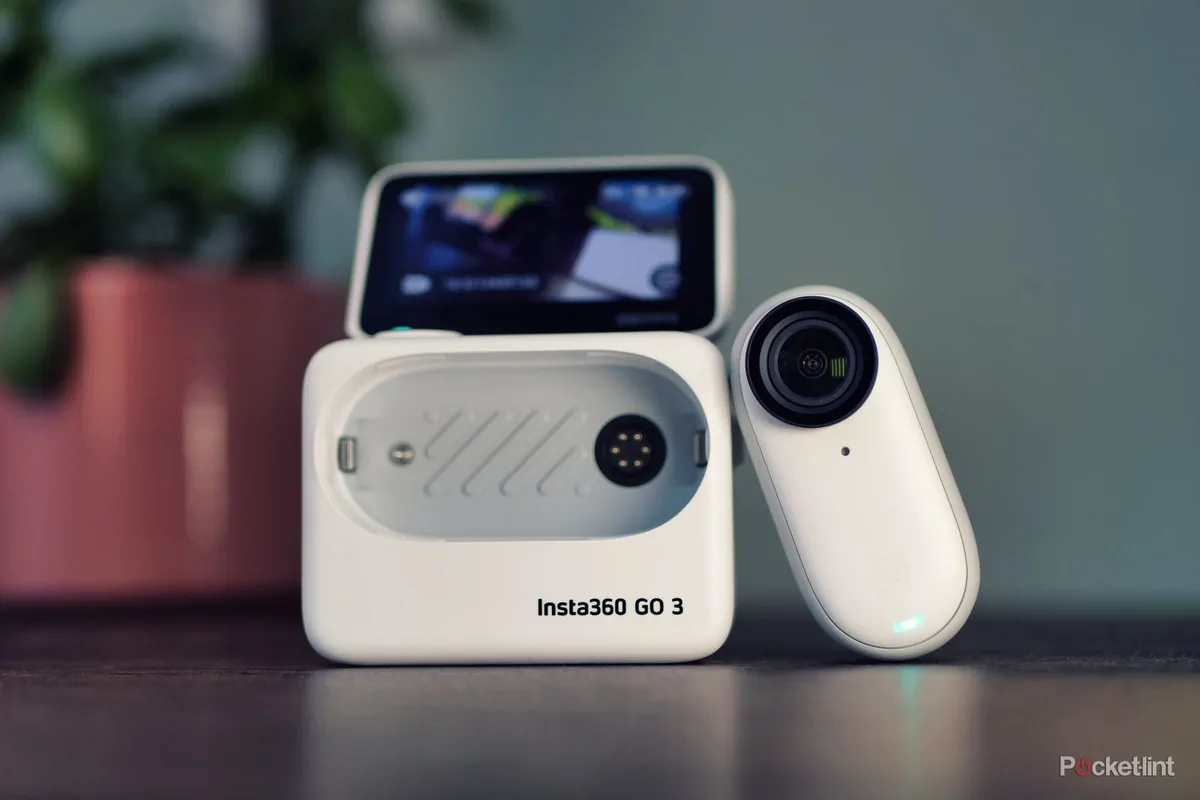
Image source: Web (Bing) / richard-errington.co.uk (Web image (fair-use with source credit))
What those LED lights mean
The GO 3S uses LED indicators to communicate charging status. Here's what the lights tell you, based on the manufacturer's documentation.
| Light behavior | Camera status | Case status |
|---|---|---|
| Solid green | Fully charged | Case battery full |
| Slow blinking green | Charging normally | Case battery charging |
| Solid red | Error or low battery | Case battery very low |
| Fast blinking red | Connection issue or fault | Overheating or hardware problem |
| No light | No power or no connection | Case battery dead |
A solid red or fast blinking red light on the camera while it's in the case is your first clue something is off. Don't ignore it.
Why the case battery matters
Many users don't realize the charge case has its own battery. It holds about 1270 mAh. That's enough to charge the camera three to four times.
But if you drain that case battery completely, the case's pass-through charging may not work as expected.
When you plug the case into USB power with a dead case battery, the case first charges its own battery. Then it passes power to the camera. That can take 30 to 45 minutes.
If you pull the camera out too early, thinking nothing is happening, you restart the cycle.
Diagnose the Problem: A Decision Tree for Charging Failures
Let's troubleshoot this methodically. Start at the top and work your way down.
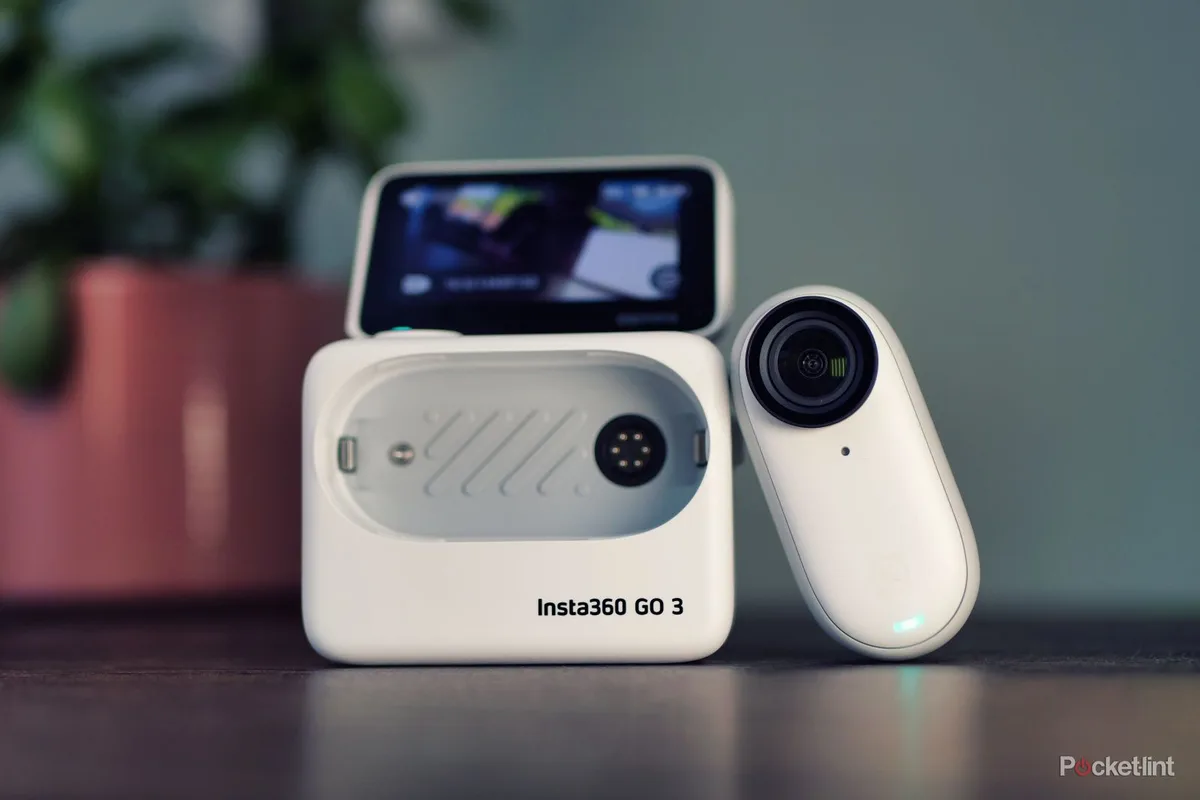
Image source: Web (Bing) / richard-errington.co.uk (Web image (fair-use with source credit))
Step 1: Check the camera LED when docked
Place the camera in the case and close it. Wait 10 seconds. What does the LED do?
No light at all:
- The case battery is likely dead. Plug the case into USB power using a known-good cable and a 5V/1A or higher wall adapter. Wait 10 minutes, then check again.
- If still no light, check the magnetic pins on both the camera and the case. Look for debris, corrosion, or bent pins.
Solid red or fast blinking red:
- This usually means a poor connection. Remove the camera and inspect both sets of contacts.
- Clean the contacts with a dry microfiber cloth. For stubborn grime, use a cotton swab lightly dampened with isopropyl alcohol at 90% or higher. Let it dry completely before reinserting.
Slow blinking green:
- The camera is charging normally. Leave it alone for 60 minutes. If it still hasn't charged after that, the battery may need calibration. Let it drain fully and try again.
Step 2: Check the case LED when plugged in
Plug the case into USB power without the camera inside. The case has its own LED indicator.
No light:
- The USB cable or adapter is likely faulty. Try a different cable and a different wall adapter. Use only certified USB-C cables. Cheap cables often fail to deliver consistent power.
- The case's USB-C port may be damaged. Inspect it for debris or bent components.
Solid red:
- The case battery is critically low. It needs to charge for at least 30 minutes before it can power the camera.
Blinking green:
- Normal charging. Wait until the light turns solid green, then insert the camera.
Step 3: Test with a different power source
If both the case and camera seem fine but charging still fails, the issue is likely the power source.
- Use a wall adapter rated at 5V/1A or higher. Standard smartphone adapters work well.
- Avoid using a computer USB port. Many laptop USB ports deliver only 0.5A. That's too low.
- Try a power bank with USB-A output. Some USB-C to USB-C cables may not negotiate power correctly with the GO 3S case.
Step 4: Reset the camera
Sometimes the camera's internal charging controller gets stuck. A manual reset can clear it.
To reset the GO 3S:
- Press and hold the mode button on the side of the camera for 10 seconds.
- Release the button. The camera should power off completely.
- Wait 10 seconds, then place it back in the charge case.
This is similar to resolving a frozen state on other action cameras. The same approach works for handling a system lockup on the GoPro HERO13.
Step 5: Update the firmware
Insta360 has released several firmware updates that specifically addressed charging behavior. An outdated firmware can cause the camera to reject a charge or report incorrect battery levels.
Connect the camera to the Insta360 app. Go to settings and check for firmware updates. If an update is available, install it with the camera inside the case and the case plugged into USB power.
Do not interrupt the update.
Common Charging Mistakes (and How to Avoid Them)
Even experienced users make these errors. Here are the most frequent ones and how to sidestep each.
Relying on the case battery alone
The case battery is meant for topping up your camera on the go. It's not a primary charger. If you always drain the case battery to zero and then plug in both devices, you'll encounter slow or delayed charging.
Keep the case topped up when you're near a wall outlet.
Using a low-quality USB cable
Not all USB-C cables are created equal. Many cheap cables lack proper shielding or don't support the current draw the GO 3S case needs. Stick with the cable that came in the box.
Or buy a certified USB-C cable from a reputable brand. Avoid cables that feel flimsy or have loose connectors.
Forgetting to clean the contacts
Dust, pocket lint, and dried water spots are invisible enemies of the magnetic charging system. Every few weeks, inspect the four pins on the camera and the corresponding pads inside the case. A dry cloth is usually enough.
If you've used the camera in wet conditions, dry the contacts thoroughly before docking.
Leaving the camera in the case for weeks
The GO 3S draws a small amount of power from the case even when fully charged. If you store the camera in the case for extended periods without using it, both batteries can drain completely. This deep discharge can make the camera appear unresponsive.
For long-term storage, keep the camera and case separate. Store each at about 50% charge.
Ignoring temperature warnings
Lithium-ion batteries like the one in the GO 3S have a narrow safe charging range. The manufacturer specifies 0°C to 40°C (32°F to 104°F). Charging outside that range triggers a protection circuit that halts charging.
In winter, warm the camera and case in your pocket for a few minutes before charging. In summer, keep it out of direct sunlight.
Not letting the case charge first
As we covered earlier, if the case battery is completely empty, it needs time to wake up. Many users see no immediate response and assume the case is broken. Give it at least 15 minutes on a known-good power source before you decide something is wrong.
Overlooking firmware as the culprit
Firmware bugs are real. If your GO 3S worked fine for months and suddenly refuses to charge, a recent update or a pending update could be the cause. Check the app for updates before you start cleaning contacts or ordering replacement parts.
It's faster and costs nothing.
Pro Tips for Stubborn Charging Problems
Some charging issues don't resolve with the basic steps. If you've cleaned the contacts, tried different cables, and updated the firmware but still get a red light, these deeper fixes might help.
Try a forced battery recalibration
Lithium-ion batteries can lose track of their charge level over time. The GO 3S's internal battery management system sometimes reports a wrong percentage. That makes the camera think it's full when it's not.
To recalibrate:
- Drain the camera battery completely by recording until it powers off.
- Leave it off for at least two hours.
- Place it in the charge case and charge it uninterrupted to 100%.
- Use the camera normally for a full cycle.
Repeat this process once every few months. Many owners find this fixes intermittent charging failures that no other step could solve.
Check for magnetic interference
The charge case uses magnets to hold the camera in place and align the pins. Strong external magnetic fields can disrupt this alignment.
If you store your camera near speakers, magnetic phone mounts, or inductive charging pads, try moving it. Place the case on a non-metallic surface while charging. Some users report that charging on a wireless charging pad interferes with the case's charging circuit.
Use the accessory clip as a diagnostic tool
The GO 3S ships with a magnetic accessory clip that attaches to the camera. If you have that clip, try charging the camera through it.
Attach the clip to the camera. Plug a USB-C cable directly into the clip's port. If the camera charges this way but not through the case, the problem is the case's pogo pins or internal wiring.
If it still doesn't charge, the issue is likely in the camera itself.
This test isolates the fault to one component. It saves you from replacing the wrong part.
When to suspect a hardware defect
If you have tried every software and environmental fix and the camera still refuses to charge, a hardware defect is possible. Bent pogo pins, corrosion on the internal charging circuit, or a failed battery are beyond user repair.
The manufacturer's warranty covers manufacturing defects. Contact Insta360 support. Before you do, note your firmware version and describe the LED behavior.
A systematic report speeds up the troubleshooting process.
This mirrors the diagnostic approach used for USB connection issues on other compact cameras. Isolating the cable from the device is always the first step.
Keeping Your Charge Case and Camera Healthy Long-Term
Preventive maintenance is easier than troubleshooting a dead camera on the day you need it. A few simple habits keep the charging system reliable.
Clean the contacts every two weeks
Dust and pocket lint accumulate faster than you expect. Make it a habit to wipe the magnetic pins on the camera and the contact pads inside the case every couple of weeks.
Use a dry microfiber cloth. For oily residue, use a cotton swab with 90% isopropyl alcohol. Let it evaporate fully before reassembling.
Do not use water, cleaners with additives, or abrasive materials.
Store at partial charge
Lithium-ion batteries degrade fastest when stored at 100% charge or at 0%. For the GO 3S, the ideal long-term storage level is around 50%.
If you won't use the camera for a month or more, charge it to about half. Remove it from the case. Store both in a cool, dry place.
This prevents the deep discharge issue that often mimics a charging failure.
Avoid extreme temperatures
Heat is the enemy of lithium-ion batteries. Never leave the GO 3S in a parked car on a sunny day. Temperatures above 45°C (113°F) can permanently damage the battery and trigger thermal protection circuits that block charging.
Cold slows charging but rarely causes permanent damage. If the camera feels cold to the touch, warm it gradually. Do not use direct heat sources like a hair dryer.
Body heat from a pocket works fine.
Update firmware regularly
Insta360 periodically releases firmware updates that improve battery management and charging behavior. Check the app every few months for updates.
A single firmware update can fix a charging issue you've been fighting for weeks. Many users report that after updating, their camera starts charging reliably again. It's the cheapest and fastest fix you can try.
Protect the USB-C port
The charge case's USB-C port is exposed to the elements. Debris or moisture in this port can prevent the case from charging. That in turn stops the camera from charging.
Keep the port clean. Blow out dust with compressed air. If the port feels loose, be gentle with cable insertion and removal.
A damaged port often requires case replacement.
What about the case's internal battery?
The case battery degrades over time, just like any rechargeable battery. After several hundred charge cycles, its capacity drops noticeably.
If the case stops holding a charge long enough to top up the camera, replacement is the only option. Insta360 sells the charge case separately. It's worth keeping a spare if you rely on the camera for frequent outings.
Safety Warnings: When to Stop and Get Help
Most charging problems are harmless. But some signs indicate a serious issue that requires immediate attention.
Stop charging if you see swelling
A swollen battery is a fire risk. If the camera or the charge case shows any bulging, distortion, or separation of the casing, stop using it immediately.
Do not attempt to charge a swollen device. Do not puncture it. Place it in a fireproof container if possible.
Contact local battery recycling services for proper disposal.
Stop charging if the device gets excessively hot
The GO 3S and its case warm up during normal charging. That's expected. But if either becomes too hot to touch comfortably, something is wrong.
Unplug the device immediately. Let it cool in a safe, open area away from flammable materials. Do not charge it again until you have identified the cause.
Common causes of overheating include using a charger with too high a current rating, charging in direct sunlight, or a short circuit in the charging circuit.
Stop charging if you smell burning or see smoke
This is rare with modern devices, but it can happen. If you detect a burning smell or see smoke, unplug the device and move it to a non-flammable surface.
Do not use water on a lithium-ion battery fire. Use a Class D fire extinguisher or sand. If you don't have either, evacuate the area and call emergency services.
When to contact the manufacturer
Contact Insta360 support if:
- The camera shows a solid red LED with known-good cables and clean contacts.
- The case does not charge at all after trying multiple power sources.
- You see physical damage to the camera or case.
- The device has been exposed to water beyond its IPX4 rating.
Keep your serial number and purchase receipt ready. The manufacturer's official troubleshooting guides and warranty support are the most reliable resources.
Frequently Asked Questions About GO 3S Charging
How long does the GO 3S take to fully charge?
The camera takes about 60 minutes to charge from empty. The case takes about 80 to 90 minutes when plugged into a 5V/1A adapter. Both times vary with temperature and power source quality.
Can I use the camera while it's charging?
No. The GO 3S has no USB port and cannot operate while docked in the case. You must remove it from the case to use it.
There is no passthrough recording mode while charging.
Why does my GO 3S charging case blink red?
A blinking red LED on the case usually indicates a low case battery or a connection error. Charge the case alone for 30 minutes first. If the light persists, clean the pins and try a different cable.
Is it safe to charge the GO 3S overnight?
Generally yes. The charging circuit stops drawing power once the battery is full. However, for best battery health, avoid leaving it plugged in for extended periods after it reaches 100%.
Can I use a fast charger with the GO 3S?
Yes, but the camera only draws 5V at 1A. A fast charger will work, but the GO 3S will not charge faster. Higher voltage chargers may cause the case to warm up more than normal.
What should I do if my GO 3S won't turn on after charging?
First, make sure the camera is not completely dead. Place it in the case and check the LED. If the LED is solid green but the camera won't power on, press and hold the mode button for 10 seconds to reset it.
Your Quick Reference: What to Try First
When your GO 3S won't charge, follow this order. It saves time and prevents unnecessary steps.
| Step | Action | Time needed |
|---|---|---|
| 1 | Clean the magnetic contacts on camera and case | 1 minute |
| 2 | Use a known-good USB cable and 5V/1A adapter | 2 minutes |
| 3 | Let the case charge for 15 minutes, then insert camera | 15 minutes |
| 4 | Reset the camera by holding the mode button for 10 seconds | 1 minute |
| 5 | Update firmware via the Insta360 app | 5 minutes |
| 6 | Recalibrate the battery (drain fully, recharge fully) | 1 day |
| 7 | Contact Insta360 support | Varies |
If the camera still won't charge after step 6, the problem is almost certainly hardware related. The same firmware update process used for other action cameras applies here. Keep this reference handy for the next time your GO 3S leaves you waiting.

Similar Posts






























