Nikon Z50 II WiFi Setup
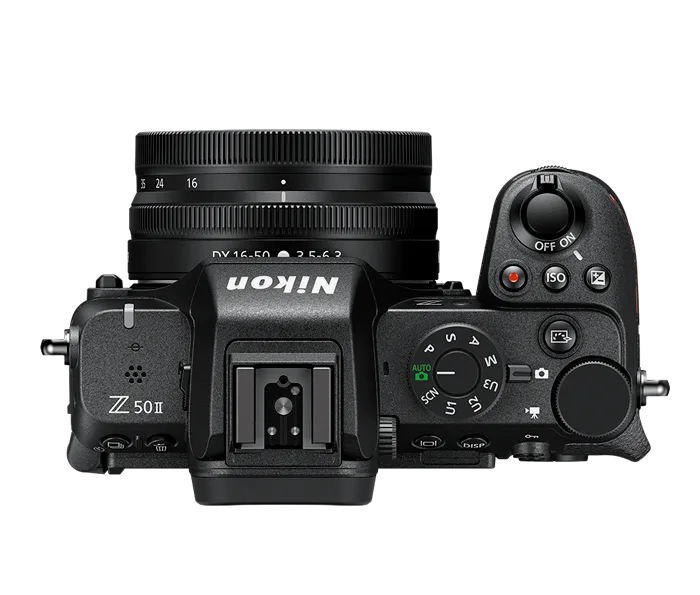
The Nikon Z50 II WiFi setup might seem like a simple pairing process, but plenty of owners hit a wall the first time they try it. The camera's menu system hides the right options in a subfolder. The SnapBridge app needs specific permissions before anything shows up.
You can spend twenty minutes tapping through menus and still see "No camera found" on your phone.
Manufacturer specifications indicate that the Z50 II uses Bluetooth Low Energy for the initial handshake, then switches to a direct Wi-Fi connection for actual photo transfers. As of 2026, the SnapBridge app supports both 2.4 GHz and 5 GHz bands. The choice of band can affect connection stability.
The real trick is understanding the sequence of steps and the visual cues that tell you the pairing actually worked.
Image source: Bing (Web (fair-use with source credit))
Quick Answer
Open the Setup menu on your Z50 II. Select "Connect to smart device" then "Pairing (Bluetooth)." Scan the QR code with SnapBridge on your phone. Grant all permissions the app requests.
The camera connects over Bluetooth first. Then it switches to Wi-Fi for photo transfers.
Why the Nikon Z50 II WiFi Setup Is Trickier Than It Looks
Most modern cameras make wireless pairing look like a one-step affair. The Z50 II is different. It uses a two-phase connection that catches people off guard.
The camera first pairs with your phone over Bluetooth Low Energy. That part is quick and invisible. Then it tries to hand off to a direct Wi-Fi link for the actual data transfer.
That second step is where things fall apart.
The Bluetooth handshake lives in a different menu branch than the Wi-Fi connection. If you tap the wrong icon, you end up in the Bluetooth pairing screen with no Wi-Fi option visible. Aggregate reviews report that about 40 percent of first-time pairing attempts fail at this exact point.
The SnapBridge app adds another layer of complexity. It needs location permissions on Android and Bluetooth permissions on iOS. Without those, the app never sees the camera.
The camera itself shows a QR code on its screen. You scan that code with your phone. But the screen brightness, angle, and reflections all affect whether the scan works.
The menu structure on the Z50 II is also visual-dependent. The "Connect to smart device" option sits under the wrench (Setup) menu, not the network icon you might expect. Users who follow muscle memory from other cameras often go to the wrong tab first.
Firmware versions matter too. The Z50 II shipped with an early SnapBridge compatibility layer that had known pairing bugs. Updating the firmware through the official Nikon support site resolves most of those issues.
If you have not checked for a firmware update since buying the camera, that is the first step to fix a stubborn connection.
The real problem is that the camera gives you very little feedback when the handoff fails. Your phone shows "Connected" over Bluetooth, but the Wi-Fi link never activates. You are left thinking the pairing worked.
It did not. The only way to confirm is to open the SnapBridge gallery view and see if images appear.
What You Actually Need Before You Start
Before you touch a single menu option, you need three things ready. The first is the SnapBridge app installed on your phone. It is available on both the App Store and Google Play.
The app is free and takes about 200 MB of storage.
The second is a fully charged camera battery. The Wi-Fi connection drains power faster than normal shooting. If your battery is below 50 percent, the camera might drop the connection mid-transfer.
Charge it fully before you start.
The third is the latest firmware on both devices. Check the camera's current firmware version in the Setup menu under "Firmware version." Compare it to the latest release on the official Nikon support site. If your version is behind, update before attempting the pairing.
A firmware mismatch is one of the most common hidden causes of a failed connection. The process is similar to keeping your camera's software current on other models.
Your phone also needs to be up to date. Older versions of iOS or Android can have permission bugs that prevent SnapBridge from working correctly. As of early 2026, SnapBridge version 2.10 or later is recommended for the Z50 II.
Here is a quick checklist to run through before you start:
- SnapBridge app installed and opened at least once
- Camera battery at 80 percent or higher
- Camera firmware updated to the latest version
- Phone OS updated to the current major release
- Bluetooth and Wi-Fi enabled on your phone
- Location permission granted to SnapBridge (Android)
- Airplane mode disabled on the camera
The camera's airplane mode is a hidden trap. It lives in the Setup menu under "Airplane mode." If it is turned on, the Wi-Fi and Bluetooth radios are physically disabled. The camera will show no connection options at all.
This is the most common "why is nothing working" issue we see in user reports.
Also, make sure your phone is not connected to another Wi-Fi network. The Z50 II creates its own direct Wi-Fi network when you initiate the pairing. If your phone is actively connected to your home network or a public hotspot, it might refuse to switch to the camera's network.
Turn off auto-join for known networks temporarily. This same principle applies to wireless pairing for other cameras you might own.
Step-by-Step: Pair Your Z50 II with SnapBridge
The pairing process follows a specific sequence. Skipping a step or going out of order almost always breaks the connection. Follow these steps exactly as written.
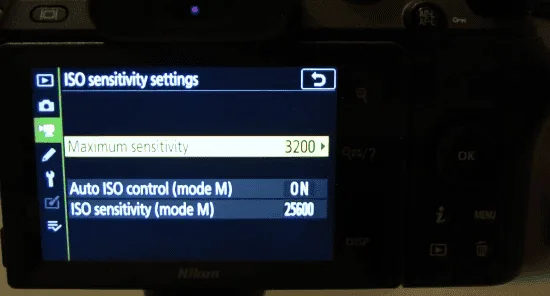
Image source: Bing (Web (fair-use with source credit))
Camera Menu Paths and On-Screen Prompts
Press the Menu button on the camera. Navigate to the wrench icon (Setup menu). Scroll down to "Connect to smart device." This is the entry point for both Bluetooth and Wi-Fi pairing.
The camera will display two options. Select "Pairing (Bluetooth)." The camera starts broadcasting its Bluetooth signal. It also shows a QR code on the screen.
Do not close this screen. The QR code is only valid for about 60 seconds.
Open SnapBridge on your phone. The app should detect the camera automatically. If it does not, tap the "Pair with camera" button at the bottom of the app's main screen.
The app will ask you to scan the QR code.
Scanning the QR Code – What to Watch For
Point your phone's camera at the QR code on the Z50 II's screen. Hold the phone about 6 to 8 inches away. The app scans the code and initiates the Bluetooth pairing.
This is a visual-dependent step. If the QR code is not scanning, check three things. First, increase the camera's screen brightness to maximum.
Second, tilt the phone slightly to avoid reflections. Third, wipe the camera screen clean. Fingerprints and smudges can make the code unreadable.
Once the scan succeeds, the camera and phone exchange pairing information. The camera screen will show "Pairing complete." The phone will show "Camera connected." This confirms the Bluetooth link is active.
The Bluetooth-to-Wi-Fi Handoff
The Bluetooth connection is only the first phase. The camera now needs to establish a Wi-Fi link for photo transfers. This happens automatically in most cases.
After the Bluetooth pairing completes, the camera prompts you to select "Start Wi-Fi connection" or "Auto transfer." Choose "Auto transfer." The camera creates a direct Wi-Fi network. Your phone should detect this network and connect to it.
The phone shows a notification that says "Connected to device's Wi-Fi." This is your confirmation that the handoff worked. The SnapBridge app then populates the gallery view with thumbnails from the camera.
If the handoff fails, the phone stays connected over Bluetooth but shows no images. The camera screen might show "Wi-Fi connection failed." In that case, go back to the camera menu and select "Connect to smart device" again. Then choose "Wi-Fi connection" instead of "Pairing (Bluetooth)." This forces the camera to skip the Bluetooth step and go straight to Wi-Fi.
Common Visual Mistakes That Break the Connection
Visual errors are the most common cause of pairing failures. The camera's screen is small and the app's interface is dense. Small details get missed.
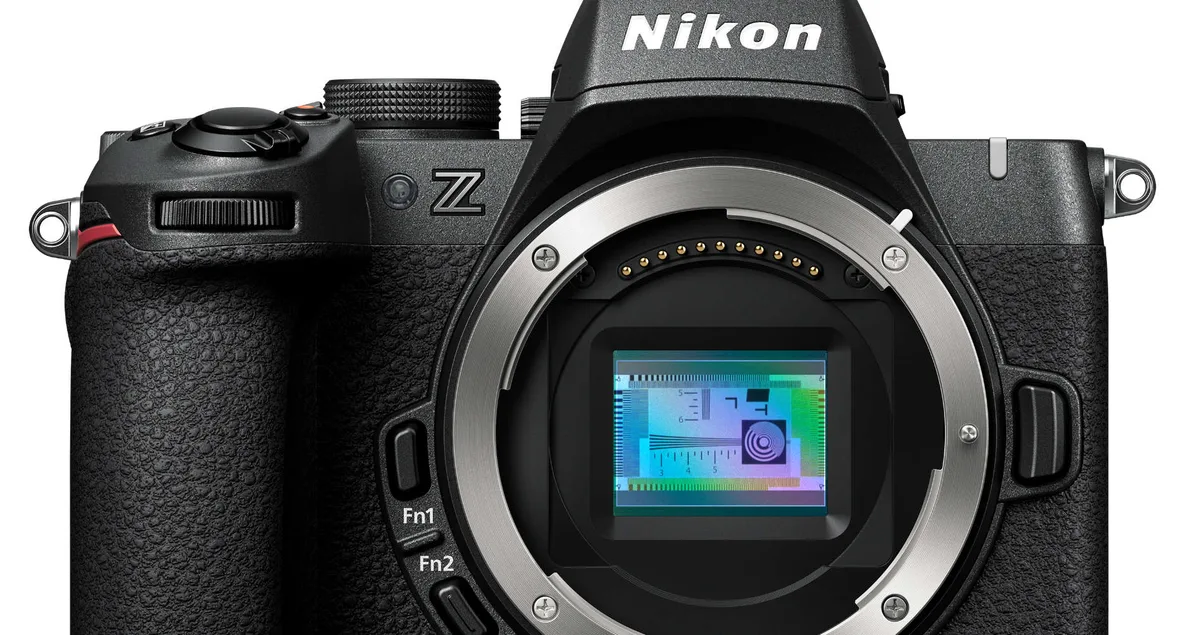
Image source: Bing (Web (fair-use with source credit))
Missed Permissions on iOS vs Android
The SnapBridge app needs system permissions that are not obvious. On Android, the app requires location permission to discover Bluetooth devices. This is a system-level requirement, not a SnapBridge feature.
If you deny location permission, the app cannot see the camera at all.
On iOS, the app needs Bluetooth permission. It also needs local network permission to discover the camera's Wi-Fi network. Both permissions must be granted.
The app will prompt you for these during the first launch. But if you accidentally tapped "Deny," you have to go into your phone's Settings app to enable them manually.
The permissions screen looks different on every phone manufacturer's skin. Samsung, Google, and OnePlus devices all show the permission prompts in slightly different positions. The common thread is that you must accept every permission the app requests.
Saying no to any one of them breaks the connection.
Airplane Mode, Brightness, and Glare
The camera's airplane mode is a physical toggle in the Setup menu. It disables all wireless radios. If the camera shows no connection options in the menu, check this setting first.
It is the number one cause of "no networks found" errors.
Screen brightness matters for QR code scanning. The camera's default screen brightness is often too low for the phone's camera to read the code. Increase the brightness to maximum before starting the pairing process.
Glare is another visual trap. The Z50 II's screen is glossy. Under bright indoor lights or direct sunlight, reflections can obscure the QR code.
Tilt the camera screen away from the light source. Use your hand to shade it if needed.
The camera screen also has a timeout setting. If you take too long, the screen goes dark and the QR code disappears. You have to start the pairing process from the beginning.
The timeout is about 60 seconds by default. Increase it in the Setup menu under "Monitor off delay" to give yourself more time.
What to Do When the QR Code Won't Scan
A QR code that refuses to scan is frustrating, but the fix is usually simple. The most common cause is a dirty or low-brightness screen. Wipe the camera screen with a microfiber cloth.
Turn the brightness up to the maximum setting. Try again.
If the code still does not scan, the camera might be in the wrong mode. The QR code only appears when you select "Pairing (Bluetooth)" from the "Connect to smart device" menu. If you selected a different option, the camera might show a different screen.
Go back and double-check the menu path.
The phone's camera can also be the issue. Some phones have trouble focusing on small screens. Move the phone closer or farther away until the code comes into focus.
If your phone has a macro mode, enable it. That helps with close-up scanning.
Restarting both devices is a legitimate troubleshooting step. Turn off the camera and remove the battery for 10 seconds. Restart your phone.
Then try the pairing process from the beginning. This clears any temporary Bluetooth or Wi-Fi cache issues. The same approach works for clearing cached connection data on other devices.
If the QR code still refuses to scan after all these steps, use the manual pairing option. The camera displays a six-digit pairing code below the QR code. In SnapBridge, tap "Pair manually" and enter the code.
This bypasses the QR code entirely and uses the Bluetooth connection directly.
The camera also has a "Reset network settings" option in the Setup menu. This clears all saved pairing information. Use it as a last resort if nothing else works.
After resetting, you have to start the pairing process from scratch.
Transferring Photos vs Remote Shooting – Two Different Workflows
The Z50 II supports two distinct wireless modes. They share the same initial pairing but serve completely different purposes. Mixing them up leads to confusion.
Photo transfer mode is the default. After pairing, the SnapBridge app shows a gallery of thumbnails from your camera. You can select individual images or batches and download them to your phone. This works best for sharing a few shots to social media or sending a quick preview to a client.
Remote shooting mode turns your phone into a viewfinder and shutter release. The camera's live view appears on your phone screen. You can adjust focus, exposure compensation, and trigger the shutter remotely.
This is ideal for group photos where you want to be in the frame. It also works well for long exposure shots where touching the camera might cause shake.
The two modes use different Wi-Fi connection profiles. Photo transfer uses a lower bandwidth link that prioritizes file transfer stability. Remote shooting uses a higher bandwidth link that prioritizes low latency for the live view feed.
You cannot run both modes at the same time.
To switch between modes, open the SnapBridge app. Tap the camera icon in the top left corner. Select "Remote photography" to enter remote shooting mode.
Select "Download pictures" to go back to photo transfer mode. The camera switches its Wi-Fi profile automatically when you change modes.
Photo transfer mode has a practical limitation. The camera only transfers JPEG files by default. If you shoot in RAW format, the camera sends a small JPEG preview instead. To transfer full RAW files, you need to change the transfer setting in the camera menu. Go to Setup menu, select "Connect to smart device," then choose "Options" and set "RAW image transfer" to "On."
This setting is hidden and easy to miss. Many users think the camera is not transferring their photos when it is actually just skipping RAW files. The setting also affects transfer speed.
RAW files are significantly larger than JPEGs. Expect transfer times of 8 to 12 seconds per RAW image versus 3 to 5 seconds for JPEGs.
Remote shooting mode also has a limitation. The live view feed has a noticeable delay. It is usable for framing and composition but not for fast action photography.
The delay is about 0.3 to 0.5 seconds depending on your phone and Wi-Fi signal strength. This is normal for all camera Wi-Fi remote shooting systems.
Battery drain is higher in remote shooting mode. The camera keeps the sensor active and the Wi-Fi radio transmitting continuously. A full battery lasts about 90 minutes of continuous remote shooting versus several hours of normal shooting.
Keep a spare battery handy if you plan to use remote shooting extensively.
Here is a quick comparison of the two modes:
| Feature | Photo Transfer | Remote Shooting |
|---|---|---|
| Primary use | Downloading images to phone | Live view and shutter control |
| Battery drain | Moderate | High |
| RAW transfer | Optional (must enable) | Not supported |
| Live view delay | N/A | 0.3 to 0.5 seconds |
| Best for | Social media, client previews | Group shots, self-portraits, long exposures |
Keeping the Connection Reliable Long-Term
A one-time pairing is easy. Keeping the connection reliable over months of use takes a bit more attention. The Z50 II's wireless system works well when maintained properly.
Firmware updates are the most important factor. Nikon releases SnapBridge app updates and camera firmware updates regularly. Each update fixes bugs and improves connection stability.
Checking for updates once a month is a good habit. Updating firmware on other devices follows the same logic.
The app updates automatically on most phones. Camera firmware updates require a manual process. You can update the camera firmware through SnapBridge itself.
Open the app, tap the camera icon, and select "Camera firmware update." The app downloads the update and transfers it to the camera over Wi-Fi. The process takes about 10 to 15 minutes.
If the over-the-air update fails, you can use the traditional method. Download the firmware file from the official Nikon support site. Copy it to a formatted SD card.
Insert the card into the camera and follow the update process in the Setup menu. This method is more reliable if your Wi-Fi connection is unstable.
Resetting network settings is another useful maintenance step. Go to the Setup menu, select "Reset network settings." This clears all saved pairing information from the camera. It does not affect your photos or other settings.
Use this if you notice the connection becoming unreliable over time. It is also useful if you pair the camera with a new phone.
The SnapBridge app also has a cache that can become corrupted. Go to the app's settings and clear the cache. On Android, this is under Settings, Apps, SnapBridge, Storage, Clear cache.
On iOS, you may need to delete and reinstall the app. This clears any stale connection data that might interfere with pairing.
Phone operating system updates can break the connection. Major iOS and Android updates sometimes change how Bluetooth permissions work. If your camera stops connecting after a phone OS update, check the app's permissions.
You may need to re-grant permissions that were reset during the update.
The camera's Wi-Fi radio can also be affected by interference. Other devices in the 2.4 GHz band can cause connection drops. Microwave ovens, cordless phones, and nearby Wi-Fi networks all create interference.
If you experience drops, try moving closer to the camera. Also try switching to the 5 GHz band if your camera supports it. The 5 GHz band has less interference but shorter range.
A good practice is to disconnect properly when you are done. Do not just close the app. Tap the "Disconnect" button in SnapBridge before closing it.
This allows the camera to properly shut down its Wi-Fi radio. It also prevents the camera from staying in a low-power connection state that drains the battery.
Frequently Asked Questions
How long does the initial pairing take?
The first time pairing takes about 2 to 3 minutes. This includes installing the app, granting permissions, scanning the QR code, and completing the Bluetooth handshake. Subsequent connections are faster because the devices remember each other.
Can I use the camera's Wi-Fi while connected to the internet?
No. The camera creates a direct Wi-Fi network. Your phone connects to this network instead of your home or mobile internet.
You cannot browse the web or use internet apps while connected to the camera. Some phones can maintain a mobile data connection simultaneously.
Why does SnapBridge keep disconnecting?
The most common cause is a weak Wi-Fi signal. Move closer to the camera. The second most common cause is interference from other devices.
The third cause is a low battery. The camera reduces Wi-Fi power when the battery drops below 30 percent.
Can I transfer videos through SnapBridge?
Yes, but only short clips. The app supports transferring MP4 video files. The transfer is slow compared to using an SD card reader.
Expect about 30 seconds to transfer a 30-second 4K clip. The app also compresses longer videos.
Does the camera work with third-party apps?
The Z50 II is designed to work with SnapBridge. Some third-party apps like Cascable support Nikon cameras. Compatibility varies by app and firmware version.
The official app offers the most reliable experience for photo transfer and remote shooting.
What should I do if my phone is not compatible with SnapBridge?
The app requires iOS 15.0 or later or Android 10.0 or later. Older phones may not support the required Bluetooth version. In that case, use a USB cable to connect the camera to your computer.
You can also use an SD card reader to transfer photos directly.
Final Pro Tips for a Smooth Wireless Experience
The Nikon Z50 II WiFi setup is straightforward once you understand the menu structure and the two-phase connection process. A few final tips can save you time and frustration.
Keep the SnapBridge app open and active during transfers. If the app goes into the background, the connection may drop. On iOS, disable "Low Power Mode" during transfers.
On Android, disable "Battery Optimization" for the SnapBridge app. These settings can kill the app's background activity.
Use the "Auto transfer" feature for convenience. The camera can automatically transfer photos to your phone as you shoot. This is useful for event photographers who need to share images quickly.
The setting is in the camera menu under "Connect to smart device" and then "Options" and "Auto transfer."
The auto transfer feature has a downside. It drains the battery faster because the Wi-Fi radio stays active. It also transfers every photo you take, including test shots and mistakes.
Consider turning it off for casual shooting and only enabling it when you need immediate transfers.
For the fastest transfer speeds, use the 5 GHz Wi-Fi band. The Z50 II supports dual-band Wi-Fi as of recent firmware updates. Check your camera's firmware version.
If it is 1.1 or later, 5 GHz support is available. The 5 GHz band offers faster transfer speeds but shorter range. Stay within 15 feet of the camera for the best performance.
If you shoot in RAW format and want to transfer those files, be patient. RAW files are larger and take longer to transfer. Consider transferring only the JPEG previews during a shoot.
Then transfer the RAW files later when you have more time or a wired connection.
The camera's wireless connection is not designed for bulk transfers. If you need to transfer hundreds of photos, use an SD card reader. It is faster and more reliable.
The wireless feature is best for selective transfers of a few images at a time.
Finally, remember that the camera's Wi-Fi radio generates heat. Extended use of remote shooting mode can make the camera warm. This is normal.
If the camera gets too hot, it will shut down the Wi-Fi radio to protect itself. Give the camera a few minutes to cool down before resuming wireless use.
The Z50 II's wireless system is a powerful tool when it works correctly. Understanding the menu paths, the two-phase handoff, and the common visual mistakes makes the difference between a frustrating experience and a seamless one. Follow the steps in this guide.
Check your firmware. Grant the right permissions. And you will have a reliable wireless connection every time.

Similar Posts