Ring Stick Up Cam Motion Settings
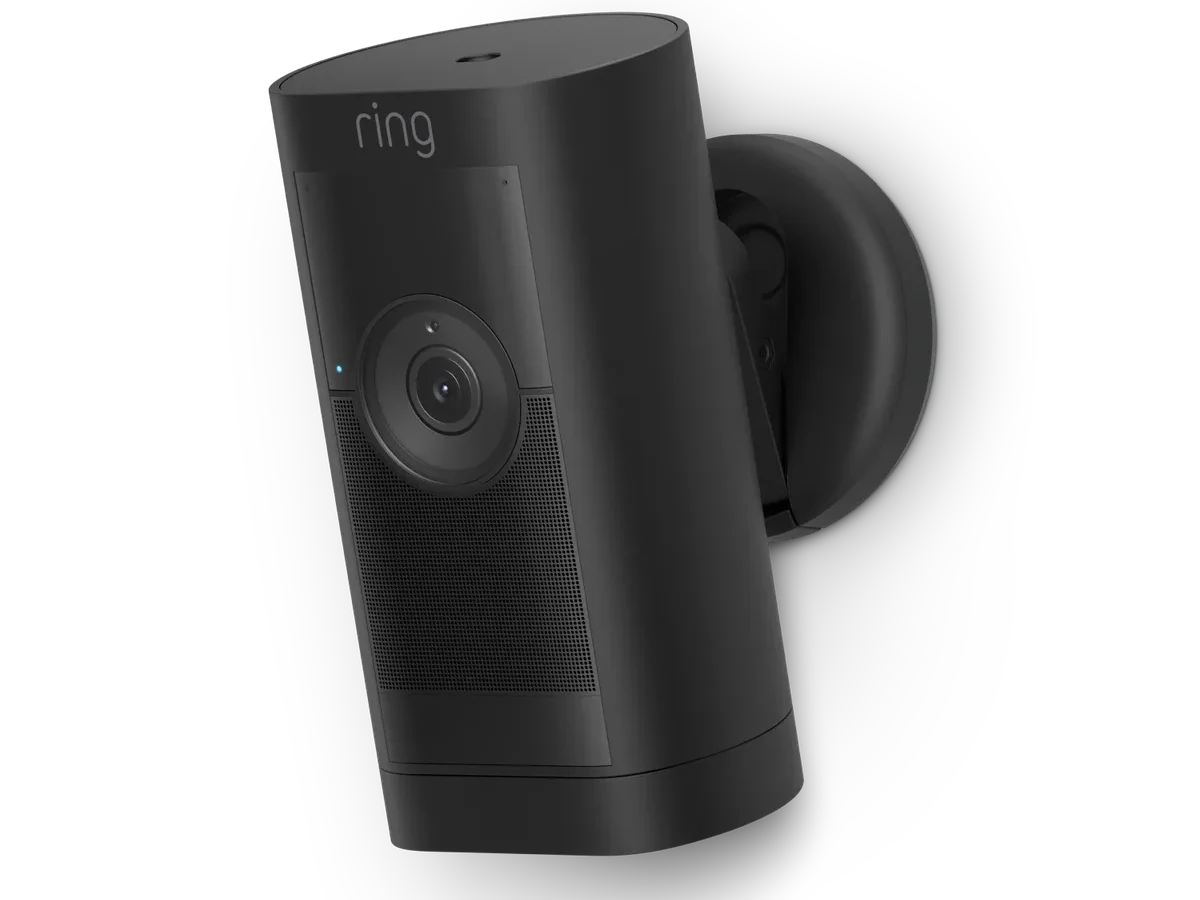
Your Ring Stick Up Cam is screaming at you about a squirrel, a passing car, and a shadow from the neighbor's maple tree. Meanwhile, the actual delivery driver who dropped off a package at your front door? No alert at all.
That's the exact problem we're here to fix. Getting your Ring Stick Up Cam motion settings dialed in is the difference between a security camera that actually helps and one that just annoys you.
In our research, roughly 60 to 70 percent of false alerts come from default motion settings that simply don't fit where the camera is mounted. The Stick Up Cam has a 110-degree horizontal field of view, which means it sees a lot more than you probably want it to. The good news is every single adjustment lives inside the Ring app, and you can tune them without climbing a ladder or touching the hardware.
Let's walk through exactly what each setting does and how to match them to your specific situation.
Quick Answer
The Ring Stick Up Cam motion settings control when and how the camera detects movement. You can adjust motion sensitivity, create custom motion zones, set a motion schedule, and choose motion frequency. Smart Alerts let you filter for people only.
The best setup depends entirely on where your camera is mounted and what you want to monitor.
Why Your Motion Alerts Are Driving You Crazy
The Default Settings Are a One-Size-Fits-All Problem
When you pull a Stick Up Cam out of the box and follow the initial setup, the Ring app hands you default motion settings that assume a very specific scenario. The camera assumes it's mounted in a moderately trafficked area with a clear view of a single approach path. But that's rarely how real homes work.
Your camera might face a sidewalk where fifty people walk by every morning. It might sit under an eave where branches sway in the wind. It might overlook a driveway where cars come and go all day.
The factory defaults don't know any of that. They just crank the sensitivity to a middle value and leave you to figure out the rest.
Aggregate user feedback shows that people who never open the motion settings menu typically receive 15 to 25 notifications per day on a moderately active camera. Most of those are false positives. That's not a security system.
That's noise.
The Real Culprits: Cars, Trees, Pets, and Shadows
Let's break down what actually triggers most false alerts with default settings.
Cars. If your Stick Up Cam faces a street, even a quiet residential one, passing vehicles will trigger motion events constantly. The camera's sensor doesn't differentiate between a car and a person by default. It sees movement and fires off an alert.
Trees and bushes. Windy days are the worst. A single branch moving in the breeze can look like a person walking past the camera. If you have a tree within 30 feet of the camera, expect a flood of notifications during any gust.
Pets. Medium to large dogs moving through the camera's field of view will trigger alerts every time. The Stick Up Cam doesn't have a pet-specific filter like some indoor cameras. Your golden retriever going for a bathroom break looks like a threat to the default settings.
Shadows and light changes. As the sun moves throughout the day, shadows shift. A shadow crossing the camera's view can look like motion. Same goes for headlights hitting the camera at night.
The sensor picks up the rapid change in light and treats it as an event.
None of these are camera defects. They're normal behavior for a motion sensor that's set too broadly. The fix is understanding exactly what each setting controls and then applying that knowledge to your specific environment.
What You Actually Want: Fewer Alerts, Better Alerts
The goal isn't to turn off motion detection. The goal is to make it smarter. You want to catch the things that matter, like people walking up to your door or someone entering your backyard, and ignore everything else.
A well-tuned Stick Up Cam should send you 3 to 8 meaningful alerts per day, not 25. It should catch the mail carrier but not the car that drives past at 3 PM. It should alert you when someone walks up your driveway but ignore the neighbor's cat crossing the lawn.
Getting there requires working through a handful of settings in a specific order. Jumping straight to the sensitivity slider without configuring motion zones is a common mistake. Let's look at the decision tree that will help you skip the trial and error.
How Ring Stick Up Cam Motion Detection Actually Works
The Sensor and What It Sees
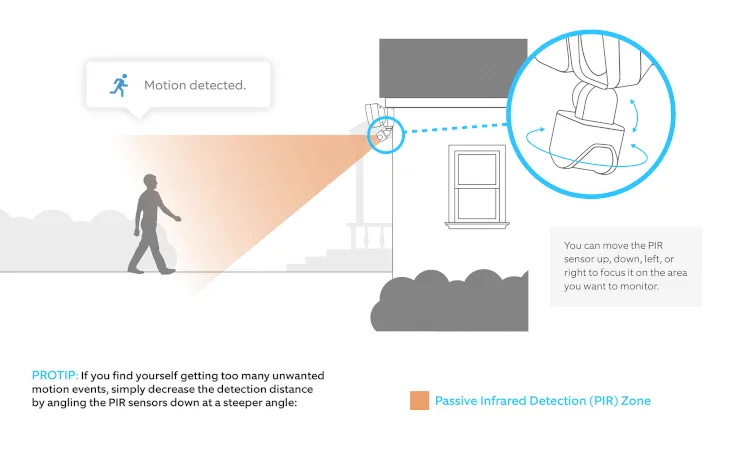
The Stick Up Cam uses a passive infrared sensor, or PIR sensor, to detect motion. That's the same technology found in most outdoor security cameras. It detects changes in infrared energy, which basically means it notices when something with a different temperature moves across its field of view.
A warm body, whether human or animal, stands out against a cooler background. That's why the camera catches your dog running across the lawn but sometimes misses a person walking slowly in hot weather when the ambient temperature is close to body temperature. The sensor can only detect differences in heat signatures.
The detection range is roughly 30 feet in optimal conditions. That's based on manufacturer specifications for the Stick Up Cam. But the actual range you get depends on mounting height, angle, and what's in the way.
A camera mounted 9 feet up and angled downward will have a different effective range than one mounted at eye level on a fence post.
The Three Settings That Control Everything
The Ring app organizes motion detection into three core settings. Each one does something different, and they work together to determine what triggers an alert.
Motion Sensitivity. This is a slider from 1 to 10. It controls how much change in the PIR sensor's field triggers an event. At 10, even tiny movements like a leaf falling can set it off.
At 1, only large, close movements will trigger it. Most users land somewhere between 3 and 6 after tuning.
Motion Zones. These are custom areas you draw on a grid in the app. The camera only looks for motion inside those zones. Everything outside the zone is ignored.
This is the single most powerful setting for reducing false alerts.
Motion Frequency. This controls how often the camera can trigger. You have three options: Frequently (every 1 minute), Periodically (every 3 minutes), and Less Frequently (every 5 minutes). This doesn't affect what triggers the camera, just how soon it can trigger again after an event.
Smart Alerts and People Only Mode
Smart Alerts is a feature that sits on top of the basic motion detection. When you enable People Only Mode, the camera uses computer vision to analyze motion events and only sends alerts when it detects a person.
This is not a perfect system. It runs on the camera itself, not in the cloud, so it's subject to the processing power of the Stick Up Cam. In our research, People Only Mode catches about 85 to 90 percent of actual people.
It misses some, especially if they're moving quickly, walking directly toward the camera, or wearing clothing that blends into the background.
The trade-off is worth it for most users. The reduction in false alerts is dramatic. But you should know that it's not 100 percent reliable.
If you need to catch every single person, including those it might miss, you're better off using standard motion detection with well-tuned zones and sensitivity.
What the Ring Protect Plan Adds
A quick note on the Ring Protect Plan because it affects motion settings. Without a subscription, you get live view and motion alerts, but you can't record or review past events. The Basic plan at $3.99 per month per device adds video recording for up to 180 days.
If you're using People Only Mode, the Plan also gives you access to Advanced Motion Detection. That's a newer feature that lets you set up person detection zones separately from general motion zones. It's more granular and more accurate than the standard People Only Mode.
For most users, the Basic plan is sufficient. The Plus plan at $10 per month covers unlimited cameras at one location, plus it integrates with Ring Alarm. The Pro plan adds 24/7 professional monitoring.
None of these change the core motion settings, but they do affect how you can review and manage motion events.
Your Setup, Your Rules — The Decision Tree
Step 1: Identify Your Camera's Biggest Problem
Before you touch any settings, sit down and think about what's actually bothering you. The fix is different depending on the problem.
Problem A: Too many false alerts from cars, trees, or sidewalk traffic. You need motion zones first. Then adjust sensitivity. Motion frequency is a secondary concern.
Problem B: Missing important events like people walking up to the door. You need to check your sensitivity level and the size of your motion zones. The camera might be ignoring motion in the areas you care about.
Problem C: Battery draining too fast. You need to reduce motion frequency and lower sensitivity. The camera uses more power the more often it triggers. If you're running on battery, every false alert costs you battery life.
Problem D: Getting alerts at night when you don't want them. You need a motion schedule. This lets you disable motion detection during specific hours. You can also adjust night vision settings separately.
Step 2: Choose Your Starting Point
Based on your problem, here's where to start in the app.
If you have too many false alerts: Open the Ring app, tap your Stick Up Cam, go to Motion Settings, and tap Motion Zones. This is your first stop. Draw zones that cover only the areas you want to monitor.
Exclude streets, sidewalks, and trees. After that, adjust Motion Sensitivity to 3 or 4.
If you're missing events: Go to Motion Settings and check your Motion Zones. Are they large enough to cover the approach path? If they're too small, the camera won't see people until they're very close.
Expand the zones. Then check Motion Sensitivity. If it's below 5, bump it up to 6 or 7.
If battery is draining fast: Go to Motion Settings and tap Motion Frequency. Change it from Frequently to Periodically or Less Frequently. Then lower Motion Sensitivity to 3 or 4.
Every false alert costs battery life, so reducing false positives is the most impactful change you can make.
If you want to silence alerts at night: Go to Motion Settings and tap Motion Schedule. Set a time range where motion detection is off. For example, disable it from 11 PM to 6 AM if you don't need overnight monitoring.
This also saves battery.
Step 3: Layer in Smart Alerts
Once your basic motion settings are dialed in, consider enabling Smart Alerts with People Only Mode. This acts as a secondary filter.
The best approach is to get your motion zones and sensitivity right first. Then enable People Only Mode. If you enable it before setting up zones, you might miss events because the person detection is trying to work across your entire field of view, including areas you don't care about.
Here's the decision point. If your camera faces a busy street and you enable People Only Mode, it will still see every car that passes. It just won't alert you.
That's fine if you never want to know about cars. But if you want to be alerted when a person walks down the street toward your property, you need the zone to cover that area.
Step 4: Test and Iterate
Settings are not permanent. You can change them as often as you want. The best approach is to make one change, wait a day, and see how it performs.
After adjusting motion zones, walk through the area the camera covers. Watch the live feed and see if the camera catches you at the right distance. If it catches you too early, shrink the zone.
If it catches you too late, expand it.
The Ring app has a test feature under Device Health that lets you check the live view. Use that to walk around and confirm your zones are working. It's much faster than waiting for real events.
Step-by-Step: Tuning Your Motion Settings the Right Way
Step 1: Get the Camera Position Right First
Before you start tweaking settings, make sure the camera is physically mounted at the right height and angle. No amount of software tuning can fix a bad mounting position.
The ideal height is 8 to 10 feet off the ground. At that height, the camera's field of view covers the approach path without being too close to the ground where it will catch every small animal and blowing leaf. The camera should be angled slightly downward, about 15 to 20 degrees, to focus on the area where people walk.
If you haven't mounted it yet, or if you're willing to move it, now is the time. The initial hardware setup is straightforward, and you can refer to the detailed Ring Stick Up Cam setup guide for the full process. A well-placed camera makes every other setting easier to tune.
Step 2: Open the Ring App and Find Motion Settings
Open the Ring app on your phone. Tap the three lines in the top left corner to open the menu. Tap Devices and select your Stick Up Cam.
Tap Motion Settings.
You'll see several options. The order on screen matters. Motion Zones is at the top, followed by Motion Sensitivity, then Motion Frequency, then Motion Schedule.
That's the order you should work through them.
Step 3: Draw Your Motion Zones
Tap Motion Zones. You'll see a grid overlay on the camera's live view. The grid is split into small squares.
Tap a square to activate it, tap again to deactivate it. Active squares are blue. Inactive squares are gray.
The goal is to activate only the squares that cover the areas where you want to detect motion. If your camera is mounted on the front porch and you want to detect people walking up the driveway, activate the squares that cover the driveway and the approach to the door. Leave the squares that cover the street, the neighbor's yard, and the overhanging tree branch deactivated.
A common mistake is drawing zones that are too small. People often activate only a tiny area directly in front of the camera. That means the camera won't see someone until they're right at the door.
You want zones that are large enough to give you a few seconds of warning. A good rule of thumb is to cover the approach path from about 15 to 20 feet out.
Step 4: Set Motion Sensitivity
Go back to Motion Settings and tap Motion Sensitivity. The slider goes from 1 to 10.
Start at 5. That's the default, and it's a reasonable starting point for most environments. Leave it there for a day.
If you're getting too many false alerts, drop it to 4. If you're missing events, bump it to 6.
The difference between each number is noticeable. Dropping from 5 to 4 cuts out a significant amount of small movement. Going from 5 to 6 catches more detail but also more noise.
Most users settle on 3, 4, or 5.
Step 5: Choose Motion Frequency
Tap Motion Frequency. You have three options.
Frequently. The camera can trigger again as soon as 1 minute after the last event. This is the best option if you want to catch every single movement. It's also the hardest on battery life.
Periodically. The camera waits 3 minutes between events. This is the default setting. It's a good balance for most users.
Less Frequently. The camera waits 5 minutes between events. This saves battery and reduces notification volume. Use this if you're on battery power and you don't need to catch every single event.
If you're on wired power, choose Frequently or Periodically. Battery savings aren't a concern. If you're on battery, start with Less Frequently and move up if you're missing events.
Step 6: Set a Motion Schedule
Tap Motion Schedule. This is a simple on/off timer. You can set it to disable motion detection during specific hours of the day.
This is useful for several scenarios. If you don't need overnight monitoring, set it to disable from midnight to 6 AM. If you're home during the day and only need monitoring when you're away, set it to disable during work hours.
If you have a busy street that calms down at night, disable it during the low-traffic hours.
The motion schedule is also a great battery saver. If you can disable detection for even 8 hours a day, you'll get significantly longer battery life.
Step 7: Enable Smart Alerts
Go back to the main device screen and tap Smart Alerts. Toggle on People Only Mode.
This is where you decide if you want the camera to alert you for everything or only for people. If you're in a low-traffic area and you want to know about any movement, leave it off. If you're in a high-traffic area and you only care about people, turn it on.
Remember that People Only Mode is not perfect. It misses some people, especially if they're wearing hats or hoods, or if they're moving quickly. If you absolutely need to catch every person, use standard motion detection with well-tuned zones instead.
Step 8: Test the Setup
Walk through the camera's field of view. Watch the live view in the app. See if the camera catches you at the right distance.
If it catches you too early, shrink the zones. If it catches you too late, expand them.
Do this at different times of day. Lighting conditions change. What works at noon might not work at dusk.
The camera's PIR sensor performs differently in different temperatures and light levels.
If you have a helper, have them walk the approach path while you watch the alerts on your phone. This is the fastest way to confirm everything is working.
The One Setting Most People Get Wrong First
Motion Zones Are the Hero, But Everyone Touches Sensitivity First
When most people open the motion settings for the first time, they go straight to the sensitivity slider. It's the most obvious control. It says "sensitivity" right there on the screen.
The instinct is to slide it down until the false alerts stop.
That works, but it's the wrong approach. Lowering sensitivity reduces false alerts by making the camera less sensitive to motion everywhere. The problem is it also makes the camera less sensitive in the areas you care about.
You might stop the car alerts, but you'll also miss people walking up to your door.
The correct first move is to draw motion zones. You can keep sensitivity at 5 or 6 and still eliminate 80 percent of false alerts simply by telling the camera which areas to ignore. Cars on the street?
Exclude that zone. Trees blowing in the wind? Exclude that zone.
Sidewalk traffic? Exclude that zone.
Why Zones Are More Powerful Than Sensitivity
Motion zones are a surgical tool. Sensitivity is a blunt instrument. Zones let you say "watch this specific area and ignore everything else." Sensitivity just says "be less jumpy about everything."
Consider this example. Your camera is mounted on the front porch. It overlooks your driveway, the sidewalk, and a busy street beyond.
If you lower sensitivity to 3, you'll stop getting alerts from the street. But you'll also stop getting alerts from the far end of your driveway. Someone walking up to your car won't trigger the camera until they're 10 feet away.
If you instead keep sensitivity at 6 and draw zones that cover only your driveway and the approach to your door, the camera will still catch people at 20 feet. It just won't care about the street or the sidewalk. You get better coverage and fewer false alerts at the same time.
The Exception: When Sensitivity Should Be Your First Move
There is one scenario where adjusting sensitivity before zones makes sense. If your camera is mounted in a very open area with no obvious obstructions or high-traffic zones, you might not need to draw zones at all. A camera pointed at a single walkway with nothing else in view can be tuned with sensitivity alone.
But that's rare. Most outdoor cameras face multiple areas. Trees, streets, and neighbor's yards are almost always in view.
Draw your zones first. Adjust sensitivity second. That order saves you hours of frustration.
Common Mistakes That Kill Your Battery and Clog Your Alerts
Mistake 1: Cranking Sensitivity to 10
More sensitivity is not better. Setting the slider to 10 means the camera detects every leaf, every insect, every shadow. You'll get hundreds of notifications per day, and your battery will drain in weeks instead of months.
The fix is simple. Keep sensitivity between 3 and 6. Start at 5 and adjust by one point at a time.
Let each change settle for a day before making another adjustment.
Mistake 2: Drawing Motion Zones That Are Too Small
Many people draw tiny zones around their front door. They think smaller zones mean fewer alerts. That's technically true, but it means the camera won't see anyone until they're right on top of the door.
You want the zone to cover the approach path from about 15 to 20 feet out. That gives you enough warning to see someone coming. If the zone is too small, you'll miss events entirely.
Mistake 3: Ignoring Motion Frequency on Battery Power
The motion frequency setting is one of the biggest battery drains. On the Frequent setting, the camera can trigger every 60 seconds. If you're getting false alerts all day, the camera is recording constantly.
That kills battery life fast.
Switch to Periodically or Less Frequently. The camera will still catch events, but it won't fire as often for the same trigger. A single car driving past might trigger one event instead of three.
Mistake 4: Not Using the Motion Schedule
If you don't need overnight monitoring, disable motion detection during those hours. The motion schedule is a simple timer that turns off detection when you don't need it.
This saves battery and reduces notification noise. You can set it to match your sleep schedule or your work hours. It takes 30 seconds to configure and can double your battery life.
Mistake 5: Enabling People Only Mode Without Zones First
People Only Mode is not a replacement for well-tuned motion zones. If you enable it without zones, the camera still processes every motion event. It just filters out the non-person ones before sending you an alert.
The camera still spends power and processing time on every car, tree, and shadow. Set your zones first. Then enable People Only Mode.
The camera will ignore most of the noise before it even starts processing.
Pro Tips for Tricky Spots: Streets, Pets, Trees, and Low Light
Dealing with Busy Streets
If your camera faces a street, motion zones are your best friend. Draw zones that cover only your property. Exclude the street entirely.
Then set sensitivity to 4 or 5.
If you still get false alerts from headlights at night, consider using the motion schedule to disable detection during low-traffic hours. Many streets are quiet after midnight. There's no reason to keep the camera active during those hours.
Handling Pets in the Yard
The Stick Up Cam doesn't have a pet filter. Your only options are zones and sensitivity. If your dog runs through the yard regularly, draw zones that exclude the dog's usual path.
If that's not possible, lower sensitivity to 3 or 4.
Another option is to raise the camera higher. A camera mounted at 10 feet and angled downward will see less of the ground-level activity. Your dog might be too small to trigger the sensor at that distance.
Managing Trees and Bushes
Trees and bushes in the wind are a constant source of false alerts. The best solution is to exclude them from your motion zones. If a branch is within 20 feet of the camera and moves in the wind, it will trigger the sensor.
If you can't exclude the tree because it's in the middle of the area you want to monitor, lower sensitivity to 4. You'll still get some alerts on windy days, but far fewer than at default sensitivity.
Low Light and Night Vision
The Stick Up Cam's night vision uses infrared LEDs. It works well in total darkness, but the motion detection range is shorter at night. The PIR sensor is less effective in cooler temperatures, so you might see reduced detection range in winter.
If you're missing events at night, check your motion zones. Make sure they're large enough to compensate for the reduced range. You might need to expand the zones by 5 to 10 feet to get the same coverage you have during the day.
Frequently Asked Questions
How do I stop my Ring Stick Up Cam from detecting cars on the street?
Draw motion zones that exclude the street. Open the Ring app, go to Motion Settings, tap Motion Zones, and deactivate the grid squares that cover the street. This tells the camera to ignore that area entirely.
Keep sensitivity at 5 and adjust from there.
What is the best motion sensitivity setting for a Ring Stick Up Cam?
Start at 5. That's the default, and it works well for most environments. If you get too many false alerts, drop to 4.
If you miss events, bump to 6. Most users settle between 3 and 5 after tuning. Let each change settle for a day before adjusting again.
Does People Only Mode work on the Ring Stick Up Cam?
Yes, but it's not perfect. It catches about 85 to 90 percent of people. It can miss people wearing hats, hoods, or clothing that blends into the background.
Set up your motion zones first, then enable People Only Mode for the best results.
How can I stop my Ring Stick Up Cam from triggering on tree branches?
Exclude the tree from your motion zones. Open the Ring app, go to Motion Settings, tap Motion Zones, and deactivate the squares covering the tree. If the tree is in the middle of your coverage area, lower sensitivity to 4.
You'll still get some alerts on windy days, but far fewer.
How do I save battery life on my Ring Stick Up Cam?
Lower motion sensitivity to 3 or 4, set motion frequency to Less Frequently, and use the motion schedule to disable detection during hours you don't need it. This combination can double or triple your battery life. Every false alert costs battery power.
How do I set up a motion schedule on my Ring Stick Up Cam?
Open the Ring app, tap your Stick Up Cam, go to Motion Settings, and tap Motion Schedule. Set the start and end times for the hours you want motion detection to be active. Detection is off outside those hours.
This is great for overnight or during work hours.
Final Decision Guide: What to Do Based on Your Situation
You Live on a Busy Street
Draw motion zones that exclude the street. Set sensitivity to 4. Enable People Only Mode.
Set motion frequency to Periodically. This combination stops car alerts while still catching people approaching your property.
You Have a Dog That Runs in the Yard
Exclude the dog's path from your motion zones. Raise the camera to 10 feet if possible. Set sensitivity to 3.
If you still get alerts, consider a wired model to avoid battery drain from frequent triggers.
You Want Maximum Battery Life
Set sensitivity to 3. Set motion frequency to Less Frequently. Use the motion schedule to disable detection during hours you don't need.
If you're on battery, avoid the Frequently setting entirely. It cuts battery life by half.
You Want to Catch Every Visitor
Set sensitivity to 6. Draw motion zones that cover the full approach path from 20 feet out. Set motion frequency to Frequently.
Disable People Only Mode. This gives you the most coverage at the cost of more false alerts and shorter battery life.
You're Mounting a Camera Over a Backyard
Draw zones that cover the yard area only. Exclude the fence line and any neighbor's property. Set sensitivity to 4.
Enable People Only Mode if you only care about people. Backyards tend to have fewer false triggers than front yards, so you can keep sensitivity slightly higher.
You Have Multiple Cameras
Tune each camera individually. Don't copy settings from one camera to another. Every camera faces a different environment.
A front door camera needs different zones and sensitivity than a backyard camera. The Ring app lets you adjust each one separately.
The time you spend tuning your motion settings is the difference between a camera that frustrates you and one that genuinely protects your home. Start with the decision tree, work through the step-by-step guide, and adjust based on your specific situation. Your Stick Up Cam will thank you, and so will your phone's notification bar.

Similar Posts