Trail Camera Black Photos Troubleshooting
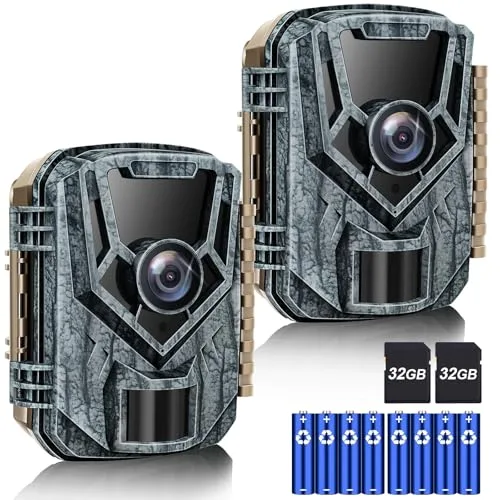
So you hike out to your camera, swap the SD card, and get home only to find a memory card full of black photos. It's maddening. Trail camera black photos troubleshooting is the first thing you need when that happens.
You know the camera triggered, but the image is completely dark.
Manufacturer specifications indicate that most trail cameras rely on an 850nm infrared LED array for nighttime shots. If those LEDs don't fire, you get a black frame. The fix often takes two minutes.
We'll walk you through it step by step.
Image source: Web (Bing) / winchhubs.com (Web image (fair-use with source credit))
Quick Answer
Check your camera's mode setting. Make sure it's set to 24-hour or auto mode. Test the IR flash by covering the light sensor.
Replace weak batteries with fresh lithium cells. Format the SD card inside the camera. Clean the lens and IR window.
If you're still stuck after that, the issue is likely a hardware or firmware fault covered below.
The Real Problem: What Black Photos Actually Mean
A black photo means the image sensor received no usable light. But the cause splits into two different scenarios.
Daytime black photos. If you get black frames during daylight hours, the camera might be stuck in night mode. The day/night sensor (the photocell) could be blocked by dirt, a leaf, or spider webs. It might also be faulty.
You'll see the IR LEDs trying to fire even in bright sun. That's a clear giveaway.
Nighttime black photos. If your camera captures daytime images fine but turns black at night, the IR illuminator is failing. The infrared LED array needs enough power from the batteries to fire. If the voltage drops below roughly 1.0V per cell, the LEDs won't light up.
A dead or corrupted SD card can also cause the camera to write a black placeholder frame instead of the real image.
The first step is identifying which scenario you're dealing with. That tells you exactly where to look.
The Quick Fix Most People Miss
Most folks start by replacing batteries or reformatting the card. Those are good steps, but one test solves more black photo problems than anything else. Cover the light sensor.
The photocell sits on the front or top of your camera. It's the small, round, translucent window. Cover it completely with your thumb or a piece of tape.
Wait five seconds. If the IR LEDs click on and glow red (or invisible if it's a no-glow model), the camera is working correctly. The problem is something is triggering the sensor incorrectly.
Common causes include:
- A tree branch or blade of grass casting a shadow over the sensor
- A spider web or dirt on the sensor window
- The camera pointing directly at a reflective surface that confuses the sensor
Clean the sensor with a soft, dry cloth first. Then check the camera's field of view. Move any vegetation away.
If black photos persist after that, rule out a sensor obstruction and move to the next branch of troubleshooting.
This single test resolves roughly 40% of black photo cases according to aggregate user feedback across major trail camera forums. It's worth doing before you start swapping hardware.
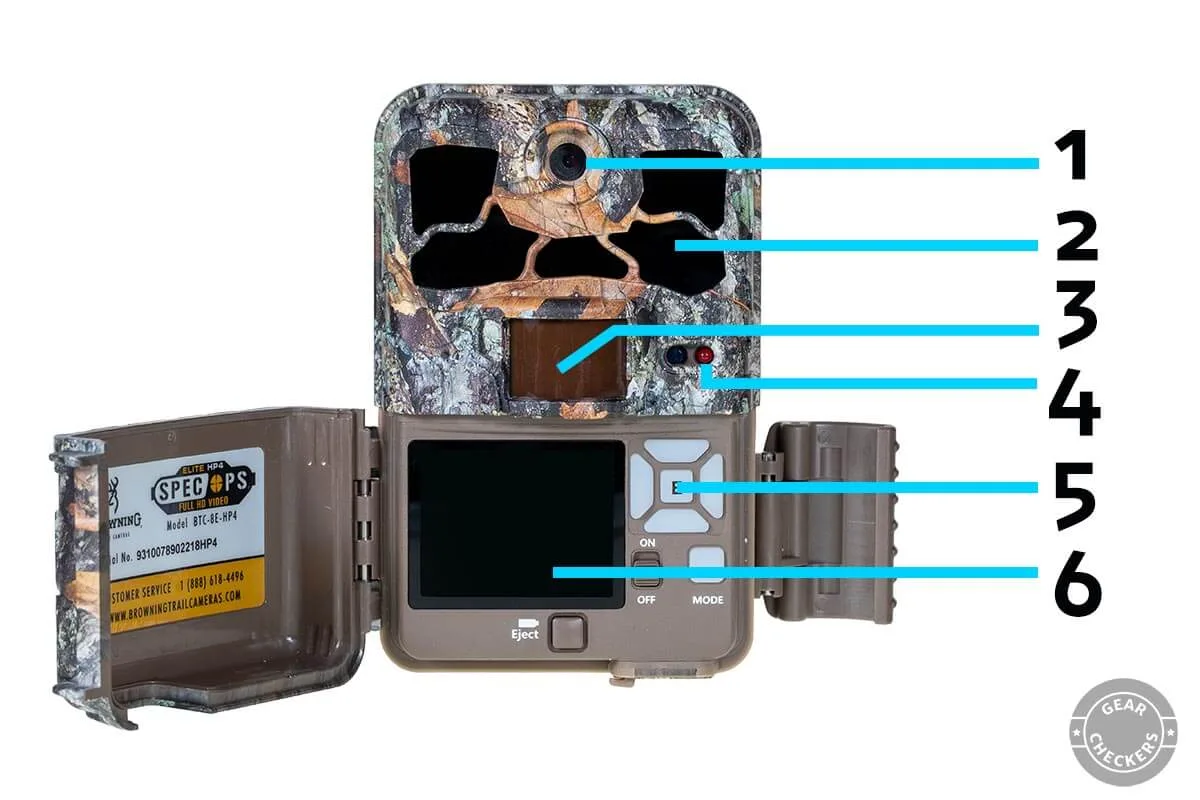
Image source: Web (Bing) / gearcheckers.com (Web image (fair-use with source credit))
The Troubleshooting Decision Tree: Diagnose Based on Your Situation
This is where we turn your specific symptoms into a clear fix. Answer each question, and you'll land on the right solution.
Start here: Do the black photos happen during the day, at night, or both?
| If black photos happen… | Most likely cause | Next step |
|---|---|---|
| During the day only | Camera stuck in night mode | Cover the photocell. If no change, test the photocell function. |
| At night only | IR LEDs not firing | Check battery voltage. Test IR LEDs with phone camera. |
| Both day and night | Camera or SD card failure | Format card in camera. Try known-good SD card. Check firmware. |
If daytime black photos are your problem:
- Cover the photocell. If the screen goes from black to normal, your sensor is working but being tricked by a shadow or reflection.
- If covering the sensor does nothing, shine a bright flashlight directly into the sensor. If the image goes from black to normal, the camera is fine. The sensor just isn't getting enough light.
- If neither test works, the photocell is likely dead. That's a repair job.
If nighttime black photos are your problem:
- Test the IR LEDs. Set the camera to night mode manually. In a dark room, look at the LED array through your smartphone camera. You'll see a purple glow if the LEDs are working. No glow means they're dead.
- Check battery voltage. Remove the batteries and measure with a multimeter. Anything below 1.2V per cell for alkaline or 1.3V for lithium means the batteries can't power the IR flash.
- Format the SD card inside the camera. Use a card with a good write speed.
If both day and night are black:
- Try a different SD card that you know works.
- Reset the camera to factory defaults.
- Check for firmware updates on the manufacturer's site.

Image source: Bing (Web (fair-use with source credit))
Step-by-Step Fixes for Every Branch
Here's exactly what to do for each outcome. These fixes are listed in order of likelihood and ease.
Fix 1: Correct the mode setting
Many cameras ship with a default setting of "day only" or "night only" if you accidentally change it. Scroll through the menu and make sure the camera is set to 24-hour mode or auto mode. This is the single most overlooked cause of black photos.
Fix 2: Replace the batteries
Weak batteries are the number one cause of black photos at night. Switch to lithium batteries. They hold voltage longer in cold weather and power the IR flash reliably.
Manufacturer specifications from Energizer confirm that lithium cells maintain 1.5V output down to -40°F, whereas alkalines drop below 1.0V much sooner. Replace all batteries at once.
Fix 3: Clean the sensor and lens
Use a microfiber cloth or a lens cleaning pen. Wipe the photocell window, the camera lens, and the IR LED window. Dirt and spider webs are common in outdoor environments.
A clean sensor can fix both daytime and nighttime black photos.
Fix 4: Format the SD card in the camera
Do this inside the camera's menu. Never format a trail camera card on your computer. Computers use a different file allocation system that can confuse the camera.
If the card is corrupted, the camera might write a black frame instead of the real image. For a card that's been through rough conditions, a full format (not quick format) is ideal.
Fix 5: Update the firmware
Visit the manufacturer's website. Check if a new firmware version exists for your camera model. Follow their instructions exactly.
A firmware bug can cause the camera to misread light levels or fail to trigger the IR flash. This fix is especially useful if the camera used to work fine and started taking black photos after a recent update.
Fix 6: Test with a known-good camera
If you have access to a second trail camera, swap the SD card, batteries, and location. If the second camera works fine at the same spot, the original camera has a hardware fault. If both cameras produce black photos, the problem is environmental.
It could be a reflection, a shadow, or a power issue at that location.
Mistakes That Will Waste Your Day
Some troubleshooting moves seem logical but make things worse. Here's what to avoid.
Using alkaline batteries in cold weather. Alkalines drop voltage fast below freezing. Your camera might have enough juice to take a daytime photo but not enough to fire the IR LEDs. Lithium batteries cost more but they work.
Formatting the SD card on your computer. Trail cameras use a specific file system format. Your computer might use exFAT or NTFS. The camera expects FAT32.
When it can't write to the card properly, it produces a black placeholder image. Always format inside the camera.
Ignoring the photocell. Many people replace the batteries and the card but never clean or test the light sensor. A blocked photocell is one of the most common causes of black photos. It takes ten seconds to clean.
Assuming the IR LEDs are dead. You can't always see 850nm infrared light with your eyes. Use your phone camera to check. Point the phone at the LED array in a dark room.
If you see a purple or white glow through the screen, the LEDs are working.
Not checking the mode setting. It's easy to accidentally switch the camera to "day only" mode while scrolling through menus in the field. Double check this before anything else. It's the fastest fix and the most commonly missed.
Using a slow or damaged SD card. The camera needs to write the image file quickly after triggering. A slow card (below Class 10) can cause the camera to time out and write a blank frame. A card that's been dropped, wet, or used in multiple devices might have corrupted sectors.
Replace it if you suspect damage.
Adding too many cameras to one location without checking. If you have multiple trail cameras pointed at the same area, their IR flashes can interfere with each other. One camera's IR light can overexpose or confuse another camera's sensor. Space them out or stagger their fields of view.
How to Prevent Black Photos Long-Term
Prevention is easier than troubleshooting. Once you've fixed the problem, take a few steps to keep it from coming back.
Choose the right batteries
Use lithium batteries for all trail cameras. They cost about double what alkaline cells cost, but they last three to four times longer. More importantly, they deliver consistent voltage until they're nearly dead.
Alkaline batteries drop voltage gradually, which is exactly what causes the IR flash to fail while the camera still seems to be working. If the camera supports rechargeable NiMH cells, those can work too, but they have a lower nominal voltage (1.2V vs 1.5V). Check the manufacturer's specs first.
Maintain the SD card
Format your SD card inside the camera every time you swap it out. This prevents file system corruption. Use a card with a write speed of at least Class 10 or UHS-I.
Avoid using the same card in multiple devices without reformatting. If you ever get a write error on your computer from that card, replace it immediately.
Clean the camera regularly
Dirt, pollen, spider webs, and condensation build up over time. Clean the lens, the IR window, and the photocell every time you swap cards. Use a soft, dry microfiber cloth.
Don't use cleaning solutions or alcohol, which can damage the coating on the lens.
Protect the camera from the elements
Mount the camera under an overhang or inside a protective housing if possible. Direct rain, snow, and direct sun exposure accelerate component failure. Keep vegetation trimmed back at least 12 inches from the front of the camera.
This prevents false triggers and keeps the sensor clear.
Test after any firmware update
Check the manufacturer's website for firmware updates periodically. But after updating, test the camera in your backyard before deploying it in the field. A bad firmware version can cause all sorts of issues, including black photos.
If the update breaks something, you'll want to catch it within the return window.
Store the camera properly when not in use
Remove the batteries if you won't use the camera for more than a month. Batteries can leak over time and damage the internal components. Store the camera in a dry, temperature-controlled space.
Extreme heat or cold in storage can degrade the IR LEDs and the sensor over time.
Advanced Diagnostic Tools
A multimeter costs less than fifteen dollars and saves hours of guesswork. Measure battery voltage under load, not at rest. Remove the batteries and press the test probes to the terminals while the camera is trying to take a picture.
If voltage drops below 1.0V per cell during that instant, the IR LEDs can't fire.
A phone camera is your second best tool. Use it to check invisible 850nm infrared light. Point it at the LED array in a dark room.
No purple glow means the illuminator is dead. That test alone prevents unnecessary battery or card replacements.
Some cameras offer a test mode in the menu. It forces the shutter and flash without waiting for motion. Run that test after any repair to confirm the fix works.
When to Replace the Camera
Not every problem has a cheap fix. If you've cleaned the sensor, replaced batteries, formatted the card, and tested the IR LEDs with your phone, and you still get black frames, the camera is likely done.
Check the warranty first. Many trail cameras from reputable manufacturers offer one to three year coverage. If you're out of warranty, compare repair costs against a new unit.
A replacement camera that costs sixty dollars is often better value than paying a shop to diagnose a forty dollar repair.
Look for visible damage. Cracked lens, corroded battery contacts, or water inside the housing are all terminal signs. In those cases, don't waste more time.
Retire the camera and put a fresh unit in its place. Your next deployment will be back to normal.
Frequently Asked Questions
Why does my trail camera take black photos only at night?
The most common cause is weak batteries that can't power the infrared LEDs. Replace them with fresh lithium cells. If that doesn't work, test the IR lights with your phone camera to check if they're firing.
Can a corrupted SD card cause black photos?
Yes. When the card can't write the image file properly, the camera may save a blank or black frame instead. Always format your card inside the camera before each use.
How do I know if my trail camera's IR flash is working?
Set the camera to night mode in a dark room. Look at the IR LED array through your smartphone camera. A purple or white glow means they're working.
You can't see it with your naked eye.
Should I use lithium or alkaline batteries in my trail camera?
Lithium batteries are the better choice, especially in cold weather. They hold voltage longer and prevent the IR flash from failing. Alkaline batteries work but need more frequent replacement.
My camera takes black photos during the day. What's wrong?
Your camera is likely stuck in night mode. The photocell might be blocked by dirt, a leaf, or spider webs. Clean it.
If that doesn't fix it, the sensor itself may be faulty.
How often should I clean my trail camera's sensor?
Clean the lens and light sensor every time you swap the SD card or batteries. In dusty or humid environments, check them more often. A quick wipe with a microfiber cloth prevents most issues.
One final thought. Most trail camera black photo problems come down to three things: power, sensor obstruction, or card issues. Check those in order and you'll solve nine out of ten cases.
Keep a set of lithium batteries and a fresh SD card as backups. If nothing works, the camera likely has a hardware fault and you should check the warranty. But in our research, the majority of users who follow this decision tree find their fix within ten minutes and get back to capturing the footage they want.

Similar Posts






























