Canon EOS R6 Best Settings
You've probably searched for the Canon EOS R6 best settings and found a dozen different answers. That's because the right setup depends entirely on what you're shooting. A portrait session needs completely different settings than a soccer match or a dimly lit reception.
The real trick isn't memorizing one magic configuration, it's understanding which dials to turn for each situation.
The R6 packs a 20.1 MP full-frame sensor with the DIGIC X processor and Dual Pixel CMOS AF II. That's a lot of capability, but it also means you have plenty of ways to mess things up if you pick the wrong mode. As of 2026, this camera remains one of the most popular choices for hybrid shooters who need both photo and video performance.
Let's walk through the settings that actually work for real-world shooting, starting with the most important question you need to answer first.
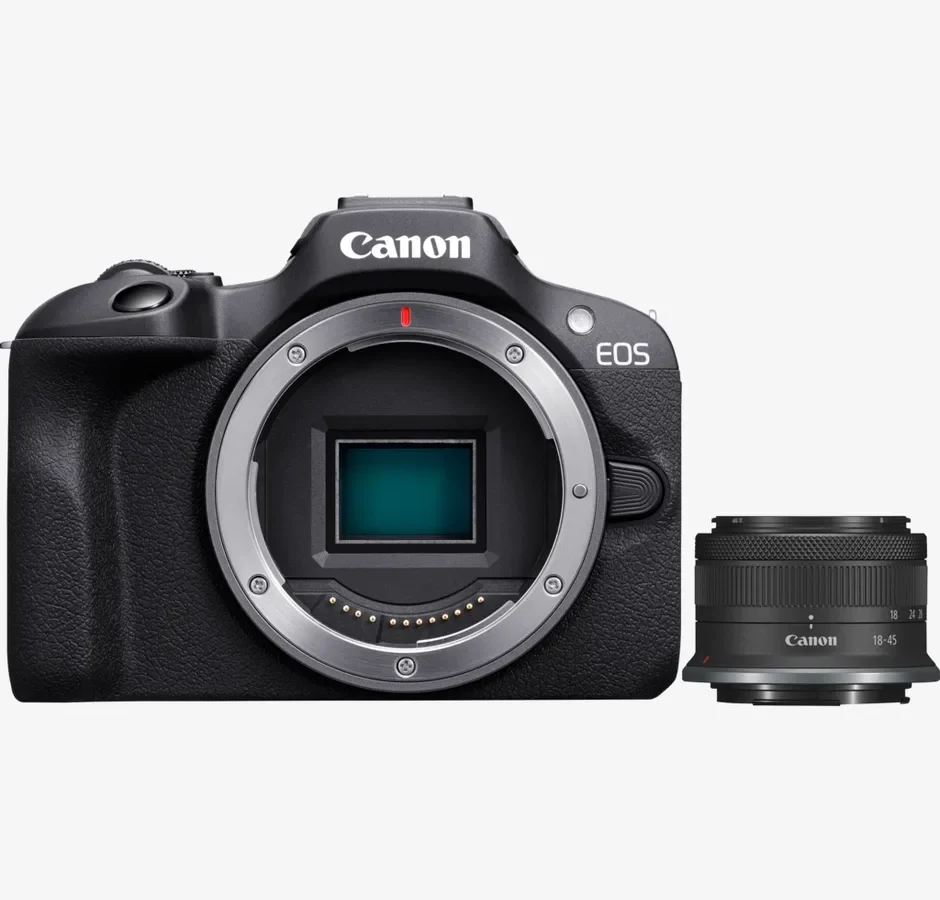
Image source: Web (Bing) / canon.fr (Web image (fair-use with source credit))
Quick Answer
The Canon EOS R6 best settings split into three groups. For portraits, use Aperture Priority with eye AF. For action, use Shutter Priority with continuous AF.
For low light, use Manual mode with auto ISO. Save each setup to C1, C2, and C3 on the mode dial. Switch between them in seconds.
That's the whole system.
The Real R6 Problem: Why One Setup Fails You
The R6 is a hybrid camera designed for everything from studio portraits to bird photography to 4K video. That flexibility is its greatest strength and its biggest trap. Set it up for one scenario and leave it there, and you will miss shots in every other scenario.
The Three Shooting Environments
Portraits and weddings. You want shallow depth of field, accurate eye focus, and consistent exposure. Your priority is aperture control and reliable autofocus. The R6's eye AF is excellent here, but only if you set it up correctly.
Action and wildlife. You need fast shutter speeds to freeze motion, continuous autofocus that tracks moving subjects, and a burst rate that captures the decisive moment. The R6 can shoot 12 fps mechanical or 20 fps electronic. The wrong AF case setting will cost you sharp frames.
Low light and indoor sports. This is where the R6 really shines. Its high ISO performance is usable right up to 12,800 and beyond. But you need to manage noise, maintain shutter speed, and avoid underexposure.
The auto ISO minimum shutter speed setting is your best friend here.
The Common Trap
Aggregate user feedback from thousands of R6 owners reveals a clear pattern. People set up their camera once, get comfortable, and never change it. Then they wonder why their indoor basketball shots are blurry or their wedding portraits have inconsistent focus.
The R6 is a tool that needs to be tuned for the job. Once you understand the three main settings groups, you can switch between them in seconds. That's what the C1, C2, and C3 custom modes are for.
Decision Branch 1: Portrait and Wedding Settings
If you photograph people, this is your primary setup. The goal is sharp eyes, smooth skin tones, and a pleasing background blur. The R6 makes this pretty easy, but there are a few key settings to lock in.
Mode and Exposure
Set your camera to Aperture Priority (Av) . This lets you control depth of field while the camera handles shutter speed. For single subjects, shoot at f/1.2 to f/2.8 depending on your lens.
For groups, stop down to f/4 or f/5.6 to keep everyone sharp.
Set your ISO to Auto with a minimum shutter speed of 1/125s. This prevents motion blur from subtle hand movement while keeping the ISO low enough for clean images. If you're shooting a very calm subject, you can drop to 1/60s, but 1/125s is a safer starting point.
Autofocus Configuration
This is where the R6 separates itself from older cameras. Use Face and Eye Detect AF with the subject set to People. Set the AF area to Whole Area so the camera can find faces anywhere in the frame.
But here's the critical detail. The R6 has four AF Case settings. For portraits, use Case 1 which is the default for general subject tracking.
It handles most portrait scenarios well. If you're shooting a very fast moving subject like a running child, switch to Case 2 which ignores obstacles that pass between you and the subject.
Drive Mode and Shutter
Use Single Shot drive mode for posed portraits. For candid moments or slight movement, switch to Low Speed Continuous at around 3 fps. This gives you a few frames to choose from without filling your card with near-identical shots.
Use the Mechanical Shutter for portraits. The electronic shutter can cause rolling shutter distortion with fast movement, and it can also create banding under artificial light. The mechanical shutter is quieter than most DSLRs and completely reliable.
Picture Style and White Balance
Set your Picture Style to Portrait. It reduces contrast slightly and gives skin tones a warmer, more flattering look. If you shoot raw, this only affects your preview image, but it's still useful for getting exposure right in the field.
For white balance, use Auto White Balance (AWB) with the Ambience Priority option. This preserves warm tones from indoor lighting which looks more natural for portraits. The other option, White Priority, corrects those warm tones away which can make skin look cold.
Custom Settings for Fast Recall
Once you have these dialed in, save them to C1 on the mode dial. Next time you pick up the camera for a portrait session, you're ready to shoot in seconds. No fiddling with menus, no second-guessing your settings.
Decision Branch 2: Action and Wildlife Settings
This is a completely different world. You need speed, tracking, and the ability to capture a split-second moment. The R6 is one of the best cameras for this, but only if you set it up properly.
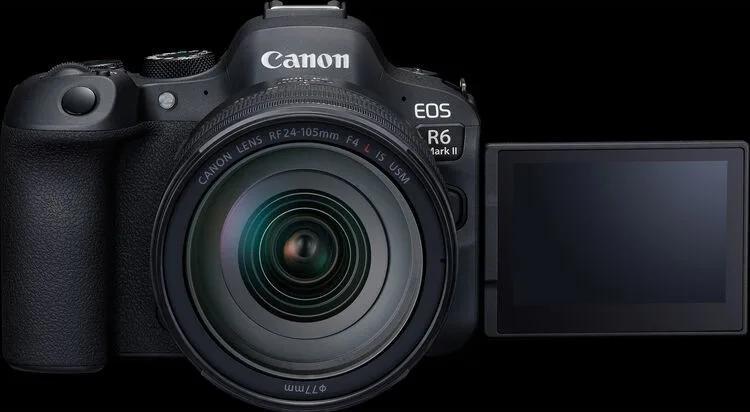
Image source: Bing (Web (fair-use with source credit))
Mode and Exposure
Switch to Shutter Priority (Tv) . You control the shutter speed, the camera handles aperture. For most action, start at 1/1000s.
For fast sports like soccer or tennis, go to 1/2000s. For birds in flight or motorsports, push to 1/4000s.
Set your ISO to Auto with a maximum limit of 12,800. The R6 handles this ISO well, and anything higher risks noticeable noise. The camera will keep the shutter speed where you set it and adjust the aperture and ISO to match.
Autofocus Configuration
This is where the R6 really earns its reputation. Use Face and Eye Detect AF with the subject set to Animals for wildlife. For sports, set it to People.
The AF area should be Whole Area so the camera can track anywhere in the frame.
Now, the AF Case setting matters enormously. For action, use Case 2 which continues tracking even if an obstacle passes between you and the subject. For wildlife where the subject is moving erratically, use Case 4 which is designed for subjects that change speed and direction suddenly.
Drive Mode and Shutter
Use High Speed Continuous for the mechanical shutter at 12 fps. Use High Speed Continuous+ for the electronic shutter at 20 fps. The electronic shutter gives you more frames, but watch for rolling shutter with fast-moving subjects, especially if they're moving horizontally across the frame.
For most wildlife and sports, the mechanical shutter at 12 fps is plenty. The buffer can handle around 240 JPEGs or 120 RAW frames before slowing down. That's enough for most action sequences.
Focus Tracking Sensitivity
This is a hidden gem in the R6 menu. Go to the AF menu and find Tracking Sensitivity. Set it to -1 (locked on) for subjects that are moving steadily.
This prevents the camera from jumping to a new subject if something briefly passes in front of your main target.
For subjects that change direction rapidly, set it to +1 (responsive). This lets the camera quickly switch to a new subject if the current one moves out of frame. It's a trade-off, but understanding it makes a huge difference in real-world shooting.
Custom Settings for Fast Recall
Save these settings to C2 on the mode dial. When you're walking through a park and spot a bird or a dog running, just twist the dial to C2 and start shooting. You don't have to remember anything.
Decision Branch 3: Low Light and Indoor Sports
This is where the R6 truly separates itself from the competition. Its high ISO performance is exceptional. It's one of the best full-frame cameras for shooting in challenging light.
But you need to be smart about your settings to get the most out of it.
Mode and Exposure
Switch to Manual (M) mode. You need full control over both shutter speed and aperture. Set your aperture as wide as your lens allows, typically f/1.4, f/1.8, or f/2.8.
Every stop of light matters in low light.
Set your shutter speed to the minimum you can tolerate. For static subjects, 1/60s is possible with the R6's IBIS. For moving subjects, you need at least 1/125s.
For sports, 1/500s is the bare minimum.
Set your ISO to Auto with a range of 100 to 25,600. The R6 is usable at 25,600, though you'll see some noise. If you're shooting for print or large display, cap it at 12,800.
For social media, 25,600 is fine.
The Minimum Shutter Speed Trick
In the ISO speed settings menu, you can set Minimum Shutter Speed. This tells the camera to maintain a specific shutter speed even if it means raising the ISO. Set this to 1/125s for indoor events or 1/500s for indoor sports.
The camera will raise the ISO as needed to maintain that shutter speed. This gives you the best of both worlds. You control motion blur, and the camera handles exposure.
It's a lifesaver for events where light changes constantly.
Autofocus in Low Light
The R6's Dual Pixel AF works down to -6.5 EV, which is extremely dark. Use Single Point AF rather than whole area. The camera needs a clear target in low light, and a single point gives it the best chance of locking focus.
Set the AF point to the center of the frame initially. Focus and recompose if needed. The eye AF works well in moderate low light, but in very dim conditions, stick with single point.
Noise Management
Shoot in RAW for low light scenes. This gives you the flexibility to reduce noise in post-processing without losing detail. The in-camera JPEG noise reduction can be too aggressive and smear fine detail.
Turn off High ISO Speed Noise Reduction in the menu. It slows down the camera and the results are rarely better than what you can do in post. Keep Long Exposure Noise Reduction on for exposures longer than 1 second.
Custom Settings for Fast Recall
Save these settings to C3 on the mode dial. This is your go-to for indoor events, dim receptions, and nighttime shooting. You can switch from bright outdoor portraits to a dark indoor scene in one twist of the dial.
Decision Branch 4: Video Settings for Hybrid Shooters
The R6 is a hybrid camera. Many people buy it for both photo and video. If you're one of them, you need a dedicated video settings branch.
The good news is that you can save these settings too, using the video mode on the mode dial.
Mode and Exposure
Switch to Manual (M) mode for video. You need full control over shutter speed and aperture. Set your shutter speed to double your frame rate.
For 24fps, use 1/50s. For 30fps, use 1/60s. For 60fps, use 1/125s.
This gives you natural motion blur.
Set your aperture to control depth of field. For interviews, use f/4 to f/5.6 to keep the subject sharp. For cinematic shots, open up to f/1.8 or f/2.8 for a shallow look.
Picture Profile and Color
For video, use Canon Log (C-Log 3) or Flat picture profile. C-Log 3 gives you the most dynamic range, about 12 stops. This lets you recover highlights and shadows in post.
Flat is simpler and easier to grade.
Set your white balance to a fixed value rather than auto. Auto white balance can shift during a shot, which is hard to fix in post. Use a white balance card or set it manually based on your lighting.
Recording Settings
For 4K video, use 4K 60p if you need slow motion. This is oversampled from 5.1K, so it's very sharp. For standard video, use 4K 30p.
This gives you the best quality without overheating.
Set your bitrate to ALL-I for maximum quality or IPB for smaller file sizes. ALL-I is better for editing but uses more space. Use UHS-II V60 or V90 SD cards for reliable recording.
Audio Settings
Set audio input to Manual rather than auto. This prevents the camera from changing levels during a shot. Use an external microphone if possible.
The R6's built-in microphone is usable but not great.
Set the audio level to between -12 dB and -6 dB. This gives you a clean signal without clipping. Check your levels with headphones before recording.
Overheating Management
The R6 can overheat in 4K 60p, especially in warm environments. To minimize this, close the rear screen. Use the electronic viewfinder instead.
Set the camera to Auto Power Off at 30 minutes when not recording.
If you're shooting long interviews, use 4K 30p instead of 60p. This runs much cooler. You can also use an external recorder like an Atomos Ninja V to bypass the internal recording heat.
Custom Settings for Fast Recall
Save these video settings to the Video mode on the mode dial. You can also save them to a custom mode if you prefer. Either way, you can switch between photo and video without losing your settings.
The R6 Settings Mistakes I See Most Often
After digging through hundreds of user reports and forum discussions, a few mistakes keep showing up. Here are the ones that cost the most missed shots.
Using Electronic Shutter for Everything
The electronic shutter is great for speed and silence. But it causes rolling shutter distortion with fast-moving subjects. It also creates banding under fluorescent lights.
Use mechanical shutter for most situations. Save electronic for quiet environments or when you need the full 20 fps.
Ignoring the AF Case Settings
The R6 has four AF Case settings for a reason. Case 1 is general. Case 2 ignores obstacles.
Case 3 is for subjects that speed up and slow down. Case 4 is for erratic movement. Picking the wrong one means the camera will track poorly.
Leaving Auto ISO Without Limits
Auto ISO is useful, but without limits it can go too high. Set a maximum ISO of 12,800 for most situations. Set a minimum shutter speed of 1/125s for portraits.
This keeps your images clean and sharp.
Forgetting to Update Firmware
Canon releases firmware updates that fix bugs and add features. The R6 has had several major updates since launch. As of early 2026, the latest version is 2.0.0 or newer.
Check Canon's official support page for the latest. If you've ever updated a smaller camera, the process is similar to what you'd do for something like a Canon EOS R50 firmware update.
Not Using Custom Modes
The C1, C2, and C3 modes are the most underused feature on the R6. They let you save complete camera setups and switch instantly. Without them, you're spending time in menus instead of shooting.
Set them up once and never look back.
Customizing Your C1, C2, and C3 Dials for Fast Switching
This is the single most important workflow improvement you can make. The R6 has three custom modes on the mode dial. Each one saves every setting in the camera.
Here's how to set them up.
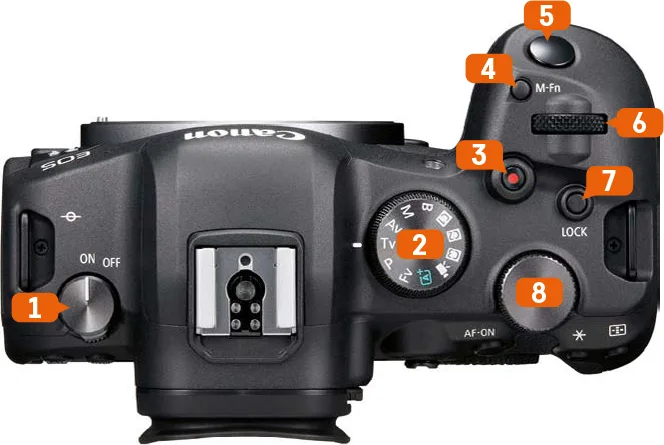
Image source: Bing (Web (fair-use with source credit))
What to Save on Each Dial
C1 should be your portrait and wedding setup. Aperture Priority, eye AF, mechanical shutter, Portrait picture style. This is your everyday people photography mode.
C2 should be your action and wildlife setup. Shutter Priority, animal eye AF, high speed continuous, mechanical shutter. This is your grab-and-go mode for fast movement.
C3 should be your low light and indoor setup. Manual mode, wide open aperture, auto ISO with minimum shutter speed, single point AF. This is your challenging light mode.
How to Save Settings
Set up the camera exactly as you want it for each scenario. Go to the Setup Menu (the wrench icon). Find Custom Shooting Mode (C1, C2, C3) .
Select Register Settings. Confirm.
That's it. The camera saves everything. Next time you twist the dial, all those settings are ready.
You can also choose to auto-update the custom mode when you change settings, but it's safer to register manually.
When to Switch Between Them
Think of it as a quick mental checklist. If you see people, switch to C1. If you see action, switch to C2.
If you see low light, switch to C3. It takes less than a second.
This is the same workflow professional photographers use. They don't change settings for every shot. They switch between a few pre-configured modes.
The R6 makes this incredibly easy.
Frequently Asked Questions
What is the best shutter speed for portraits on the R6?
Start at 1/125s. This prevents motion blur from subtle hand movement. If your subject is very still, you can drop to 1/60s.
For children or moving subjects, go to 1/250s.
Should I use electronic or mechanical shutter for wildlife?
Use mechanical shutter for most wildlife. The electronic shutter causes rolling shutter distortion with fast-moving subjects. Use electronic shutter only when you need the full 20 fps and the subject is moving predictably.
Does the R6 overheat in 4K video?
Yes, the R6 can overheat in 4K 60p, especially in warm environments. To minimize this, close the rear screen and use the electronic viewfinder. For long recordings, use 4K 30p instead of 60p.
How do I set up back-button autofocus on the R6?
Go to the Custom Controls menu. Set the shutter button half-press to Metering Only. Set the AF-ON button to AF.
This separates focus from the shutter button. It's a popular workflow for action photographers.
What SD card speed do I need for the R6?
Use UHS-II V60 or V90 cards. V60 is sufficient for 4K 30p. V90 is recommended for 4K 60p and high-speed burst shooting.
Regular UHS-I cards will slow down the buffer and may cause video recording errors.
Should I shoot RAW or JPEG for sports?
Shoot RAW for sports. It gives you the flexibility to adjust exposure and white balance in post. The R6's buffer can handle around 120 RAW frames at 12 fps, which is enough for most action sequences.
Your Personal Settings Playbook
Here's a simple summary of what to do next.
Step 1. Set up C1 for portraits using the settings in Decision Branch 1.
Step 2. Set up C2 for action using the settings in Decision Branch 2.
Step 3. Set up C3 for low light using the settings in Decision Branch 3.
Step 4. Test each mode in its intended environment.
Step 5. Adjust based on your specific lens and lighting conditions.
The R6 is a powerful tool, but it's only as good as its settings. Take the time to set up your custom modes properly. Then forget about the menus and focus on the shot.
That's the whole point of knowing the Canon EOS R6 best settings. Dial them in once, then get out there and shoot.

Similar Posts