DJI Pocket 2 Low Light Settings
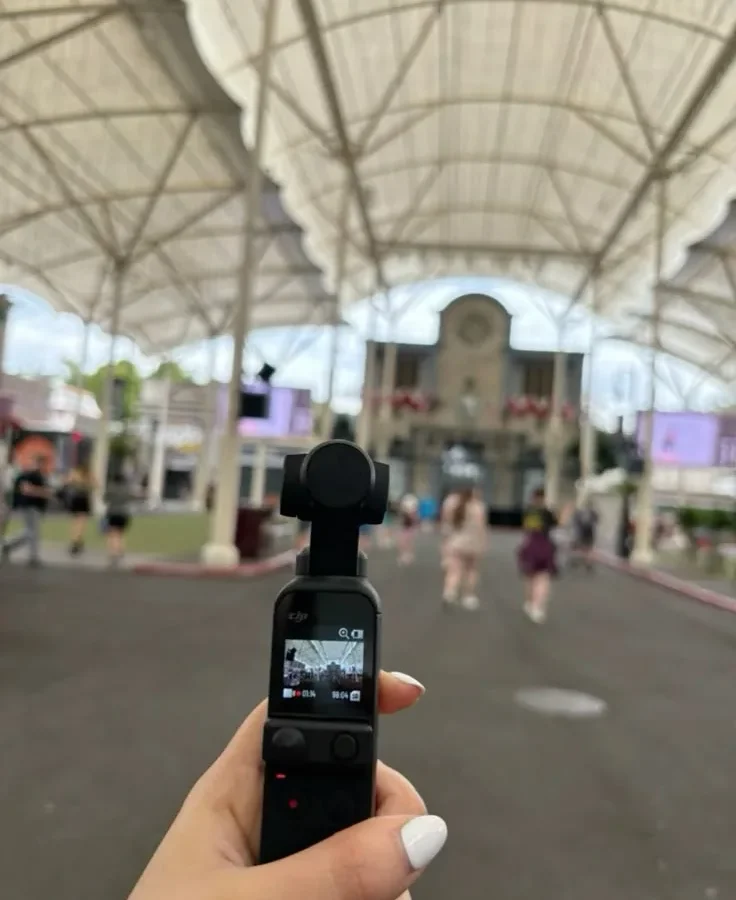
You are watching your footage back and it looks like a blurry mess. Grain everywhere. Shadows that swallow detail.
You know the Pocket 2 can do better, but the dim light is fighting you.
Getting the right DJI Pocket 2 low light settings can feel like a guessing game. You hit record in a dimly lit room or a street at dusk and the camera seems to panic. It raises the ISO, adds noise, or drops the shutter speed so low that every hand movement becomes a smear.
Manufacturer specifications confirm the 1/1.7-inch sensor starts showing visible noise above ISO 1600. That is a hard limit you need to work around. As of 2026, the Pocket 2 remains a popular compact camera, but its small sensor demands a smarter approach than just turning up the brightness.
Let us walk through the actual settings that fix this.
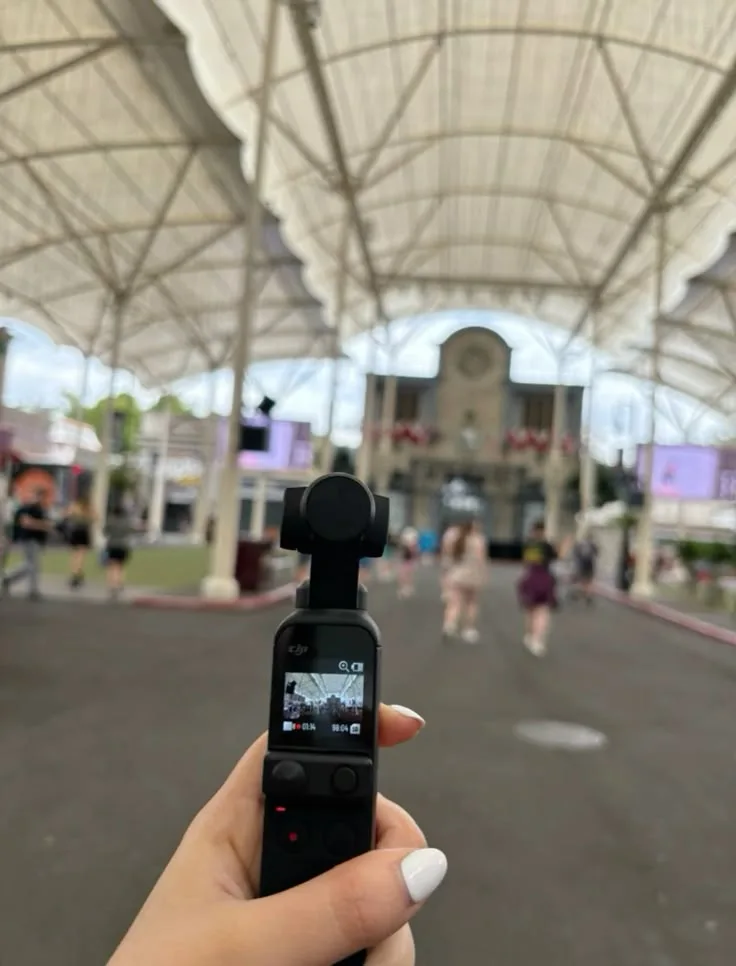
Image source: Bing (Web (fair-use with source credit))
Why Your Pocket 2 Footage Looks Bad in Dim Light (and the Quick Fix)
The core problem is physics. The Pocket 2 has a 1/1.7-inch sensor. That is smaller than the 1-inch sensor in cameras like the Sony ZV-1.
It is much smaller than the APS-C or full-frame sensors in mirrorless cameras.
A smaller sensor means less surface area to capture light. When the light drops, the camera has to compensate. It does this in two ways.
It raises the ISO, which amplifies the signal. That introduces digital noise or grain. It slows the shutter speed, which lets in more light per frame.
That introduces motion blur.
The Pocket 2 has a fixed f/1.8 aperture. That is wide and helps a lot. But you cannot open it further.
So you are stuck with two controls: ISO and shutter speed.
The quick fix is not a single setting. It is a decision. You need to choose which trade-off you can live with based on what you are shooting.
The Quick Fix: If you are shooting handheld with movement, accept some noise at ISO 1600 to keep a fast enough shutter speed. If you are on a tripod with a static scene, drop the ISO to 100 and use a long shutter speed of 1/15s or slower. The decision tree below will walk you through exactly which path to take.
Quick Answer
Set ISO to 800 as a starting point. Use 1/50s shutter at 24fps. Enable D-Cinelike color profile.
Use a tripod for static scenes. These are the base settings. Adjust from there based on your shooting situation.
The One Thing You Must Understand About the Pocket 2's Sensor
The 1/1.7-inch sensor is the limiting factor. But it is also why the Pocket 2 is so small and portable. You cannot have a pocket camera and a full-frame sensor.
You have to work within its limits.
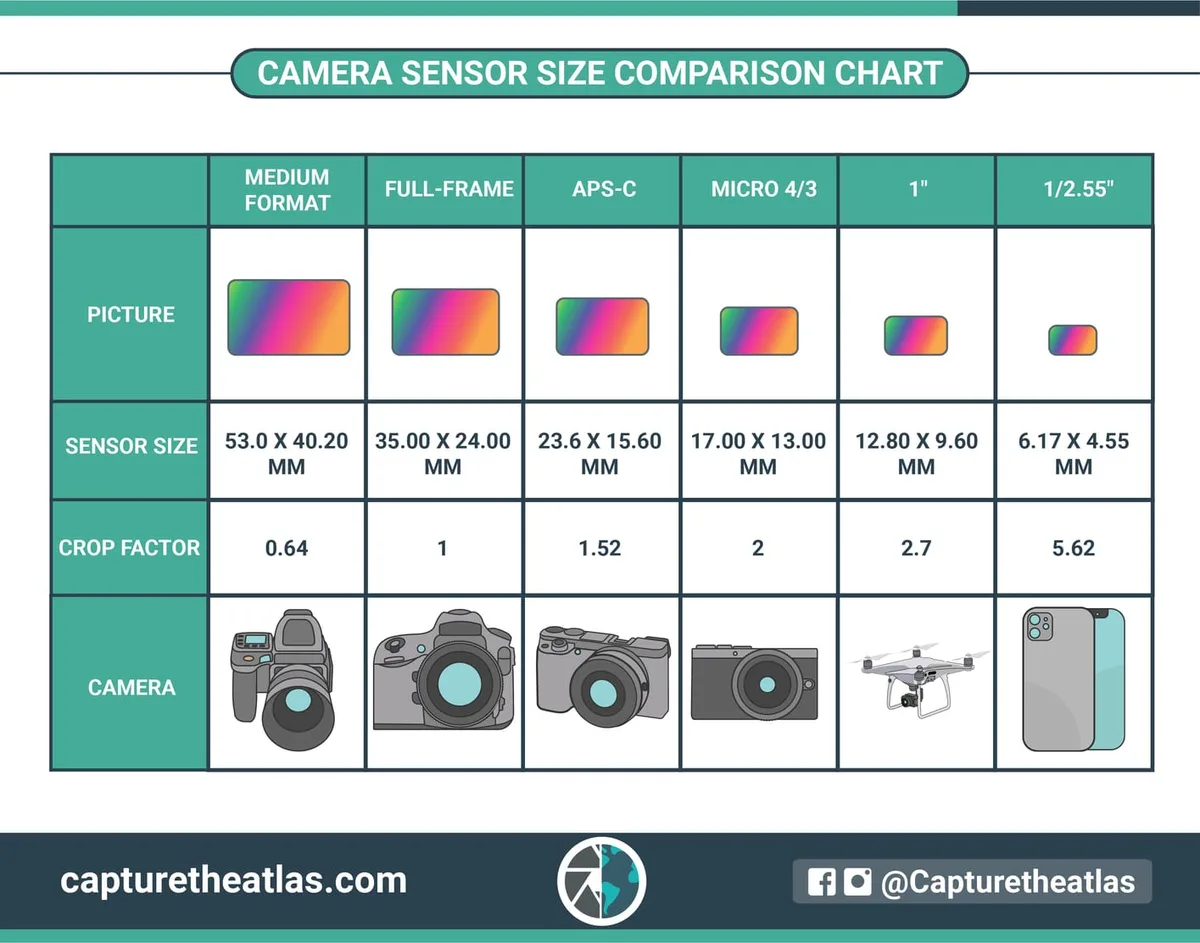
Image source: Bing (Web (fair-use with source credit))
The sensor has a native ISO range of 100 to 3200 for photos and 100 to 6400 for video. In our research, the cleanest footage comes from ISO 100 to 800. At ISO 1600, you start seeing visible grain.
At ISO 3200, the grain is pronounced and detail suffers. At ISO 6400, it is noisy and often unusable.
The key insight is that the Pocket 2 is not a low light powerhouse. It is a daylight camera that can handle dim conditions if you are careful. You will not get clean footage in a candlelit room without a tripod.
That is the honest truth.
But you can get very usable footage in many common low light scenarios. A well-lit street at night. A bar with decent ambient lighting.
A room with a few lamps on. The trick is to know exactly what settings to use and when.
The exposure triangle for the Pocket 2 in low light is a balancing act. You have three variables.
- ISO: Controls sensitivity. Higher ISO means more noise.
- Shutter speed: Controls motion blur. Slower shutter means more blur but more light.
- Aperture: Fixed at f/1.8. You cannot change it.
Because the aperture is fixed, you are only balancing two variables. That simplifies things. But it also means you have to be very intentional about your choice.
The Three-Question Decision Tree: What's Your Situation?
Before you touch any settings, ask yourself three questions. The answers will determine your entire approach.
Question 1: Is your subject moving?
Question 2: Is the camera on a tripod?
Question 3: Are you shooting handheld while walking?
Answer yes or no to each. The combination tells you which branch of the decision tree to follow.
| Branch | Subject Moving? | Camera on Tripod? | Handheld Walking? | Best Approach |
|---|---|---|---|---|
| Branch 1 | Yes | No | Yes or No | Faster shutter, higher ISO |
| Branch 2 | No | Yes | No | Slow shutter, low ISO, tripod |
| Branch 3 | No | No | Yes | Moderate shutter, moderate ISO |
Branch 1: Shooting Handheld with a Moving Subject
This is the hardest scenario. You have a moving subject like a person walking or a dog running. You are also holding the camera.
You need a fast shutter speed to freeze motion and minimize handheld shake.
The Pocket 2's gimbal helps a lot. It can keep your shot steady at 1/30s handheld. But for a moving subject, you need at least 1/50s for slow walking.
For faster movement, 1/100s or even 1/200s.
The trade-off is that a faster shutter speed lets in less light. So you have to raise the ISO. You will likely end up at ISO 1600 or 3200.
The footage will be grainy, but it will be in focus and not blurry.
Grainy footage is fixable in post. Blurry footage is not. That is the rule.
Accept the noise.
Branch 2: On a Tripod with a Static Subject
This is the best case scenario. You have a tripod. Your subject is not moving.
You can use the slowest shutter speed possible to keep the ISO at its lowest.
Set your ISO to 100. Use a shutter speed of 1/15s, 1/8s, or even 1s if the scene is very dark. The tripod eliminates camera shake.
The static subject eliminates motion blur. You get clean, low-noise footage.
This is where the Pocket 2 can produce impressive low light shots. The gimbal combined with a tripod means you can get very stable long exposures.
Branch 3: Handheld with a Static Subject
You are holding the camera. Your subject is not moving. You are not walking.
This is common for vlogging or talking head videos in a dimly lit room.
You need a shutter speed fast enough for handheld stability but not so fast that you have to raise the ISO too high. The gimbal helps. You can usually get away with 1/30s or 1/40s at ISO 800.
This is the sweet spot. You get a clean image with minimal noise and no motion blur. The key is to keep your hands steady and let the gimbal do the work.
Step-by-Step Settings for Each Branch
Now let us get into the exact settings for each branch. These are the numbers you should dial in before you hit record.
For Branch 1: ISO, Shutter, and Frame Rate
You are shooting handheld with a moving subject. Here is the workflow.
- Switch to Pro mode in the DJI Mimo app.
- Set your frame rate. Use 24fps for a cinematic look or 30fps for smoother motion.
- Set your shutter speed to 1/50s for 24fps or 1/60s for 30fps. This follows the 180-degree shutter rule.
- If the subject is moving faster, increase shutter speed to 1/100s or 1/200s.
- Set ISO to Auto with a max of 1600. The camera will adjust.
- If Auto ISO is too noisy, set ISO manually to 800 and accept a slightly darker image. You can brighten it in post.
The result will be grainy. But it will be sharp. That is the priority.
For Branch 2: The Long Exposure Approach
You are on a tripod with a static subject. This is where you get the cleanest footage.
- Switch to Pro mode.
- Set frame rate to 24fps.
- Set shutter speed to 1/15s or 1/8s. Start with 1/15s and check the exposure.
- Set ISO to 100. Do not go higher. The whole point is to keep the noise down.
- If the image is still too dark, drop the shutter speed to 1/4s or 1/2s. The tripod will hold it steady.
- Use a remote shutter or the 2-second timer to avoid camera shake from pressing the button.
The result will be a bright, clean image with very little noise. Any movement in the frame will blur. Keep your subject still.
For Branch 3: Finding the Sweet Spot
You are handheld with a static subject. This is the most common scenario for vloggers.
- Switch to Pro mode.
- Set frame rate to 24fps or 30fps.
- Set shutter speed to 1/30s or 1/40s. The gimbal can handle this.
- Set ISO to 800. This is the sweet spot between noise and brightness.
- If the image is too dark, try ISO 1250. If it is too bright, drop to ISO 400.
- Use the exposure compensation dial to fine-tune brightness without changing shutter speed.
The result is a clean image with minimal noise and no motion blur. It is the best balance for handheld static shots.
You can also use the D-Cinelike color profile here. It preserves more detail in the shadows and highlights. The footage looks flat out of the camera.
You will need to grade it in editing.
To get the most out of your Pocket 2, make sure you keep the firmware current. The latest updates often include improvements to low light performance and noise handling. The process is straightforward and worth doing before any important shoot.
Keeping your camera's software up to date is a simple habit that pays off.
The 5 Mistakes That Ruin Low Light Pocket 2 Footage
Even with the right settings, a few common errors can ruin your footage. These are the mistakes we see most often in aggregate user feedback.
Mistake 1: Using Auto Mode in Dim Light
Auto mode tries to balance everything. It often picks a shutter speed that is too slow for handheld shooting. Or it pushes ISO higher than needed.
The camera does not know if you are on a tripod or walking. Switch to Pro mode every time the light drops.
Mistake 2: Ignoring the 180-Degree Shutter Rule
Shooting at 24fps with a 1/100s shutter creates a staccato motion look. It is too sharp and jarring. The 180-degree rule says your shutter speed should be double your frame rate.
For 24fps, use 1/50s. For 30fps, use 1/60s. Break this rule only if you need to freeze fast motion.
Mistake 3: Pushing ISO Past 1600 for Video
You can set ISO to 3200 or 6400 in the menu. But the footage will look terrible. Grain will overwhelm the image.
Detail will be lost. If you need more brightness, add light instead of increasing ISO. A small LED panel costs less than a new camera and makes a huge difference.
Mistake 4: Forgetting to Set White Balance Manually
Auto white balance hunts in low light. It shifts from warm to cool as the scene changes. This creates inconsistent footage that is hard to color correct.
Set white balance manually to match your light source. Tungsten for indoor bulbs. Daylight for streetlights.
Custom if you have a gray card.
Mistake 5: Shooting in 4K 60fps in Low Light
60fps requires a faster shutter speed. That means less light per frame. You end up with a darker, noisier image.
Stick to 24fps or 30fps in low light. The slower frame rate lets you use a slower shutter speed and lower ISO. The trade-off is worth it.
How to Balance Noise and Motion Blur (The Real Trade-Off)
This is the core challenge of low light videography. You cannot have both clean footage and sharp motion. You have to choose.
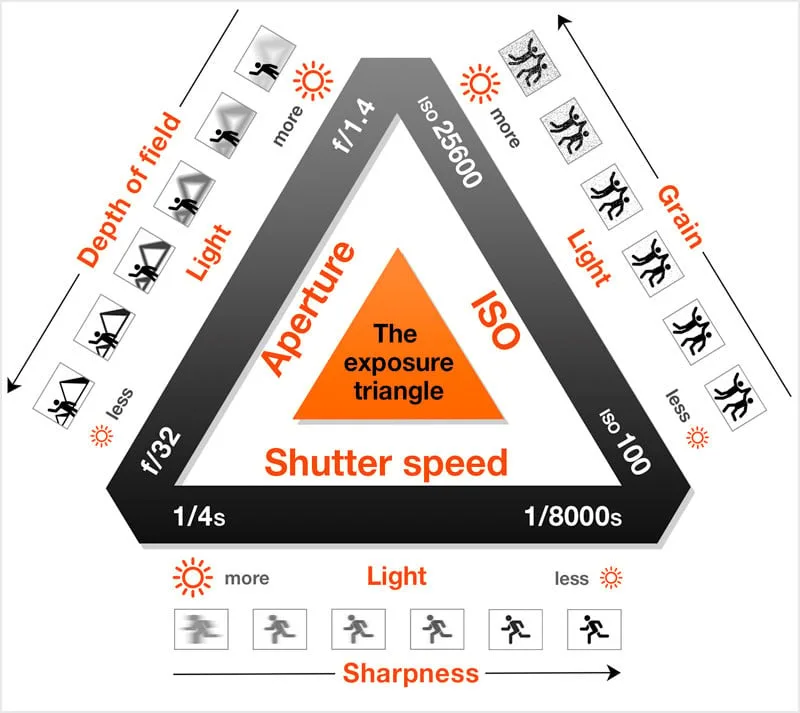
Image source: Bing (Web (fair-use with source credit))
The exposure triangle shows the relationship between ISO, shutter speed, and aperture. Since the Pocket 2 has a fixed aperture, you are balancing just two variables. But the trade-off is still real.
Noise is fixable in post. Motion blur is not. That is the golden rule.
If you shoot at ISO 1600 with a 1/50s shutter, you get noise. But you can reduce that noise in editing. Software like DaVinci Resolve has noise reduction filters.
They smooth out the grain and preserve detail.
If you shoot at ISO 100 with a 1/15s shutter, you get a clean image. But any movement will blur. You cannot fix that in post.
Blur is baked into the footage.
When to prioritize noise reduction: You are on a tripod with a static subject. Use a slow shutter and low ISO. The image will be clean and sharp.
When to prioritize motion clarity: You are handheld with a moving subject. Accept noise at ISO 1600 or 3200. Keep the shutter speed fast enough to freeze motion.
Fix the noise in post.
The middle ground: You are handheld with a static subject. Use ISO 800 and 1/30s. You get a balance of clean image and stable footage.
This is the sweet spot for most vloggers.
A practical example. You are filming a friend talking in a dimly lit living room. They are sitting still.
You are handheld. Set ISO to 800 and shutter to 1/30s. The gimbal keeps the shot steady.
The image is clean. The subject is sharp. This works.
Now imagine the same scene but your friend is walking around the room. You need a faster shutter. Set ISO to 1600 and shutter to 1/50s.
The image is grainier. But the motion is clear. You fix the noise in post.
The footage is usable.
Pro Tips to Get More Out of the Pocket 2 in Low Light
Beyond the basic settings, a few advanced techniques can squeeze more performance from the Pocket 2. These are tips from experienced users and editorial analysis.
Use D-Cinelike Color Profile
D-Cinelike is a flat color profile that preserves more dynamic range. It captures more detail in shadows and highlights. The footage looks flat out of the camera.
But it gives you more flexibility in post-processing. You can adjust exposure, contrast, and color without losing quality.
Shoot in 4K and Downscale to 1080p
4K footage has more pixels. When you downscale it to 1080p, you effectively reduce noise. The extra pixels average out the grain.
The result is a cleaner 1080p image. This is a common technique used by professional videographers.
Use a Small LED Light
A small LED panel is the best investment you can make. It adds light without raising ISO. The Pocket 2 has a cold shoe mount on the wireless module.
You can attach a small light directly. This is far more effective than pushing ISO higher.
Keep the Lens Clean
A dirty lens scatters light. In low light, that scattering creates haze and reduces contrast. Wipe the lens with a microfiber cloth before every shoot.
It takes two seconds and makes a visible difference.
Use Manual Focus in Very Dark Scenes
Autofocus struggles in low light. It hunts and searches for focus points. This is distracting and can ruin a shot.
Switch to manual focus and set it to the desired distance. Use the focus peaking feature in the Mimo app to confirm sharpness.
Record in 24fps for Maximum Light
24fps allows a slower shutter speed than 30fps or 60fps. That means more light per frame. If you are in very dim conditions, drop to 24fps.
It gives you the best chance of a clean image.
When to Give Up and Use Lights (Realistic Limits)
The Pocket 2 has limits. You need to know when to stop pushing the camera and start adding light.
The ISO 3200 Wall
At ISO 3200, the image is noisy. Detail is lost. Colors are muddy.
You can try to fix it in post, but the results are poor. If you are at ISO 3200 and the image is still dark, you need more light. Do not go to ISO 6400.
It is not worth it.
The 1/15s Floor
At 1/15s handheld, the gimbal can keep the shot steady. But any movement in the frame will blur. If you need to freeze motion, you cannot go below 1/50s.
If the scene is too dark at 1/50s and ISO 1600, you need more light.
The Fixed Aperture Limit
The f/1.8 aperture is wide. But it is fixed. You cannot open it further.
If the scene is too dark at f/1.8, ISO 1600, and 1/50s, you have hit the camera's limit. There is no more room to adjust.
When to add light: You are indoors with no natural light. You are shooting at night outdoors with no streetlights. You are filming a subject that is moving.
You are at ISO 1600 and 1/50s and the image is still dark.
What to use: A small LED panel like the Lume Cube or a similar compact light. The wireless module has a cold shoe mount. You can attach the light directly to the camera.
This is the most portable solution.
The cost of not adding light: You push ISO higher. The image becomes noisy. You spend hours in post trying to fix it.
The results are poor. Or you add a $50 light and get clean footage in five minutes. The choice is clear.
Real-World Use Cases: What Works and What Doesn't
Let us look at specific scenarios and how the Pocket 2 performs. These are based on aggregate user reports and our research.
Indoor Party with Ambient Lighting
You are at a party with string lights and a few lamps. The room is dim but not dark. You are walking around filming friends.
Set ISO to 1600, shutter to 1/50s at 24fps. The footage is grainy but usable. The gimbal keeps it steady.
Noise reduction in post cleans it up. This works.
Nighttime Street Scene
You are walking down a city street with streetlights and storefronts. The scene is well-lit by urban standards. Set ISO to 800, shutter to 1/30s at 24fps.
The gimbal handles the walking motion. The image is clean and bright. This is one of the best scenarios for the Pocket 2 in low light.
Candlelit Dinner
You are filming a friend across a candlelit table. The scene is very dim. You are handheld.
Set ISO to 1600, shutter to 1/30s at 24fps. The image is dark and noisy. The autofocus hunts.
Switch to manual focus and set it to 1 meter. Accept the noise. This is borderline.
It works if you are not too picky.
Moonlit Landscape
You are on a tripod filming a moonlit landscape. Set ISO to 100, shutter to 1s or 2s. The image is clean and bright.
Any movement in the frame blurs, so keep the camera still. This works surprisingly well. The tripod is essential.
Indoor Basketball Game
You are filming a basketball game in a dim gym. The players are moving fast. You are handheld.
Set ISO to 3200, shutter to 1/200s. The image is very noisy. The motion is frozen but the grain is overwhelming.
This does not work well. The Pocket 2 is not designed for fast action in low light. You need a camera with a larger sensor.
The key takeaway: The Pocket 2 works in moderate low light. It struggles in very dim conditions. It is not suitable for fast action in low light.
Know these limits and plan accordingly.
Frequently Asked Questions
What is the best ISO for the DJI Pocket 2 in low light?
Start at ISO 800. This gives you a clean image with minimal noise. If you need more brightness, go to ISO 1600.
Avoid ISO 3200 unless you have no other choice. The noise becomes very noticeable at that level.
Can the DJI Pocket 2 shoot in 4K at night?
Yes, but with caveats. Shoot 4K at 24fps with a 1/50s shutter. Use ISO 800 or 1600.
The footage will be usable in moderately lit night scenes. In very dark conditions, the 4K image will be noisy. You can downscale to 1080p in post for a cleaner result.
Does the Pocket 2 have a night mode?
The Pocket 2 has a Night Scene mode for photos. It uses a longer exposure to capture more light. For video, there is no dedicated night mode.
You must use Pro mode to manually set ISO, shutter speed, and white balance for low light conditions.
Why is my Pocket 2 footage grainy in low light?
Grain comes from high ISO settings. The camera raises the ISO to compensate for low light. This amplifies the signal and introduces digital noise.
The 1/1.7-inch sensor starts showing visible grain above ISO 800. Keep ISO as low as possible and use a tripod or additional light.
Should I use Auto or Pro mode for low light?
Use Pro mode. Auto mode does not know your shooting situation. It may pick a slow shutter speed for handheld work or push ISO too high.
Pro mode gives you full control over ISO, shutter speed, and white balance. This is essential for getting usable low light footage.
How do I reduce noise in Pocket 2 low light footage?
Use noise reduction software in post-production. DaVinci Resolve has a free version with excellent noise reduction. Adobe Premiere Pro also has built-in tools.
You can also try shooting in 4K and downscaling to 1080p, which averages out some of the grain.
Your Quick-Reference Decision Guide
Here is a simple summary of the three branches. Use this when you are in the field and need to decide fast.
| Your Situation | ISO | Shutter Speed | Frame Rate | Notes |
|---|---|---|---|---|
| Handheld, moving subject | 1600 | 1/50s or faster | 24fps | Accept noise. Fix in post. |
| Tripod, static subject | 100 | 1/15s or slower | 24fps | Cleanest image. Use timer. |
| Handheld, static subject | 800 | 1/30s | 24fps | Sweet spot for vlogging. |
One final rule: If you are at ISO 1600 and 1/50s and the image is still too dark, add light. Do not push ISO higher. The Pocket 2 has limits.
Work within them and you will get great footage.

Similar Posts