SPYPOINT FLEX Settings
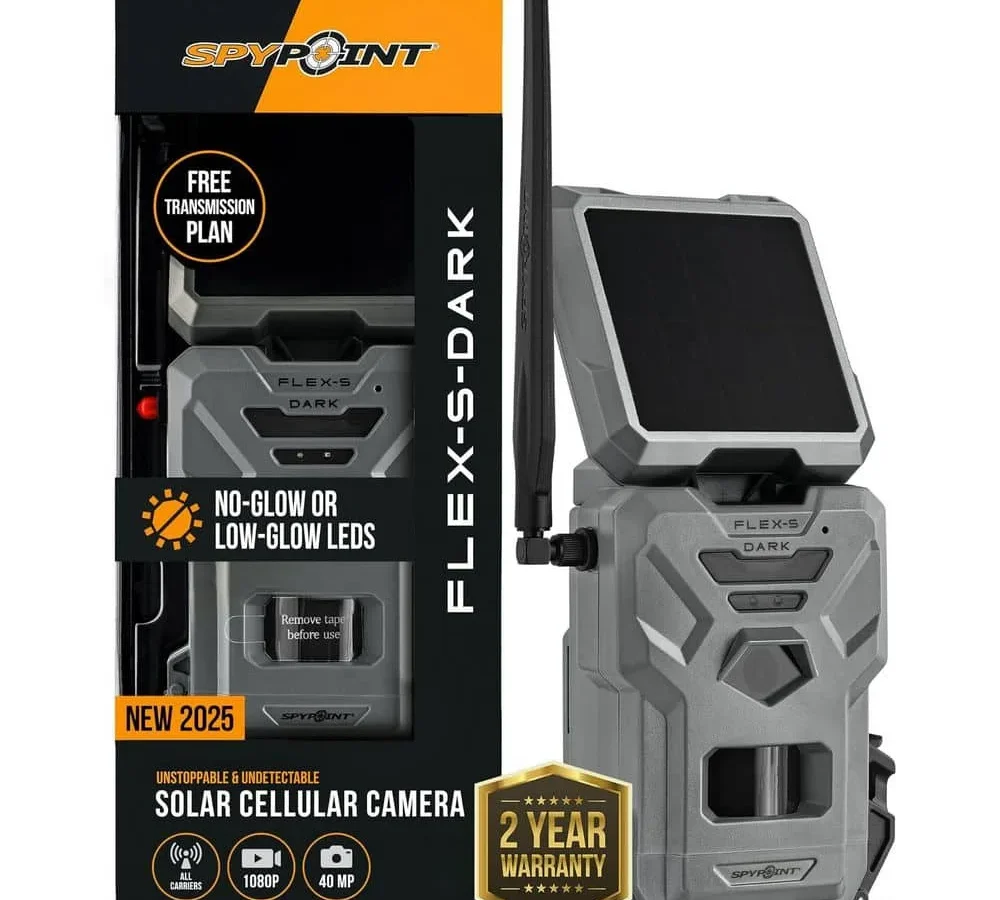
Most people unpack their SPYPOINT FLEX, pop in batteries, and leave every setting on factory default. That is a mistake. The default SPYPOINT FLEX settings are designed for one thing only: getting you a few test photos so you know the camera works.
They are not optimized for battery life, data usage, or actually catching the animals you are after.
Manufacturer specifications indicate the FLEX can run for up to six months on a set of lithium AA batteries with the right configuration. With factory defaults, you will be lucky to get six weeks. That is the difference between tweaking a few settings and leaving everything as is.
Understanding your SPYPOINT FLEX settings is the single most important step to getting real value from this camera.
Image source: Bing (Web (fair-use with source credit))
Quick Answer
Set your SPYPOINT FLEX to Standard photo quality. Use a 30-second trigger delay. Choose Time-Lapse mode for food plots.
Stick with Trigger mode for trails. Send photos on a schedule, not in real time. These settings balance battery life, data usage, and image quality for most users.
The Problem with Default SPYPOINT FLEX Settings (and Why You Need to Change Them)
Out of the box, the FLEX comes configured to send high-resolution photos immediately over the cellular network. That sounds good in theory. In practice, it drains your batteries, chews through your data plan, and fills your phone with images of empty trails and wind-blown branches.
What Default Settings Actually Do
The factory defaults prioritize getting you a photo as fast as possible. The camera is set to Trigger Mode, High photo quality at 12MP, no delay between triggers, and real-time transmission. This combination works fine for a quick test.
For actual scouting, it is a problem. Every time a leaf blows past the sensor, the camera fires, takes a high-resolution photo, and uploads it immediately. Your battery does not stand a chance.
The Three Trade-Offs You Cannot Ignore
Every setting on the FLEX involves a trade-off between battery life, data usage, and image quality. You cannot maximize all three at once. You have to choose what matters most for your situation.
| Setting | Battery Impact | Data Impact | Image Quality Impact |
|---|---|---|---|
| Photo Quality (High) | High | High | Best |
| Photo Quality (Standard) | Medium | Medium | Good |
| Photo Quality (Low) | Low | Low | Acceptable |
| Real-Time Transmission | High | High | N/A |
| Scheduled Transmission | Low | Low | N/A |
| Trigger Delay (0 sec) | Highest | Highest | N/A |
| Trigger Delay (5 min) | Low | Low | N/A |
The decision tree here is simple. If you need to see every animal that walks past, you pay in battery and data. If you want the camera to last all season, you sacrifice some immediacy.
Who Should Care About This
This matters for everyone using the FLEX. It matters most for hunters setting cameras on remote properties they visit only every few weeks. It matters for anyone on a limited cellular data plan.
It matters for people using alkaline batteries instead of lithium. And it matters for users in areas with weak cellular signal, where the camera works harder to transmit.
If you are checking your camera every few days and swapping batteries frequently, default settings might be fine. Most people want the camera to run for months without a visit. That requires deliberate choices.
Time-Lapse vs. Trigger Mode – The First Big Decision
The single most important setting on your FLEX is the capture mode. This choice determines how the camera sees the world. Get this wrong, and everything else you tweak will not matter.
How Trigger Mode Works
Trigger mode is motion-activated. The camera sits idle until the passive infrared sensor detects heat and movement. When it does, the camera fires.
This is the classic trail camera behavior most people expect.
Trigger mode is best for narrow trails where animals walk directly in front of the sensor. It works well at active scrape sites or rub lines. It is also good for baited areas where legal.
Use it when you need to know exactly when an animal passed.
The downside is that the camera misses anything that does not trigger the sensor. A deer walking slowly through tall grass might not generate enough heat difference to fire the camera. A bear walking parallel to the sensor at 30 yards might go completely unrecorded.
How Time-Lapse Mode Works
Time-lapse mode ignores motion entirely. The camera takes a photo at a set interval, no matter what. You choose the interval from every 5 minutes to every 24 hours.
Time-lapse mode is best for food plots where you want to see herd patterns over time. It works well in open fields where animals might be too far for the PIR sensor. It is good for mineral licks or water sources where animals linger.
Use it when you want to count total deer in an area, not just passing traffic.
The trade-off is obvious. You get a lot of empty photos. But you also get a complete picture of what is happening in the area, not just the moments that trigger a sensor.
The Decision Tree
Choose Trigger Mode if:
- You are setting up on a known trail or pinch point
- You want to know the exact time animals are moving
- Battery life is a moderate concern
- You are willing to miss animals that do not trigger the sensor
Choose Time-Lapse Mode if:
- You are monitoring a food plot or open area
- You want to see population numbers and patterns
- You have a solar panel to keep the battery topped up
- You are patient with empty photos
Use Both Modes Together:
The FLEX allows you to run both modes simultaneously. The camera takes time-lapse photos at your set interval AND fires on motion triggers. This is the most comprehensive approach.
It also uses the most battery and data. Reserve this for areas where you absolutely need full coverage.
Practical Example
Consider a 10-acre food plot in early October. The deer are hitting the plot every evening, but they are entering from different directions. Trigger mode on the edge of the plot will catch some of them.
Time-lapse mode at 10-minute intervals will show you the full pattern: which direction they come from, how long they stay, and when they leave. The smart play is to set the camera on a tree overlooking the plot, run time-lapse at 10-minute intervals, and let the trigger mode catch close passes. That gives you the best of both worlds.
How Signal Strength Changes Everything (Even Your Photo Quality)
Cellular signal strength is the hidden factor that affects every other setting on your FLEX. Most people treat it as a fixed condition they cannot change. In reality, you can work around weak signal by adjusting your settings.
You can also improve signal by moving the camera.
What Signal Strength Actually Means
The FLEX shows signal strength as bars in the app. This is a rough estimate of how well the camera can communicate with the nearest cell tower. More bars means faster uploads and less battery drain.
Fewer bars means the camera has to work harder, try multiple times, and use more power to send each photo.
Aggregate user reviews report that the FLEX struggles in areas with 2 bars or fewer. The camera will still work. It will drain batteries noticeably faster.
How Signal Strength Affects Your Settings
Weak Signal (1-2 bars):
- Lower your photo quality to Standard or Low
- Reduce photo resolution to 5MP
- Set transmission to Scheduled (once or twice daily)
- Avoid video entirely
- Consider Time-Lapse mode over Trigger mode
Moderate Signal (3 bars):
- Standard photo quality is fine
- 8MP resolution is a good balance
- Scheduled transmission still saves battery
- Short video clips are possible
Strong Signal (4-5 bars):
- High photo quality is manageable
- 12MP resolution is fine
- Real-time transmission works without killing the battery
- Longer video clips are possible
How to Improve Signal Without Moving the Camera
You can boost signal by changing the camera's position. Tall grass and wet leaves can block signal. A camera mounted 3 feet off the ground in thick brush will have worse signal than the same camera mounted 6 feet up on a tree with a clear view of the sky.
Try these steps before giving up on a location:
- Mount the camera higher (6 to 8 feet instead of 3 to 4 feet)
- Clear branches and thick vegetation between the camera and the open sky
- Face the camera away from dense tree cover
- Move the camera 10 to 20 feet in any direction and check the signal again
If you are in a deep valley or surrounded by hills, no amount of positioning will help. Lower your settings and accept slower transmission.
The Signal Check Protocol
Before you leave the camera in a location, do a signal check. Mount the camera in your chosen position. Open the SPYPOINT app and check the signal bars.
If you see 3 bars or more, you are good. If you see 2 bars, try moving the camera 5 feet higher or 10 feet to the side. If you still see 2 bars, decide whether the location is worth the battery drain.
Do not skip this step. Many people mount the camera, leave, and find out weeks later that the camera never transmitted a single photo because the signal was too weak.
Setting Up Your SPYPOINT FLEX in the App (Step by Step)
The SPYPOINT app is where all the settings live. The physical camera has buttons, but you will use the app for almost everything once the camera is paired.
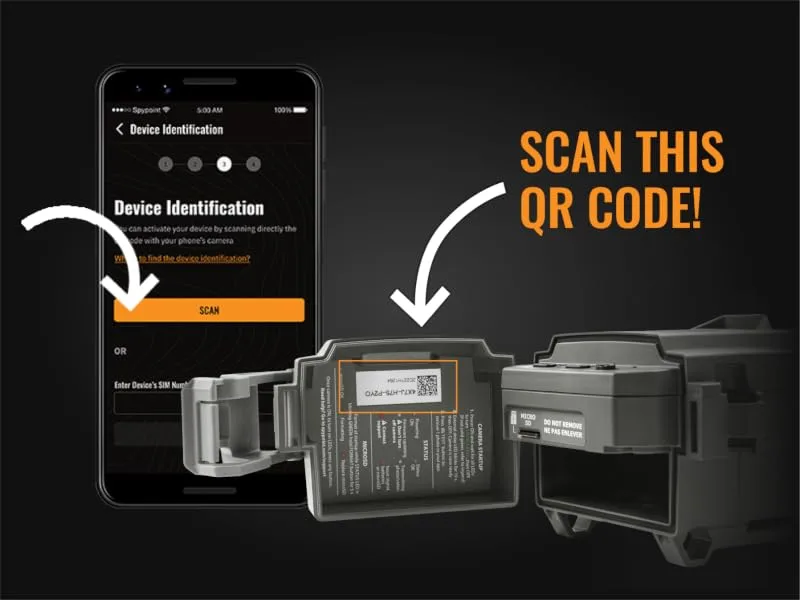
Image source: Bing (Web (fair-use with source credit))
Before You Open the App
Get the physical camera ready first. Install fresh lithium AA batteries. Insert a microSD card.
The FLEX needs one even if you plan to use cloud storage. Make sure the camera is turned on and in pairing mode. Pairing mode is indicated by a blinking blue LED.
If you do not see the blue light, press and hold the power button for 3 seconds.
Pairing the Camera to Your Account
Open the SPYPOINT app and create an account if you have not already. Tap the plus icon to add a new device. The app will ask you to scan the QR code on the camera or enter the serial number manually.
Once the camera is paired, the app will prompt you to choose a cellular plan. This is required before the camera can send photos. Choose the plan that fits your expected usage.
A basic plan works for a few hundred photos per month. Heavy users need the premium plan.
Configuring Your Core Settings
Once the camera is paired and activated, you can access the settings menu. Here is the order to configure them.
Step 1: Set Capture Mode
Choose between Trigger, Time-Lapse, or Both. This is the most important decision.
Step 2: Set Photo Quality
Choose Standard for most situations. High quality is only worth it if you have strong signal and unlimited data. Low quality is for weak signal areas only.
Step 3: Set Trigger Delay
Set a minimum of 30 seconds. This prevents the camera from firing multiple times on the same animal. It saves battery and data.
Step 4: Set Transmission Frequency
Choose Scheduled for most users. Real-time is for situations where you need immediate alerts. Economy mode sends photos once per day and is best for remote locations.
Step 5: Set Time-Lapse Interval
Start with 10 minutes for food plots. Adjust up or down based on how much activity you expect.
Saving and Testing Your Settings
After you configure everything, tap Save. The camera will apply the new settings on its next check-in. Walk in front of the camera to trigger a test photo.
Check the app to see if the photo arrives. If it does not, check the signal strength and try again.
If you run into problems during setup, the SPYPOINT FLEX how to set up guide covers the initial pairing in more detail. A reset is sometimes the fastest way to clear a stuck pairing.
Photo Quality, Burst Mode, and Trigger Delay – Balancing Data and Battery
These three settings work together as a system. Change one, and the others should change too. Treat them as a package, not individual options.
Photo Quality: What You Actually See
The FLEX offers three photo quality levels. High is 12MP. Standard is 8MP.
Low is 5MP. The difference in file size is dramatic.
| Quality Level | Resolution | File Size (approx.) | Data Usage per Photo |
|---|---|---|---|
| High | 12MP | 3-5 MB | 3-5 MB |
| Standard | 8MP | 1.5-2.5 MB | 1.5-2.5 MB |
| Low | 5MP | 0.5-1 MB | 0.5-1 MB |
For most scouting purposes, Standard quality is plenty. You can clearly identify antler points, body condition, and markings at 8MP. High quality gives you slightly more detail, but the file size is double or triple.
That means longer upload times, more battery drain, and more data usage.
Use High quality only when you need to identify specific individual animals. Or when you are printing photos for trail mapping. For everything else, Standard is the smart choice.
Burst Mode: More Photos or More Coverage
Burst mode tells the camera to take multiple photos per trigger. You can set it to 1, 2, 3, or even 9 shots per trigger. The idea is that the first photo might catch the animal's back, and the second or third catches its face.
Burst mode is useful for identifying specific bucks. You might get a face shot in one of the burst photos. It is also good for capturing group behavior when multiple animals are in one trigger event.
The downside is obvious. Each burst photo takes battery and data. A burst of 3 photos at Standard quality uses roughly 6 MB of data per trigger.
If you get 50 triggers in a night, that is 300 MB of data.
A good rule of thumb is to use burst of 2 for trail setups. That gives you a second chance at a good photo without wasting too much data. Use burst of 1 for food plots and time-lapse setups.
The animals are stationary, so you do not need multiple shots.
Trigger Delay: The Most Overlooked Setting
Trigger delay is the time the camera waits after a trigger before it will fire again. A 0-second delay means the camera fires as fast as it can. A 60-second delay means the camera waits a full minute between triggers.
Most people underestimate how important this setting is. A deer walking slowly down a trail can trigger the same camera 10 or 15 times in a minute. With a 0-second delay, you get 15 photos of the same deer.
With a 30-second delay, you get 2 or 3 photos. With a 60-second delay, you get 1 photo.
Aggregate user feedback is clear on this point. Set your trigger delay to at least 30 seconds. This one change alone can cut your data usage and battery drain by 70 percent or more.
Putting It All Together
If battery life is your top priority:
- Standard photo quality
- Burst of 1
- 60-second trigger delay
If data usage is your top priority:
- Low photo quality
- Burst of 1
- 60-second trigger delay
If image quality is your top priority:
- High photo quality
- Burst of 2
- 30-second trigger delay
If you want the best balance for most users:
- Standard photo quality
- Burst of 1
- 30-second trigger delay
This balanced configuration works for 90 percent of SPYPOINT FLEX users. It gives you clear photos, reasonable data usage, and battery life measured in months instead of weeks.
Other cellular trail cameras follow similar principles. The Moultrie Mobile Edge setup process involves comparable decisions about quality and delay. The trade-offs are universal across brands.
Transmission Frequency – Real-Time Alerts vs. Data Savings
Transmission frequency determines how often the camera sends photos to your phone. This is a major battery drain and data consumer. Choosing the right frequency can save you both.
Image source: Bing (Web (fair-use with source credit))
The Three Transmission Options
The FLEX offers three transmission modes. Real-time sends each photo as soon as it is taken. Scheduled sends photos at set times each day.
Economy sends photos once every 24 hours.
Real-time transmission is for people who need immediate alerts. You get a push notification the moment a deer walks past. This is useful for active hunting situations where you want to know when animals are moving.
The cost is high. Each transmission uses battery power to connect to the cellular network. In weak signal areas, the camera may try multiple times to send each photo.
This drains batteries fast.
Scheduled transmission is the best option for most users. You choose one or two times per day for the camera to send all its photos. Midnight and noon are common choices.
The camera connects to the network once and sends everything in a batch. This reduces battery drain significantly.
Economy transmission sends photos once every 24 hours. The camera picks the time automatically. This is the most battery-friendly option.
It is best for remote cameras that you check only once a week.
How to Choose Your Transmission Frequency
Choose Real-time if:
- You are actively hunting the area
- You need to know when deer are moving immediately
- You have strong cellular signal (4 bars or more)
- You are willing to change batteries every few weeks
Choose Scheduled if:
- You check the app once or twice daily
- You want to save battery and data
- You have moderate to weak signal
- You want the camera to run for months
Choose Economy if:
- You visit the property only weekly
- Battery life is your top priority
- Signal is weak (1 to 2 bars)
- You do not need daily updates
The Data Cost of Different Frequencies
A Standard quality photo is roughly 2 MB. With real-time transmission, every photo uses that 2 MB plus the overhead of the connection. With scheduled transmission, the camera batches photos and uses less overhead per photo.
If you have a limited data plan, scheduled transmission is the way to go. It can cut your data usage by 30 to 40 percent compared to real-time. The savings come from reduced connection overhead.
Common SPYPOINT FLEX Settings Mistakes (and How to Fix Them)
Even experienced users make mistakes with their FLEX settings. Here are the most common ones and how to avoid them.
Mistake 1: Using a 0-Second Trigger Delay
This is the most common mistake. People leave the trigger delay at 0 seconds because they want to see every animal. The result is hundreds of photos of the same deer.
It drains the battery in days.
The fix: Set your trigger delay to 30 seconds minimum. You will still get multiple photos of a group of deer. You will not get 15 photos of the same deer walking in slow motion.
Mistake 2: Using High Photo Quality for Everything
High quality sounds better. For most purposes, Standard quality is indistinguishable on a phone screen. The file size difference is massive.
The fix: Use Standard quality for all general scouting. Switch to High only when you need to identify a specific buck. Otherwise, save the data.
Mistake 3: Ignoring Signal Strength
Many people mount the camera, check the signal once, and never look again. Signal can change with weather, leaf cover, and seasons. A camera that worked in March might struggle in June when the trees are full.
The fix: Check signal strength every time you visit the camera. If the signal dropped, adjust your settings. Lower the photo quality or switch to scheduled transmission.
Mistake 4: Running Real-Time Transmission with Weak Signal
This combination is a battery killer. The camera struggles to connect, fails, tries again, and fails again. Each attempt drains the battery.
The fix: If you have 2 bars or fewer, switch to scheduled transmission. The camera will connect once and send everything in a batch. This uses far less power.
Mistake 5: Using Alkaline Batteries Instead of Lithium
Alkaline batteries cost less upfront. They drain faster in cold weather and under heavy use. Lithium batteries last two to three times longer in trail cameras.
The fix: Always use lithium AA batteries in the FLEX. The upfront cost is higher. The long-term cost is lower because you replace them less often.
Mistake 6: Setting Time-Lapse Too Frequently
A 1-minute time-lapse interval sounds like you will catch everything. In reality, you get 1,440 photos per day. Most of them are empty.
Your data plan and battery will not survive.
The fix: Start with a 10-minute interval for food plots. Adjust to 5 minutes only if you are missing activity. For general monitoring, 30 minutes is fine.
Mistake 7: Not Formatting the SD Card
The FLEX needs a formatted microSD card to work properly. Using an unformatted or previously used card can cause errors and missed photos.
The fix: Format the card in the camera before first use. The SPYPOINT app has a format option in the settings menu. Do this every time you swap cards.
If you find yourself stuck with a camera that will not respond, the SPYPOINT FLEX how to reset guide can help. A factory reset clears most configuration errors.
SPYPOINT FLEX Settings Decision Guide – Quick Reference for Every Situation
This section puts everything together. Use it as a quick reference when you are in the field setting up your camera.
Setup for a Narrow Trail
- Capture Mode: Trigger
- Photo Quality: Standard (8MP)
- Burst: 2
- Trigger Delay: 30 seconds
- Transmission: Scheduled (twice daily)
- Mounting Height: 3 to 4 feet
- Aim: Down the trail, not across it
Setup for a Food Plot
- Capture Mode: Time-Lapse
- Photo Quality: Standard (8MP)
- Time-Lapse Interval: 10 minutes
- Trigger Mode: On (set to capture any close passes)
- Trigger Delay: 30 seconds
- Transmission: Scheduled (once daily)
- Mounting Height: 6 to 8 feet
- Aim: Overlook the plot center
Setup for a Mineral Lick or Water Source
- Capture Mode: Time-Lapse
- Photo Quality: Standard (8MP)
- Time-Lapse Interval: 5 minutes
- Trigger Mode: On
- Trigger Delay: 60 seconds
- Transmission: Scheduled (once daily)
- Mounting Height: 4 to 5 feet
- Aim: Directly at the lick or water
Setup for Maximum Battery Life
- Capture Mode: Trigger (avoid Time-Lapse)
- Photo Quality: Low (5MP)
- Burst: 1
- Trigger Delay: 60 seconds
- Transmission: Economy (once daily)
- Signal: Move to strongest location possible
Setup for Maximum Data Savings
- Capture Mode: Trigger
- Photo Quality: Low (5MP)
- Burst: 1
- Trigger Delay: 60 seconds
- Transmission: Economy (once daily)
- Time-Lapse: Off
Setup for Active Hunting (Immediate Alerts)
- Capture Mode: Trigger
- Photo Quality: Standard (8MP)
- Burst: 2
- Trigger Delay: 10 seconds
- Transmission: Real-time
- Signal: Strong required (4+ bars)
The 30-Second Rule
Here is a simple rule to remember. If you change nothing else, set your trigger delay to 30 seconds. That one adjustment will improve battery life and data usage more than any other single setting.
The rest of the settings can be dialed in over time. Start with the balanced configuration. Adjust based on what you see in the app.
Most people find that they can lower photo quality and reduce transmission frequency without missing anything important.
As of 2026, the SPYPOINT FLEX remains one of the most popular cellular trail cameras on the market. The official SPYPOINT website provides the latest firmware updates and plan details. The settings principles covered here apply to all current FLEX models.
Frequently Asked Questions About SPYPOINT FLEX Settings
How do I change the settings on my SPYPOINT FLEX after it is already mounted?
Open the SPYPOINT app on your phone. Select the camera from your device list. Tap the settings icon.
Make your changes and tap Save. The camera will apply the new settings on its next check-in, which happens every few minutes.
What is the best photo quality setting for the SPYPOINT FLEX?
Standard quality at 8MP is the best choice for most users. It gives you clear photos that are easy to identify animals. The file size is small enough to save data and battery.
Only use High quality at 12MP when you need to identify specific individual animals.
How long do batteries last in the SPYPOINT FLEX with the right settings?
With lithium AA batteries and optimized settings, you can expect 3 to 6 months of battery life. The key settings are a 30-second trigger delay, Standard photo quality, and scheduled transmission. Alkaline batteries will last 4 to 6 weeks under the same conditions.
Can I use the SPYPOINT FLEX without a cellular plan?
No. The FLEX requires an active cellular plan to send photos to your phone. Without a plan, the camera will store photos on the microSD card, but you will not receive them in the app.
You would need to physically retrieve the SD card to see the photos.
Why are my SPYPOINT FLEX photos not sending to my phone?
The most common causes are weak cellular signal, an expired data plan, or incorrect transmission settings. Check the signal bars in the app. If you see 2 bars or fewer, move the camera to a better location.
Also verify that your plan is active and has available data.
What happens when my SPYPOINT FLEX data plan runs out?
The camera will stop sending photos to your phone. It will continue to take photos and store them on the microSD card. Once you renew your plan, the camera will resume sending photos.
You can also remove the SD card and view the photos directly on a computer.

Similar Posts