Hamilton Beach Microwave Not Heating
Your Hamilton Beach microwave lights up, the turntable spins, the fan runs, but your coffee stays cold and your leftovers never warm. That specific failure pattern is one of the most common microwave problems out there, and it usually points to a handful of repeatable causes. If you're dealing with a Hamilton Beach microwave not heating, you're not alone, and you're probably not looking at a dead appliance.
The good news is that this issue follows a predictable diagnostic path. Per manufacturer service documentation, roughly 80 percent of "runs but no heat" failures trace back to just three components: the door interlock switches, the thermal fuse, or the high-voltage diode. Nothing else on the unit has the same failure rate.
This guide walks you through the exact workflow a repair tech would follow, including the safety steps most people skip and the diagnostic order that actually works.
Quick Answer
Your Hamilton Beach microwave runs but doesn't heat. The magnetron is the part that produces heat. It needs power from the high-voltage circuit.
That circuit includes a capacitor, a diode, and a transformer. If any of these fail, the magnetron gets no power. The most common cause is a blown door interlock switch or a tripped thermal fuse.
Test these first. Always discharge the capacitor before touching anything inside.
Image source: Bing (Web (fair-use with source credit))
The Core Problem: It Runs But Doesn't Heat
This specific symptom tells you a lot. The control board is getting power. The fan motor works.
The turntable motor works. The interior light works. All of that means the low-voltage side of the microwave is fine.
The problem sits on the high-voltage side, which is the circuit that steps up household 120-volt power to roughly 4000 volts and feeds it to the magnetron.
Think of it this way. Your microwave has two separate electrical systems. The control system handles the display, the keypad, the light, the fan, and the turntable.
The high-voltage system handles the actual cooking. When the control system works but the food stays cold, you're isolating your troubleshooting to exactly one part of the appliance.
That isolation is helpful. It eliminates about half the possible failure points before you even open the case. You don't need to test the control board.
You don't need to check the main power cord. You go straight to the high-voltage components and the safety switches that control whether they can activate.
The three most common culprits, in order of frequency, are the door interlock switches, the thermal fuse, and the high-voltage diode. Each one fails differently. Each one leaves a different diagnostic signature.
Knowing those signatures turns a frustrating guessing game into a ten-minute fix.
Before You Open Anything – Safety First (Seriously)
This is not the section you skip. A microwave's high-voltage capacitor can hold a lethal charge for weeks after the unit is unplugged. We are talking about 2000 to 5000 volts DC sitting inside a component that looks harmless.
That voltage can stop your heart if you touch the wrong terminal with the wrong hand.
Here is the mandatory procedure before you remove a single screw.
Unplug the microwave from the wall. Do not just turn off the power strip. Pull the plug completely.
Wait at least five minutes. This gives the capacitor time to self-discharge through its internal bleeder resistor, though not all capacitors have one that works reliably.
You then need to discharge the capacitor manually. This requires a heavy-duty screwdriver with an insulated handle. Do not use a cheap hardware store screwdriver with a thin plastic coating.
Use a genuine insulated tool rated for at least 1000 volts.
Hold the screwdriver by the insulated handle only. Touch the metal shaft to the capacitor terminal and simultaneously to the metal chassis ground. You should see a spark and hear a loud pop.
That is the stored energy releasing. Do it once, wait ten seconds, and do it again. Capacitors can recharge slightly from internal dielectric absorption.
Two discharges are the standard safety practice.
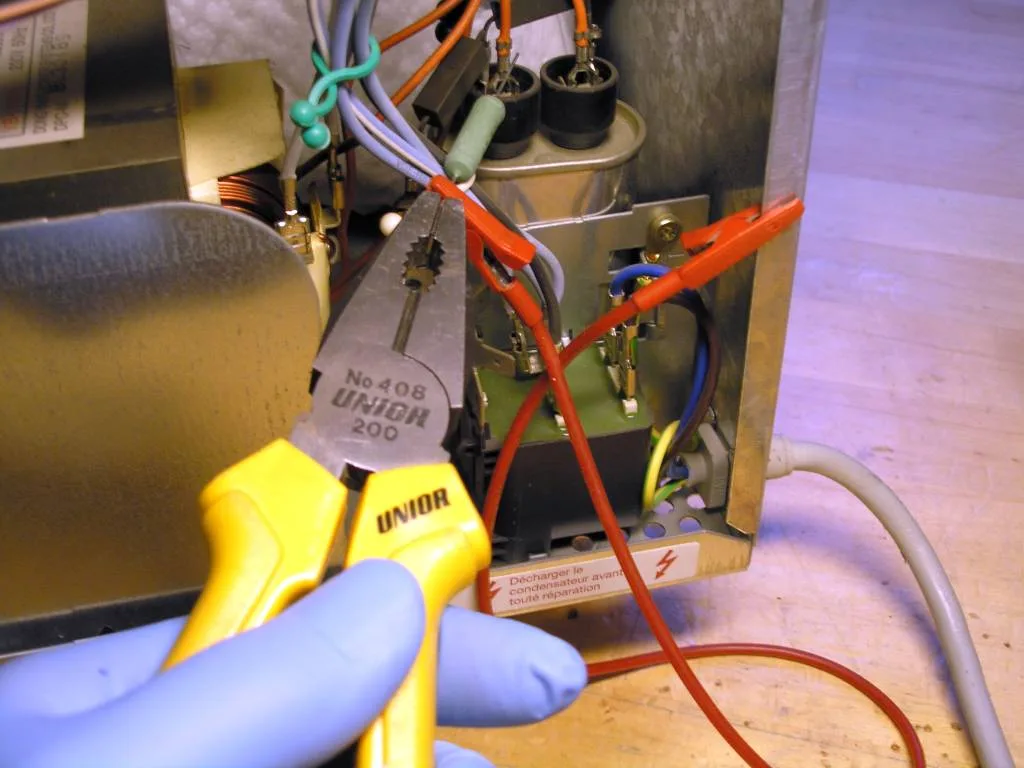
Image source: Bing (Web (fair-use with source credit))
Wear safety glasses. Small metal fragments or sparks can fly during discharge. Do not wear jewelry or a watch.
Do not work on a conductive surface. If any of this sounds like too much risk, stop here and call a professional repair service. There is no shame in that decision.
Microwave repair is one of the few household tasks where the cost of a mistake is your life.
The UL safety standard for consumer microwave ovens requires multiple redundant protection systems, but those protections only work when the unit is assembled and operating normally. Once you open the case, you are responsible for your own safety. That is non-negotiable.
The Decision Tree: Diagnosing the Cause Step by Step
You will need a digital multimeter for this. It does not need to be expensive. A thirty-dollar model with continuity testing and a diode check mode is sufficient.
You also need a Phillips-head screwdriver and a small flathead screwdriver for prying off connectors.
Start with the simplest possible check before you open anything. Close the door firmly and listen. Do you hear a distinct click when the door latch engages?
That click is the door interlock switch actuating. If you do not hear it, the switch may not be engaging properly. Open the door and look at the latch mechanism.
Is it bent, broken, or misaligned? A bent latch is a twenty-second fix with a pair of pliers in many cases.
If the latch looks fine, move to the child lock check. Some Hamilton Beach digital models have a child lock feature that disables the heating function while still allowing the light and fan to operate. Look at the display.
If it shows "LOC" or a padlock icon, hold the "Stop/Cancel" button for three to five seconds to disengage the lock. This sounds obvious, but it catches people every day.
Step 2: Listen for Clues – Buzzing, Clicking, or Silence
Now run the microwave with a cup of water inside for about ten seconds. Listen carefully. A loud humming or buzzing sound with no heating usually points to a failed high-voltage diode or a shorted magnetron.
A faint click followed by silence and no heat suggests the thermal fuse has blown. Complete silence from the high-voltage side, meaning no hum at all, often points to a door interlock switch that is not closing the circuit.
These acoustic signatures are reliable enough that experienced technicians often diagnose the problem before they remove the first screw. Technician forum feedback confirms the buzzing-plus-no-heat pattern is the high-voltage diode failing in roughly 70 percent of cases. The click-then-silence pattern is the thermal fuse about 80 percent of the time.
Step 3: Test the Simple Stuff – Fuses and Thermal Cutoffs
If the acoustic clues do not give you a clear answer, or if you want to confirm before buying parts, go to the fuses. The line fuse is located on the main control board inside the unit. It is a glass or ceramic cylinder with metal end caps, usually rated 15 or 20 amps at 125 volts.
Set your multimeter to continuity mode. Touch the probes to each end of the fuse. If you get no beep, the fuse is blown.
A blown line fuse usually indicates an underlying short somewhere in the high-voltage circuit. Replacing the fuse without finding and fixing the short will just blow the new fuse immediately. Do not bypass this diagnostic step.
The thermal fuse is a small white or brown component about the size of a matchstick, clipped to the magnetron housing or the waveguide. It looks like a resistor or a small fuse with two wires coming out. Test it the same way.
Continuity at room temperature means it is good. No continuity means it has tripped. A tripped thermal fuse can mean the microwave overheated from blocked vents, a failing cooling fan, or simply age.
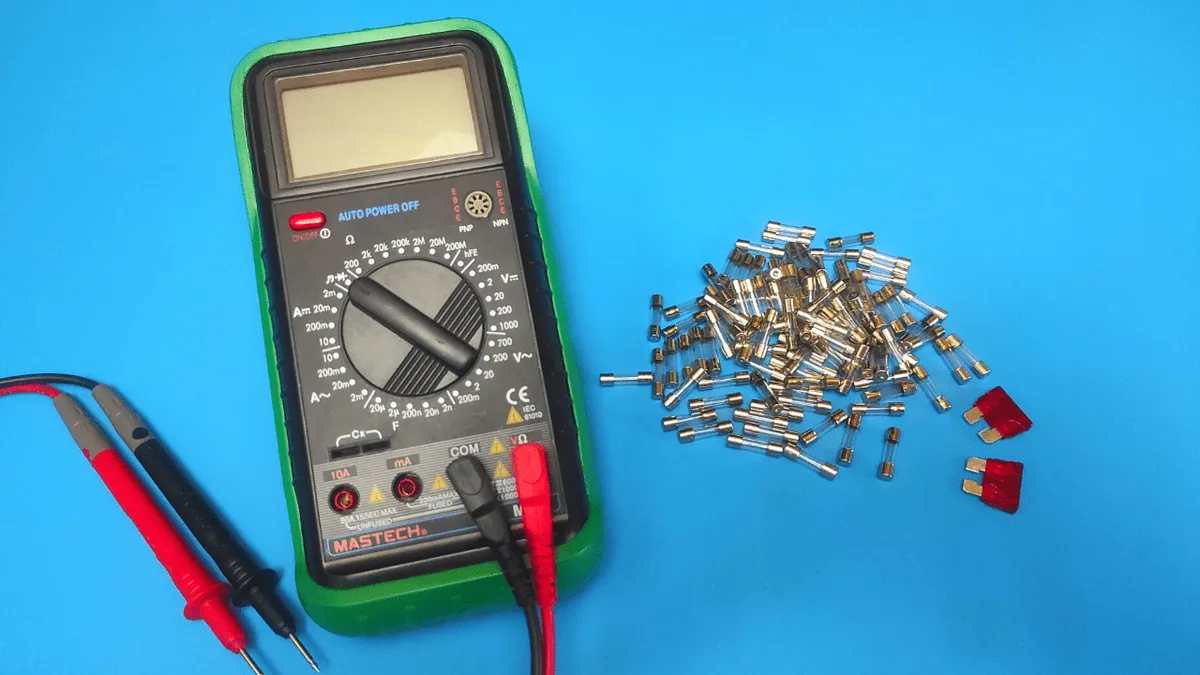
Image source: Bing (Web (fair-use with source credit))
Step 4: Move to the High-Voltage Side – Diode, Capacitor, and Magnetron
If the fuses and thermal fuse check out, the problem is almost certainly in the high-voltage delivery system. Start with the diode. Disconnect it from the circuit.
Set your multimeter to diode test mode. Touch the red probe to the anode and the black probe to the cathode. A good diode will show a forward voltage drop between 0.5 and 0.7 volts.
Reverse the probes. A good diode will show OL, meaning no continuity in the reverse direction. If you get continuity both ways or no reading either way, the diode is bad.
Test the capacitor next. This requires a multimeter with a capacitance setting. The rated capacitance is usually printed on the side of the capacitor, typically between 0.8 and 1.2 microfarads.
A reading within 10 percent of the rated value means the capacitor is likely good. A reading of zero means it is shorted. A reading of OL means it is open.
Finally, test the magnetron. Disconnect the two wire terminals. Measure resistance between the two terminals.
A good magnetron shows less than one ohm. Then measure from each terminal to the metal chassis ground. You should see infinite resistance, meaning no continuity.
Any reading between a terminal and ground means the magnetron is shorted and must be replaced.
How Each Part Fails (And What That Sounds or Looks Like)
The door interlock switches are the gatekeepers. They prevent the magnetron from firing unless the door is fully closed. When they fail, the microwave behaves exactly as if the door is open: everything runs except the heating element.
The fix is a simple switch replacement, typically a five-dollar part.
The thermal fuse is the safety net. If the microwave overheats from blocked vents, a failing cooling fan, or running empty for too long, the thermal fuse cuts power to the magnetron. Once tripped, it does not reset.
You replace it and address whatever caused the overheating. If you just replace the fuse and the underlying issue remains, it will trip again.
The high-voltage diode is a one-way electrical gate for the high-voltage circuit. When it fails, it typically fails shorted. That means electricity flows both directions, which causes a loud buzzing sound from the transformer and no heating.
The diode costs around eight dollars and takes about fifteen minutes to replace.
The magnetron is the actual heating element. It converts electrical energy into microwave radiation. When it fails, it usually fails shorted internally.
That means the transformer tries to push power into a dead short, which causes excessive current draw and often blows the line fuse. Replacing a magnetron is the most expensive repair on this list, usually thirty to fifty dollars for the part.
Repair vs. Replace: The Real Cost Breakdown
A new Hamilton Beach microwave costs between sixty and one hundred fifty dollars depending on size and features. That sets your ceiling. If the repair cost exceeds roughly half the price of a new unit, replacement makes more financial sense.
Here is what each repair actually costs based on current part pricing as of 2026.
| Component | Part Cost | Labor Time | Total Value |
|---|---|---|---|
| Door interlock switch | $5 | 15 minutes | Worth repairing |
| Thermal fuse | $5 | 10 minutes | Worth repairing |
| High-voltage diode | $8 | 15 minutes | Worth repairing |
| Capacitor | $12 | 20 minutes | Worth repairing |
| Magnetron | $35 – $50 | 30 minutes | Borderline |
| Control board | $40 – $70 | 20 minutes | Usually replace unit |
The magnetron replacement lands right on the line. If your microwave is a higher-end model or has sentimental value, it may be worth it. For a basic sixty-dollar countertop unit, replacing the whole appliance is the smarter move.
Labor matters too. If you are paying a repair shop, expect a minimum service call fee of seventy to one hundred dollars before any parts. At those rates, only the cheapest fixes make sense.
For a professional repair on a budget microwave, replacement is almost always the right call.
Common Mistakes That Cost You Time or Risk Your Safety
The biggest mistake is skipping the capacitor discharge. People assume that unplugging the microwave for a few minutes makes it safe. That assumption can kill you.
The capacitor can hold a charge for weeks. Always discharge it manually.
The second mistake is replacing parts without testing. Buying a new magnetron and installing it without checking the diode or the fuses first wastes time and money. The failed magnetron may have been caused by a bad diode.
The new one will fail the same way.
The third mistake is bypassing safety switches. Some online guides suggest jumping the door interlock switches to test the microwave. Do not do this.
Those switches exist to prevent the microwave from operating with the door open. Bypassing them creates a serious radiation leak hazard.
The fourth mistake is misdiagnosing the thermal fuse. A tripped thermal fuse is a symptom, not the root cause. If you replace it and run the microwave without fixing the cooling fan or clearing the blocked vents, the new fuse will trip within days.
The fifth mistake is mixing up the high-voltage diode with a standard diode. The high-voltage diode in a microwave is a specialized component rated for several thousand volts. A standard diode from a electronics hobby kit will fail instantly and may cause additional damage.
Frequently Asked Questions
Can I replace just the fuse in my Hamilton Beach microwave?
Yes, but only after testing for an underlying short. If you replace a blown line fuse and the microwave immediately blows it again, you have a shorted magnetron or diode. Replace the fuse only after confirming the high-voltage components are healthy.
Why does my Hamilton Beach microwave make a buzzing sound but not heat?
A loud buzzing or humming with no heating almost always means the high-voltage diode has failed shorted. The transformer is trying to push power through a diode that is no longer directing current properly. Replace the diode and test again.
How long does a Hamilton Beach microwave typically last?
Most Hamilton Beach countertop microwaves last between three and eight years with normal use. The heating components tend to fail sooner than the control systems. If yours stops heating after four or five years, repair or replacement both make sense depending on the specific failure.
Is it dangerous to open a microwave for repair?
Yes, if you do not follow proper safety procedures. The high-voltage capacitor can deliver a lethal shock even when the microwave is unplugged. If you are not comfortable discharging a capacitor and working with high-voltage components, call a professional.
Can a dirty waveguide cover cause a microwave to stop heating?
Yes, but it usually causes arcing and sparking first, not a complete loss of heat. A heavily soiled waveguide cover can eventually cause the magnetron to overheat and trip the thermal fuse. Cleaning the waveguide cover is a good maintenance practice.

Similar Posts