Insta360 GO 3S Video Settings
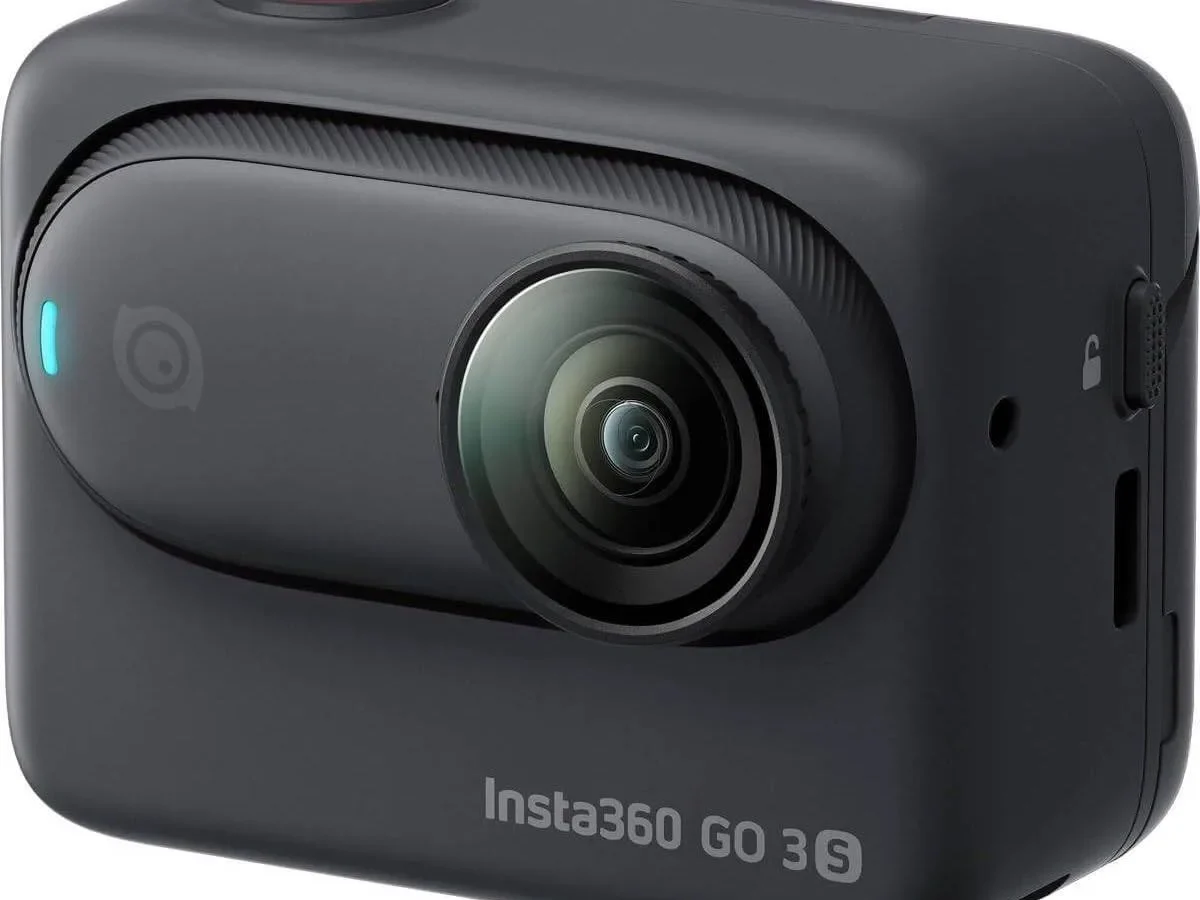
Use 4K at 30 fps for most situations. Switch to 4K at 60 fps for fast action. Drop to 1080p at 120 fps for slow motion.
Enable FlowState stabilization for handheld shots. Turn off stabilization on a tripod. These settings cover 90 percent of what you'll shoot.
Image source: Bing (Web (fair-use with source credit))
What You're Really Up Against: Why "One Setting" Doesn't Work for the GO 3S
The GO 3S is a tiny camera with a tiny sensor. Every setting choice involves a compromise. You cannot have maximum resolution, maximum frame rate, maximum stabilization, and maximum battery life all at once.
Something has to give.
Three core conflicts drive every decision. The first is heat. The GO 3S has no active cooling.
Recording 4K at 60 fps for more than 12 minutes can trigger an automatic shutdown. The second is storage. A 4K clip at 60 fps uses roughly 1 GB every 6 minutes.
The third is low light. The small sensor struggles in dim conditions. Pushing the frame rate higher makes the problem worse.
This camera was designed for short, punchy clips. Think 15 to 30 seconds. Not 45 minute talking heads.
The settings that work for a skateboarding trick will look terrible for a sunset timelapse. What works indoors under LED lights will be unusable in direct sunlight.
The goal is not one perfect setting. It is matching the right settings to the right moment. For a mountain bike run, prioritize stabilization and frame rate.
For a cooking tutorial, prioritize resolution and field of view. For indoors, prioritize exposure and noise control.
The most common regret is choosing the wrong resolution for the activity. People shoot everything in 4K at 60 fps and wonder why the camera overheats after 10 minutes. Or they shoot everything in 1080p and wonder why the footage looks soft.
Understanding the trade-offs beforehand saves you from these mistakes.
Remember that the GO 3S is a wearable camera. It is designed to be mounted on a hat, a chest strap, or a bike handlebar. The footage is often moving, shaking, or swinging.
Stabilization is not optional for most users. But stabilization also crops the image, which changes the effective field of view. That is a trade-off you need to know about before you start recording.
The Settings You Need to Understand Before You Start
Before you dive into the decision tree, you need to know what each setting actually does. The GO 3S has several key controls that interact with each other.
Resolution determines how much detail the camera captures. The GO 3S offers three options: 4K (3840×2160), 2.7K (2720×1536), and 1080p (1920×1080). Higher resolution means sharper footage, but it also means larger files, more heat, and shorter battery life.
For social media, 4K gives you room to crop and reframe in post. For quick clips that stay full frame, 1080p is often enough.
Frame rate controls how many still images the camera captures per second. Standard frame rates are 24, 25, 30, 50, 60, 100, and 120 fps. Higher frame rates create smoother motion but reduce low-light performance and increase file size.
The GO 3S can shoot 120 fps only at 1080p, not at 4K or 2.7K. That is a limitation you need to plan around.
Field of view (FOV) determines how much of the scene fits in the frame. The GO 3S offers Standard, Wide, Ultra-wide, and Linear modes. Standard is the most natural look.
Wide and Ultra-wide capture more of the scene but introduce distortion. Linear corrects the distortion but crops the image. For action shots, Ultra-wide gives a dramatic POV.
For vlogs, Standard or Linear keeps your face looking natural.
Stabilization smooths out camera shake. FlowState is the standard mode and works well for most situations. Horizon Lock keeps the horizon level even if the camera rotates a full 360 degrees.
But Horizon Lock crops the image more and uses more battery. Use FlowState for general use. Use Horizon Lock only when the camera is likely to spin around, like on a helmet mount.
Pro Video mode gives you manual control over ISO, shutter speed, and white balance. In auto mode, the camera makes these decisions for you. For most users, auto mode works fine.
But if you are shooting in tricky lighting or want a specific look, Pro mode lets you lock in the settings.
Here is a quick reference table for the main resolution and frame rate combinations:
| Resolution | Frame Rate | Use Case | Battery Life (approx) |
|---|---|---|---|
| 4K | 30 fps | All-purpose, social media | 45 minutes |
| 4K | 60 fps | Fast action, sports | 35 minutes |
| 2.7K | 30 fps | Good balance of quality and battery | 50 minutes |
| 2.7K | 60 fps | Action with better battery | 40 minutes |
| 1080p | 30 fps | Long clips, battery saving | 55 minutes |
| 1080p | 120 fps | Slow motion | 45 minutes |
These are rough estimates. Real-world battery life depends on temperature, stabilization mode, and whether you are using the app. The pattern is clear.
Higher resolution and higher frame rate drain the battery faster.
One important note about bitrate. The GO 3S does not give you manual control over bitrate. The camera uses a variable bitrate that adjusts based on the scene. A static talking head uses less storage than a fast-moving landscape.
If you are planning to edit your footage, know that the bitrate is sufficient for social media but not for professional cinema work.
The Decision Tree: Find Your Ideal Settings Based on What You're Shooting
This is the heart of the guide. Instead of one recommendation, we will walk through four common scenarios. Find the one that matches your situation and follow the branch.
Branch 1 – Action Sports & Fast Motion
You are mounting the GO 3S on a helmet, a bike handlebar, or a chest strap. You are moving fast, and the camera is shaking. Your priority is smooth footage with enough frame rate to capture the action.
Set resolution to 4K and frame rate to 60 fps. This gives you the best balance of detail and motion smoothness. Enable FlowState stabilization.
Do not use Horizon Lock unless the camera is likely to spin fully around, because it crops the image too much.
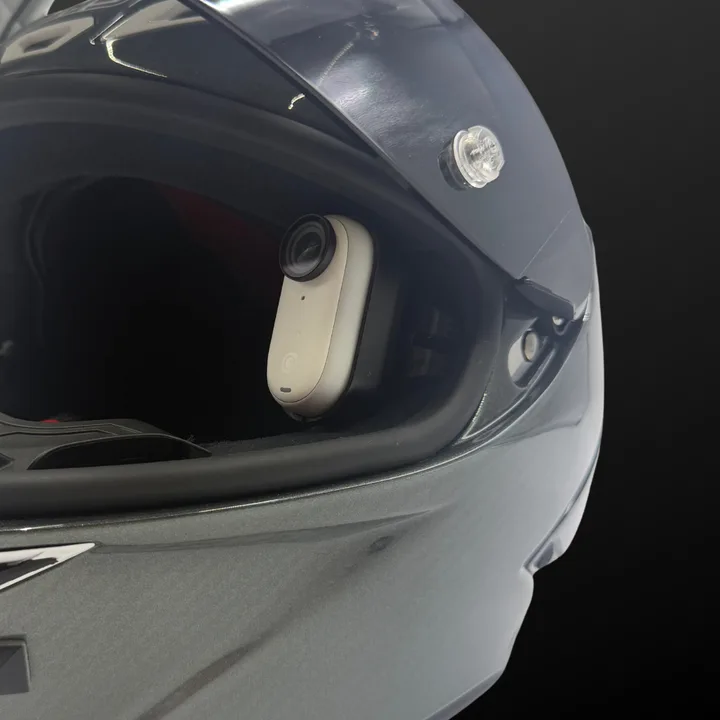
Image source: Bing (Web (fair-use with source credit))
If you want slow motion, switch to 1080p at 120 fps. This gives you 4x slow motion at 30 fps playback. You lose resolution, but the slow-motion effect is smooth and dramatic.
The 4K option does not support 120 fps, so this is your only choice for real slow motion.
If the camera is overheating, drop to 2.7K at 60 fps. The lower resolution produces less heat, and the difference in quality is hard to notice on a phone screen. You will get longer recording times and less risk of a shutdown.
If you are shooting in bright sunlight, you can use the full 4K at 60 fps without issues. The sensor handles bright light well. Just keep an eye on the camera temperature.
If it feels hot to the touch, give it a break.
Branch 2 – Vlogging, Talking Heads & Selfie Mode
You are holding the camera on a selfie stick or mounting it on a desk. You are talking to the camera. Your priority is a natural-looking image with good audio and a flattering field of view.
Set resolution to 4K and frame rate to 30 fps. This gives you the best image quality without the heat and battery drain of 60 fps. Enable FlowState stabilization.
Set the field of view to Standard or Linear. Wide and Ultra-wide will distort your face and make the background look stretched.
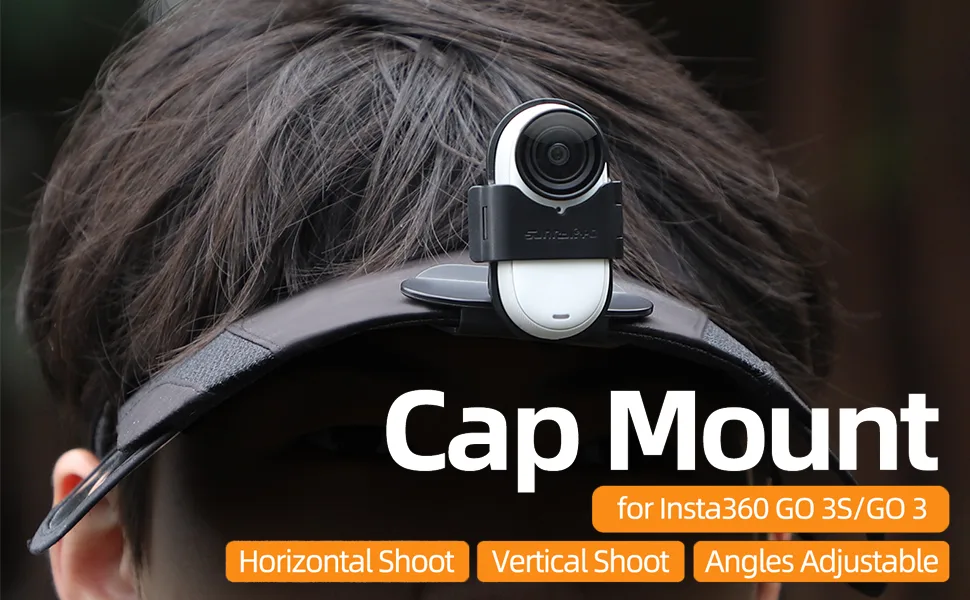
Image source: Bing (Web (fair-use with source credit))
If you are indoors, pay attention to lighting. The GO 3S struggles in low light, so add a lamp or shoot near a window. If the footage looks grainy, try dropping to 1080p at 30 fps.
The lower resolution hides some noise, and the camera handles it better.
If you are recording long clips, keep them under 15 minutes. The camera has a recording limit of 30 minutes at 4K, but it is better to stop and restart every 10 to 12 minutes. This gives the camera a chance to cool down.
If you want to use the selfie screen, remember that the flip screen only shows a preview. It does not affect the recorded footage. Use it to frame your shot, but trust the settings you have chosen.
Branch 3 – Low Light, Indoor & Night Scenes
You are shooting indoors, at dusk, or in a dimly lit room. Your priority is getting a usable image without too much noise or grain.
Set resolution to 1080p and frame rate to 24 or 30 fps. The lower resolution and frame rate let the sensor capture more light per frame. Enable FlowState stabilization.
Turn off any digital zoom, because it magnifies noise.
If you are shooting a static scene, mount the camera on a tripod or flat surface. Turn off stabilization entirely. Stabilization introduces micro-movements that can actually make static shots look worse.
Use the timer or the app to trigger the recording without touching the camera.
If the footage is still too dark, consider using Pro Video mode. Set the ISO to a maximum of 800. Higher than that introduces significant noise.
Set the shutter speed to 1/30 or 1/24. This lets in more light but can blur motion.
Do not expect miracles. The GO 3S is not a night camera. Its small sensor is fundamentally limited in low light. If you regularly shoot in dim conditions, this might not be the right camera for you.
For occasional use, these settings will get you a usable result.
Branch 4 – Timelapse, Hyperlapse & Long-Loop Recording
You want to capture a sunset, a busy street, or a long road trip. Your priority is battery efficiency and storage management.
Use the Timelapse mode in the app. Set the interval to 1 or 2 seconds for fast-moving scenes. Set it to 5 or 10 seconds for slow-moving scenes like clouds or shadows.
The camera will capture a frame at each interval and stitch them into a video.
For hyperlapse, walk with the camera mounted on a chest strap or hat. Use the Hyperlapse mode, which stabilizes the footage and speeds it up. Set resolution to 4K at 30 fps for the best quality.
The stabilization in hyperlapse mode is excellent.
For loop recording, use the Loop Recording mode. This continuously records and overwrites old footage, keeping only the most recent segment. It is useful for dashboard-style recording.
Set it to 5 or 10 minutes. Note that loop recording uses the same resolution and frame rate options as normal video.
Battery saving tips. For long timelapses, mount the camera and connect it to a power bank. The GO 3S can record while charging. This is the only way to get extended recording times.
Turn off the display and disable Wi-Fi when not needed.
How to Dial In the Settings: Step-by-Step Walkthrough
Now that you know which settings to use, here is how to actually set them on the camera. The process is slightly different depending on whether you are using the in-camera controls or the Insta360 app.
Using the camera directly. The GO 3S has a small touchscreen on the front. Swipe down to open the settings menu. Tap the resolution icon to cycle through the options.
Tap the frame rate icon to change it. The screen shows the current combination at the top. You can also tap the stabilization icon to toggle FlowState on or off.
Using the app. Open the Insta360 app on your phone. Connect to the camera via Wi-Fi. The settings menu is more detailed here.
You can access Pro Video mode, change the field of view, and adjust audio settings. The app also shows a live preview, which is helpful for framing your shot. If you need help setting up the camera for the first time, check our guide on getting started with the camera.
For Pro Video mode. In the app, tap the Pro Video toggle. This unlocks manual controls for ISO, shutter speed, and white balance. Set the ISO between 100 and 800.
Set the shutter speed based on your frame rate. A good rule is to use the reciprocal of the frame rate. For 30 fps, use 1/30.
For 60 fps, use 1/60. For white balance, use the presets or set a custom Kelvin value.
For stabilization. In the app, tap the stabilization icon. You will see FlowState and Horizon Lock options. FlowState is the default.
Horizon Lock is available only at certain resolutions and frame rates. The app will tell you if the current combination supports it.
For audio. The GO 3S has a built-in microphone. You can enable Wind Reduction in the app to reduce wind noise. Audio Zoom is also available and focuses the microphone on the subject.
These are useful for vlogging but not essential.
For storage management. The camera has internal storage of 32, 64, or 128 GB, depending on the model. You can check the remaining space in the app or on the camera screen. If you are running low, delete unwanted clips or transfer them to your phone.
Formatting the camera periodically helps maintain performance.
If you are new to the camera, take a few test shots. Try different settings and review the footage. The best way to learn is to see the results for yourself.
The camera is small and forgiving. Experimentation is part of the process.
Common Mistakes People Make with the GO 3S (and How to Avoid Them)
Even experienced users trip up on these. Here are the most frequent errors.
Using 4K at 60 fps for everything. This is the number one mistake. It drains the battery, heats up the camera, and fills your storage fast. Use 4K at 60 fps only for action.
For static shots, vlogs, or general use, 4K at 30 fps looks nearly identical and gives you longer recording time.
Forgetting to change the field of view. The GO 3S defaults to Ultra-wide. That fisheye look is great for action shots but terrible for vlogs. Your face looks distorted, and the background stretches unnaturally.
Switch to Standard or Linear for talking heads.
Leaving stabilization on when it is not needed. If the camera is mounted on a tripod, a desk, or any stable surface, turn off FlowState. Stabilization introduces micro-adjustments that can make a static shot look jittery. It also crops the image, so you lose some of the wide angle.
Ignoring the recording limit. The GO 3S stops recording after 30 minutes at 4K, and it can overheat before that. If you are recording a long event, stop and restart every 10 to 12 minutes. This gives the camera a chance to cool down.
For extended recording, connect a power bank and keep the camera in the shade.
Not updating the firmware. Insta360 releases firmware updates that improve stabilization, fix bugs, and add features. The GO 3S needs to be updated via the app. Check for updates every few months.
Outdated firmware can cause stuttering, glitches, and poor performance.
Shooting in low light without adjusting settings. The auto mode pushes the ISO too high, which creates noise. If you are indoors or at dusk, switch to 1080p at 30 fps and use Pro Video mode with a manual ISO of 400 to 800. The footage will be cleaner.
Mounting the camera incorrectly. The magnetic mount is strong, but it is not foolproof. For high-impact sports, use the included tether. If you are mounting on a helmet or bike, clean the surface thoroughly before attaching the adhesive mount.
A dirty surface means the mount will fail.
Forgetting to format the storage. Over time, the internal storage can get fragmented. Deleting files individually is not enough. Every few weeks, format the storage in the app or on the camera.
This keeps the file system clean and reduces the chance of errors.
Pro Tips: Squeeze More Battery Life, Avoid Overheating, and Save Storage
These tips come from manufacturer documentation and collective user experience. They are not in the manual, but they work.
Battery life extenders. Turn off the camera's display when you are not using it. The screen is a major power drain. Disable Wi-Fi when you are not transferring files.
The camera constantly searches for a connection otherwise. In the app, you can set the camera to auto-power off after 1 or 2 minutes of inactivity.
Heat management strategies. The GO 3S generates heat during recording, especially in 4K at 60 fps. To avoid overheating, keep the camera in the shade when not recording. If you are outdoors, point the camera away from direct sunlight.
The black body absorbs heat quickly. For long recording sessions, hold the camera in your hand, which acts as a heat sink.
Storage optimization. If you are shooting for social media, 1080p is often enough. The compression on Instagram, TikTok, and YouTube reduces the quality of 4K footage anyway. You save storage and battery without losing visible quality.
Use the Loop Recording mode for dashcam-style use. It overwrites old footage, so you never run out of space.
Using the app for editing. The Insta360 app has AI-powered editing tools that can reframe, stabilize, and color-correct your footage. Many users shoot in 4K and let the app handle the output. This gives you flexibility to crop and reframe in post.
The app handles the heavy lifting of stabilization, so you can shoot with less worry.
Recording in short bursts. Think of the GO 3S as a clip camera, not a camcorder. Record 15 to 30 seconds at a time. This gives you better footage, longer battery life, and less heat.
You can always stitch clips together in the app. The pause/resume feature is perfect for this.
Keeping the camera firmware updated. As mentioned earlier, this is critical. New updates often include better stabilization algorithms and improved battery management. Check the app for updates before every major shoot.
For detailed firmware instructions, refer to the official Insta360 support page.
Using the right accessories. The magnetic pendant mount is great for hands-free vlogging. The hat clip is excellent for POV footage. The suction cup mount works on cars, windows, and smooth surfaces.
Each accessory changes how the camera handles, and the settings should match. For example, a hat clip gives you a bobbing POV, so use FlowState stabilization. A suction cup mount on a car is stable, so you can turn stabilization off.
Checking the camera temperature. The camera will warn you if it is too hot, but you can feel it. If the body is warm to the touch, it is fine. If it is hot, stop recording and let it cool.
The camera will shut down automatically if it reaches a critical temperature, but you can avoid that by taking breaks.
For timelapses, use a power bank. The GO 3S can record while charging. This is the only way to capture long timelapses of sunsets, cloud movements, or construction projects. Mount the camera, plug it in, and let it run.
The camera will stop when the storage is full or the battery is disconnected.
Frequently Asked Questions
What is the best video setting for the Insta360 GO 3S?
For general use, 4K at 30 fps with FlowState stabilization. This gives you the best balance of quality, battery life, and heat management. For action, use 4K at 60 fps.
For slow motion, use 1080p at 120 fps.
Can the GO 3S shoot in 4K at 60 fps for long periods?
Not reliably. The camera can overheat after 10 to 15 minutes of continuous recording at 4K at 60 fps. For longer sessions, drop to 2.7K at 60 fps or 4K at 30 fps.
Take breaks to let the camera cool down.
How do I fix grainy footage on the GO 3S?
Grain comes from low light. Switch to 1080p at 30 fps and use Pro Video mode with a manual ISO of 400 to 800. Add extra light to your scene.
The small sensor cannot handle dim conditions well.
Does the GO 3S have a recording limit?
Yes. The camera stops recording after 30 minutes at 4K and 15 minutes at 4K at 60 fps. This is a firmware limit to prevent overheating.
You can restart recording manually.
How do I update the firmware on the GO 3S?
Open the Insta360 app on your phone. Connect the camera. Go to the settings menu and look for Firmware Update.
The app will check for updates and guide you through the process. Make sure the camera has at least 50 percent battery before updating.
Is the GO 3S waterproof?
No. It is splash-resistant. To use it underwater, you need the official dive case, which is sold separately.
Without the case, water damage is not covered by warranty.

Similar Posts