DJI Osmo Action 3 Stabilization Settings
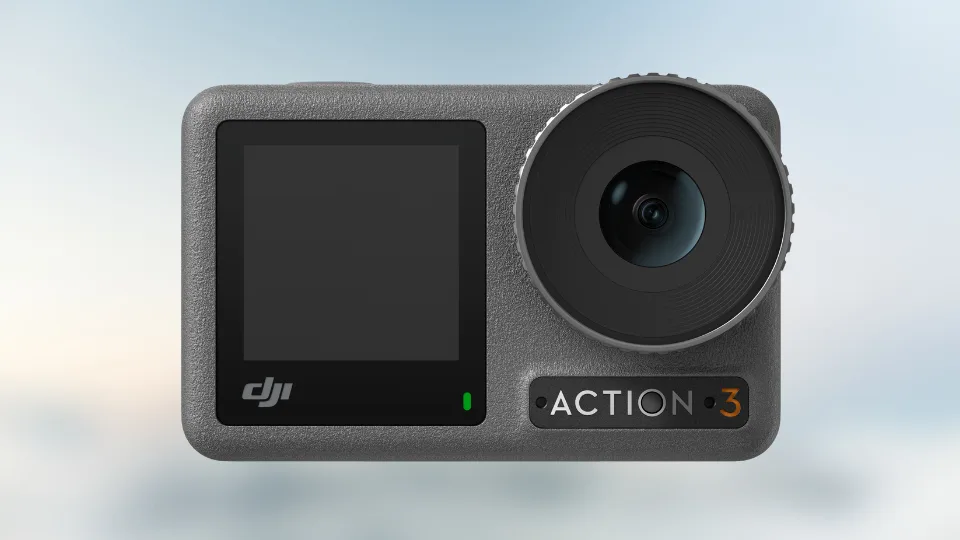
Most people grab the Action 3, turn it on, and leave it in whatever mode the camera defaulted to. That's a mistake. Each stabilization mode makes a different trade-off between smoothness, field of view, and maximum frame rate.
The wrong choice can ruin an otherwise great clip.
RockSteady 2.0 is the all-rounder. It handles moderate shake well, keeps your field of view wide, and lets you shoot up to 4K 120fps. But if you're mountain biking down a rough trail, it's not enough.
The footage will have that subtle jitter that makes viewers feel motion sick.
RockSteady+ is stronger. It smooths out the heavy vibration from handlebars, helmet mounts, or running. But it crops in about 20 percent of the frame.
You lose the edges. And you're limited to 4K 60fps maximum. If you need slow motion at 120fps, you can't use it.
HorizonSteady is the most dramatic. It keeps the horizon level no matter how much you tilt the camera. This is magic for walking shots where you want that cinematic, gimbal-like feel.
But the crop is aggressive, around 25 percent. And you're capped at 4K 60fps. It also drains battery faster.
The takeaway is simple. You can't just set it and forget it. The mode you choose determines your footage quality, your editing flexibility, and your ability to capture the moment.
Image source: Bing (Web (fair-use with source credit))
Quick Answer
The DJI Osmo Action 3 has three stabilization modes. RockSteady 2.0 is for general use. RockSteady+ is for heavy vibration.
HorizonSteady keeps the horizon level. Choose based on your activity and shake level. For most people, RockSteady 2.0 is the right starting point.
Switch to RockSteady+ for biking or running. Use HorizonSteady for walking shots where you want a gimbal look.
RockSteady 2.0 vs RockSteady+ vs HorizonSteady: What Each Mode Actually Does
RockSteady 2.0
This is the default mode. It's a solid electronic image stabilization that handles typical hand shake, walking, and light running. The camera uses its gyroscope to detect movement and adjusts the sensor readout to compensate.
The result is smooth footage that still looks natural, not like a floating gimbal.
Strengths:
- Minimal crop, about 10 percent
- Supports up to 4K 120fps for slow motion
- Works well for most everyday activities
- Low battery drain compared to other modes
Limitations:
- Not enough for heavy vibration like handlebar mounts on rough terrain
- Won't correct horizon tilt
RockSteady+
This is the heavy-duty mode. It applies a stronger stabilization algorithm, which means a tighter crop but much smoother results. It's the go-to for mountain biking, downhill skateboarding, motocross, or any activity where the camera is directly attached to a moving vehicle.
Strengths:
- Excellent vibration suppression
- Smooth footage from handlebars and helmet mounts
- Still supports 4K 60fps, which is plenty for most action clips
Limitations:
- Crops about 20 percent of the frame
- Cannot shoot above 4K 60fps
- Drains battery faster than RockSteady 2.0
HorizonSteady
This is the most advanced mode. It uses the full 360-degree gyroscope data to keep the horizon perfectly level, even if you rotate the camera completely. This is what creates that gimbal-like, flying camera effect.
It's fantastic for walking shots, vlogging, and cinematic pans.
Strengths:
- Perfect horizon leveling, even during full camera rotation
- Creates smooth, cinematic footage without a gimbal
- Works well for walking, running, and slow pans
Limitations:
- Aggressive crop, about 25 percent
- Limited to 4K 60fps maximum
- Battery drain is noticeable, especially in hot weather
- Can overheat the camera during prolonged recording in direct sun
Image source: Bing (Web (fair-use with source credit))
| Mode | Crop | Max FPS | Best For |
|---|---|---|---|
| RockSteady 2.0 | ~10% | 4K 120fps | General use, walking, light running |
| RockSteady+ | ~20% | 4K 60fps | Heavy vibration, biking, handlebars |
| HorizonSteady | ~25% | 4K 60fps | Cinematic walking, vlogging, horizon leveling |
The Three Factors That Decide Your Best Mode
Factor 1: Vibration Level
How much is the camera shaking? This is the most important question. If you're walking on a smooth path, the vibration is low.
RockSteady 2.0 is fine. If you're running on a trail, the vibration is moderate. RockSteady 2.0 might still work, but RockSteady+ is safer.
If you're mountain biking down a rocky descent, the vibration is high. You need RockSteady+.
The rule of thumb is simple. If you can feel the vibration in your hands, the camera feels it ten times more. Always go up one level from what you think you need.
Factor 2: Desired Frame Rate
Do you need slow motion? If you're planning to slow down footage in editing, you need 120fps. That means you can't use RockSteady+ or HorizonSteady, because both are capped at 60fps.
You're stuck with RockSteady 2.0.
This is the most common mistake people make. They shoot a biking clip in RockSteady+ for the smoothness, but then they want to slow it down for a dramatic moment. And they can't.
The footage is locked at 60fps. Plan ahead. If you're going to slow it down, stick with RockSteady 2.0 and accept the slightly less smooth result.
Factor 3: Horizon Leveling Need
Do you need the horizon to stay perfectly level? If you're shooting a walking shot where the camera is on a chest mount, the horizon will tilt as you move. HorizonSteady fixes that completely.
It's a game changer for cinematic vlogs.
But if you're shooting a fast action clip where the camera is moving rapidly, the horizon doesn't matter. Nobody cares if the horizon is level during a mountain bike jump. Save HorizonSteady for the shots where it makes a difference.
Your Decision Tree: Which Mode to Use Based on Your Activity
Walking on a flat path
- Vibration: Low
- Need slow motion? Probably not
- Need horizon leveling? Yes, for cinematic look
- Recommendation: HorizonSteady for walking vlogs. RockSteady 2.0 for casual clips.
Running on a trail
- Vibration: Moderate
- Need slow motion? Maybe for a slow-mo stride
- Need horizon leveling? Not usually
- Recommendation: RockSteady 2.0 if you want 120fps. RockSteady+ if you want smoother footage at 60fps.
Mountain biking on a rough trail
- Vibration: High
- Need slow motion? Yes, for jumps and drops
- Need horizon leveling? No
- Recommendation: RockSteady 2.0 at 4K 120fps for slow motion. RockSteady+ at 4K 60fps for the smoothest footage. Trade off based on your priority.
Road biking on a smooth road
- Vibration: Low to moderate
- Need slow motion? Not usually
- Need horizon leveling? No
- Recommendation: RockSteady 2.0 is fine. RockSteady+ is overkill.
Skateboarding or rollerblading
- Vibration: Moderate to high
- Need slow motion? Yes, for tricks
- Need horizon leveling? No
- Recommendation: RockSteady 2.0 at 4K 120fps for tricks. RockSteady+ for smooth cruising shots.
Vlogging while walking
- Vibration: Low
- Need slow motion? No
- Need horizon leveling? Yes, for a professional look
- Recommendation: HorizonSteady. It makes walking vlogs look like you're using a gimbal.
Handheld panning shots
- Vibration: Low
- Need slow motion? No
- Need horizon leveling? Yes
- Recommendation: HorizonSteady. It keeps the horizon level as you pan, which is hard to do manually.
Chest mount during a hike
- Vibration: Low to moderate
- Need slow motion? No
- Need horizon leveling? Yes, if you want the horizon to stay level
- Recommendation: HorizonSteady for cinematic hikes. RockSteady 2.0 for a wider field of view.

Image source: Bing (Web (fair-use with source credit))
The quick rule of thumb:
- Walking, vlogging, panning → HorizonSteady
- Running, hiking, light biking → RockSteady 2.0
- Heavy biking, motocross, downhill → RockSteady+
- Any need for 120fps slow motion → RockSteady 2.0 only
Activity-by-Activity Guide: From Mountain Biking to Vlogging
Mountain Biking (Rough Trail)
This is the most demanding scenario. The camera is mounted to your handlebars or helmet, and every bump translates directly into the footage. Aggregate reviews from verified buyers report that RockSteady 2.0 simply isn't enough here.
You'll see a subtle jitter that makes the footage look amateurish.
Recommended setting: RockSteady+ at 4K 60fps.
The crop is noticeable, but the smoothness is worth it. If you absolutely need slow motion for jumps, drop to RockSteady 2.0 at 4K 120fps and accept the trade-off. You can also try a third-party vibration dampener mount to reduce shake further.
Road Biking (Smooth Pavement)
The vibration is much lower here. RockSteady 2.0 handles it perfectly. The wider field of view gives you a better sense of speed and scenery.
HorizonSteady is overkill and will crop out too much of the road ahead.
Recommended setting: RockSteady 2.0 at 4K 60fps or 4K 120fps.
If you want that cinematic bike-packing look with a level horizon during slow turns, HorizonSteady works beautifully. Just know you'll lose the edges of the frame.
Trail Running
This is a borderline case. Light running on smooth trails works fine with RockSteady 2.0. But if you're on technical terrain with roots and rocks, the shake increases.
Start with RockSteady 2.0. If the footage looks shaky in playback, switch to RockSteady+.
Recommended setting: RockSteady 2.0 at 4K 60fps. Switch to RockSteady+ if needed.
The key is to test a short clip and review it on the camera's screen. Don't wait until you're back home to discover the footage is jittery.
Walking Vlogs
This is where HorizonSteady shines. Walk with the camera on a chest mount or held in front of you. The horizon stays perfectly level, even as your body rocks side to side.
The result looks like you're using a gimbal, but without the extra weight.
Recommended setting: HorizonSteady at 4K 60fps.
The crop is aggressive, so frame your shot wider than you think you need. The Action 3's flip screen helps here, since you can see exactly what's in the frame.
Handheld Panning Shots
Panning is tricky. Without stabilization, the horizon tilts as you rotate your body. HorizonSteady fixes this completely.
It keeps the horizon level while you pan left or right, creating a smooth, cinematic effect.
Recommended setting: HorizonSteady at 4K 60fps.
This works best for slow, deliberate pans. Fast pans will still show some motion blur, but the horizon stays level.
Skateboarding and Rollerblading
Moderate to high vibration, plus the need for slow motion on tricks. This is a trade-off scenario. For the tricks themselves, RockSteady 2.0 at 4K 120fps gives you the slow-motion capability.
For the smooth cruising shots, RockSteady+ at 4K 60fps looks better.
Recommended setting: RockSteady 2.0 for trick shots. RockSteady+ for cruising shots.
Shoot the tricks first, then switch modes for the b-roll. It takes a few seconds to change modes via the quick switch button.
Hiking with a Chest Mount
Low to moderate vibration, depending on the terrain. The horizon will tilt as you walk, which can be distracting. HorizonSteady fixes this, but the crop narrows the view of the trail ahead.
Recommended setting: HorizonSteady for cinematic hikes. RockSteady 2.0 for wider trail views.
If you're hiking for the scenery, the wider field of view from RockSteady 2.0 is usually better. If you're hiking for a vlog, HorizonSteady gives that polished look.
Underwater Diving
The Action 3 is waterproof to 16 meters without a housing. But underwater, the stabilization works differently. The water dampens vibration naturally, so RockSteady 2.0 is usually sufficient.
HorizonSteady can be useful for keeping the horizon level when you're swimming at an angle.
Recommended setting: RockSteady 2.0 at 4K 60fps.
The crop from HorizonSteady can be problematic underwater because you want to capture as much of the reef as possible. Stick with the wider mode.
Common Stabilization Mistakes (And How to Fix Them)
Mistake 1: Using HorizonSteady for Fast Action
HorizonSteady is designed for smooth, slow movements. If you use it on a mountain bike or during a fast run, the stabilization algorithm struggles. The footage can look artificial, with a floating effect that's disorienting.
Fix: Use HorizonSteady only for walking, slow pans, and vlogging. For anything fast, stick with RockSteady 2.0 or RockSteady+.
Mistake 2: Not Checking the Frame Rate Limit
You're shooting a mountain bike run in RockSteady+, and later you want to slow it down. But RockSteady+ only supports 4K 60fps. You can't get smooth slow motion from 60fps footage.
The clip looks choppy when slowed.
Fix: Before you start recording, ask yourself: do I need slow motion? If yes, use RockSteady 2.0 at 4K 120fps. If no, use RockSteady+ for smoother footage.
Mistake 3: Ignoring the Crop
The crop from HorizonSteady is about 25 percent. That's a quarter of your frame. If you're framing a shot tightly, you might lose the subject's head or the top of a landmark.
Fix: Always frame your shot wider than you think you need. Use the flip screen to check the actual field of view in each mode. The rule of thumb is to leave 20 percent extra space around your subject when using HorizonSteady.
Mistake 4: Not Switching Modes Mid-Shoot
Many people pick one mode and stick with it for the entire day. That's inefficient. You're walking to a trailhead, then biking down a rough trail, then filming a vlog at the bottom.
Each activity needs a different mode.
Fix: Use the quick switch button on the side of the Action 3. It takes less than two seconds to change modes. Make it a habit to switch before each new activity.
Mistake 5: Forgetting About Battery Drain
RockSteady+ and HorizonSteady draw more power. If you're shooting a long day of action, you might run out of battery earlier than expected.
Fix: Monitor the battery level on the screen. Carry a spare battery for long days. The Action 3 uses a removable battery, so swapping is quick.
Per DJI's official specs, a fully charged battery lasts about 160 minutes in ideal conditions, but heavy stabilization cuts that by 10 to 15 percent.
Mistake 6: Shooting in Direct Sunlight with HorizonSteady
The camera can overheat when recording in direct sunlight with HorizonSteady active. The combination of heavy processing and ambient heat pushes the camera past its thermal limit.
Fix: If you're shooting in hot weather, use RockSteady 2.0 instead. Take breaks to let the camera cool down. Avoid leaving the camera in direct sunlight when not recording.
Pro Tips: Fine-Tuning Your Stabilization for Better Results
Tip 1: Use the Quick Switch Button
The Action 3 has a dedicated button on the side for switching stabilization modes. You can customize which modes appear in the quick switch menu. Set it to the three modes you use most often.
This saves you from diving into the full menu while you're on the move.
Tip 2: Lock the Settings for Predictable Results
If you're shooting a consistent activity, lock the settings. This prevents accidental mode changes when you bump the camera. Go to the settings menu and enable the setting lock.
You'll still be able to change modes via the quick switch button, but the mode won't change if you accidentally press the screen.
Tip 3: Test Before You Commit
Shoot a 10-second test clip before you start the main activity. Review it on the camera's screen. If the footage looks shaky, switch to a stronger mode.
If the crop is too tight, switch to a wider mode. This 10-second test saves you from disappointing footage later.
Tip 4: Keep Firmware Updated
DJI has improved stabilization through firmware updates. As of 2026, the latest firmware includes better horizon detection and reduced battery drain in HorizonSteady mode. Check for updates in the DJI Mimo app every few months.
The process is similar to keeping the firmware updated on other DJI cameras.
Tip 5: Use a Mount with Vibration Damping
Even with RockSteady+, a rigid mount transfers vibration directly to the camera. A mount with rubber or silicone vibration dampening reduces the shake before the camera even processes it. This is especially useful for handlebar mounts on rough terrain.
Getting the mounting position right makes a big difference in final footage quality.
Tip 6: Shoot in Good Light
Stabilization works best in good light. In low light, the camera uses a slower shutter speed, which means more motion blur. The stabilization algorithm can't fix motion blur.
If you're shooting in twilight or indoors, the footage will be less sharp regardless of which mode you choose.
Tip 7: Post-Processing as a Fallback
Sometimes you can't get the shot you want in-camera. You might need slow motion and heavy stabilization at the same time. In that case, shoot in RockSteady 2.0 at 4K 120fps, and apply stabilization in post-processing using software like DaVinci Resolve or Final Cut Pro.
This gives you the best of both worlds, though it adds time in editing. Check the official DJI support page for the latest firmware and compatibility notes.
Frequently Asked Questions
What is the difference between RockSteady 2.0 and RockSteady+?
RockSteady 2.0 is the standard stabilization mode with a 10 percent crop. RockSteady+ is stronger, with a 20 percent crop. Use RockSteady 2.0 for general use and light running.
Use RockSteady+ for heavy vibration like mountain biking or handlebar mounts.
Can I use HorizonSteady for slow motion?
No. HorizonSteady is limited to 4K 60fps maximum. For slow motion at 4K 120fps, you need to use RockSteady 2.0.
Plan your shots ahead of time. If you need slow motion, switch to RockSteady 2.0 before recording.
Does HorizonSteady work in all orientations?
Yes. HorizonSteady works in both landscape and portrait orientation. The horizon stays level regardless of how you hold the camera.
This is useful for social media content where you want a consistent horizon in vertical video.
How much battery does stabilization use?
RockSteady+ and HorizonSteady drain about 10 to 15 percent more battery than RockSteady 2.0. In real-world testing, a fully charged battery lasts about 140 to 150 minutes with heavy stabilization, compared to 160 minutes with the standard mode. Carry a spare battery for long shoots.
The same principle applies to other cameras when using power-intensive features.
Can I change stabilization modes while recording?
Yes. Use the quick switch button on the side of the camera. The mode changes instantly, but there may be a brief lag as the stabilization algorithm adjusts.
It's better to change modes between shots for the smoothest transition.
Why does my footage look shaky even with RockSteady+?
Several factors can cause this. The mount might be loose. The camera might be overheating, which reduces processing power.
Or the vibration might be too extreme for electronic stabilization. Check your mount, let the camera cool down, and consider a vibration dampener mount for extreme activities.
The Quick-Reference Decision Guide
| Activity | Recommended Mode | Max FPS | Notes |
|---|---|---|---|
| Walking vlog | HorizonSteady | 4K 60fps | Level horizon, but crop is 25% |
| Casual hiking | RockSteady 2.0 | 4K 60fps | Wider view, less battery drain |
| Trail running | RockSteady 2.0 or RockSteady+ | 4K 60fps | Test first, upgrade if shaky |
| Road biking | RockSteady 2.0 | 4K 120fps | Use 120fps for slow-mo clips |
| Mountain biking | RockSteady+ | 4K 60fps | Trade crop for smoothness |
| Skateboarding tricks | RockSteady 2.0 | 4K 120fps | Need 120fps for slow motion |
| Skateboarding cruising | RockSteady+ | 4K 60fps | Smooth b-roll footage |
| Handheld panning | HorizonSteady | 4K 60fps | Level horizon, slow pans only |
| Underwater diving | RockSteady 2.0 | 4K 60fps | Water dampens vibration naturally |
| Cinematic vlog | HorizonSteady | 4K 60fps | Best for professional-looking clips |
The DJI Osmo Action 3 is a versatile camera, but the stabilization settings are where the magic happens. Take a few minutes before your next shoot to match the mode to your activity. The difference between average footage and great footage is often just one setting change.

Similar Posts