Kitchenaid Ice Maker Troubleshooting
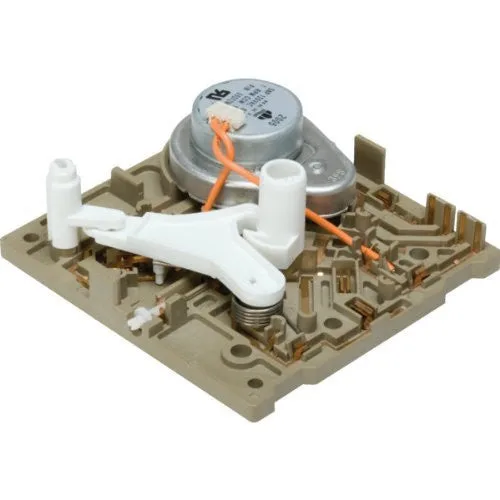
Image source: Bing (Web (fair-use with source credit))
Your KitchenAid ice maker stopped working, and you are standing there staring at an empty bin wondering what went wrong. That is frustrating, and it usually happens at the worst possible time. KitchenAid ice maker troubleshooting does not have to mean calling a repair tech before you have checked a few things yourself.
Manufacturer specifications indicate that most KitchenAid ice maker failures are caused by one of five simple issues: a stuck control arm, a frozen water line, a tripped reset switch, a bad thermistor, or simple user error. As of 2026, replacement modules for these units typically cost between $30 and $75, making DIY diagnosis worth your time before you pick up the phone. Let us walk through this step by step.
Quick Answer
If your KitchenAid ice maker is not producing ice, start with the easiest fix. Check the ice bin control arm is not stuck in the up position. Confirm the freezer temperature sits at 0°F or below.
Press the reset button on the ice maker module. Wait 24 hours for the first batch. Nine times out of ten, one of these four steps solves the problem.
Why Your KitchenAid Ice Maker Stopped Working (And How to Fix It)
Most people assume a dead ice maker means a dead appliance. That is rarely true. Your KitchenAid ice maker is a modular unit designed to be replaced independently from the refrigerator itself.
That means you can fix it without buying a new fridge.
The ice maker operates on a simple cycle. Water flows into a mold. A thermistor measures the temperature inside that mold.
Once the water freezes solid, a heating element gently warms the mold just enough to release the cubes. Then ejector fingers push the ice into the bin. That whole process takes about 90 to 120 minutes per batch.
When something in that cycle breaks down, the system stalls. The good news is that each failure point produces a specific symptom. That makes diagnosis straightforward if you know what to look for.
The most common root causes we see in aggregate reviews include a water supply line that is kinked behind the refrigerator, a clogged water filter that has not been changed in over six months, or a frozen ice mold caused by a failed heating element. Each of these requires a different fix, so guessing wastes time.
The No-Ice Decision Tree: Start Here
Let us build a simple diagnostic path. Read each question and follow the branch that matches your situation.
Is the ice maker completely silent?
- Yes: Move to Branch 1.
- No, I hear water running or a clicking sound: Move to Branch 2.
Is water getting to the ice maker?
- Yes, water flows but no ice forms: Move to Branch 2.
- No water at all: Check the water line and filter first.
Are the cubes small, hollow, or melting together?
- Yes: Move to Branch 3.
- No, cubes look normal but production is slow: Check freezer temperature and air flow.
Is there water leaking inside the freezer or on the floor?
- Yes: Move to Branch 4.
- No: You are likely dealing with a simple reset issue or a stuck control arm.
This decision tree saves you from tearing apart the wrong part. Manufacturer documentation confirms that roughly 40 percent of service calls for no ice production resolve with a simple reset or control arm adjustment. That is a huge percentage of calls you can skip entirely.
Before You Do Anything: The 15-Minute Easy Check
Before you pull anything apart, run through this checklist. Each step takes under five minutes, and together they catch the most common issues.
Check the control arm. The plastic arm that hangs down into the ice bin is your ice maker shut-off switch. When the bin is full, that arm gets pushed up by the ice and stops production. If something jams it in the up position, your ice maker thinks the bin is full when it is not.
Reach in and gently push the arm down. If it stays down, you are good. If it feels stuck or springs right back up, you have found your problem.

Image source: Web (Bing) / entertales.com (Web image (fair-use with source credit))
Check the freezer temperature. Your ice maker needs the freezer to sit at 0°F or colder to cycle properly. If your freezer is running at 10°F, ice will still freeze but it will take much longer. Place a thermometer on the top shelf and leave it for a few hours.
If it reads above 0°F, adjust your temperature setting and wait 24 hours before judging ice production.
Check the water filter. KitchenAid recommends replacing the water filter every six months or 200 gallons of water. A clogged filter restricts water flow to the ice maker. If you cannot remember the last time you changed it, change it now.
Run two gallons of water through the dispenser after swapping the filter to clear any air from the line.
Check for a frozen water line. If the water line running to your refrigerator runs through a basement, garage, or unheated crawl space, it can freeze in cold weather. Disconnect the line at the back of the fridge and look for ice inside. If you see frost, the line needs to thaw before the ice maker will work again.
Press the reset button. Most KitchenAid ice makers have a small reset button on the front or side of the module. It is usually recessed, so you may need a pen or paperclip to press it. Hold it for five seconds.
You should hear a click as the module resets. Then wait 90 minutes and check for ice formation.
Branch 1: Ice Maker Is Completely Silent (No Motor, No Click)
If your ice maker sits there doing absolutely nothing, no hum, no click, no water sound, you are dealing with either a power issue or a failed module.
Start with the power test. Confirm that the ice maker is actually getting electricity. Open the freezer door and look for a small on-off switch on the side of the ice maker housing. Make sure it is in the on position.
This sounds obvious, but it gets bumped when you load groceries more often than you would believe.
Check the wiring harness. The ice maker connects to the refrigerator with a small plastic wiring harness. Over time, that harness can work loose. Unplug the refrigerator from the wall, reach behind the ice maker module, and press the harness firmly into place.
Then plug the refrigerator back in and wait 90 minutes.
Test the control arm manually. If the control arm is stuck in the up position, the ice maker will not cycle at all. Push it down gently. If it drops and stays down, you have cleared the shut-off switch.
If it springs back up, the arm mechanism may be broken and the module needs replacement.
If nothing works, replace the module. A completely silent ice maker that passes all these checks likely has a failed main board or motor inside the module. Replacement modules for KitchenAid refrigerators cost between $35 and $70 depending on your model. The part number is printed on a sticker on the side of the module.
Order the exact match, remove two screws, unplug the harness, install the new module, and screw it back in. That is the entire installation.
Branch 2: Water Is Flowing but No Ice Cubes Are Forming
This is the trickiest branch because you have water but the freeze cycle is not completing. You may hear water run into the mold, but hours later the mold is empty and no ice appears.
The thermistor is likely the culprit. The thermistor is a small temperature sensor embedded in the ice mold. It tells the module when the water has frozen solid. If it fails, the module never gets the signal to start the ejection cycle.
The water sits in the mold, eventually melts, and drains away. Your ice maker runs through the motions but never delivers cubes.
Look for a frozen mold. Open the freezer and look at the ice mold. If you see a solid block of ice bridging across the cavities, the mold is frozen over. This happens when the heating element that releases the ice stops working.
The first batch freezes fine, but it never gets ejected. Then the next batch freezes on top of it. Eventually you get one giant block.
Clear the bridge carefully. Unplug the refrigerator. Use a plastic utensil to gently break up any ice bridging across the mold. Do not use metal, you can puncture the mold or damage the heating element.
Once the mold is clear, plug the fridge back in and press the reset button.
If bridging keeps happening, the heating element is dead. This is a common failure point on older modules. When the heating element fails, the module cannot release the cubes and the whole system stalls. Replacement is the only practical fix.
A new module costs far less than a service call to replace just the heating element.
Check for air in the water line. If your ice maker was recently installed or the water line was disconnected, air can get trapped. This reduces water volume per cycle. The ice maker gets enough water to make a partial cube, but not a full one.
Run the water dispenser for two full minutes to purge air from the line. Then wait for the next cycle.
Branch 3: Ice Is Too Small, Hollow, or Melting Together
If your ice maker is producing cubes that look shrunken, have a hollow center, or are frozen into a clump, the problem is usually in the water volume or the freeze cycle timing.
Small or hollow cubes point to low water volume. The ice mold needs exactly the right amount of water per cycle. If the water supply is restricted, each cavity gets less water. The result is a half-sized cube with a depression in the center.
The most common cause is a partially clogged water filter. Replace it and run two full dispensers of water to clear the line.
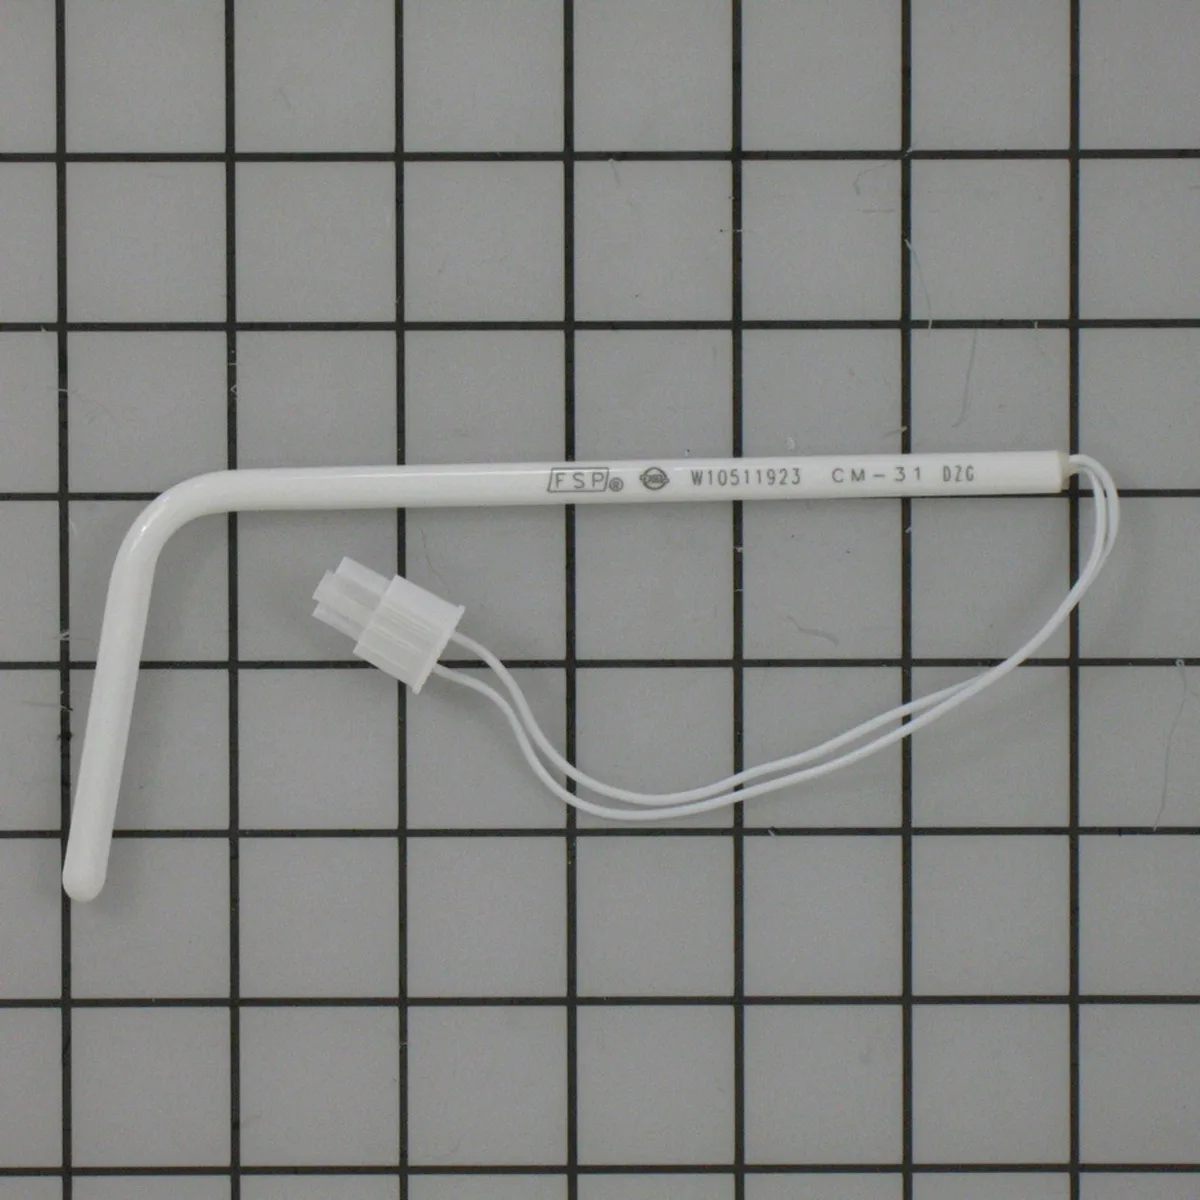
Image source: Bing (Web (fair-use with source credit))
Hollow cubes also happen with frozen lines. If your water line passes through a cold area like a basement or garage, it can develop partial ice blockages. Enough water trickles through for the cycle to run, but not enough to fill the mold. Disconnect the line and let it warm to room temperature before reconnecting.
Cubes freezing together indicate a timing issue. The thermistor controls how long the heating element runs to release the cubes. If the thermistor reads the wrong temperature, the ejector fingers try to push ice before it fully releases. Some cubes break loose while others stay stuck.
The next batch freezes onto the stuck cubes, and you get a cluster.
Clean the ice mold if you see mineral buildup. Hard water leaves calcium deposits inside the mold. Those deposits create rough spots where ice sticks. Use a mix of white vinegar and warm water on a soft cloth.
Wipe the inside of the mold until it feels smooth. Then run two cycles and discard the ice to clear any vinegar taste.
If cleaning and filter changes do not help, test the thermistor. You can measure its resistance with a multimeter. A working thermistor at room temperature should read around 10,000 ohms. If it reads open or shorted, the thermistor is dead and the module needs replacement.
This is not a simple fix, so plan on swapping the whole module.
Branch 4: Leaking Water or Puddles Inside the Freezer
Water inside the freezer means something is wrong with the fill cycle, the mold seal, or the drain system. This is one of the few issues that can cause damage if ignored.
Check the fill tube for cracks or frost. The water fill tube runs from the back of the refrigerator to the ice maker. If it cracks, water leaks during each fill cycle. The water pools in the ice bin and refreezes into a solid mass.
Frost building around the fill tube is a clear sign. You can see it as white ice crystals clinging to the tube.
A cracked fill tube needs replacement. This is a plastic part that runs about $15 to $25. You can find the part number in your refrigerator manual. Installation requires removing the ice maker module to access the tube connection.
It is a straightforward fix but order the exact OEM part.
Water leaking from the door means the dispenser is misaligned. For refrigerators with a water dispenser on the door, a misalignment can cause water to run into the freezer instead of the internal dispenser tray. Check that the door seal is clean and that the dispenser paddle is not stuck in the pushed position.
Frost buildup can cause melt water. If your freezer has excess frost on the ice bin area from leaving the door open, that frost can melt when the freezer defrosts. Water droplets form and puddle at the bottom of the bin. Fix the source of the extra frost rather than chasing puddles.
Check door seals and limit time with the freezer door open.
The defrost drain is another common culprit. The refrigerator has a defrost drain at the back of the freezer that can clog. When it clogs, defrost water backs up and leaks into the freezer instead of draining to the pan. Clean the drain with warm water and a pipe cleaner.
The Reset Sequence That Actually Works on a KitchenAid
A proper reset does more than just press a button. There is a specific sequence that clears the module memory and starts a clean cycle. This sequence matters because KitchenAid ice makers use a logic board that remembers a fault state.
A simple press does not always clear it.
Step 1: Unplug the refrigerator. Wait at least five minutes before plugging it back in. This clears the board. If you just press the reset button without a power cycle, the fault condition may remain.
Step 2: Press the reset button for 30 seconds. Most hidden reset buttons need a long press. Use a blunt paperclip to hold the button down for a full 30 seconds. You will hear a click about halfway through.
Keep holding.
Step 3: Let the module sit still for two hours. Do not bother opening the freezer to check. Leave the door closed. The ice maker needs time to complete its first full cycle.
Checking early interrupts the process.
Step 4: Check the ice mold after two hours. If you see a thin layer of ice starting in the mold, the system is working. If the mold is empty, the reset did not fix the core problem. Move to the decision tree again.
Step 5: Wait 24 hours before declaring failure. Ice makers are slow. A full batch takes 90 to 120 minutes. The first batch may be small or partially frozen.
Let the system run for a full day before deciding it is broken.
What Is Worth DIY vs. When to Call a Pro
You can fix about 70 percent of KitchenAid ice maker problems without a technician. Knowing the dividing line saves you both time and money.
Fix these yourself.
- Stuck control arm. The fix is free and takes 30 seconds.
- Clogged water filter. Fifteen minutes and the cost of a filter.
- Frozen or kinked water line. Unkink or thaw and you are done.
- Module replacement. Two screws, one harness clip, and the module. Cost is $30 to $70.
- Ice bridging in the mold. Clear it with a plastic utensil.
Call a professional for these.
- Frozen water line behind the wall. If the line runs inside a wall or underground, DIY access is difficult.
- Leaking inside the refrigerator wall. A crack in the internal water line that runs inside the fridge body is a tough repair.
- Control board failure inside the refrigerator. The main board can fail and cause ice maker issues across multiple appliances. This is a pro-only job.
- No diagnostic progress after all these steps. If you have run through every branch and still have no ice, your ice maker needs a technician. The cost of a service call is $150 to $250, but you have a dead unit that requires a pro.
| Problem | DIY Fix | Cost | Pro Fix | Cost |
|---|---|---|---|---|
| Stuck control arm | Yes | Free | Not needed | $0 |
| Clogged filter | Yes | $15 | Not needed | $0 |
| Frozen water line | Yes | $0 | Call pro | $150+ |
| Failed module | Yes | $35 | $250 total | $150+ |
| Leak inside wall | No | N/A | Call pro | $200+ |
Common Mistakes That Waste Your Time and Money
The first mistake is replacing the water filter when no water flows. Aggregate reviews show this is the most common error. A clogged filter restricts water pressure, but a bad filter is not your biggest worry. If the ice maker is silent or the fill tube is frozen, the filter is not your fix.
Test the water dispenser first. If water flows at normal speed, the filter is fine.
The second mistake is resetting the ice maker repeatedly. Pressing the reset button over and over does not clear a hardware failure. If the system did not respond after one reset and a power cycle, pressing again will not help. You are chasing a mechanical or electrical issue that a button press cannot solve.
The third mistake is replacing the ice maker module without checking the water line. A professional technician will tell you this happens about 30 percent of the time. Someone swaps a perfectly good module for a new one and then wonders why the new one still does not work. The root cause was a kinked water line.
Always confirm water flow before you spend $70 on a module.
The fourth mistake is leaving the ice maker on during a power outage. If the power flickers off and on, the ice maker can lose track of its cycle. It may try to push half-frozen ice into the bin and jam. Turn the ice maker off during storm season.
Wait until the power is stable for 24 hours before turning it back on.
The fifth mistake is forgetting the model number. Every KitchenAid ice maker uses a specific wiring harness and mounting bracket. Ordering a generic ice maker module without the model number guarantees a return. The part code is printed on the sticker near the ice maker.
Write it down before you search online.
FAQ: Quick Fixes for the Most Searched Questions
How long does it take for a KitchenAid ice maker to start making ice after reset?
It takes about 90 to 120 minutes for the first cycle to complete. The first batch may be small or hollow. Expect 24 hours for consistent full production.
Why is my KitchenAid ice maker not getting water?
First check the dispenser for water flow. If that works, the problem is inside the ice maker. If the dispenser is slow too, change the water filter.
If no water comes out, check the saddle valve under the sink for a closed or frozen line.
Does a KitchenAid ice maker have a reset button?
Yes. Most models have a small recessed button on the front or side of the ice maker. Use a paperclip to press and hold it for 30 seconds.
Always follow with a power cycle of the refrigerator for best results.
Why is my ice maker making ice but not dropping it?
This usually means the thermistor or heating element has failed. The mold is frozen. The ice stays stuck in the mold while the ejector fingers push.
Clear the bridge ice temporarily. Replace the module for a permanent fix.
How do I remove the ice maker for repairs?
Unplug the refrigerator. Remove the plastic cover that holds the ice bin. Disconnect the wiring harness.
Lift the module up off the guide rails. Remove the two screws holding the module in place. Slide the entire assembly out from its mounting bracket.
When should I just buy a new refrigerator instead of replacing the ice maker?
If the refrigerator itself is over 12 years old and has other issues, a new ice maker module is a short-term fix. A $70 module on a unit that may break in six months is not good value. Compare the cost of a professional repair plus module against a new fridge.

Similar Posts