Prevena Wound Vac Troubleshooting
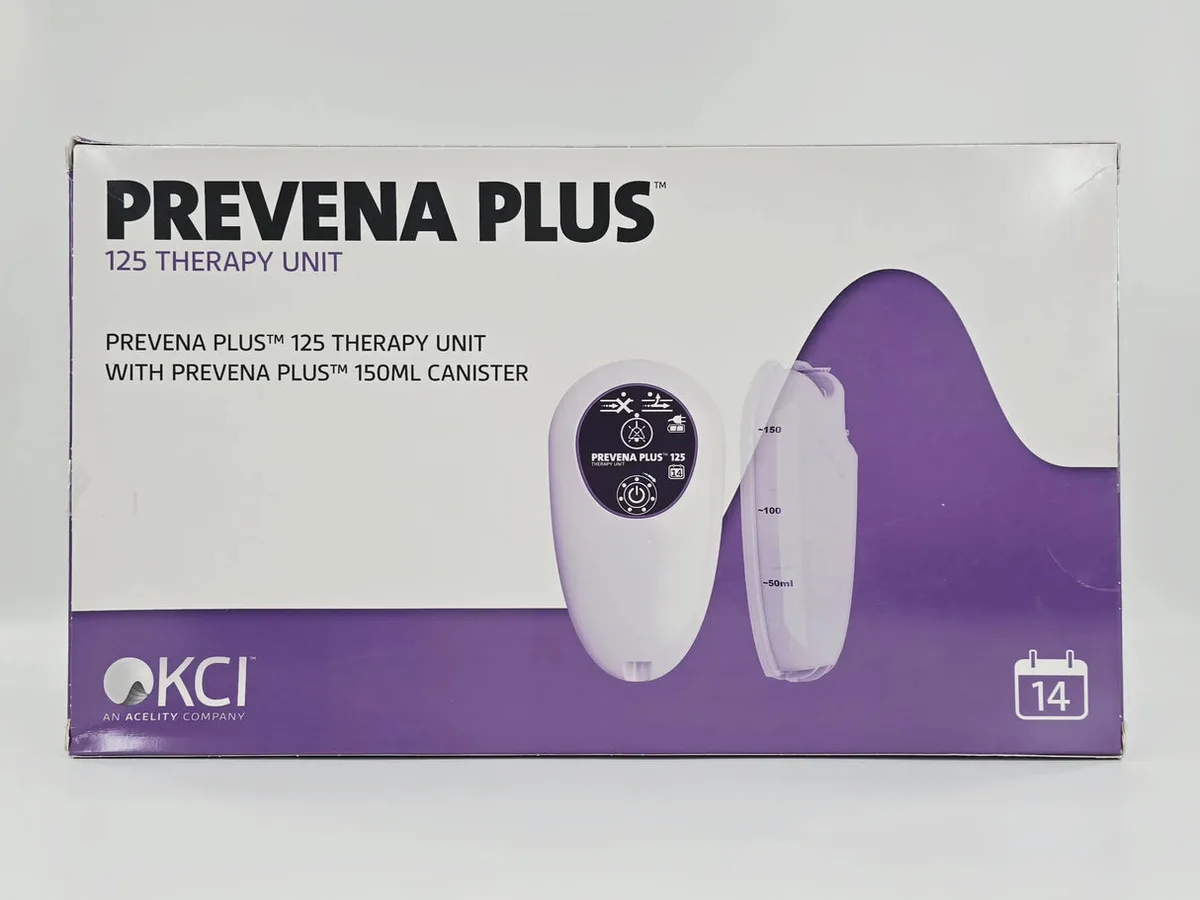
Image source: Bing (Web (fair-use with source credit))
Your wound vac starts beeping in the middle of the night. You check the tubing. You check the canister.
Nothing looks wrong, but the alarm keeps going. If you've been through this with a Prevena system, you know exactly how frustrating that moment is. Prevena wound vac troubleshooting is something nurses, home health aides, and even patients end up dealing with more often than you'd expect.
According to manufacturer documentation from 3M/KCI, the Prevena Plus system is designed to deliver continuous negative pressure at -125 mmHg for up to 7 days per dressing change. But in practice, seal failures and alarm triggers happen frequently. Knowing how to respond safely matters.
Quick Answer
Prevena wound vac troubleshooting starts with checking three things. First, inspect the dressing seal around the edges. Second, look for kinks or compression in the tubing.
Third, verify the canister is seated properly and not full. Most alarms come from a leak at the dressing edge. If the seal looks good and the tubing is clear, power cycle the unit by turning it off for 10 seconds and restarting.
Persistent alarms after these steps require a wound care nurse evaluation.
Why Getting Prevena Troubleshooting Wrong Can Be Dangerous
This is not a "try a few things and see what happens" situation. A wound vac is a medical device managing a surgical incision. Getting troubleshooting wrong can cause real harm.
The Prevena system works by pulling fluid and air out of a closed surgical incision. It reduces edema, removes drainage, and holds the wound edges together. If the seal breaks or the pressure drops, that protection disappears.
The incision becomes vulnerable to fluid accumulation, seroma formation, and infection.
A 2020 meta-analysis in the International Wound Journal found that closed incision negative pressure therapy significantly reduced surgical site infections compared to standard dressings. But that benefit depends entirely on the system maintaining consistent negative pressure. Intermittent pressure loss means intermittent protection.
Risk of Fluid Backup
If you disconnect the tubing without clamping it first, fluid can flow backward into the dressing. That fluid came from the wound. Introducing it back into the incision increases infection risk.
Manufacturer instructions are clear: always clamp the tubing before disconnecting.
Risk of Skin Damage from Adhesive
The Prevena dressing uses a silicone adhesive that can be aggressive. If you repeatedly lift and reseal the dressing to check for leaks, you risk tearing the skin. This is especially true for older patients, patients on steroids, or anyone with fragile skin.
Once the skin is damaged, maintaining a seal becomes nearly impossible.
Risk of Delayed Recognition of Wound Complications
A false alarm that keeps beeping can train you to ignore it. You assume it is "just a leak" again. But sometimes that alarm means something is genuinely wrong.
A full canister, an occlusion in the tubing, or a dressing that has completely lost seal all need attention. If you dismiss the alarm without checking, you can miss a wound that is bleeding, infected, or failing to heal.
Risk of Infection Spread
Negative pressure therapy on an infected wound can spread bacteria deeper into tissue. The Prevena system is cleared for closed surgical incisions only. If the incision shows signs of infection like redness spreading, purulent drainage, or warmth, stop the therapy and contact a clinician.
Troubleshooting the device instead of treating the infection is a dangerous mistake.
Risk of Battery Failure at the Wrong Time
The Prevena Plus battery lasts 8 to 10 hours per charge according to manufacturer specs. If the unit is running on battery and the alarm wakes you up, you might not know the battery is low. The system can shut off completely.
That means hours without negative pressure on the wound overnight. Always confirm the unit is plugged in when possible and check the battery indicator regularly.
How the Prevena System Works — The Basics You Need to Know
Before you can troubleshoot, you need to understand what the device is actually doing. The Prevena system is not complicated, but the components work together in a specific way.
The system has four main parts. The dressing, the tubing, the canister, and the therapy unit.
The Dressing
The Prevena Peel and Place dressing is a multi-layer foam pad with a silicone adhesive border. It applies directly over the closed incision. The foam layer distributes negative pressure across the wound.
The adhesive creates an airtight seal around the edges.
The dressing comes in different sizes. You match the size to the incision length. The dressing also has a built-in port where the tubing connects.
That port is part of the dressing. You do not attach anything to it. It is ready to go out of the package.
The Tubing Set
The tubing connects the dressing port to the canister. It is a single, clear plastic tube. You cannot cut it or modify it.
The tubing has a clamp on the patient end. That clamp is important for safe disconnection.
The tubing is the most common site for problems. It kinks. It gets compressed under bedding.
It gets pulled when the patient rolls over. All of those things trigger occlusion alarms.
The Canister
The canister collects wound fluid. It holds 300 milliliters. The canister has a filter that prevents fluid from reaching the therapy unit.
The filter can become saturated if the canister is overfilled or if the fluid is very thick.
The canister snaps into the therapy unit. If it is not seated correctly, the system will not start. The canister is single use.
You do not empty it. You replace the entire canister when full and dispose of the old one per medical waste guidelines.
The Therapy Unit
The therapy unit is the pump. It creates negative pressure by pulling air out of the sealed system. The unit runs on AC power or internal battery.
It has a control panel with a power button, a silence button, and indicator lights.
The unit delivers continuous negative pressure at -125 mmHg. Some models also offer intermittent mode, which cycles pressure on and off. The default setting for the Prevena Plus on closed incisions is continuous.
The unit monitors pressure inside the dressing. If the pressure drops below a certain threshold for a set time, an alarm triggers. That alarm is your signal that something is wrong.
How the Pressure Loop Works
Think of the system as a closed loop. The dressing seals the wound. The tubing connects the dressing to the canister.
The canister connects to the pump. The pump pulls air out, creating negative pressure. The dressing collapses slightly against the wound, holding it together and drawing fluid out.
Any break in that loop causes a pressure drop. A leak at the dressing edge. A crack in the canister.
A loose tubing connection. The pump detects the drop and alarms.
Understanding this loop is the foundation of Prevena wound vac troubleshooting. Every alarm is telling you that the loop is broken somewhere. Your job is to find where.
The Most Common Prevena Problems and What They Actually Mean
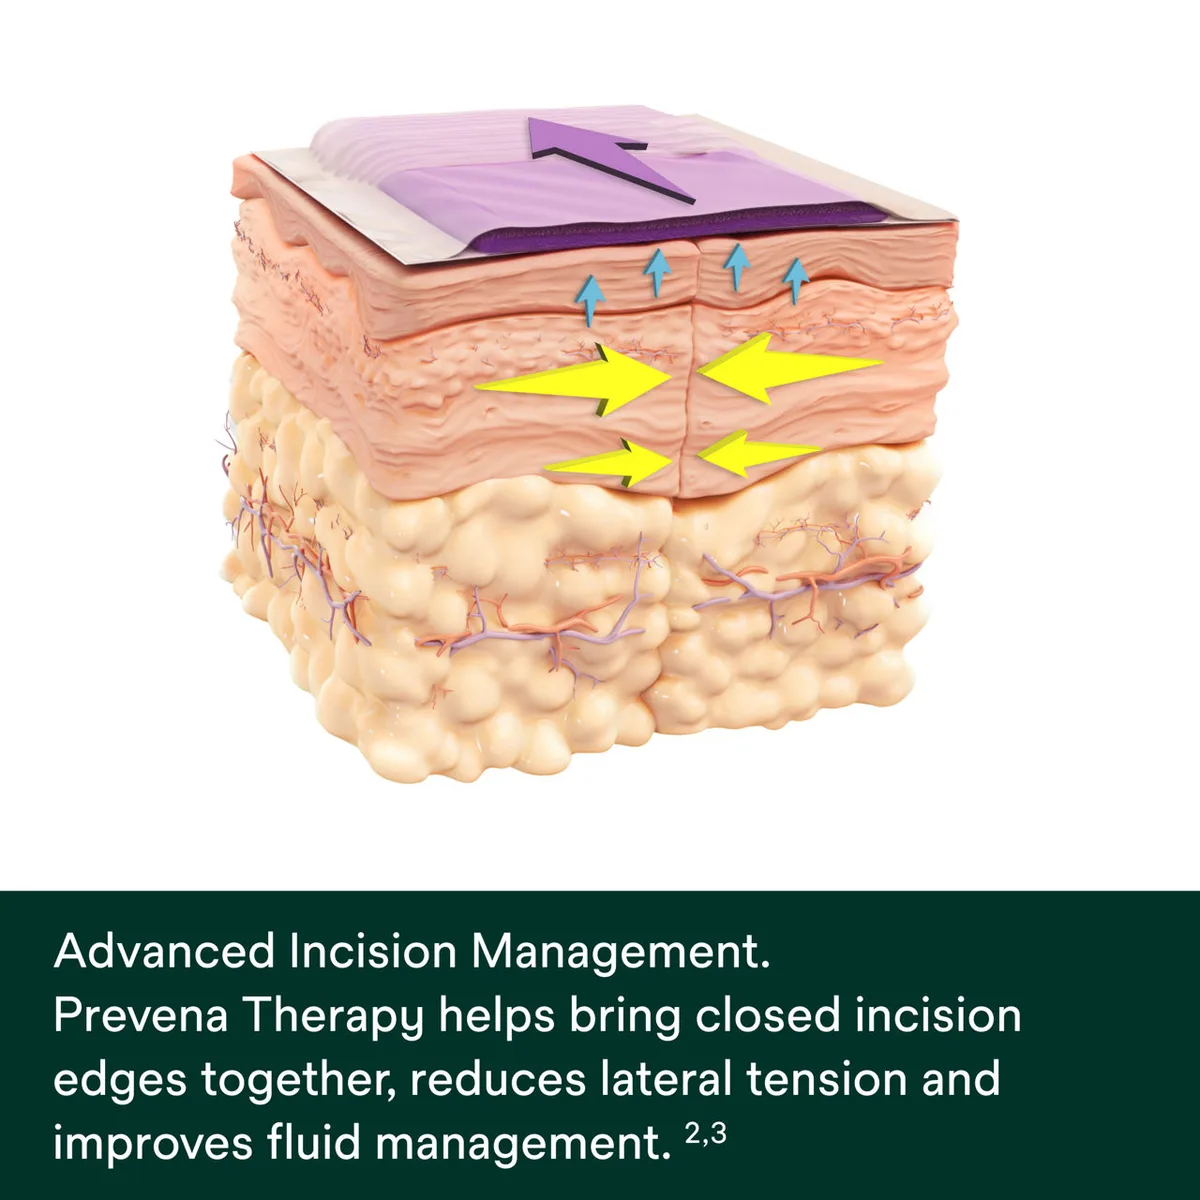
Image source: Bing (Web (fair-use with source credit))
Now let's get specific. There are four main categories of problems with the Prevena system. Each one sounds different, behaves differently, and requires a different response.
Dressing Seal Failure
This is the most common problem by far. Aggregate clinical feedback and nursing best practice documentation indicate that dressing seal failure accounts for roughly 70 percent of Prevena alarms.
The dressing loses its edge seal. Air gets in. The pump cannot maintain negative pressure.
The alarm sounds.
Why it happens:
- The incision is in a location that bends, like the groin, shoulder, or abdomen.
- The patient has oily or sweaty skin, which weakens the adhesive.
- Hair was not shaved adequately before dressing application.
- The dressing was applied over a skin fold or crease.
- The dressing has been on for several days and the adhesive is degrading.
What it sounds like:
A soft hissing sound near the dressing edge. The alarm beeps intermittently, often when the patient moves. The pressure indicator on the unit shows fluctuating numbers.
Tubing Occlusion
A blocked tube triggers a different kind of alarm. The pump cannot pull air because something is blocking the path.
Why it happens:
- The tubing is kinked under the patient's body or bedding.
- The tubing is compressed by a bedrail, seatbelt, or chair arm.
- Blood or thick fluid has clotted inside the tube.
- The dressing port is blocked by wound debris or folded foam.
What it sounds like:
A steady, continuous alarm. The pressure indicator shows a high negative pressure reading because the pump is working against the blockage. When you look at the tubing, you can often see where it is pinched.
Canister Issues
The canister is a potential failure point that people often overlook.
Why it happens:
- The canister is full. The 300 mL capacity has been reached.
- The canister filter is saturated. This happens with thick, viscous wound fluid or if the canister was tipped.
- The canister is not snapped into the unit correctly. The pump cannot create vacuum.
What it sounds like:
An alarm that starts suddenly and stays on. The canister full indicator light is lit. If the filter is saturated, you might see moisture in the tubing above the canister.
Battery or Power Problems
The Prevena Plus runs on AC power or internal battery. Power problems cause the system to stop working entirely.
Why it happens:
- The AC adapter is unplugged or disconnected.
- The battery is depleted. Eight to ten hours of runtime is the max.
- The patient was moved and the unit was unplugged but not switched to battery.
What it sounds like:
The unit goes silent. No pump sound. No lights.
If the battery is critically low, the unit may beep a low battery warning before shutting down.
Step-by-Step Troubleshooting: From Alarm to Fix
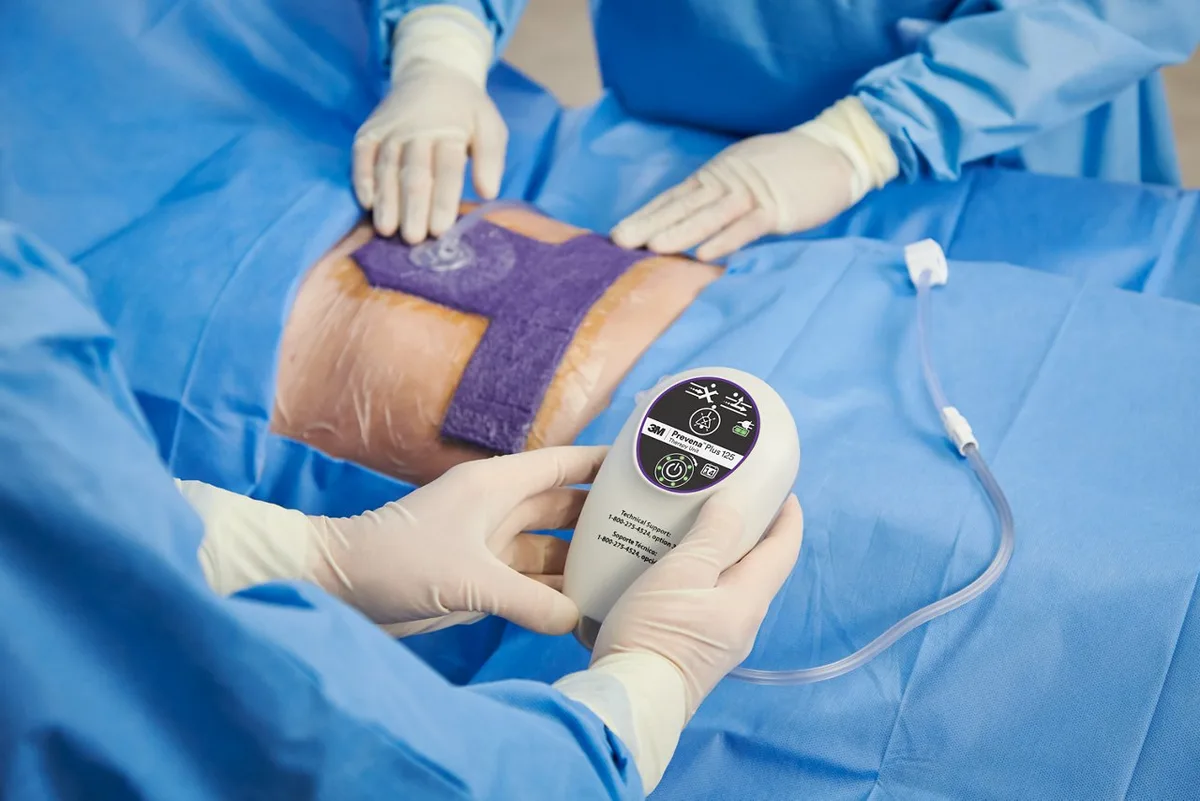
Image source: Bing (Web (fair-use with source credit))
When that alarm goes off, follow this sequence. Do not skip steps. Do not jump to conclusions.
Work through the checklist in order.
Step 1: Look at the Display
Before you touch anything, read the indicator lights on the therapy unit. The Prevena Plus has specific lights for different problems.
| Indicator | What It Means |
|---|---|
| Yellow flashing alarm | Leak detected. Pressure is too low. |
| Red steady alarm | Occlusion detected. Pressure is too high. |
| Canister full light (yellow) | Canister is at capacity. |
| Battery light (yellow flashing) | Less than 30 minutes of battery remaining. |
This tells you what category of problem you are dealing with. A leak alarm and an occlusion alarm are not the same thing.
Step 2: Check the Dressing Seal
Press the silence button to stop the beeping. Then run your hand gently around the entire edge of the dressing. Feel for lifted edges.
Listen for a hissing sound.
If you feel a lifted edge, press it down firmly for ten seconds. Body heat helps the adhesive bond. If the edge stays down, the system should re-establish pressure within 30 seconds.
If it lifts again, you have an ongoing seal problem.
Step 3: Inspect the Tubing
Follow the tubing from the dressing port to the canister. Look for kinks, bends, or compression. Run your fingers along the entire length.
Patients often lie on the tubing without realizing it.
If you find a kink, straighten it. If the tubing is under the patient, reposition the tubing so it runs freely. Check where the tubing exits the dressing.
The port can bend at a sharp angle if the dressing is placed in a difficult location.
Step 4: Check the Canister
Look at the fluid level. If the canister is close to the 300 mL fill line, replace it. If the canister is not full but the filter appears wet or saturated, replace the canister.
Press down on the canister to confirm it is fully seated. You should hear a click. If the canister is loose, press it firmly into place.
Step 5: Power Cycle the Unit
If steps 1 through 4 did not resolve the alarm, turn the unit off. Wait ten seconds. Turn it back on.
The unit will run a self-check. This clears transient alarms and resets the pressure monitoring.
If the alarm returns immediately after power cycling, the problem is ongoing. Do not keep resetting it. Move to step 6.
Step 6: Clamp and Reconnect
If you suspect a tubing connection issue, clamp the tubing at the patient end near the dressing port. Disconnect the tubing from the canister. Reconnect it firmly.
Unclamp the tubing. See if the alarm clears.
If it does not, the problem is either in the dressing itself or in the therapy unit. Both require clinical intervention.
Step 7: When to Stop
Do not attempt to remove the dressing to check the wound unless you are a trained wound care professional. Do not cut the tubing. Do not open the therapy unit.
Do not try to repair a cracked canister.
If you have gone through steps 1 through 6 and the alarm persists, or if the wound looks different than it did before, contact the wound care nurse or the clinician managing the case. That is not failure. That is appropriate escalation.
Step 8: Document What Happened
Write down what you observed. Which alarm triggered. What you checked.
What resolved it or did not. That information helps the next nurse or clinician understand what is going on with the wound and the device.
When to Stop Troubleshooting and Call a Wound Care Nurse
Not every problem can be fixed at the bedside. Knowing when to stop and call for help is just as important as knowing what to check.
Call the wound care nurse if any of these conditions are true:
- The alarm persists after all steps in the checklist have been followed.
- The dressing is visibly loose or has lifted more than one edge.
- The wound appears red, swollen, or has new drainage that looks different.
- The patient reports new or worsening pain under the dressing.
- The tubing is cracked or the dressing port is damaged.
- The therapy unit displays an error code that does not match the standard alarm indicators.
- The canister cannot be seated properly or the filter is clearly saturated.
Do not keep cycling the unit. Do not retape the dressing with medical tape unless specifically instructed by the clinician. The dressing is designed as a single sealed unit.
Adding tape can actually create new leak paths or trap bacteria.
When you call, have the following information ready:
- How long the alarm has been sounding.
- What steps you already tried.
- The alarm light color and pattern.
- The patient's current pain level and wound appearance.
This helps the nurse make a faster decision about what to do next. In many cases, the nurse will come to assess the dressing or arrange a dressing change. In some cases, the therapy may need to be discontinued and the wound managed differently.
What Not to Do: Common Mistakes That Make Things Worse
Troubleshooting mistakes happen when people are tired, frustrated, or in a hurry. Here are the ones that cause the most harm.
Do Not Ignore the Alarm
The most common mistake is pressing the silence button and walking away. The alarm will resound after the silence period. Meanwhile, the wound is not getting the pressure it needs.
If you cannot resolve the alarm within a few minutes, call for help.
Do Not Use Tape to Fix the Dressing
Medical tape is not designed for negative pressure. It can lift, wrinkle, or create micro-leaks. Some tapes can irritate the skin under the dressing.
If the dressing edge is lifting, the correct fix is to replace the dressing, not patch it.
Do Not Disconnect the Tubing Without Clamping
This is the most dangerous mistake. Unclamped disconnection allows air to rush into the dressing and fluid to drain backward. Always clamp the tubing first, then disconnect.
Reclamp before reconnecting.
Do Not Let the Canister Overflow
The canister has a fill line at 300 mL. Once fluid reaches the filter, the filter can become saturated. A saturated filter stops the pump from creating vacuum.
You cannot unclog a saturated filter. You have to replace the entire canister. Check the canister level at least once per shift.
Do Not Place the Tubing Under the Patient
This sounds obvious, but it happens constantly. The patient rolls onto the tubing, compressing it. The pump reads an occlusion.
The alarm goes off. Keep the tubing free and visible. Route it over the patient's gown or bedding, not under.
Do Not Use the Device After the Expiration Date
Prevena dressings and canisters have expiration dates printed on the packaging. Expired adhesive may not seal properly. Expired canisters may have compromised filters.
Check the date before applying a new dressing.
Do Not Attempt to Reuse Single-Use Components
Every dressing, canister, and tubing set is single-use. Reusing them increases infection risk and decreases therapy effectiveness. Dispose of used components according to your facility's medical waste policy.
Understanding Prevena Alarm Codes at a Glance
The Prevena Plus therapy unit uses a combination of light colors and patterns to communicate what is wrong. Here is a quick reference.
| Light Color | Pattern | Meaning | Action |
|---|---|---|---|
| Yellow | Flashing | Low pressure / leak | Check dressing seal and tubing |
| Red | Steady | High pressure / occlusion | Check for kinked or blocked tubing |
| Yellow (canister icon) | Steady | Canister full or filter saturated | Replace canister |
| Yellow (battery icon) | Flashing | Low battery | Plug in AC power |
| No light | None | Unit off or dead battery | Check power connection or replace battery |
Some models also produce a three-beep sequence on startup to confirm the unit is functional. If the unit does not beep at all when turned on, the battery may be completely drained or the unit may be faulty.
If you see a light pattern not listed here, consult the clinician guide that came with the device or call the manufacturer's technical support. Do not guess.
Keeping the Dressing Sealed Longer — Pro Tips from Wound Nurses
A well-applied Prevena dressing can last the full seven days. But a poorly prepared skin surface can cause failure within hours. Here is what wound nurses do to maximize dressing longevity.
Prepare the Skin Properly
Before the dressing goes on, the skin around the incision must be clean and dry. Remove any adhesive residue from previous dressings. Use an adhesive remover wipe if needed.
Apply a skin barrier wipe or film around the incision site. This protects the skin from the adhesive and helps the dressing stick. Let the barrier dry completely before applying the dressing.
This takes about 30 seconds.
Shave Hair, Do Not Clip
Hair under the adhesive creates channels for air to leak. Use an electric shaver, not a razor. Razors cause micro-cuts that can bleed under the dressing.
Shave at least two inches around the incision site.
Avoid Placing the Dressing Over Skin Folds
If the incision is near the groin or abdomen, the dressing may need to be placed carefully to avoid creases. A wound nurse can cut the dressing to fit around skin folds if needed. Do not cut the dressing yourself unless trained to do so.
Use Additional Barrier Products if Needed
For patients with very oily skin, some clinicians use extra skin prep or adhesive enhancer wipes. These products are available from the manufacturer and should be used according to instructions.
Monitor the Patient's Position
In the first 48 hours after surgery, patients often shift in bed. This movement can stress the dressing edges. Encourage the patient to avoid lying directly on the dressing.
Pillows can help offload pressure.
Check the Dressing Twice Per Shift
At minimum, inspect the dressing edges and the tubing route once per shift. Early detection of a lifted edge gives you time to call for a dressing change before the alarm sounds.
Know When to Replace Early
If the dressing has been on for five or six days and begins to lift at the edges, replace it rather than trying to reseal it. The adhesive loses strength over time. A fresh dressing provides a better seal.
Frequently Asked Questions
How long can a Prevena dressing stay on?
Up to 7 days per manufacturer guidelines. The actual wear time depends on wound drainage, skin condition, and seal integrity. If the dressing is intact and the wound is healing well, it can stay the full week.
Why does my Prevena keep beeping every few minutes?
This is usually a small air leak. Check the dressing edges for a lifted area. Press down firmly for ten seconds.
If the beeping stops and then returns, the leak is ongoing and you likely need a dressing change.
Can I shower with the Prevena dressing on?
Yes, the Prevena dressing is waterproof when properly sealed. But do not submerge the therapy unit. Keep the unit dry and away from direct water.
Do not shower if the dressing edge is already lifting.
What does it mean when the canister is full but the unit keeps running?
This can happen if the filter is not yet saturated. But if the canister is at capacity, replace it. Do not try to empty it.
Replace the entire canister with a new one.
Is it safe to silence the alarm and wait until morning?
No. A continuous alarm means the pressure is not being maintained. The wound is not getting therapy.
Silence the alarm, troubleshoot quickly, and call for help if you cannot resolve it. Waiting overnight can delay healing and increase infection risk.
How do I know if the therapy unit itself is broken?
If the unit does not turn on when plugged into AC power with a charged battery, or if the alarm persists after replacing the dressing and canister with new components, the unit may need service. Contact the manufacturer's technical support line for guidance.

Similar Posts