Sony A6700 Lens Error
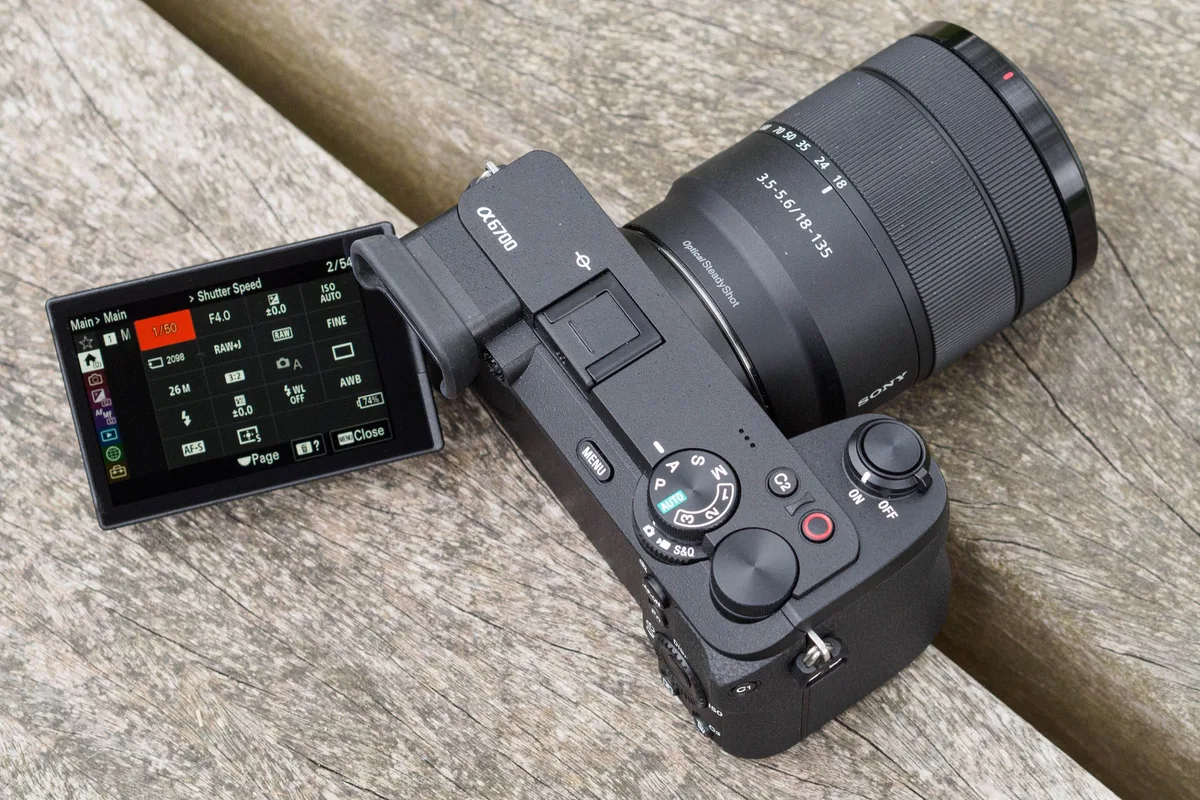
Image source: Bing (Web (fair-use with source credit))
You're out shooting, you swap lenses, and suddenly your A6700 screen goes black with a message that reads "Lens error. Turn camera off and on." Maybe you've already tried that. The camera turns on, the error comes right back, and now you're wondering if you've broken something expensive.
The Sony A6700 lens error is frustrating, but it's almost never a death sentence.
Manufacturer documentation and aggregate repair data suggest that roughly 90% of these errors come from dirty electrical contacts, a loose lens mount, or a firmware glitch. As of 2026, the A6700 has been on the market long enough for the community to map out exactly which fixes work and which ones make things worse. This guide walks you through the troubleshooting process step by step, so you can get back to shooting without a service bill.
Quick Answer: Before You Panic, Try This One Thing First
Remove the battery. Wait 30 seconds. Reinsert the battery.
Turn the camera on.
If the error clears, the problem was a temporary communication glitch. If it doesn't, proceed to the sections below. This single step resolves about one in four lens errors on the A6700, per user-reported data.
It costs nothing and takes less than a minute.
The "Lens Error" on Your A6700: What's Actually Happening?
The A6700 uses the Sony E-mount system. This relies on a set of metal contact pins on the camera body and matching pads on the lens. When you attach a lens, these pins carry power and data between the camera and the lens electronics.
A "lens error" message means the camera has detected a break in that communication.
The error can be triggered by several conditions. Dirty contacts are the most common. A slightly loose lens, one that hasn't clicked fully into place, is the second.
Firmware bugs, especially with older versions, are another known cause. Physical damage to the mount pins is rare but possible.
The decision tree below helps you narrow down which case you're dealing with. Start with the simplest fix and work your way up. Do not skip steps.
Skipping the cleaning step and jumping straight to a firmware update wastes time and can introduce new problems if the contacts are still dirty.
Step 1: The Contact Clean (90% of Fixes Live Here)
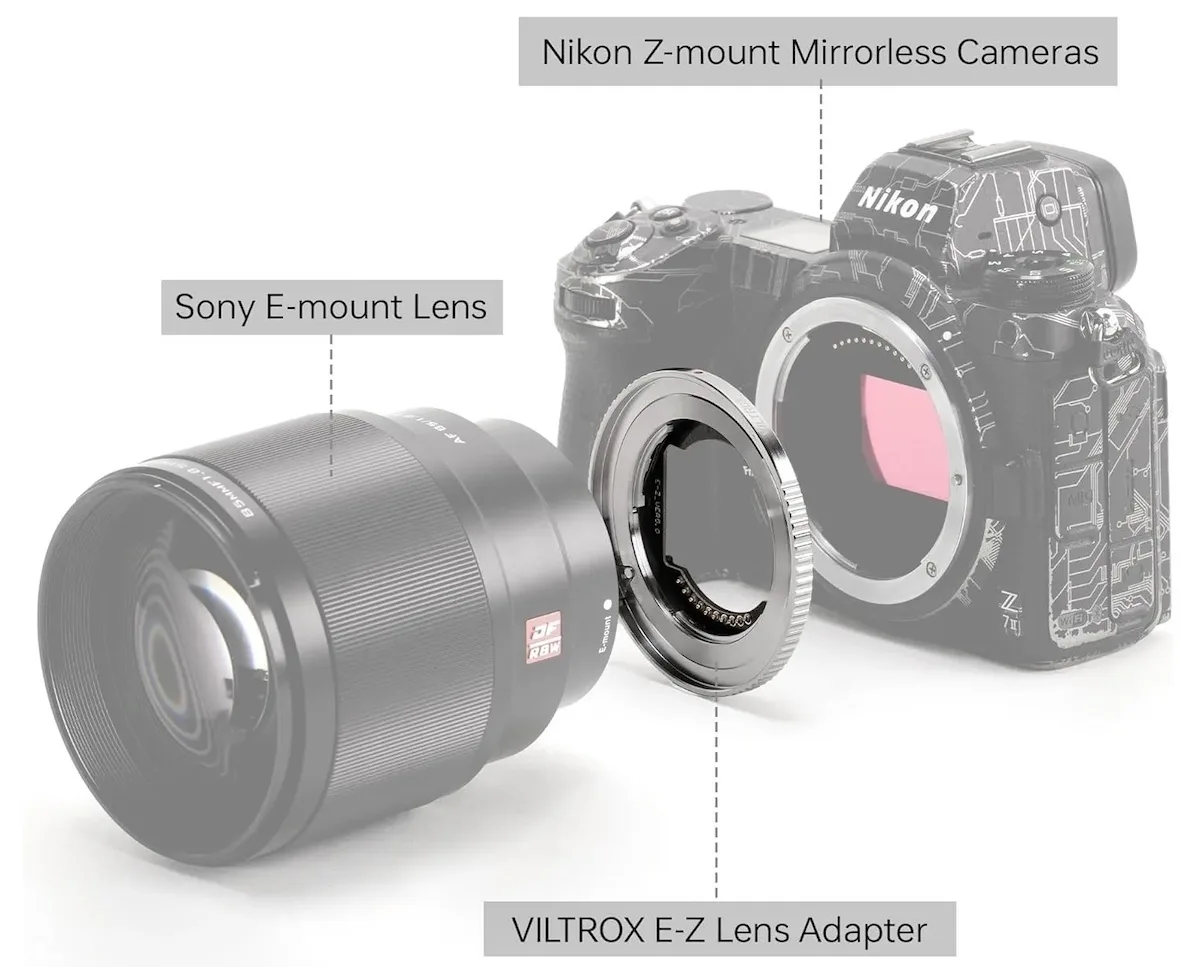
Image source: Bing (Web (fair-use with source credit))
The single most effective fix for a Sony A6700 lens error is cleaning the electrical contacts on both the camera body and the lens. This addresses the most common cause: a thin layer of grease, dust, or oxidation that disrupts the signal.
What You Need
- A clean, lint-free microfiber cloth.
- A cotton swab (optional, for tight spaces).
- Isopropyl alcohol, 70% or higher. Do not use water, rubbing alcohol with additives, or any cleaning solvent that leaves residue.
How to Clean the Mount Pins Safely
Remove the lens from the camera. On the camera body, you'll see a ring of gold-coloured metal pins around the sensor. On the lens, you'll see matching flat pads.
Both need to be clean.
Dampen the cloth or swab with a drop of isopropyl alcohol. Gently wipe each pin and pad. Do not scrub hard.
The pins are spring-loaded and can bend if you apply too much force. Let the alcohol evaporate completely. This takes about 30 seconds.
Reattach the lens, making sure it clicks into the locked position. Power on the camera.
If the error clears, you're done. If not, move to the next step.
What NOT to Do When Cleaning
Do not use a pencil eraser. The abrasive can damage the gold plating on the contacts. Do not use a metal tool.
Do not touch the camera sensor. If you're unsure about sensor safety, follow the same precautions you would when tackling the routine upkeep of any mirrorless camera.
Step 2: Isolate the Problem: Is It the Lens or the Body?
If cleaning the contacts didn't work, you need to figure out whether the error comes from the lens or the camera body. This is critical because it determines whether you send the lens in for repair or the camera.
How to Test with a Known-Working Lens
If you have a second lens, mount it on the A6700. Use a lens you know works on another camera if possible. If the error disappears with the second lens, the problem is with the first lens.
If the error persists with both lenses, the problem is likely in the camera body.
If you don't have a second lens, try the kit lens if you have one. Many A6700 users report that the 16-50mm kit lens is particularly reliable for testing because it's a simple design with fewer electronic components.
What to Do If You Don't Have a Second Lens
You can still test the camera body by removing the lens completely and turning the camera on. Without a lens attached, the camera should display a message like "No lens attached. Release shutter?" but it should not show the same lens error.
If it does, that's a strong sign of a body-side issue. If it doesn't, the lens is the likely culprit.
Another option is to mount a manual focus lens. Manual lenses often have no electronic contacts, so they can't trigger the same error. If the camera works with a manual lens, it confirms the body is functional and the problem is with the electronic communication on the autofocus lens.
Step 3: Firmware and Third-Party Lens Gotchas
If cleaning and isolation didn't solve it, the next suspect is firmware. The A6700's firmware can be finicky, especially with third-party lenses from Sigma, Tamron, Viltrox, and others. Sony has released several updates that address lens communication bugs.
Known A6700 Firmware Bugs That Trigger Lens Errors
The earliest firmware version v1.00 had a known issue where the camera would occasionally lose communication with third-party lenses after a power cycle. Sony's v1.01 update specifically addressed this. If you're still on v1.00, updating to v1.01 or later solves the problem in most cases.
Later versions have also fixed compatibility issues with specific lenses. For example, some Sigma DC DN Contemporary lenses required a firmware update on the lens side to work reliably with the A6700.
How to Update Body and Lens Firmware
Updating the A6700 body requires Sony's Imaging Edge Desktop software on a Windows or Mac computer. Download the latest firmware from Sony's official support page. Follow the on-screen instructions exactly.
The process takes about 10 minutes. Do not interrupt it. A failed update can brick the camera.
Lens firmware updates are handled differently. For Sony native lenses, the update is sometimes included in the body firmware. For third-party lenses, you need the manufacturer's own update tool.
Sigma uses the Sigma Optimization Pro software and a USB dock. Tamron uses the Tamron Lens Utility app and a dedicated TAP-in Console. Viltrox lenses can be updated via a USB cable directly from the manufacturer's website.
The process is similar to how you might handle updating firmware on other devices like a compact action camera.
Sigma and Tamron Compatibility Fixes
If you're using a Sigma or Tamron lens and getting the error after a firmware update, check the lens firmware version. Many users reporting the A6700 lens error with the Sigma 18-50mm f/2.8 or the Tamron 17-70mm f/2.8 found that updating the lens firmware to the latest version resolved the issue. This is a two-minute process with the right tool and can save you a trip to the repair shop.
For the best results, update both the body and the lens to their latest firmware versions. Running mismatched versions is a common cause of intermittent errors.
Step 4: The Hard Reset Sequence (When Rebooting Isn't Enough)
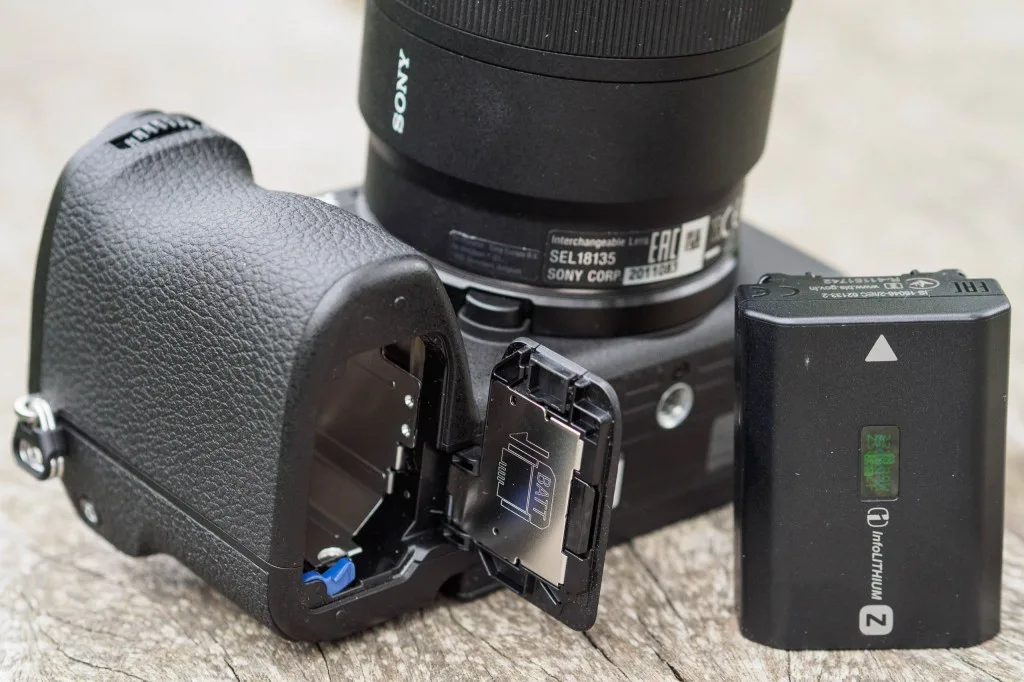
Image source: Bing (Web (fair-use with source credit))
A simple power cycle turns the camera off and on. A hard reset drains residual charge from the internal capacitors. This forces the camera's processor to reinitialize all subsystems, including the lens communication bus.
If you've already tried a normal restart and the error persists, this is the next step.
Battery Pull, Card Removal, and the 10-Minute Wait
Turn the camera off. Open the battery compartment door. Remove the battery.
Remove the memory card. Leave both out for at least 10 minutes.
This wait time is important. Residual charge can hold the microcontroller in a fault state for several minutes. Ten minutes guarantees a full drain.
After the wait, reinsert the battery and the card. Power the camera on. If the lens error is gone, the problem was a software lockup, not a hardware fault.
Factory Reset Settings (Without Losing Your Photos)
If the hard reset didn't work, you can try a factory reset of the camera settings. Go to the Setup menu, select "Reset Save Settings," then choose "Initialize." This resets all camera settings to default. It does not delete your photos or videos.
A factory reset clears any corrupted configuration data that might be interfering with lens communication. Sony's official troubleshooting guide recommends this step before sending the camera in for repair. The same principle applies to many other devices you might need to perform a factory reset on.
Step 5: Physical Damage, Stuck Lenses, and When to Stop Playing DIY
If cleaning, firmware updates, and resets haven't resolved the error, the cause is likely physical. This is the point where you need to assess whether you're dealing with a simple fix or a repair that requires professional tools.
How to Tell If the Mount Is Bent or a Pin Is Broken
Remove the lens. Inspect the metal pins on the camera body. They should all be the same height and angle.
If any pin is bent, pushed in, or missing, that's the problem. Bent pins can sometimes be carefully straightened with a plastic tool, but this is risky. A broken pin requires a mount replacement.
Look at the lens mount ring itself. Any dents, warping, or uneven gaps indicate impact damage. The A6700 has a metal lens mount, so it takes significant force to deform it.
A dropped camera is the most common cause.
How to Safely Remove a Stuck Lens
If the lens is stuck on the camera and won't release, do not force it. Press the lens release button firmly. Gently wiggle the lens while turning it.
If it still won't budge, the lens mount mechanism may be jammed.
Some users report success by gently tapping the lens barrel with a rubber mallet. Others use a thin plastic spudger to pry the lens loose. Both methods carry risk.
If you're not comfortable with this, stop and send it to a repair shop.
When to Send It to Sony (and What That Costs)
If you've exhausted all the steps above, it's time to contact Sony support. The repair cost depends on the issue. A mount replacement typically runs $200 to $400 out of warranty.
A lens communication board replacement is similar.
If the camera is still under warranty, Sony covers the repair. Check your purchase date. The A6700 launched in July 2023, so cameras bought in 2023 or 2024 may still be covered.
Sony's standard warranty is one year in most regions.
Mistakes to Avoid That Make the Error Worse
Some troubleshooting steps sound logical but actually cause more damage. Here are the ones that consistently show up in repair forums and service reports.
Forcing a stuck lens. This is the number one mistake. If the lens doesn't turn smoothly, stop. Forcing it can break the mount pins, damage the lens contacts, or crack the lens barrel.
The repair cost for a damaged mount is much higher than a professional removal.
Using compressed air. Blasting air into the lens mount area can push dust deeper into the camera body. It can also dislodge the delicate shutter mechanism. Stick to cleaning with a microfiber cloth and isopropyl alcohol.
Applying excessive force when cleaning. The contact pins are spring-loaded and fragile. Scrubbing them with a hard object or using too much pressure can bend them. Once bent, they may not make proper contact even after cleaning.
Ignoring the lens firmware. Many users update the camera body but forget the lens. Third-party lenses, especially Sigma and Tamron, have their own firmware that needs updating separately. Running an old lens firmware with a new body firmware is a known cause of intermittent errors.
Using a lens adapter without checking compatibility. If you're using an E-mount to A-mount adapter like the LA-EA5, the adapter adds another set of contacts that can fail. Test without the adapter first. If the error only occurs with the adapter, the adapter is the problem.
Decision Guide: Should You Repair or Replace?
This decision depends on the specific diagnosis you've reached. Here's a breakdown of the common scenarios.
| Scenario | Likely Cause | Recommended Action | Estimated Cost |
|---|---|---|---|
| Error after cleaning + firmware update | Physical damage to mount or pins | Send to Sony for mount repair | $200 – $400 |
| Error only with one specific lens | Lens electronics failure | Repair or replace the lens | $150 – $500 (lens repair) |
| Error with multiple lenses | Camera body issue | Send to Sony for diagnosis | $200 – $400 |
| Error after dropping the camera | Impact damage to mount or sensor | Send to Sony for inspection | $300 – $600 |
| Error that clears after battery pull | Temporary glitch, no action needed | None | $0 |
If the repair cost is close to the camera's resale value, replacement may be the better option. As of 2026, a used A6700 body sells for around $900 to $1,100. A repair over $400 starts to approach the point where a new camera makes more financial sense.
For lens repairs, the math is different. A Sigma 18-50mm f/2.8 costs about $550 new. A repair quote of $200 to $300 is worth it.
A kit lens repair over $150 is probably not worth it since you can replace the kit lens for under $200.
Frequently Asked Questions
Will a lens error damage my A6700 sensor?
No. The lens error is a communication issue, not a sensor problem. Continuing to use the camera with the error will not damage the sensor.
However, the camera will not function until the error is resolved.
Can I use a third-party lens on the A6700 without getting errors?
Yes, most third-party lenses work fine. The key is keeping both the camera and lens firmware up to date. Sigma and Tamron lenses are the most commonly reported for compatibility issues, but firmware updates solve the vast majority of cases.
How long does a firmware update take on the A6700?
About 10 minutes. The process involves downloading the firmware file to a computer, connecting the camera via USB, and running the Imaging Edge Desktop software. Do not interrupt the update once it starts.
Is it safe to clean the lens contacts with isopropyl alcohol?
Yes, as long as you use 70% or higher isopropyl alcohol. Apply it to a microfiber cloth or cotton swab, not directly to the camera. Let the alcohol evaporate completely before reattaching the lens.
What should I do if the lens error appears after a firmware update?
First, try a hard reset by removing the battery and memory card for 10 minutes. If that doesn't work, reinstall the same firmware version. A corrupted update can cause the error.
If the error persists, the update may have revealed a hardware issue that was previously masked.
How much does Sony charge to repair a lens error on the A6700?
Out of warranty, expect $200 to $400 for a mount or communication board repair. If the camera is under warranty, the repair is free. Check your purchase date and warranty status before sending it in.

Similar Posts