Sony A7 IV Best Settings
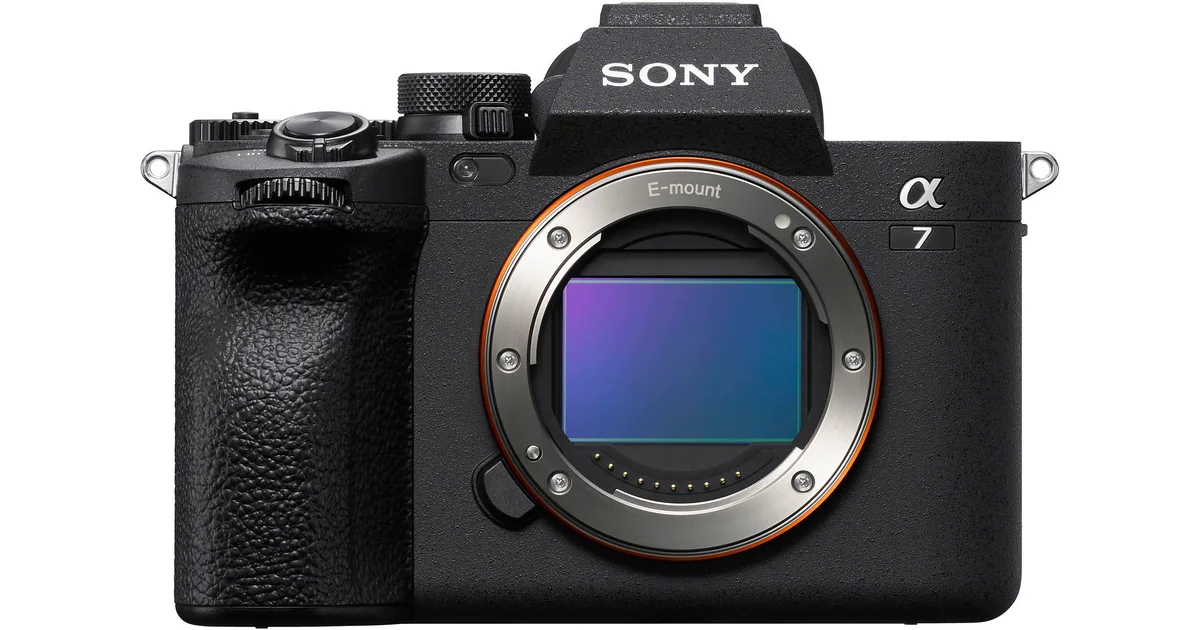
Image source: Bing (Web (fair-use with source credit))
The Sony A7 IV best settings aren't a one-size-fits-all list. They change based on what you're shooting, portraits, sports, landscapes, or video. That's the real challenge with this camera.
It has so many options that you can easily get lost in the menus.
Manufacturer specifications indicate the A7 IV's 33-megapixel sensor and BIONZ XR processor give it exceptional flexibility across genres. As of 2026, it remains one of the most popular hybrid cameras on the market. The key is knowing which levers to pull for each situation.
Quick Answer
The best Sony A7 IV settings depend on your subject. Use Aperture Priority for portraits. Switch to Shutter Priority for sports.
Use Manual mode for video. Start with Auto ISO and adjust from there.
Why "Best Settings" Depends on What You're Shooting
The A7 IV is a hybrid camera. It's equally capable of stills and video. But the settings that work for one often hurt the other.
The most common frustration among new owners is treating the camera like a point-and-shoot. You can't leave it in Auto and expect great results across every scenario.
The core trade-offs look like this:
| Setting | Portrait | Sports | Landscape | Video |
|---|---|---|---|---|
| Mode | Aperture Priority | Shutter Priority | Aperture Priority | Manual |
| Priority | Shallow depth of field | Fast shutter speed | Maximum sharpness | Consistent exposure |
| ISO range | 100–6400 | 100–12800 | 100 (fixed) | 100–6400 |
| Focus | AF-S, Eye AF | AF-C, Tracking | Manual | AF-C, Tracking |
| Shutter speed | 1/125 or slower | 1/1000 or faster | Variable, tripod | 1/60 (for 30p) |
Here's the logic behind each decision:
If you're shooting a person standing still, you want a wide aperture to blur the background. That's Aperture Priority. The camera picks the shutter speed, and you control the look.
If you're shooting a runner, you need a fast shutter to freeze motion. That's Shutter Priority. The camera picks the aperture, and you control the motion blur.
If you're shooting a landscape, you want sharpness from front to back. That's also Aperture Priority, but at f/8 to f/11. Use a tripod because the shutter speed will be slow.
If you're shooting video, you need total control over aperture and shutter speed to maintain the 180-degree shutter rule. That's Manual mode.
The decision tree is simple:
- What is your subject? (Person, animal, action, scene, or video)
- What is the lighting? (Bright, moderate, low, or mixed)
- What is your priority? (Subject isolation, freezing motion, depth of field, or exposure consistency)
Answer those three questions, and you'll know which mode and settings to use. The rest of this guide walks through each scenario in detail.
The A7 IV's menu system is deeper than previous Sony generations. That's a good thing once you learn it. But it means you need a systematic approach rather than random tweaking.
The Universal Settings Every A7 IV Owner Should Set
Before you change anything for a specific scenario, set up the camera's foundation. These settings apply to almost every situation. Set them once and leave them.
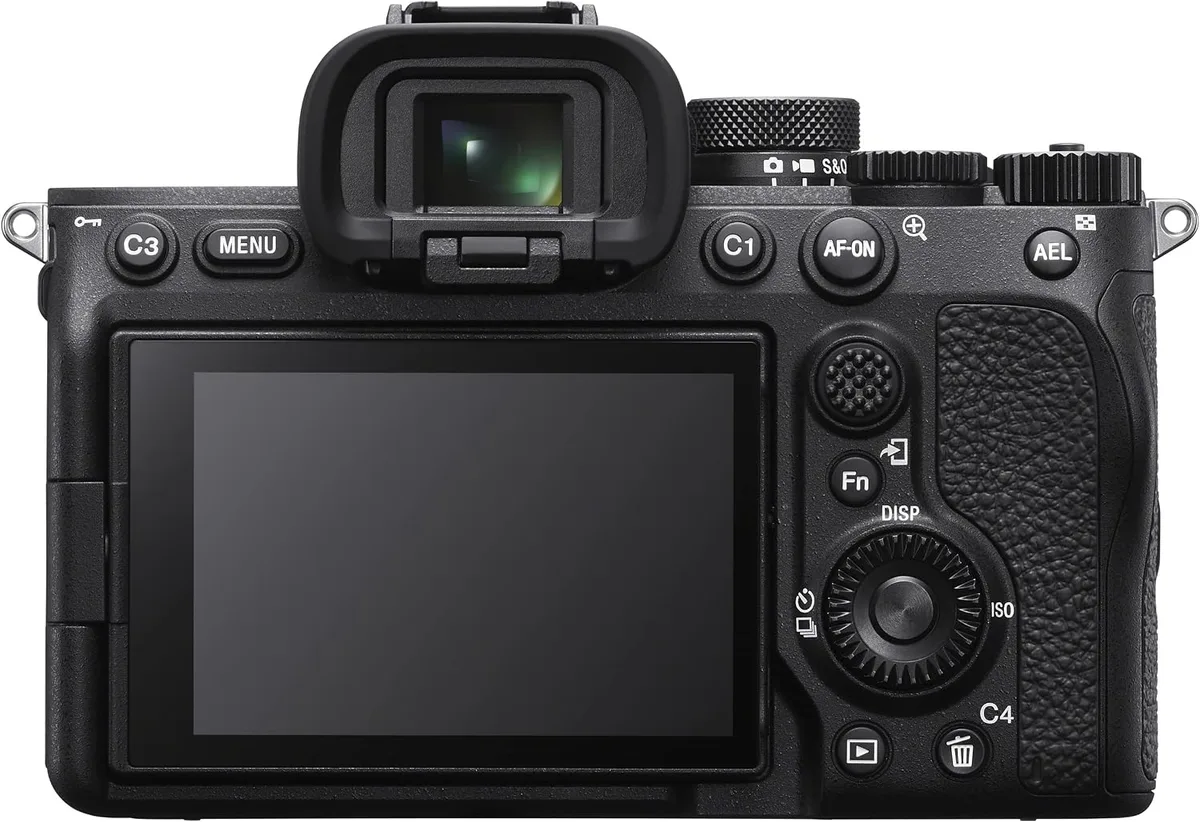
Image source: Bing (Web (fair-use with source credit))
Back-button focus is the most important single change you can make. It separates focus from the shutter button. Go to the Camera menu, find AF w/ shutter, and set it to Off.
Then assign AF-ON to the dedicated AF-ON button. Now you can focus and recompose without the camera refocusing when you press the shutter.
Custom buttons give you instant access to frequently changed settings. These assignments work well for most users:
- C1: Focus Area (Wide, Zone, Spot, Tracking)
- C2: Drive Mode (Single, Continuous, Self-timer)
- C3: ISO (or Zebra for video shooters)
- Lens button: Focus Magnifier (for manual focus confirmation)
- AEL button: Spot metering toggle
Auto ISO is your safety net. Set the minimum to 100 and the maximum to 12800. Then set the minimum shutter speed to Auto.
This tells the camera to raise ISO before dropping below a reasonable shutter speed. You can adjust the base minimum shutter speed later for each scenario.
File format depends on your workflow. If you edit photos, shoot RAW. If you share straight out of camera, shoot JPEG Fine.
For flexibility, shoot RAW + JPEG. For video, use XAVC S 4K at 30p in full-frame mode. That's the best balance of quality and file size.
Picture Profile for stills: use the Standard Creative Look with contrast and saturation at zero. This gives you a neutral starting point that's easy to edit later. For video, use PP1 (S-Log2) if you plan to grade, or Standard if you don't.
White balance should be set manually for consistent results. Auto White Balance drifts in mixed lighting. Set it to Daylight for outdoor shots and Tungsten or Custom Kelvin for indoor.
A good starting point is 5500K for daylight and 3200K for tungsten.
Memory card slots need to be configured. Slot 1 should be your primary card. Set it to record RAW photos or 4K video.
Slot 2 can be backup or overflow. Use UHS-II cards for the best performance. They clear the buffer faster.
Format your cards in-camera before every shoot. This prevents file system errors and ensures clean storage. Do it as part of your pre-shoot routine.
Sensor cleaning should be set to Automatic. The camera vibrates the sensor when you turn it off. This keeps dust off the sensor.
If you see spots in your images, run the manual cleaning mode from the menu. Proper manual sensor cleaning routines help keep the imaging sensor free of debris.
Firmware should be kept current. Sony releases updates that improve autofocus performance and add features. Check the Sony support page for your region.
Periodic firmware checks ensure your camera has the latest improvements.
Portrait & Headshot Settings
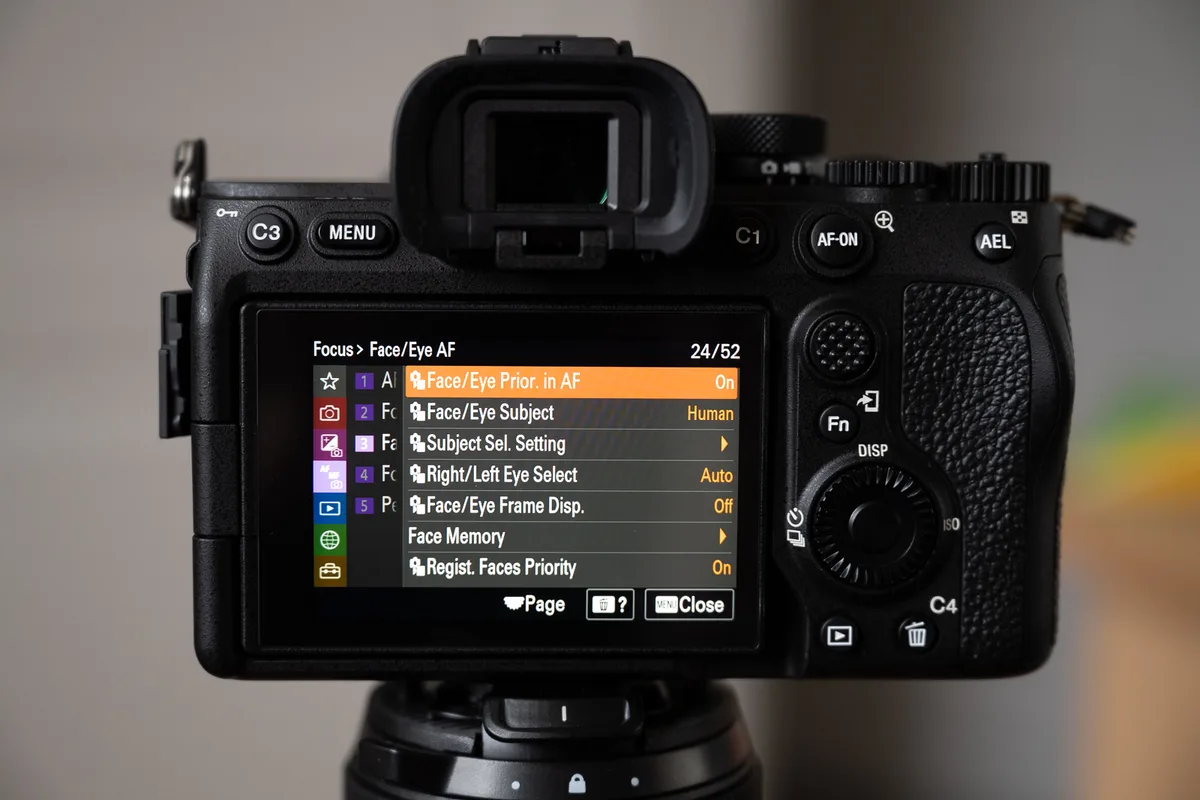
Image source: Bing (Web (fair-use with source credit))
Portrait photography is where the A7 IV shines brightest. Its Eye AF is among the best in any camera under $3,000. The 33-megapixel sensor captures fine detail in skin texture and hair.
Recommended portrait settings:
| Setting | Value |
|---|---|
| Mode | Aperture Priority (A) |
| Aperture | f/1.4 to f/2.8 |
| ISO | Auto ISO 100–6400 |
| Shutter speed | Minimum 1/125 (set in Auto ISO) |
| Focus mode | AF-S (Single) |
| Focus area | Flexible Spot S or M |
| Eye AF | Human — ON |
| Drive mode | Single shot |
| Creative Look | Portrait (contrast -1, saturation +1) |
| White balance | Daylight or Custom Kelvin (5500K) |
| Picture Profile | Standard or Portrait |
Why these settings work:
A wide aperture at f/1.4 to f/2.8 creates shallow depth of field. This separates the subject from the background. The Eye AF locks onto the subject's eye and holds it even as they move slightly.
AF-S mode is best for static subjects because it focuses once and stays locked.
Auto ISO with a minimum shutter speed of 1/125 ensures you get sharp images even in moderate light. The camera raises ISO to maintain that speed. ISO 6400 on the A7 IV is very clean.
You can push to 12800 in a pinch.
The Portrait Creative Look with slightly reduced contrast and increased saturation gives pleasing skin tones straight out of camera. If you shoot RAW, you can ignore this and adjust in post.
Tips for better portraits:
- Use Eye AF for every shot. It's accurate and fast.
- Position the focus point on the subject's face. The camera will find the eye.
- Bracket your exposure. Shoot one at the metered value, one under, and one over. This gives you options in post.
- Use a reflector or fill light for even lighting on the face.
- Shoot at the subject's eye level for a natural perspective.
- Avoid shooting wide open in very bright light. The shutter speed may exceed the camera's sync speed for flash.
Common mistakes:
- Shooting at f/1.4 all the time. This can make the depth of field too shallow. One eye might be sharp while the other is soft. Use f/2.8 for group portraits or when you need both eyes in focus.
- Using auto white balance in mixed lighting. It can shift skin tones green or orange. Set a custom white balance for consistent results.
- Forgetting to check the background. A wide aperture blurs it, but a cluttered background still distracts. Move the subject or change your angle.
Eye AF is so reliable that you can focus on composition instead of focus. This is a real advantage for event photographers who need to work quickly. If you're also shooting video alongside portraits, the same settings work well for talking-head footage.
Sports, Action & Wildlife Settings
Sports and wildlife photography demand speed. The A7 IV delivers 10 frames per second with continuous autofocus. That's fast enough for most action, though not as fast as the A1 or A9 series.
Recommended sports and wildlife settings:
| Setting | Value |
|---|---|
| Mode | Shutter Priority (S) or Manual |
| Shutter speed | 1/1000 or faster (1/2000 for birds in flight) |
| Aperture | f/2.8 to f/5.6 (as wide as possible) |
| ISO | Auto ISO 100–12800 |
| Focus mode | AF-C (Continuous) |
| Focus area | Tracking Wide or Zone |
| Eye AF | Animal ON (for wildlife) |
| Drive mode | Continuous Hi+ (10fps) |
| Shutter type | Mechanical (avoid electronic for fast action) |
| Tracking sensitivity | 2 (steady lock) or 3 (responsive) |
Why these settings work:
A fast shutter speed of 1/1000 or faster freezes motion. For birds in flight, 1/2000 is the minimum. The camera's AF-C mode continuously adjusts focus as the subject moves.
Tracking Wide grabs the subject and follows it across the frame.
Animal Eye AF works on birds, mammals, and even some reptiles. It's not perfect, but it gives you a fighting chance. Zone focus is a good alternative when Eye AF can't find the eye.
It focuses on a specific area of the frame.
The mechanical shutter at 10fps gives you a sequence of images to choose from. The electronic shutter introduces rolling shutter, which warps fast-moving subjects. Use mechanical for all sports and wildlife.
Buffer management:
The A7 IV's buffer holds about 28 RAW frames at 10fps. That's about 2.8 seconds of continuous shooting. After that, the camera slows down.
To avoid this, shoot in short bursts. Let off the shutter every 2 to 3 seconds. This gives the buffer time to write to the memory card.
Using a UHS-II card helps. It clears the buffer faster than UHS-I. The camera supports UHS-II in both slots.
Use them for the best performance.
Tips for better action shots:
- Pre-focus on the area where the action will happen. This helps the AF system lock on faster.
- Use a wider aperture to let in more light. This keeps ISO lower and shutter speed higher.
- Track the subject with the camera. Panning with the motion keeps the subject in the frame.
- Shoot in bursts of 3 to 5 frames. That's enough to capture the peak moment without filling the buffer.
- Use the Zone focus area for predictable movement. Use Tracking Wide for erratic movement.
Common mistakes:
- Using electronic shutter for fast action. The rolling shutter effect is obvious on cars, runners, and sports.
- Shooting at too slow a shutter speed. 1/500 is not enough for most sports. Start at 1/1000.
- Letting the buffer fill up. Short bursts are better than one long hold.
- Not using Animal Eye AF for wildlife. It's a significant advantage. Enable it in the menu.
If you're using a telephoto lens, the camera's stabilization helps. The 5-axis IBIS works with most lenses. It doesn't freeze motion, but it reduces camera shake.
Keep it on for normal shooting. Turn it off for tripod work.
Landscape & Street Photography Settings
Landscape and street photography share a common priority: sharpness and control. For landscapes, that means maximum depth of field and low ISO. For street, it means fast operation and discreet shooting.
Recommended landscape settings:
| Setting | Value |
|---|---|
| Mode | Aperture Priority (A) |
| Aperture | f/8 to f/11 |
| ISO | 100 (fixed) |
| Shutter speed | Camera decides (use tripod) |
| Focus mode | Manual focus |
| Focus area | Any (you're manual) |
| Drive mode | Self-timer 2s or remote |
| Shutter type | Mechanical |
| Long exposure NR | ON (for shots over 30 seconds) |
| Picture Profile | Standard or Landscape Creative Look |
| White balance | Daylight (5500K) |
Why these settings work:
Aperture f/8 to f/11 gives maximum sharpness across the frame. The lens performs best at these apertures. ISO 100 gives the cleanest dynamic range and lowest noise.
The self-timer or remote eliminates camera shake from pressing the shutter.
Manual focus is preferred for landscapes. Auto focus can grab a foreground branch or a distant tree. Use the focus magnifier to zoom in and fine-tune focus.
Set focus about one-third of the way into the scene for maximum depth of field.
Long exposure noise reduction doubles the recording time. It takes a dark frame after the exposure to map and remove noise. This is useful for exposures over 30 seconds.
Recommended street photography settings:
| Setting | Value |
|---|---|
| Mode | Aperture Priority (A) |
| Aperture | f/5.6 to f/8 |
| ISO | Auto ISO 100–6400 |
| Shutter speed | Minimum 1/250 |
| Focus mode | Manual (zone focus) or AF-C |
| Focus area | Wide |
| Drive mode | Single |
| Shutter type | Silent electronic |
| Picture Profile | Standard or Monochrome Creative Look |
Zone focus is the key technique for street photography:
Set your lens to f/8. Focus at about 3 meters. Everything from 2 to 6 meters will be sharp.
You don't need to look through the viewfinder. Just raise the camera and shoot. This is fast and discreet.
The silent electronic shutter means no shutter sound. People won't notice you taking photos. This is important for candid street photography.
Tips for better landscapes:
- Use a tripod for every shot. It's the only way to guarantee sharpness at low ISO.
- Bracket your exposures. Shoot three frames: one at the metered value, one under, and one over. This gives you options for HDR blending.
- Use the built-in intervalometer for time-lapses. It's in the menu under Shooting > Interval Shooting.
- Check the histogram. Avoid clipping highlights. The A7 IV has good dynamic range, but you still need to protect the highlights.
- Clean the sensor before a landscape shoot. Dust spots are obvious in sky and smooth areas.
Common mistakes:
- Shooting at f/22 for maximum depth of field. This reduces sharpness due to diffraction. Stick to f/8 to f/11.
- Using auto focus for landscapes. It can miss the intended focus point. Use manual focus for precision.
- Forgetting to turn off image stabilization when using a tripod. The IBIS can introduce micro-blur when the camera is perfectly still. Turn it off.
- Using the electronic shutter for landscapes. It's fine for static scenes, but the mechanical shutter is more reliable.
The A7 IV's 33-megapixel sensor gives you plenty of resolution for large prints. Use the Pixel Shift feature for 240-megapixel stills. This is useful for reproduction work.
It requires a tripod and a stationary subject.
Low Light & Night Photography Settings
Low light is where the A7 IV's larger sensor and high ISO performance shine. The 33-megapixel sensor handles noise well up to ISO 6400. Beyond that, you lose detail.
Recommended low light settings:
| Setting | Value |
|---|---|
| Mode | Aperture Priority (A) or Manual |
| Aperture | f/1.4 to f/2.8 (as wide as possible) |
| ISO | Auto 100–12800 |
| Shutter speed | 1/60 minimum (or faster for moving subjects) |
| Focus mode | AF-S |
| Focus area | Flexible Spot S |
| Long exposure NR | ON |
| Shutter type | Mechanical |
Why these settings work:
A wide aperture lets in more light. This keeps ISO lower and maintains image quality. Auto ISO up to 12800 gives you room to work.
ISO 6400 is very usable. ISO 12800 requires noise reduction in post.
AF-S with Flexible Spot S helps the camera find focus in dim conditions. The spot focus point is smaller and more precise than Wide mode. It won't grab a background light by mistake.
Tips for low light shooting:
- Use a fast prime lens. A 35mm f/1.4 or 50mm f/1.2 makes a significant difference.
- Brace the camera against a wall or table. This allows slower shutter speeds without blur.
- Use the self-timer for long exposures. It eliminates shake from pressing the shutter.
- Shoot in RAW. You have more flexibility to recover shadows and reduce noise in post.
- Turn off Long Exposure NR for shorter exposures. It's only needed for shots over 30 seconds.
Common mistakes:
- Using auto focus in near-darkness. The AF system hunts and may fail. Switch to manual focus and use focus peaking. The red peaking highlights edges quite well.
- Using too slow a shutter speed for handheld shots. 1/60 is the minimum for a 50mm lens. Use the reciprocal rule: shutter speed should be at least 1/focal length.
- Pushing ISO beyond 12800. The image becomes noisy and loses detail. Use noise reduction software instead.
Common Settings Mistakes and How to Fix Them
Leaving the camera on Auto White Balance
Auto WB drifts in mixed lighting. Tungsten and daylight together confuse the sensor. Set a custom white balance or use Kelvin.
For portraits, 5500K is a good starting point. For indoor tungsten, start at 3200K.
Not formatting the card before a shoot
Always format in-camera. It clears the card and prevents file system errors. Do it once per session.
This is one of the simplest ways to avoid corrupted files.
Using the wrong Picture Profile for video
If you're not grading, don't use S-Log. It looks flat and washed out. Use PP1 (S-Log2) only if you plan to grade.
Use Standard or Creative Look if you want to share straight out of camera.
Ignoring the buffer
The A7 IV's buffer is decent but not massive. It holds about 28 RAW frames at 10fps. If you're shooting bursts, let off the shutter every 3 seconds.
This gives the buffer time to write to the card.
Overheating in 4K 60p
Flip the screen out. Point it away from the body. Use a small fan if you're shooting indoors.
The camera will warn you before it shuts down. 4K 30p is much more stable for long recording sessions.
Using the wrong card slot
Slot 1 supports UHS-II. Slot 2 also supports UHS-II. Use UHS-II cards in both slots for the best performance.
UHS-I cards are slower and will fill the buffer faster.
Forgetting to update firmware
Sony releases firmware updates that improve autofocus performance and add features. Check the Sony support page every few months. Updating the camera's software is straightforward and keeps your camera running at its best.
Frequently Asked Questions
What is the best shutter speed for portraits on the A7 IV?
Start at 1/125 for static subjects. This is fast enough to avoid camera shake but slow enough to keep ISO low. For moving subjects, use 1/250 or faster.
Should I use electronic or mechanical shutter for sports?
Use mechanical shutter for sports. The electronic shutter has rolling shutter, which warps fast-moving subjects. Mechanical shutter at 10fps is the better choice.
What is the best ISO for the A7 IV in low light?
ISO 6400 is very usable. ISO 12800 works with noise reduction in post. Above that, you lose detail.
Use a fast prime lens to keep ISO lower.
How do I set up back-button focus on the A7 IV?
Go to the Camera menu. Find AF w/ shutter. Set it to Off.
Then press the AF-ON button to focus. The shutter button now only takes the photo. This separates focus from shutter release.
Which memory card should I use for the A7 IV?
Use UHS-II SD cards for the best performance. They clear the buffer faster than UHS-I cards. Use them in both slots.
Slot 1 and Slot 2 both support UHS-II.
Can the A7 IV overheat when recording 4K video?
Yes, especially in 4K 60p mode. Keep the screen flipped out. Use a small fan for indoor shoots. 4K 30p is much more stable for long recording sessions.
The camera warns you before it shuts down.
Quick Reference Decision Guide
Use this guide to find your starting point based on what you're shooting.
| Subject | Mode | Aperture | Shutter | ISO | Focus |
|---|---|---|---|---|---|
| Portrait | A | f/1.4–2.8 | Auto (min 1/125) | 100–6400 | AF-S, Eye AF |
| Sports | S or M | f/2.8–5.6 | 1/1000+ | 100–12800 | AF-C, Tracking |
| Wildlife | S or M | f/2.8–5.6 | 1/2000+ | 100–12800 | AF-C, Animal Eye AF |
| Landscape | A | f/8–11 | Auto (tripod) | 100 (fixed) | Manual |
| Street | A | f/5.6–8 | Auto (min 1/250) | 100–6400 | Zone focus |
| Video (cinematic) | M | f/2.8–4 | 1/60 (30p) | 800 (S-Log3) | AF-C, Tracking |
| Low light | A or M | f/1.4–2.8 | 1/60+ | 100–12800 | AF-S, Spot |
The Sony A7 IV is a versatile camera. It rewards you for learning its settings. Start with the table above, then adjust based on your specific conditions.
The more you shoot, the faster you'll know which settings to reach for.

Similar Posts