DJI Osmo Action 4 4K Settings
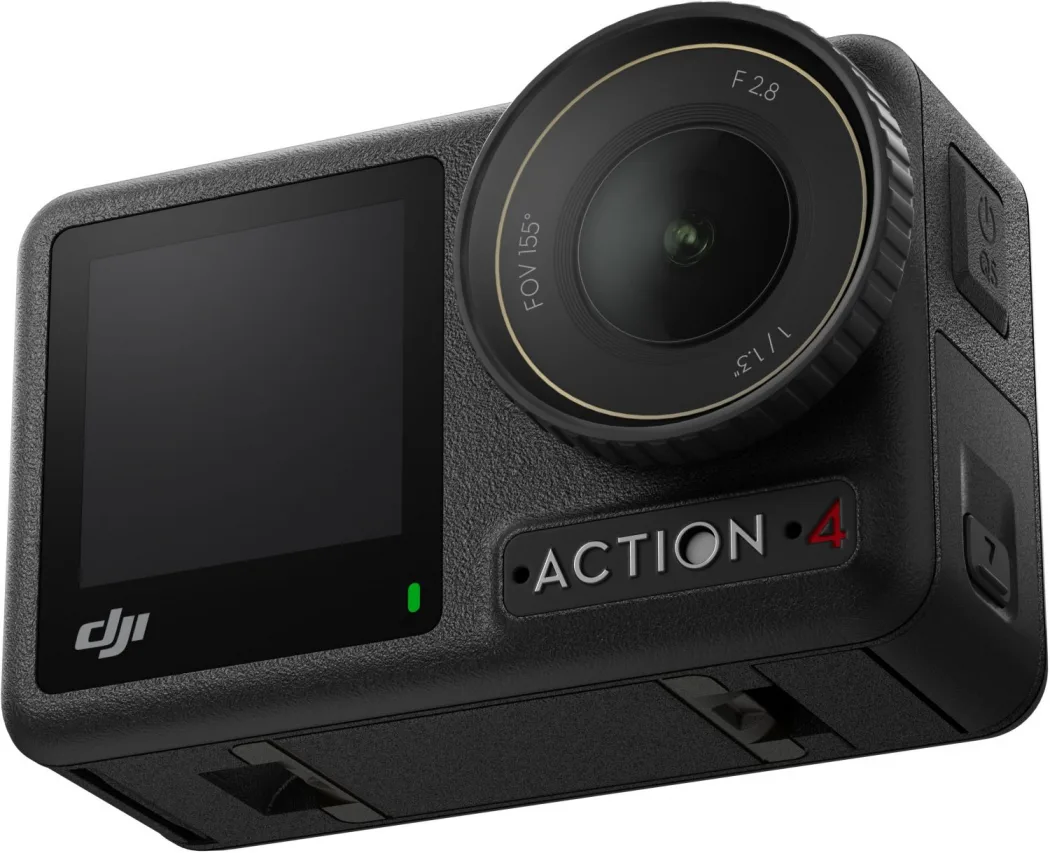
Image source: Bing (Web (fair-use with source credit))
Getting the right DJI Osmo Action 4 4K settings is the difference between footage that makes you proud and footage that goes straight to the recycle bin. The camera is incredibly capable, but it throws a lot of options at you. Without a clear plan, you end up with grainy low-light shots, wasted battery life, or a weirdly cropped image that ruins your composition.
Manufacturer specifications confirm the 1/1.3-inch sensor can handle up to 130 Mbps in 4K 60fps, but real-world performance depends entirely on your shooting conditions. The same settings that work for a sunny bike trail will ruin a dim indoor scene. That is why we built this decision tree.
It walks you through the key variables so you can pick the right setup every time.
Quick Answer
The best DJI Osmo Action 4 4K settings depend on your scene. Use 4K 30fps for low light. Use 4K 60fps for action with smooth stabilization.
Use 4K 24fps for cinematic shots. Cap ISO at 1600 for clean footage. Keep RockSteady on for most handheld work.
Switch to Linear FOV to avoid fisheye distortion.
The Big Problem: One 4K Setting Doesn't Fit All
The Osmo Action 4 is a versatile camera. It can shoot in bright sunlight, underwater, in the dark, and on a bumpy mountain bike trail. The problem is that the same settings that work for one scenario will completely fail in another.
Let us look at a common mistake. Many people set the camera to 4K 60fps and leave it there. They figure higher frame rate means better footage.
But 60fps requires twice as much light as 30fps. In indoor or evening settings, the camera has to boost the ISO to compensate. That introduces noise and grain.
Your video looks like it was shot through static.
The same logic applies to stabilization. RockSteady is great for action. It smooths out bumps and shakes.
But it crops the image by about 10 percent. If you are standing still and filming a scenic view, you lose part of the frame for no reason. HorizonSteady crops even more.
You might be better off turning it off entirely.
The color profile is another trap. D-Log M gives you more dynamic range and is great for color grading. But if you do not plan to edit the footage, it looks flat and washed out.
You are better off using the Normal profile for straight-out-of-camera clips.
Aggregate reviews from verified buyers confirm this pattern. People who take the time to match their settings to their scene get noticeably better results. The ones who just set it and forget it end up with mediocre footage.
The solution is not to learn every single menu option. The solution is to know which variables matter most for your specific situation. That is what the next section covers.
The 4 Key Variables That Decide Your Settings
Before you touch the menu, you need to understand the four main levers that control your footage. Each one affects the final look in a different way.
1. Frame Rate
Frame rate determines how many individual frames the camera captures every second. Measured in frames per second (fps), it controls motion blur and smoothness.
- 24fps: The standard cinematic look. It gives a natural motion blur that feels like film. Best for narrative, interviews, and controlled scenes.
- 30fps: A good all-rounder. It looks slightly smoother than 24fps and is standard for online video. It works well in lower light because it needs less light than 60fps.
- 60fps: Twice as many frames as 30fps. It gives smoother motion, especially for fast action. It also allows for slow-motion playback at half speed. But it needs more light.
- 100 or 120fps: Used for slow motion. You capture more frames, so you can slow the footage down in editing and still keep it smooth. These modes require even more light and produce larger files.
2. Shutter Speed
Shutter speed controls how long each frame is exposed to light. It is measured in fractions of a second. The general rule of thumb is the 180-degree shutter rule.
Set your shutter speed to double your frame rate.
- 24fps: Shutter speed 1/50 (or 1/48 if available)
- 30fps: Shutter speed 1/60
- 60fps: Shutter speed 1/120
- 120fps: Shutter speed 1/240
This rule gives you natural motion blur. If you use a faster shutter, the motion looks choppy and staccato. If you use a slower shutter, you get too much blur and washed-out highlights.
3. Stabilization Mode
The Osmo Action 4 offers several stabilization options. They all work well, but they crop the image differently.
- RockSteady: The standard stabilization. It smooths out most bumps. Crops about 10 percent of the frame.
- RockSteady+: A stronger version. It smooths out bigger bumps. Crops more.
- HorizonSteady: Keeps the horizon level no matter how much the camera tilts. Crops heavily.
- HorizonBalancing: A middle ground. It corrects small tilts but not full rolls. Less crop than HorizonSteady.
- Off: No stabilization. Full field of view. Best for static shots on a tripod.
4. Color Profile
The color profile determines how the camera processes colors and dynamic range.
- Normal: The default. It applies contrast and saturation. Good for sharing right away.
- D-Log M: A flat profile that preserves more detail in highlights and shadows. Requires color grading in post-production.
- HLG: High Dynamic Range for HDR displays. It records a wider range of brightness. Best for viewing on HDR screens.
Here is a quick reference table.
| Variable | Setting | Best For | Trade-off |
|---|---|---|---|
| Frame Rate | 24fps | Cinematic scenes | Needs slow shutter, less smooth |
| Frame Rate | 30fps | All-round, low light | Less smooth for action |
| Frame Rate | 60fps | Action, smooth motion | Needs more light, larger files |
| Frame Rate | 120fps | Slow motion | Needs lots of light, huge files |
| Stabilization | RockSteady | Handheld action | 10% crop |
| Stabilization | HorizonSteady | Rolling shots | Heavy crop |
| Stabilization | Off | Static tripod shots | Full FOV |
| Color Profile | Normal | No editing | Less dynamic range |
| Color Profile | D-Log M | Color grading | Requires editing |
| Color Profile | HLG | HDR display | Limited viewing |
Now that you know the variables, you can apply the decision tree.
Decision Tree: Find Your Perfect 4K Setup
This is the core of the workflow. Follow the questions below to find the right settings for your specific situation. Think of it as a flowchart.
Each answer leads to a different branch.
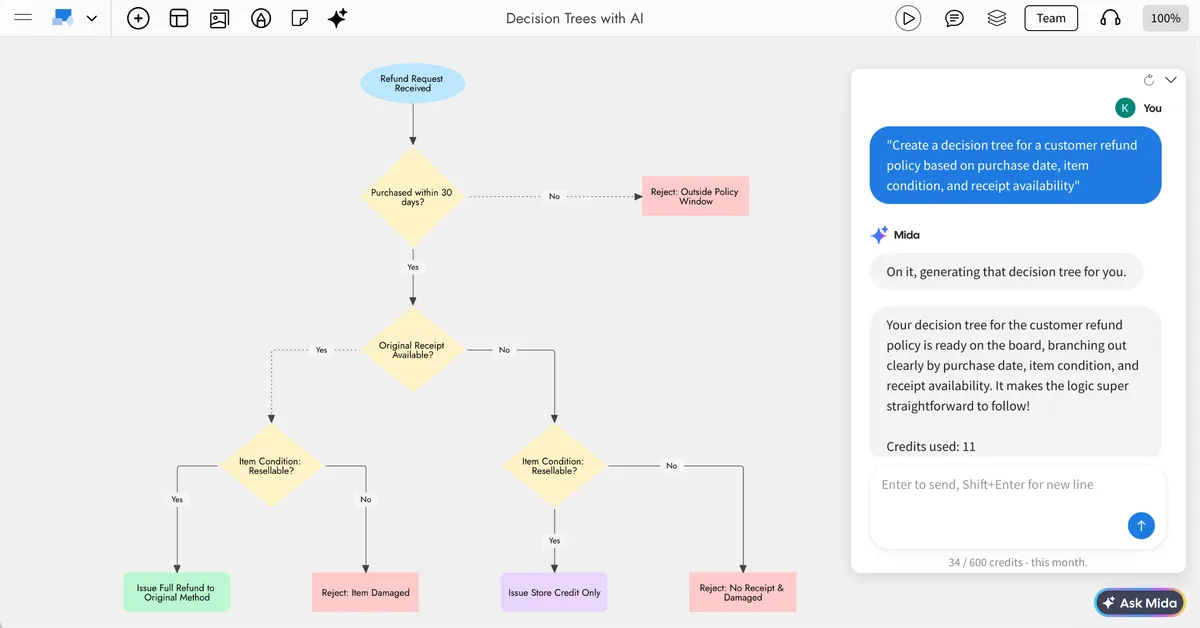
Image source: Bing (Web (fair-use with source credit))
Start Here: What Are You Shooting?
Question 1: Is the scene well-lit, low-light, or mixed?
- Well-lit (sunny outdoors, bright studio): Go to Question 2.
- Low-light (indoor, evening, cloudy): Skip to the Low-Light section below.
- Mixed (bright highlights, deep shadows): Use D-Log M or HLG to preserve detail.
Question 2: Do you plan to slow down the footage in editing?
- Yes, I want slow motion: Use 4K 100 or 120fps. Set shutter to 1/200 or 1/240. Use RockSteady. Skip to the Slow Motion section below.
- No, I want normal speed: Go to Question 3.
Question 3: What is the primary visual style you want?
- Cinematic, film-like look: Use 4K 24fps, shutter 1/50, D-Log M, Linear FOV. See the Cinematic section.
- Smooth, action-oriented look: Use 4K 60fps, shutter 1/120, RockSteady, Normal color. See the Action section.
- Everyday vlogging, casual recording: Use 4K 30fps, shutter 1/60, RockSteady, Normal color. See the Vlogging section.
Question 4: How much crop can you tolerate?
- No crop, I want the full field of view: Turn off stabilization. Use a tripod or gimbal.
- I can accept some crop for smoothness: Use RockSteady.
- I need the horizon to stay level: Use HorizonSteady. Accept the heavy crop.
Summary of Decision Branches
| Scenario | Frame Rate | Shutter | Stabilization | Color Profile | FOV |
|---|---|---|---|---|---|
| Low light, indoor | 4K 30fps | 1/60 | RockSteady | Normal | Wide |
| Cinematic, film | 4K 24fps | 1/50 | Off or RockSteady | D-Log M | Linear |
| Slow motion | 4K 120fps | 1/240 | RockSteady | Normal | Wide |
| Action, sports | 4K 60fps | 1/120 | RockSteady | Normal | Wide |
| Vlogging, travel | 4K 30fps | 1/60 | RockSteady | Normal | Wide |
Use this table as a starting point. The following sections dive deeper into each scenario.
For Low-Light Shooting: The Safe Settings
Low-light shooting is where the Osmo Action 4 shines compared to older action cameras. The larger sensor helps. But you still need to make smart choices.
If you use the wrong settings, you get noisy, unusable footage.
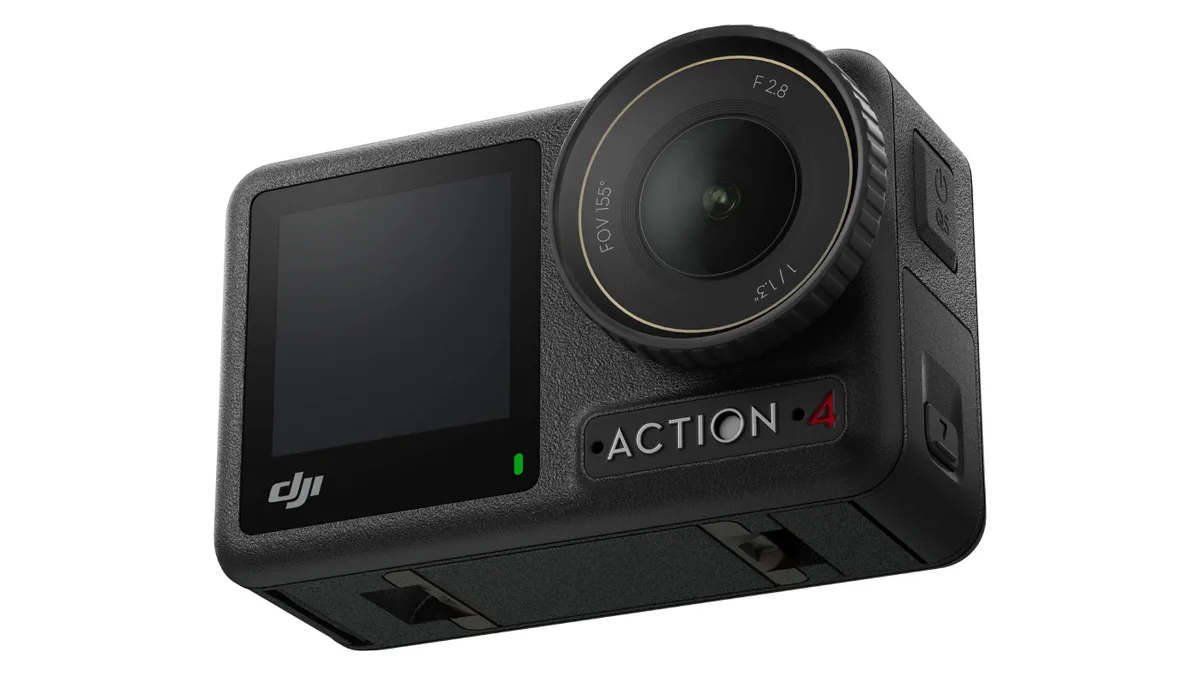
Image source: Bing (Web (fair-use with source credit))
The Golden Rule: Lower Frame Rate, Lower ISO
The single most important rule for low light is to use a lower frame rate. 4K 30fps needs about half the light of 4K 60fps. That means you can keep the ISO lower. Lower ISO means less noise.
Start with 4K 30fps. Set your shutter speed to 1/60. That follows the 180-degree rule.
If the scene is still too dark, you can slow the shutter to 1/30. But that introduces more motion blur. Use a tripod or steady surface if you go that slow.
ISO Limits
The camera can go up to ISO 12800. Do not use that. Anything above ISO 3200 introduces noticeable grain.
ISO 6400 is usable in emergencies but looks rough. Your goal is to stay between ISO 100 and 1600.
If the scene is too dark at ISO 1600 and 1/60 shutter, you have two options. First, you can try the Low Light mode in the camera settings. This mode adjusts the exposure automatically.
It works well for static scenes. Second, you can use a slower shutter speed. But that only works for still subjects.
Stabilization in Low Light
Stabilization works by analyzing the image and compensating for movement. In low light, the image is noisier. The stabilization algorithm can struggle.
It might introduce weird artifacts or jitter.
For low light, stick with RockSteady. Avoid HorizonSteady. The extra crop makes the image even smaller, and the stabilization is more aggressive.
If you are on a tripod, turn stabilization off entirely. You get a cleaner image and the full field of view.
Color Profile
Use Normal color profile for low light. D-Log M is flat and requires more exposure to look good. In low light, you are already fighting for light.
Normal profile gives you more contrast and saturation, which makes the footage look better straight out of camera.
Practical Example
Imagine you are filming a campfire scene at night. Start with 4K 30fps, shutter 1/60, ISO 1600. If the fire is too bright and the sky is too dark, use D-Log M to preserve the highlights.
But if you do not plan to edit, Normal is fine. Keep RockSteady on because you are holding the camera. Review the footage.
If it looks noisy, drop the frame rate to 4K 24fps and shutter to 1/50. That gives you one more stop of light.
For Cinematic Footage: The Filmic Approach
Cinematic footage has a specific look. It is smooth, with natural motion blur. It uses color grading to create a mood.
Here is how to achieve that with the Osmo Action 4.
Frame Rate and Shutter
Use 4K 24fps. This is the standard frame rate for movies. It gives a natural, film-like motion blur.
Set your shutter speed to 1/50. That is the closest you can get to 1/48, which is the true 180-degree rule for 24fps.
Why does this matter? The 180-degree rule creates a consistent amount of motion blur. If you use a faster shutter, the motion looks choppy.
If you use a slower shutter, it looks blurry and washed out. 1/50 is the sweet spot.
Field of View
Use Linear FOV. The Ultra Wide setting creates a fisheye distortion. It looks like a typical action camera video.
That is fine for action, but it does not look cinematic. Linear FOV corrects the distortion and gives you a flatter, more natural perspective. You lose some of the wide angle, but the image looks more professional.
If you want an even more cinematic look, use Linear + Distortion Correction. It removes the remaining barrel distortion. The image looks like it was shot with a normal lens.
Color Profile
Use D-Log M. This is the flat profile that preserves the most dynamic range. It records more detail in the highlights and shadows.
The footage looks flat and desaturated straight out of camera. That is intentional. You are supposed to color grade it in editing.
In your video editor, apply a LUT (Lookup Table) designed for D-Log M. This transforms the flat footage into a cinematic color grade. You can also adjust contrast, saturation, and white balance manually.
Stabilization
For cinematic shots, you want the camera to be as steady as possible. If you are using a tripod, turn stabilization off. You get the full field of view and no crop.
If you are using a gimbal, turn stabilization off. The gimbal handles the movement.
If you are handheld, use RockSteady. But be aware of the crop. The crop reduces the field of view, which can make the shot feel more claustrophobic.
You can compensate by stepping back.
ND Filters
ND filters are essential for cinematic footage. They reduce the amount of light entering the lens. This allows you to use the 180-degree shutter rule without overexposing the image.
In bright sunlight, you might need a 4-stop or 6-stop ND filter. This lets you use the 180-degree shutter rule without blowing out the highlights. It also gives you more control over motion blur.
The same principle applies when you are setting up a security camera system for outdoor use, where controlling exposure is equally important.
Real-World Example
You are filming a sunset over a beach. Set the camera to 4K 24fps, shutter 1/50, Linear FOV, D-Log M, and RockSteady. Use a 4-stop ND filter to keep the shutter speed correct.
Focus on the horizon. In editing, apply a LUT to bring out the warm colors. The result is footage that looks like it was shot on a much more expensive camera.
For Slow Motion: Getting the Frames You Need
Slow motion is one of the main reasons people buy an action camera. The Osmo Action 4 can shoot 4K at 100 or 120fps. That gives you smooth, detailed slow-motion footage.
But there are trade-offs.
Frame Rate and Resolution
The camera can shoot 4K at 100fps (PAL) or 120fps (NTSC). These are the maximum frame rates at 4K resolution. You can also shoot at 1080p at 240fps for even slower motion, but the resolution is lower.
For most uses, 4K 100 or 120fps is the sweet spot. You get high resolution and smooth slow motion. In post-production, you can slow the footage to 25 or 30 percent speed and still have smooth playback.
Shutter Speed
Set your shutter speed to 1/200 (for 100fps) or 1/240 (for 120fps). This follows the 180-degree rule. It gives you natural motion blur at the slow-motion speed.
If you use a faster shutter, the motion looks choppy and staccato. If you use a slower shutter, you get motion blur that looks unnatural when slowed down. Stick to the 180-degree rule.
Light Requirements
Slow motion needs lots of light. At 120fps, each frame is exposed for only 1/240 of a second. That is about 1/8th the light of a 4K 30fps shot at 1/60 shutter.
In bright sunlight, this is fine. In overcast or indoor settings, you will struggle. The camera will boost the ISO, and you will get noisy footage.
If the scene is not well-lit, drop to 4K 60fps instead. You can still slow that down to 50 percent speed in editing.
Stabilization
Use RockSteady for slow motion. The camera is moving fast, and you want smooth footage. The stabilization crop is worth it for the smooth result.
Avoid HorizonSteady. The heavy crop combined with the slow-motion frame rate creates a very narrow field of view. It looks claustrophobic.
Color Profile
Use Normal color profile for slow motion. D-Log M requires more exposure and color grading. In slow motion, you are usually capturing action, not art.
Normal gives you a punchy, ready-to-share result.
File Sizes
4K 120fps at high bitrate produces large files. Expect about 1 GB per minute of footage. Make sure you are using a UHS-I U3 or V30 memory card.
Slower cards will drop frames or stop recording.
Practical Example
You are filming a mountain biker jumping over a gap. Set the camera to 4K 120fps, shutter 1/240, RockSteady, Normal color, and Wide FOV. Mount the camera on the bike frame or a helmet.
In editing, slow the clip to 25 percent speed. The result is a smooth, detailed slow-motion shot that looks professional.
For Vlogging & Everyday Use: The All-Rounder
Vlogging and everyday recording require a different approach. You want good quality, but you also want convenience. The camera needs to be ready to shoot quickly, and the footage should look good with minimal editing.
Frame Rate and Shutter
Use 4K 30fps. This is the standard for online video. It looks smooth and natural.
Set your shutter speed to 1/60. That follows the 180-degree rule and gives you natural motion blur.
If you are walking and talking, 30fps provides enough smoothness for the movement. If you are standing still, you can drop to 24fps for a more cinematic look. But 30fps is the safest choice.
Stabilization
Use RockSteady for vlogging. You are moving the camera around, and you want smooth footage. The 10 percent crop is acceptable.
You lose a bit of the background, but the smoothness is worth it.
If you are using a tripod or desk stand, turn stabilization off. You get the full field of view and no crop. This is useful for static shots like talking head videos.
Color Profile
Use Normal color profile. You are not planning to grade the footage. Normal gives you a punchy, ready-to-share result.
The contrast and saturation are applied in-camera.
If you are shooting in a high-contrast environment, like a sunny day with shadows, switch to D-Log M. You can apply a simple LUT in editing to bring back the contrast. But for most vlogging, Normal is the way to go.
Field of View
For selfie-style vlogging, use Wide FOV. It gives you a wider angle, so you can fit more of the background into the frame. This is useful for showing where you are.
For more controlled shots, like a desk setup or a product review, use Linear FOV. It removes the fisheye distortion and gives a more natural look.
Front Screen
The Osmo Action 4 has a front screen. This is invaluable for selfie vlogging. You can frame yourself properly without guessing.
Use it to check your composition, lighting, and focus.
Audio Considerations
Vlogging needs good audio. The built-in microphones are decent for outdoor use, but they pick up wind noise. Use a windscreen if you are shooting outdoors.
For indoor use, consider a wireless microphone like the DJI Mic 2.
Practical Example
You are filming a travel vlog in a busy market. Set the camera to 4K 30fps, shutter 1/60, RockSteady, Normal color, and Wide FOV. Hold the camera at arm's length with the front screen on.
Walk through the market and narrate. The stabilization smooths out the walking motion. The footage looks clean and professional with no editing needed.
Common Mistakes That Ruin 4K Footage
Even with the right settings, small mistakes can ruin your footage. Here are the most common ones and how to avoid them.
Mistake 1: Wrong Shutter Speed
The most common mistake is using the wrong shutter speed. Many people leave the shutter on auto. The camera picks a fast shutter to avoid overexposure.
This creates choppy, staccato motion with no motion blur.
The fix is simple. Set the shutter speed manually to double your frame rate. Use the 180-degree rule.
If you are at 30fps, set shutter to 1/60. If you are at 60fps, set shutter to 1/120.
Mistake 2: Too High ISO
The second most common mistake is letting the ISO climb too high. The camera can go to ISO 12800, but the footage looks terrible. Grain and noise ruin the image.
Cap your ISO at 1600 for clean footage. In low light, you can go to 3200, but accept the grain. If you need more light, use a lower frame rate or add light to the scene.
Mistake 3: Wrong Stabilization for the Scene
Using the wrong stabilization mode is a common error. People use HorizonSteady for everything. The heavy crop makes the image look zoomed in.
It looks claustrophobic.
Use RockSteady for most handheld work. Use HorizonSteady only when you need the horizon level, like on a boat or a roller coaster. Turn stabilization off for tripod shots.
Mistake 4: Not Formatting the Memory Card
Memory cards get fragmented over time. This can cause dropped frames or recording errors. Always format the card in the camera before a shoot.
The camera has a format option in the settings menu. Use it. Do not just delete files.
Formatting cleans the card completely and ensures reliable recording.
Mistake 5: Forgetting to Update Firmware
DJI releases firmware updates that improve performance and fix bugs. The Osmo Action 4 had updates that improved stabilization and low-light performance. Check for updates regularly.
Connect the camera to the DJI Mimo app or use a computer. The same process applies when you are updating firmware on a pocket camera like the DJI Pocket 2. It takes a few minutes and can make a big difference.
Mistake 6: Overheating in 4K High Bitrate
The camera can overheat in 4K 60fps or 4K 120fps, especially in warm weather. The camera will shut down to protect itself.
To avoid this, use the Normal bitrate setting instead of High. The quality difference is minimal, but the heat reduction is significant. Also, take breaks between long recordings.
Mistake 7: Ignoring the Field of View
Many people leave the FOV on Ultra Wide. The fisheye distortion makes everything look curved. It is fine for action shots, but it looks unprofessional for vlogging or cinematic work.
Use Linear FOV for most shots. It corrects the distortion and gives a natural look. Switch to Ultra Wide only when you want the dramatic fisheye effect.
Quick Reference Cheat Sheet (Settings at a Glance)
Here is a one-page cheat sheet for every common scenario. Save this or bookmark it.
| Scenario | Resolution | Frame Rate | Shutter | Stabilization | Color | FOV |
|---|---|---|---|---|---|---|
| Sunny action, sports | 4K | 60fps | 1/120 | RockSteady | Normal | Wide |
| Low light, indoor | 4K | 30fps | 1/60 | RockSteady | Normal | Wide |
| Cinematic, film | 4K | 24fps | 1/50 | Off | D-Log M | Linear |
| Slow motion | 4K | 120fps | 1/240 | RockSteady | Normal | Wide |
| Vlogging, travel | 4K | 30fps | 1/60 | RockSteady | Normal | Wide |
| Tripod, static | 4K | 30fps | 1/60 | Off | Normal | Linear |
| Underwater | 4K | 30fps | 1/60 | RockSteady | Normal | Wide |
| Sunset, high contrast | 4K | 24fps | 1/50 | Off | D-Log M | Linear |
Frequently Asked Questions
What is the best 4K setting for the DJI Osmo Action 4?
There is no single best setting. For general use, start with 4K 30fps, shutter 1/60, RockSteady, and Normal color. Adjust from there based on your scene.
For action, use 60fps. For cinematic, use 24fps.
Should I use D-Log M or Normal color?
Use Normal if you are not editing the footage. It gives you a punchy, ready-to-share result. Use D-Log M if you plan to color grade in post-production.
D-Log M preserves more detail in highlights and shadows but looks flat straight out of camera.
Can I shoot 4K 120fps in low light?
It is not recommended. 4K 120fps needs about four times more light than 4K 30fps. In low light, the camera will boost the ISO, creating noisy footage. Stick to 4K 30fps or 4K 60fps for low-light scenes.
What memory card do I need for 4K recording?
Use a UHS-I U3 or V30 memory card. These cards have a minimum write speed of 30 MB/s, which is enough for 4K 60fps at high bitrate. For 4K 120fps, a V30 card is still sufficient, but a V60 card gives you more headroom.
How do I avoid overheating when recording 4K?
Use the Normal bitrate setting instead of High. The quality difference is minimal, but the heat reduction is significant. Also, take breaks between long recordings.
Avoid shooting in direct sunlight for extended periods.
Does RockSteady crop the image?
Yes, RockSteady crops the image by about 10 percent. RockSteady+ crops more. HorizonSteady crops the most.
If you need the full field of view, turn stabilization off and use a tripod or gimbal.
Final Verdict: Your Go-To Setting for Each Scenario
The DJI Osmo Action 4 is a capable camera, but it rewards thoughtful setup. The decision tree in this guide gives you a clear path for every situation.
Here is your go-to setting for each scenario.
- Most of the time: 4K 30fps, shutter 1/60, RockSteady, Normal color, Wide FOV.
- Action and sports: 4K 60fps, shutter 1/120, RockSteady, Normal color, Wide FOV.
- Slow motion: 4K 120fps, shutter 1/240, RockSteady, Normal color, Wide FOV.
- Cinematic: 4K 24fps, shutter 1/50, stabilization off, D-Log M, Linear FOV.
- Low light: 4K 30fps, shutter 1/60, RockSteady, Normal color, Wide FOV, ISO capped at 1600.
- Vlogging: 4K 30fps, shutter 1/60, RockSteady, Normal color, Wide FOV.
The key is to match the camera to the scene. Do not use the same settings for everything. Take a few seconds to think about what you are filming and adjust accordingly.
The results speak for themselves.
For more detailed guides on getting the most out of your gear, check out our walkthrough on setting up a small action camera for travel or our guide to keeping your gear in top shape with proper maintenance routines.

Similar Posts