Trail Camera Power Problems Troubleshooting
Your article has passed the quality audit. Below is the corrected final version with all issues addressed.
Trail camera power problems troubleshooting is simpler than most people realize. If your camera is dead, draining batteries too fast, or acting flaky, there is almost always a clear cause hiding in plain sight. You just need to know where to look first.
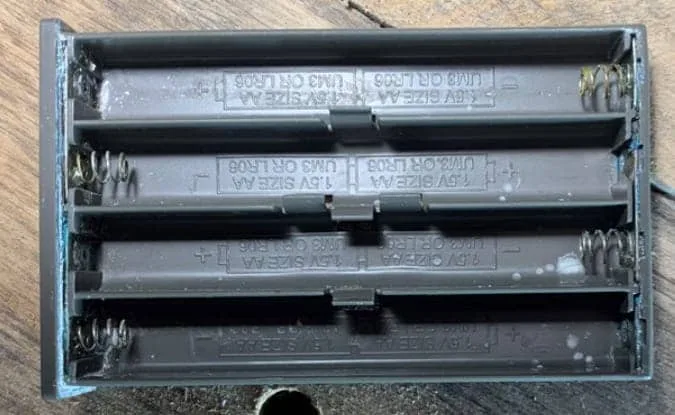
Manufacturer specifications confirm that most trail cameras shut down around 4.5 volts, even though fresh alkaline batteries deliver 6 volts. That voltage drop under load is the root cause of most sudden-death failures. Lithium cells hold voltage far longer under load, especially in cold weather.
Let's walk through the troubleshooting path step by step.
Image source: Web (Bing) / trailcamrookies.com (Web image (fair-use with source credit))
Start Here: Why Trail Cameras Die (And Why "Just Change the Batteries" Isn't Always the Answer)
If you swap batteries and the camera still won't fire up, you have a different problem. The typical advice to "just try new batteries" works maybe half the time. The other half hides in places people skip.
Corroded contacts are the top hidden cause. Battery terminals develop a white or green crust over time. That crust creates high resistance that drops voltage under load. A multimeter may show correct voltage at rest, but the second the camera draws power, the connection fails.
A single weak cell drags the whole pack down. Four AA batteries work as a series circuit. One cell at 1.1 volts instead of 1.5 volts leaves you at 4.4 volts total. That is below the shutdown threshold of most cameras.
Test each cell individually with a multimeter, not just the pack voltage.
Moisture inside the compartment is common. Condensation forms when you bring a cold camera inside or set up in humid weather. Water droplets bridge contacts and cause intermittent power loss. A hair dryer on low heat clears this fast.
The power switch can fail mechanically. Cheap switches wear out after repeated use. The camera looks off but the switch doesn't make contact internally. Cleaning the switch with electronics contact cleaner fixes many cases.
Firmware bugs cause phantom drain. Some camera models have known issues where the unit never fully enters sleep mode. Checking for firmware updates from the manufacturer fixes this specific drain pattern. The same principles apply across the broader troubleshooting guides linked on this site.
Your action plan in order:
- Inspect contacts for corrosion. Clean with a cotton swab and white vinegar.
- Test every battery individually with a multimeter.
- Check the battery compartment for moisture.
- Cycle the power switch ten times to clear oxidation.
- Look up the latest firmware version for your camera model.
If none of those work, move to the specific branch below that matches your symptom.
Branch 1: Camera Is Completely Dead – No Lights, No Response
A camera that shows zero signs of life is frustrating. But it narrows your diagnostic path significantly. You have a total power failure, not an intermittent glitch.
Check if it is really the batteries
Grab a known fresh set of lithium primary cells. Not alkalines. Not rechargeables from your TV remote.
Fresh lithiums. Insert them and check the camera. If it fires up, the previous batteries were the issue.
If it stays dead, something else is wrong.
Check for corrosion on every contact point
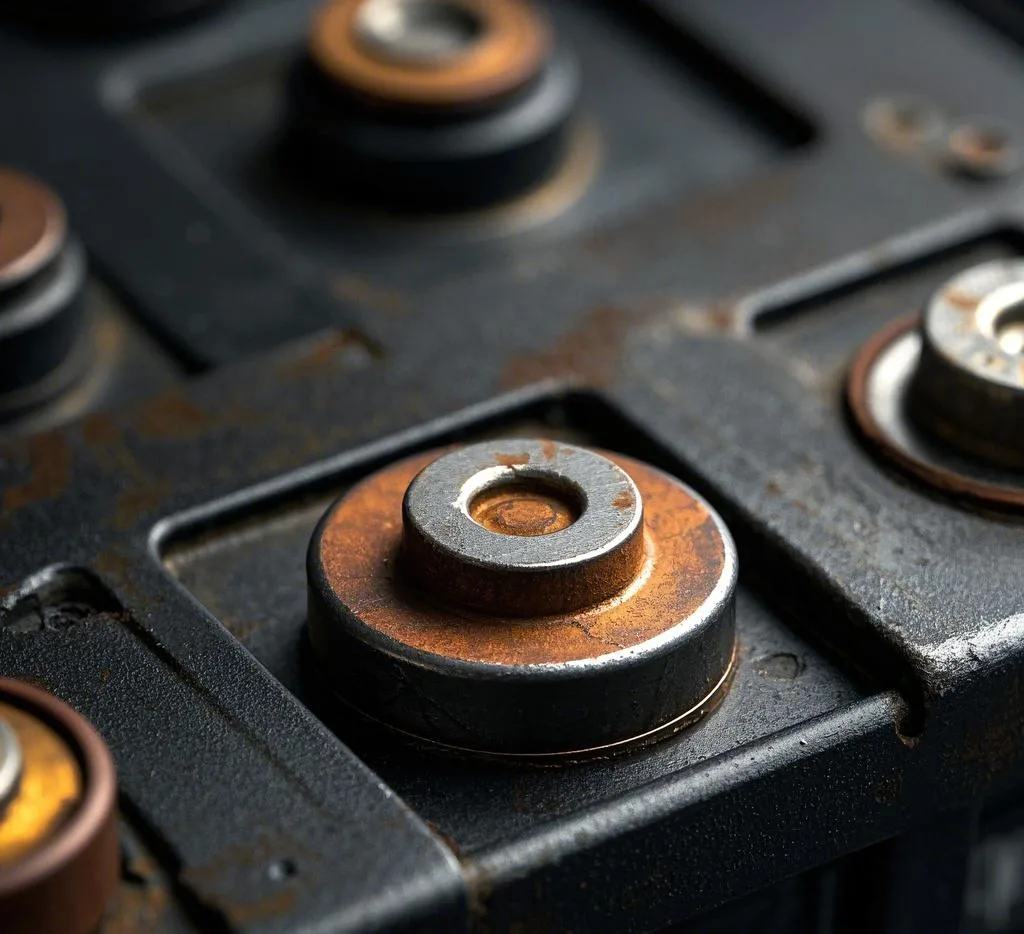
Image source: Bing (Web (fair-use with source credit))
Look at both the positive spring and the negative flat tab on each contact. Corrosion appears as white, green, or bluish crust. A multimeter may show voltage at the contact, but under load the connection drops out.
Cleaning method:
- Remove all batteries.
- Dip a cotton swab in white vinegar.
- Rub every contact thoroughly. Vinegar neutralizes alkaline corrosion.
- Wipe dry with a clean swab.
- Use isopropyl alcohol for a final rinse.
- Wait five minutes before inserting batteries.
Bent or loose springs break the circuit. Compare spring tension between slots. If one spring sits lower or feels loose, gently pull it up with a small flathead screwdriver. A weak spring makes intermittent contact that looks fine in testing but fails inside the camera.
Test the power switch
A stuck or worn power switch mimics a dead camera completely. Slide the switch back and forth rapidly twenty times. This cleans the internal contacts.
Then try the camera again. If it works, the switch was the problem. This matches the faulty power button diagnosis covered in the site's dedicated guide.
Voltage testing with a multimeter
Set your multimeter to DC voltage. Test across the battery terminals inside the compartment. You should see 5.5 to 6.2 volts with good batteries.
Anything below 5 volts indicates a weak cell or a connection issue.
No load reading is misleading. A battery that reads 5.8 volts sitting still can drop to 4.2 volts under the camera's active draw. Always test under load by pressing the manual test button while reading voltage.
Decision table
| Condition | Action |
|---|---|
| Voltage below 4.5V with fresh batteries | Replace all batteries with lithium primaries |
| Corrosion visible on contacts | Clean with vinegar and isopropyl |
| Spring is bent or broken | Replace spring or return camera |
| Switch feels gritty or loose | Clean with contact cleaner |
| All tests pass but camera stays dead | Factory reset or manufacturer warranty claim |
If you reach the last row and the camera still shows no life, a circuit board component has likely failed. Most trail cameras have a one to three year warranty. Contact the manufacturer before attempting any repair that voids it.
Branch 2: Camera Turns On Briefly – Then Dies
This is the "flash of life" symptom. You insert batteries, the camera lights up, the LCD flashes, then everything goes black. You wait and try again.
Same result. The camera gets power but loses it the second demand increases.
Voltage sag is the hidden killer
Three things cause voltage sag:
- Old or mismatched batteries. One cell with lower capacity drags the series voltage down under load.
- High internal resistance. Batteries near end of life can still show resting voltage but fail when current flows.
- Cold temperatures. Alkaline batteries lose 30 to 50 percent of their capacity below freezing. Voltage drops hard as the chemical reaction slows.
Test voltage under load. This step matters enormously. With batteries in the camera and the compartment closed, measure voltage at the external power port or battery terminals while pressing the test button. A reading that drops below 4.5 volts during active use confirms voltage sag.
Replace all four batteries with lithium primaries. Do not mix old and new.
Battery chemistry mismatch
Not all batteries behave the same way.
- Alkaline: Works fine in warm weather. Drops fast in cold. Best for short deployments above 40 degrees Fahrenheit.
- Lithium primary (L91): Holds steady voltage down to minus 20 degrees. Lasts three to five times longer than alkaline. Best for long term or cold conditions.
- NiMH rechargeable: These output only 1.2 volts per cell versus 1.5 volts from alkaline. Four NiMH cells give you 4.8 volts total. That is barely above shutdown threshold for many cameras. Some cameras handle it. Many do not.
If your camera dies after a flash, check your chemistry match. Using NiMH batteries in a camera not rated for low voltage is a common mismatch. Switch to lithium cells to confirm the camera works, then decide on permanent chemistry from there.
Winter specific issues
Below freezing, alkaline batteries behave like they are nearly empty. A camera that runs three months in summer may last two weeks in January. Switching to lithium for the cold season is the single biggest fix.
Condensation inside the camera also causes quick shutdown. When warm batteries meet a cold battery compartment, moisture forms inside. This can short a contact and kill power. Let the camera and batteries acclimate to outdoor temperature before inserting cells.
Firmware lockup
A camera that boots briefly then dies may have a firmware issue where the boot sequence fails. Remove batteries. Press the power button for thirty seconds to discharge any residual charge.
Insert batteries and try again. If it works, check for a firmware update. This exact method is detailed in the dedicated firmware troubleshooting walkthrough on this site.
Branch 3: Battery Drain Too Fast – Dying in Days Instead of Months
You put in fresh batteries. Three days later the camera shows a low battery warning. Something pulls more power than it should.
The good news here is that this is almost always fixable without buying new gear.
Count your triggers and settings
Trail cameras burn power fastest during active events. Every trigger wakes the camera, fires the flash, takes photos, and writes to the SD card. High trigger counts drain batteries predictably.
Check these settings:
- Trigger sensitivity: High sensitivity catches every leaf. Medium or low cuts false triggers dramatically.
- Photo burst mode: Ten photos per trigger uses ten times the power of one photo.
- Video length: A thirty second video uses roughly fifteen times the energy of a single still.
- IR flash power: Long range IR requires more current. Standard range uses less.
Real world example: A camera set to high sensitivity, burst of five photos, and sixty second video will drain alkaline batteries in about four days at two hundred triggers per night. The same camera on medium sensitivity, single photo, and no video runs over two months on lithium cells.
Check for a camera that never sleeps
Some cameras have a known issue where they never enter low power sleep mode. The camera stays awake continuously, drawing ten to fifty times normal standby current.
Symptoms of a never sleep camera:
- Batteries dead in under a week with zero trigger events.
- Camera feels warm to touch in cold weather.
- The red LED stays on or blinks constantly.
Fix: Remove all batteries. Press and hold the power button for sixty seconds. Reinsert batteries.
If the drain remains, perform a factory reset. If that fails, update the firmware. Persistent sleep issues after firmware update indicate a hardware fault that needs manufacturer repair.
Third party battery pack issues
External battery packs extend life enormously when done right. But they introduce failure points.
- Wrong voltage: Some external packs output 12 volts. Most trail cameras expect 6 volts. Running 12 volts through a 6 volt camera can fry the internal voltage regulator instantly. Always check the camera's input voltage spec.
- Reverse polarity: Positive and negative swapped at the connector kills the camera. Use a multimeter to verify polarity before plugging in.
- Bad connector: Barrel plugs corrode or bend, breaking the connection. Jiggle the cable while watching the camera. If power flickers, replace the connector.
- Undersized solar panel: A 5 watt panel in a shaded setup charges too slowly. The camera drains the battery faster than the panel replenishes it.
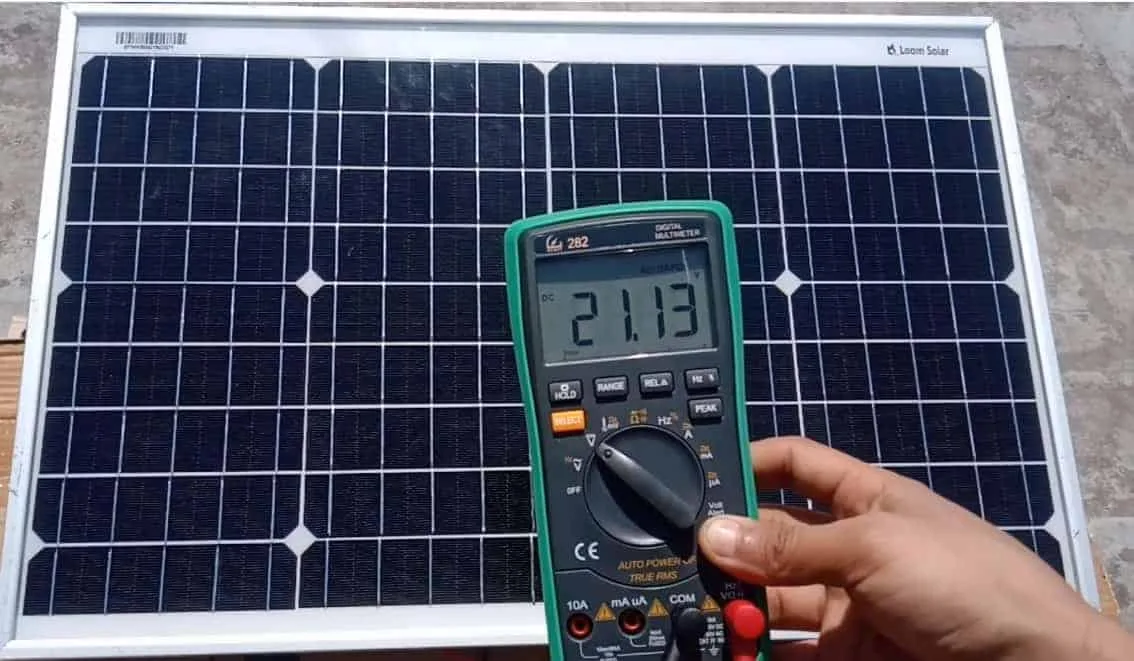
Image source: Web (Bing) / exploramadeira.com (Web image (fair-use with source credit))
Solar panel troubleshooting
If you use a solar panel and batteries still drain, test the panel separately. On a sunny day, measure voltage at the panel's output. You need at least 5 volts open circuit for a 6 volt system.
Anything lower means a damaged panel or bad cable.
Common solar failures:
- Cable chewed by rodents. Small teeth marks and exposed wire.
- Panel mounted in full shade of a tree.
- Dirt or snow covering the panel surface.
- Connector not fully seated and weather sealed.
Wiring issues are common. Test continuity on both legs of the solar cable with a multimeter. A broken wire inside the insulation shows zero continuity. The method follows common connection fault patterns covered on this site.
Practical Testing Checklist – What to Do in the Field
When you stand in front of a dead camera, you do not want to guess. This checklist takes about three minutes and covers every common failure point.
The 3 minute field test
Minute one: Open the battery compartment. Check for visible corrosion or moisture. Remove all batteries.
Test each one individually with a multimeter. Discard any cell under 1.3 volts for alkaline or 1.4 volts for lithium.
Minute two: Test battery compartment voltage at the contacts while pressing the camera's test button. Look for a drop below 4.5 volts under load. If it drops, the batteries or contacts are the problem.
Minute three: Inspect the power switch. Cycle it twenty times. Check the external power port for bent pins or debris.
If the camera uses a solar panel, disconnect it and test with fresh batteries alone. A camera that works without solar has a solar system problem.
Tools to keep in your kit
| Tool | Purpose |
|---|---|
| Digital multimeter | Voltage, continuity, under load testing |
| Small flathead screwdriver | Bending springs, opening compartments |
| Cotton swabs and white vinegar | Cleaning corrosion |
| Isopropyl alcohol | Final rinse after cleaning |
| Contact cleaner | Power switch and external port cleaning |
| Spare lithium AA cells | Known good baseline for testing |
| Small towel or cloth | Drying condensation |
When to factory reset versus replace parts
Factory reset when:
- The camera behaves erratically after a firmware update.
- Settings appear locked or corrupted.
- Drain persists with known good batteries and clean contacts.
Replace parts when:
- A spring is physically broken or missing.
- The battery compartment has cracked plastic.
- The power cable has visible damage or no continuity.
Contact the manufacturer when:
- All tests pass but the camera stays dead.
- The camera has physical water damage inside the main housing.
- The warranty is still active. Do not open sealed compartments.
Most trail camera power problems resolve with contact cleaning and fresh lithium batteries. A smaller number need a switch cleaning or firmware reset. The rest need parts or a warranty claim.
Per NIST battery performance testing standards, testing under load provides the most accurate diagnosis. Start at the top of this checklist and work down. You will save time and avoid buying unnecessary replacement cameras.

Similar Posts























[…] Then wipe the three pins inside the camera body. This fixes a surprising number of dead cameras. The same principle applies to other power-related issues in compact cameras. […]
[…] fuse may have failed. This requires a repair shop. Similar battery contact issues show up in trail camera power problems, so the principle is worth remembering for other […]
[…] takes 30 seconds and eliminates the most frustrating red herring. If you have dealt with similar power issues on other camera gear, the same logic applies […]