Action Camera Blurry Photos Troubleshooting
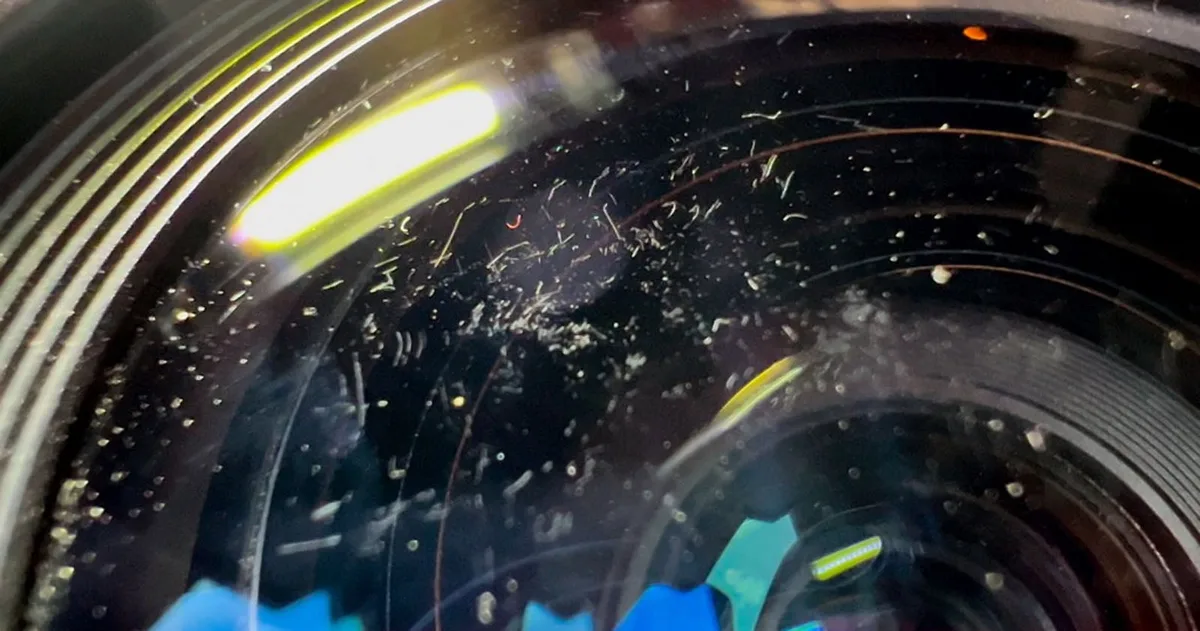
Image source: Web (Bing) / petapixel.com (Web image (fair-use with source credit))
Why Your Action Camera Footage Looks Blurry (And How to Fix It)
You just pulled your action camera out of the mount, excited to watch the footage. You plug in the card, hit play, and… everything looks soft, smeary, or smudged.
Action camera blurry photos troubleshooting is something every owner faces. But it is almost never a sign your camera is broken. It is almost always a settings mismatch, a dirty lens, or a misunderstanding about how these tough little cameras work.
As of 2026, the vast majority of action cameras use a fixed-focus lens with a minimum focus distance of 30 to 50 centimetres. That one spec explains more blur problems than any other factor.
Let us walk through the exact cause of your blur based on what you are seeing.
Quick Answer
Blurry action camera footage comes from three main causes. The shutter speed is too slow for the movement. The lens has dirt, scratches, or condensation on it.
Or the subject is closer than the camera's minimum focus distance. Start by cleaning the lens with a microfiber cloth. Then check your shutter speed.
It should be double your frame rate. Finally, make sure your subject is at least 30 centimetres away. Nine times out of ten, that solves it.
Why Action Camera Footage Gets Blurry in the First Place
Action cameras survive drops, dunks, and dust. That toughness comes with trade-offs. The small sensor needs more light to produce a clean image.
The fixed lens means you cannot adjust focus. And the built-in stabilization can actually create blur in low light.
Shutter speed is the most common culprit. Action cameras default to automatic exposure. In bright daylight that works fine.
As light drops, the camera slows the shutter to let in more light. Once that speed falls below a certain point, any movement turns into motion blur.
The sensor plays a role too. The physical sensor size on most action cameras is around 1/1.7-inch to 1/2.3-inch. That is tiny compared to a smartphone or a DSLR.
Small sensors struggle with noise at higher ISOs. That forces the camera to use slower shutter speeds to compensate, which causes more blur.
If you have been troubleshooting a larger interchangeable-lens camera, the approach is different. A standard guide for fixing blur in mirrorless cameras covers tripod technique and autofocus calibration. Action cameras have their own rules entirely.
The Fixed Focus Reality

Image source: Web (Bing) / ar.inspiredpencil.com (Web image (fair-use with source credit))
Here is the most important thing to understand. Action cameras use a fixed focus lens. Once manufactured, the focus is set permanently at the factory to a hyperfocal distance.
That distance is chosen so that everything from about one or two feet away to infinity is acceptably sharp.
"Acceptably sharp" is not "tack sharp." It is a compromise. The camera is optimised to make distant landscapes and nearby selfies both usable, but neither will be perfect. If you are pixel-peeping on a 4K monitor, you will notice softness.
That is the lens design, not a defect.
The minimum focus distance matters a lot. Most action cameras cannot focus on anything closer than about 12 inches (30 centimetres). If you mount the camera on your chest and point it at your hands holding a handlebar, you are inside that distance.
The result is permanent soft blur that no settings change will fix.
Your options are simple. Move the camera further away. Or accept that close-up detail will never be razor sharp with a fixed lens.
If you want true sharp focus at close range, you need a camera with autofocus. The process of calibrating autofocus on a mirrorless system is a different world entirely.
The Three Main Culprits: Shutter, Stabilization, and Sensor
Each type of blur looks different. Here is how to tell them apart.
Shutter speed causes motion blur. If your footage looks soft only when things are moving, or if you see smears and streaks during fast action, your shutter speed is too slow. Fix it by locking your shutter to double your frame rate. Shooting 30 frames per second?
Set shutter to 1/60th of a second. Shooting 60fps? Set it to 1/120th.
That is the 180-degree rule, and it is the single most reliable fix for motion blur.
Stabilization causes a different kind of blur. Electronic image stabilization (EIS) working hard in low light can introduce a warping, jelly-like wobble. Some people mistake that for blur. It looks more like the image is breathing or swimming.
The fix is to turn off stabilization when light is low, or use a higher frame rate which forces a faster shutter.
The sensor causes grain and softness. The image is not smeary. It just looks like a fine texture of sand over everything. Details are lost.
That is noise from high ISO. The camera is boosting sensitivity to compensate for darkness, and the trade-off is lost sharpness. The only fix is more light.
Add an external light source or accept noise reduction in post.
Each of these problems has a different feel. Knowing which one you see tells you exactly where to start troubleshooting.
The Decision Tree: Diagnose Based on Your Exact Symptom
Image source: Bing (Web (fair-use with source credit))
Match your exact problem to the right fix. Find your branch and follow the steps in order.
Branch A: Everything is always blurry, even in good light
This is the easiest one. Your lens is either dirty, scratched, or fogged. Clean it with a microfiber cloth.
If the blur is hazy or cloudy, check for condensation inside the housing. If the lens has a visible scratch, you will need a replacement part or a new camera. No setting will fix physical damage.
Branch B: Blurry only when moving or panning fast
Your shutter speed is too slow. Switch to manual exposure mode. Set your shutter to double your frame rate.
At 4K 60fps, set the shutter to 1/120. If the image is still blurry, go faster. In bright light, 1/240 or 1/480 can freeze fast motion like a bike landing or a splash.
The trade-off is that the image will become darker, so you might need to raise ISO to around 800.
Branch C: Blurry in low light, fine in daylight
This is a combination of slow shutter and high ISO noise. Your camera is struggling for light. The first fix is to switch to a lower frame rate.
Go from 60fps down to 30fps or even 24fps. That lets the shutter stay open longer without going too slow relative to the frame rate. If that is not enough, add an external light.
A small LED panel on a handle mount makes a huge difference for night shots or indoor vlogging.
Branch D: Blurry after going underwater or in humidity
That is condensation or water droplets on the lens. Before opening the housing, try a simple trick. Submerge the camera briefly underwater again, then take it out and shake it gently.
The water often wipes the fog away. For persistent fogging, use anti-fog inserts inside the housing. Also check the O-ring seal for dust or damage.
A broken seal causes slow water ingress and fogging.
Branch E: Blurry only when zoomed in or looking at distant objects
This is the fixed focus limit. Distant objects are within the hyperfocal range, but they will never be as sharp as through a telephoto lens on a full-frame camera. The only fix is to get closer to your subject, or use a higher resolution mode and zoom in during editing.
That is how action cameras work. You trade ultimate sharpness for durability and wide-angle coverage.
If none of these branches match your symptom, check the camera settings more thoroughly. A wrong exposure compensation value or an accidental filter setting can cause softness that looks like blur. Resetting to factory defaults and testing in full auto mode will eliminate that possibility.
Our guide on resolving common camera setup problems covers a full reset process step by step.
Mistakes That Make Blurry Footage Worse
Knowing what not to do saves you time. Here are the most common errors people make when trying to fix blur.
Cranking up digital zoom. Digital zoom on an action camera just crops the image and magnifies the blur. It does not give you more detail. If you need a closer view, physically move closer or accept the wider shot in post.
Using the wrong memory card. A slow memory card can cause dropped frames or compression artifacts that look like blur. According to manufacturer specifications, you need at least a V30 speed class card for 4K recording. A V60 card is better for high bitrate modes.
Ignoring the lens protector. Many action cameras come with a removable lens protector or a flat glass replacement for underwater use. A scratched or cheap protector can soften your image significantly. Remove it and test without it to see if that is the source of your blur.
Stabilizing footage that is already blurry. Electronic stabilization works best on clean, sharp footage. Running blurry footage through stabilization software just smears the blur further. Fix the source first, then stabilize.
Assuming the camera is defective. This is the most expensive mistake. Aggregate user reports suggest that fewer than five percent of blur complaints are actual hardware defects. The other 95 percent are settings, dirt, or technique.
Do not send your camera back until you have worked through the decision tree above.
Expert Tips: Settings That Save Most Footage
You do not need to master manual mode to get sharp footage. These three settings do the heavy lifting.
Use the "ProTune" or manual exposure mode. Most action cameras have a simplified manual mode buried in the settings. Turn it on. Set the shutter speed to double your frame rate.
Leave ISO on auto with a maximum cap of 800. That alone prevents the camera from using a too-slow shutter in dim light.
Switch to a lower frame rate. 60fps looks smooth, but it demands twice the shutter speed of 30fps. In marginal light, drop to 30fps or 24fps. The shutter can be slower while staying within the double-the-frame-rate rule, which lets in more light and reduces blur.
Use a flat colour profile. This does not prevent blur directly, but it preserves more detail in shadows and highlights. A flat profile gives you more room to sharpen the image in editing without introducing artifacts. The sharpening in post can make a slightly soft image look much crisper.
If you are also dealing with noisy or grainy images alongside blur, our guide on fixing noisy footage from mirrorless cameras covers noise reduction techniques that transfer directly to action camera edit workflows.
Real Scenarios: What These Fixes Look Like in Practice
Let us apply the decision tree to real situations.
Scenario one: Mountain bike test footage. A rider mounts the camera to the handlebars and films a downhill run. The footage is blurry during fast sections but sharp when the bike is stopped. The slowest shutter speed in auto mode was 1/60 at 30fps.
The fix: switch to manual, set shutter to 1/120, and cap ISO at 800. The footage is now sharp on descents but slightly darker in shade. That is the trade-off.
The rider prefers visible detail to perfect exposure.
Scenario two: Indoor vlog. The camera is on a tripod. The subject is sitting three feet away talking to the lens. Everything looks soft.
The lens is clean. The subject is within the minimum focus distance of 12 inches? No, three feet is fine.
But the lighting in the room is dim. The camera is running at 60fps with auto shutter. The shutter is at 1/30, which is below the frame rate.
Motion blur from small head movements makes the image look soft. The fix: drop to 30fps and add a small LED panel. The footage sharpens immediately.
Scenario three: Surf or underwater footage. The camera comes out of the water and the footage looks like a foggy dream. The lens has water spots. The fix: a quick fresh-water rinse and a lens wipe before the next session.
For persistent fogging, anti-fog inserts inside the housing solve the problem entirely.
Frequently Asked Questions
Can a firmware update fix blurry footage?
Sometimes. Manufacturers occasionally release firmware that improves autofocus algorithms, stabilization processing, or exposure logic. Check the support page for your specific model.
If the camera is using a buggy stabilization algorithm, a firmware update can noticeably sharpen the image. If the blur is from physical damage or dirty glass, firmware will not help.
Is a scratched lens always a lost cause?
Not always. Small surface scratches on the lens glass cause a minor loss of contrast rather than outright blur. You can test by shooting a bright scene and checking the image for flares or haze.
If the scratch is deep or right in the centre of the lens, replacement is the only option. Some models have replaceable lens covers that cost far less than a new camera.
Will an ND filter fix motion blur?
An ND filter reduces the light entering the lens, which forces the camera to use a wider aperture or slower shutter. That is the opposite of what you want for motion blur. ND filters are useful for getting a cinematic "long exposure" look on moving water, but they do not fix blur caused by fast movement.
They actually make it worse in most cases.
Why is my action camera blurry underwater but fine on land?
Water refracts light differently than air. Most action cameras use a dome-shaped lens cover that creates distortion underwater. You can fix this with a flat glass lens replacement or by shooting with a red filter to correct color shift.
The blur you see underwater is often a combination of refraction and low light, not a camera defect.
Does higher resolution mean sharper footage?
Not necessarily. 5.3K resolution captures more pixels, which gives you room to crop and zoom in post. But if the underlying blur is from slow shutter speed or dirty glass, higher resolution just gives you a bigger blurry image. Fix the cause first, then shoot at the highest resolution your card can handle.
Should I turn off stabilization entirely?
Only in specific situations. Turn off stabilization if you are shooting in very low light and seeing the warping effect described earlier. Turn it off if the camera is mounted on a tripod or a steady surface where it is not needed.
For most action use, stabilization is your friend and helps prevent the motion blur caused by your own movement.
Decision Guide: Which Fix to Try First
Your symptoms determine your starting point. Here is the order to follow.
| If you see this | Try this first | Then this |
|---|---|---|
| Constant softness in all conditions | Clean the lens | Check for scratches |
| Blur only during movement | Lock shutter to 2x frame rate | Raise ISO cap to 800 |
| Blur only in dim light | Switch to 30fps or 24fps | Add external light |
| Hazy or foggy image | Check for condensation | Use anti-fog inserts |
| Softness at distance | Shoot at highest resolution | Crop in editing |
| Warping or swimming image | Turn off stabilization | Update firmware |
The single most powerful fix is understanding the 180-degree shutter rule. Once you lock your shutter speed to double your frame rate, you eliminate the most common cause of action camera blur overnight. Everything else is cleaning, positioning, or accepting the limits of a fixed-focus lens.
If you continue to have trouble after working through this guide, your camera may actually be defective. But run through the branches first. The odds are heavily in favour of a settings fix, not a hardware problem.

Similar Posts