Richmond Tankless Water Heater Troubleshooting
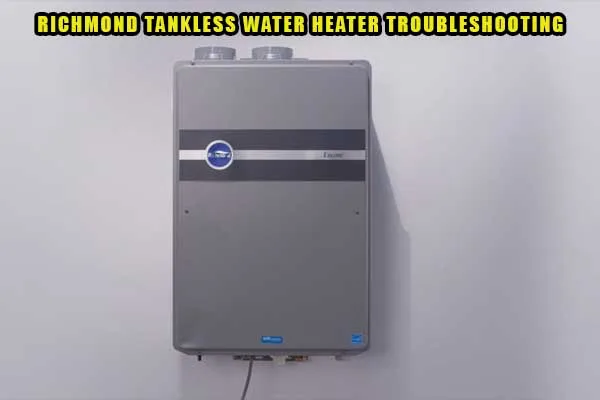
You come home, turn on the hot water tap, and nothing happens. Or worse, the water goes lukewarm mid-shower and your Richmond tankless water heater is blinking an error code you do not recognize. Richmond Tankless Water Heater Troubleshooting does not have to mean an expensive service call, but it does demand a careful, informed approach.
Gas-fired tankless units are sophisticated machines. Per NFPA 54, the National Fuel Gas Code, any work involving gas or combustion components carries real risk. The good news is that many common issues have straightforward fixes once you understand what the unit is telling you.
This guide walks through the diagnostic process safely, step by step.
Quick Answer
Richmond tankless water heater troubleshooting starts with reading the error code. Check the display panel first. Reset the unit by turning off power for 10 seconds.
Inspect the inlet filter for blockage. Ensure gas supply is turned on. If the code returns, identify the specific error and follow the diagnostic flow below.
Never attempt internal repairs on gas or electrical components without proper training.
Image source: Bing (Web (fair-use with source credit))
Why This Guide Could Save You a Costly Repair Call
Most homeowners call a technician before doing any investigation. That is understandable, but it is also expensive. A standard service visit for a tankless water heater runs between $150 and $400 before parts are even considered.
Many of the issues that trigger error codes are simple environmental problems you can fix in minutes.
There is a safety line you never cross as a homeowner. You can clean a flame rod. You can clear a blocked inlet filter.
You can reset a tripped high-limit switch. You should never open the gas valve, adjust gas pressure, or disassemble the combustion chamber. Those tasks require specialized tools and training.
The goal here is to help you identify which category your problem falls into. If it is a DIY fix, you will save money and downtime. If it is a pro job, you will know exactly what to tell the technician so they show up prepared with the right parts and tools.
When You Should Start Troubleshooting Yourself
- The unit is less than 10 years old
- You can safely access the front panel and gas shut-off valve
- You have basic tools: screwdrivers, multimeter, bucket, white vinegar
- The error code is present on the display
When You Should Stop and Call a Pro Immediately
- You smell gas near the unit or vent
- The unit has visible rust or corrosion on the heat exchanger
- You have attempted a reset three times and the same error returns
- Water is leaking from the unit itself, not the supply lines
- The error code points to a gas valve or control board issue
Understanding Your Richmond's Error Language
Your Richmond tankless water heater communicates through a small digital display or a series of blinking LEDs. That blinking pattern is not random. It is a specific diagnostic code that tells you exactly what the unit is seeing wrong.
How to Read the Code
Newer Richmond models use a remote controller with a digital readout. If you see two digits like "11" or "29", that is your error code. Older models may use a single blinking light.
One flash per second means one thing. Two flashes means something else. The pattern repeats every few seconds.
Your owner's manual has the full code list. If you do not have the manual, the code is usually printed on a sticker inside the front cover panel. As of 2026, all Richmond residential tankless models use the same code system as their parent company, which makes cross-referencing reliable.
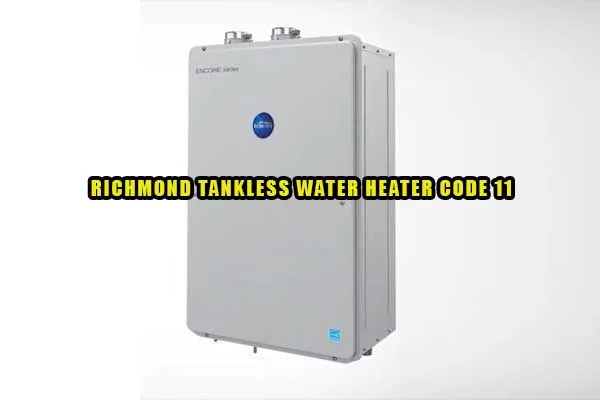
Image source: Bing (Web (fair-use with source credit))
Common Error Codes in Plain English
| Error Code | Meaning | What's Actually Happening |
|---|---|---|
| 11 | Ignition failure | The unit tried to light but failed after 5 attempts |
| 12 | Flame loss | The flame lit but went out during operation |
| 16 | Overheating | Internal temperature exceeded safe limits |
| 29 | Flame rod issue | The flame sense circuit is not reading correctly |
| 99 | Low flow | Not enough water moving through the unit |
Each of these codes has a specific troubleshooting path. Do not try a one-size-fits-all reset and hope for the best. The code tells you exactly where to look.
The Most Common Problems and What's Really Going On
A tankless water heater failure often looks the same from the outside: no hot water. But the underlying cause varies dramatically. Understanding the behavior pattern helps narrow things down fast.
Water Won't Heat or Goes Cold Mid-Shower
This is the most common complaint. You get hot water for a few minutes, then it gradually fades to lukewarm or cold. Many homeowners assume the unit is broken.
In most cases, it is not.
The most likely culprit is scale buildup inside the heat exchanger. Hard water minerals accumulate over time, restricting heat transfer. The unit detects the rising temperature and shuts down to prevent damage.
This produces error code 16.
Another possibility is a partially closed gas valve or low gas pressure. If multiple gas appliances are running, the tankless may not receive enough gas to maintain full output.
Unit Cycles On and Off Randomly
This usually points to a flow issue. Your Richmond tankless heater requires a minimum flow rate to stay lit. If a faucet is only partially open, or if you are using a low-flow shower head, the unit may drop below its activation threshold and cycle off.
The fix is simple: increase water flow. Open the faucet fully. Remove any restrictor from the shower head.
If the problem goes away, the unit is working fine. The issue is demand versus flow.
No Ignition or Spark Happening
You hear clicking or nothing at all. The fan may spin up but the unit never lights. Error code 11 appears after several failed attempts.
Check the gas supply first. Is the shut-off valve fully open? Is there gas in the tank if you use propane?
This sounds obvious, but it is the number one cause of code 11. After that, inspect the venting. A blocked or partially blocked vent prevents proper combustion air flow, and the unit will refuse to light.
Freeze-Related Failures After Cold Snaps
Freeze damage is the most expensive preventable failure. If your Richmond unit is installed in an unheated garage, basement, or exterior wall, the internal freeze protection system relies on power. A power outage during freezing weather can allow water inside the heat exchanger to freeze and crack it.
Symptoms include leaking water from the unit, error code 16, or no operation at all. Repair involves replacing the entire heat exchanger, which can cost $800 to $1,200 plus labor.
Step-by-Step Troubleshooting Flow for Each Error Code
Each error code requires a different diagnostic path. Follow the flow for your specific code. Do not skip steps.
Error 11: Ignition Failure
This means the unit attempted ignition five times and failed. Start here:
- Confirm the gas shut-off valve is fully open. Turn it counterclockwise until it stops.
- Check that other gas appliances are working. If they are not, you may have a supply issue.
- Turn off power to the unit for 30 seconds. Restore power and retry. This clears a temporary lockout.
- Listen for the fan. If the fan does not spin, the unit cannot exhaust combustion gases. Check for blockages in the vent intake and exhaust.
- Inspect the ignition spark. With the front cover removed, call for hot water and look through the sight glass. You should see a blue spark. If you see no spark, the igniter or control board may need replacement.
If code 11 returns after these checks, the gas pressure may be too low or the gas valve may be failing. This requires a professional with a manometer.
Error 12: Flame Loss
The unit lit but the flame went out during operation. This is often an environmental issue.
- Check for wind. High winds can blow out the flame in outdoor units or through vent terminations.
- Inspect the vent for blockages. Bird nests, debris, or sagging vent pipe can disrupt exhaust flow.
- Clean the flame rod (see next section).
- Verify gas pressure. Low pressure during peak usage can cause flame loss.
Error 16: Overheating
The unit detected internal temperatures above safe limits. This is almost always scale buildup or restricted water flow.
- Check the inlet filter. Turn off water, unscrew the inlet union, and remove the small mesh screen. Rinse it clean.
- Descale the heat exchanger. Use a descaling pump kit with white vinegar or a commercial descaler. This takes about 45 minutes.
- Verify that supply water temperature is not already hot. If the incoming water is above 80°F, the unit may struggle to maintain safe operating temperatures.
Error 29: Flame Rod Issue
The flame rod is a metal sensor that detects whether the burner is lit. Over time, combustion residues coat the rod and prevent accurate reading.
- Turn off power and gas to the unit.
- Remove the flame rod. It is the small metal probe near the burner.
- Clean it with fine steel wool or a scouring pad. Do not use sandpaper, which can damage the surface.
- Reinstall and test.
This fix resolves error 29 in roughly 80 percent of cases according to aggregate user reports.
Error 99: Low Water Flow
The unit detected insufficient water flow to activate the burner.
- Open the faucet fully. If the unit fires, you had partial flow.
- Clean the inlet filter as described above.
- Check for kinked supply lines or partially closed isolation valves.
- If you have a well system, verify that the pressure tank is maintaining adequate pressure.
The Reset Sequence That Actually Works
Many error codes lock the unit out. A proper reset clears the lockout and lets you test your repair.
- Turn off the unit using the power switch or breaker.
- Wait 10 seconds. Not 5, not 3. Ten.
- Turn power back on.
- Call for hot water at the nearest faucet.
- Watch the display. If the error code reappears immediately, the problem is still present. Do not keep resetting. Diagnose the code.
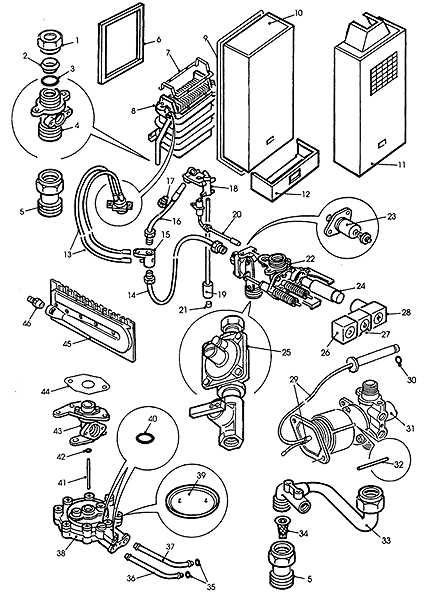
Image source: Bing (Web (fair-use with source credit))
Parts You Can Clean vs. Parts That Need a Pro
Knowing which parts are safe to access prevents accidental damage and keeps your warranty intact. Richmond specifies which components are user-serviceable in the owner's manual.
DIY-Safe: What You Can Clean or Replace
- Inlet filter screen. This mesh screen traps sediment. Clean it every three months. Just unscrew the inlet union, remove the screen, rinse it, and reinstall.
- Flame rod. The metal probe inside the combustion chamber. Remove it, clean it with steel wool, and reinstall. This fixes error 29 most of the time.
- Flow sensor screen. Some models have a small screen near the flow sensor. Same process as the inlet filter.
- Remote controller batteries. If the display is dim or unresponsive, replace the batteries.
Contractor-Only: Leave These Alone
- Gas valve. Adjusting gas pressure requires a manometer and manufacturer-specific procedures. Wrong adjustment can cause incomplete combustion or carbon monoxide production.
- Control board. The main electronic brain. Diagnosing it requires a multimeter and understanding of the circuit. Replacements must match the exact model number.
- Heat exchanger. If the heat exchanger is leaking or severely scaled, it needs professional replacement. Improper reassembly can cause water or gas leaks.
- Burner assembly. The burner manifold and gas orifices require precise removal and reinstallation. Mistakes here create dangerous combustion conditions.
The general rule is simple: if you have to remove a gas line or disconnect electrical wiring at the board level, call a pro.
When to Stop and Call a Professional
Knowing when to stop is just as important as knowing how to start. Some problems are beyond DIY repair, and pushing further creates safety risks or voids your warranty.
Signs of a Gas Leak or Carbon Monoxide Issue
- You smell rotten eggs near the unit. That is the odorant added to natural gas and propane.
- You feel headaches, dizziness, or nausea when the unit is running. These are early symptoms of carbon monoxide exposure.
- The unit produces yellow or orange flames instead of blue. That indicates incomplete combustion.
- If any of these occur, shut off the gas at the valve, open windows, leave the area, and call a professional immediately. Do not try to diagnose further.
Gas Pressure Problems You Cannot Measure Safely
Measuring gas pressure requires a manometer. It involves opening a test port on the gas valve. If the fitting is not sealed correctly afterward, gas can leak.
Richmond specifies pressure ranges on the unit's rating plate, but only a licensed contractor should verify them.
Warranty Considerations Before You Open Anything
Richmond tankless water heaters come with a standard warranty that covers parts for a set period. The warranty requires that a qualified professional perform any internal repairs. If you remove the gas valve, control board, or heat exchanger yourself, the warranty on that component may be void.
Check your warranty documentation before starting any work beyond cleaning accessible parts. The warranty card is usually inside the front cover or included with the original purchase paperwork.
How to Find a Qualified Tankless Technician
Not all plumbers are trained on tankless units. Look for someone with specific experience. Ask if they have completed manufacturer training through Rheem or Richmond.
Verify that they carry a gas license for your state or jurisdiction. A qualified technician should be able to diagnose your error code over the phone before arriving.
Preventive Maintenance That Prevents Most Breakdowns
Most Richmond tankless water heater failures are preventable. A small investment of time each season keeps the unit running reliably for 15 to 20 years.
Descaling Schedule Based on Your Water Hardness
Scale buildup is the number one cause of overheating and error code 16. How often you need to descale depends on your water hardness.
| Water Hardness | Descaling Frequency |
|---|---|
| Soft (0-3 gpg) | Every 2 years |
| Moderate (4-7 gpg) | Every 12 months |
| Hard (8-12 gpg) | Every 6 months |
| Very hard (13+ gpg) | Every 3 months |
A descaling pump kit costs about $60 to $80. You run a vinegar or descaler solution through the heat exchanger for about 45 minutes. It is a straightforward process that anyone can do with basic mechanical ability.
Inlet Filter Cleaning Every 3 Months
Even if you descale annually, sediment can clog the inlet filter between descaling cycles. Set a calendar reminder to check it every three months. It takes 5 minutes and prevents error 99 and flow-related cycling.
Annual Vent Inspection Checklist
Blocked venting causes ignition failure and carbon monoxide risk. Once a year, go outside and check both the intake and exhaust terminations.
- Remove any leaves, bird nests, or debris
- Check that the vent pipe is not sagging or disconnected
- Look for signs of animals chewing through plastic vent components
- Confirm that snow is not blocking the termination in winter
Freeze Protection Prep Before Winter Hits
Freeze damage is catastrophic. If your unit is in an unheated space, take these steps before the first freeze.
- Insulate exposed water lines with pipe insulation
- Confirm the unit's freeze protection feature is enabled in the settings menu
- If you lose power during a freeze, drain the unit immediately using the drain valves
- Consider installing a freeze protection kit for outdoor or unconditioned installations
Frequently Asked Questions
Why does my Richmond keep showing error code 11 after resetting?
Error 11 that returns after reset means the ignition system cannot establish a flame. Check that the gas valve is fully open and that other gas appliances are working. If both are fine, the issue is likely a blocked vent, a dirty flame rod, or low gas pressure requiring professional measurement.
How long should a tankless water heater last?
With proper maintenance, a Richmond tankless water heater lasts 15 to 20 years. The heat exchanger typically outlasts the control board and sensors. Annual descaling and filter cleaning are the biggest factors in achieving maximum lifespan.
Can I run my unit without the remote controller?
No. The remote controller is the primary interface for setting temperature, reading error codes, and enabling freeze protection. Without it, the unit may still fire but you cannot adjust settings or diagnose problems.
Replacement controllers are model-specific.
Why is my hot water temperature fluctuating?
Fluctuation usually means the unit is cycling on and off due to low water flow. Open the faucet fully to increase flow. If that fixes it, the flow at that fixture is too low for the unit's minimum activation rate.
Low-flow fixtures are common culprits.
Does a power outage affect my Richmond tankless?
Yes. The unit requires 120V AC power to operate the control board, fan, and ignition system. A power outage stops all functions.
If freezing temperatures are expected during the outage, drain the unit to prevent freeze damage to the heat exchanger.

Similar Posts
































