Sony ZV-E10 II Vlogging Settings
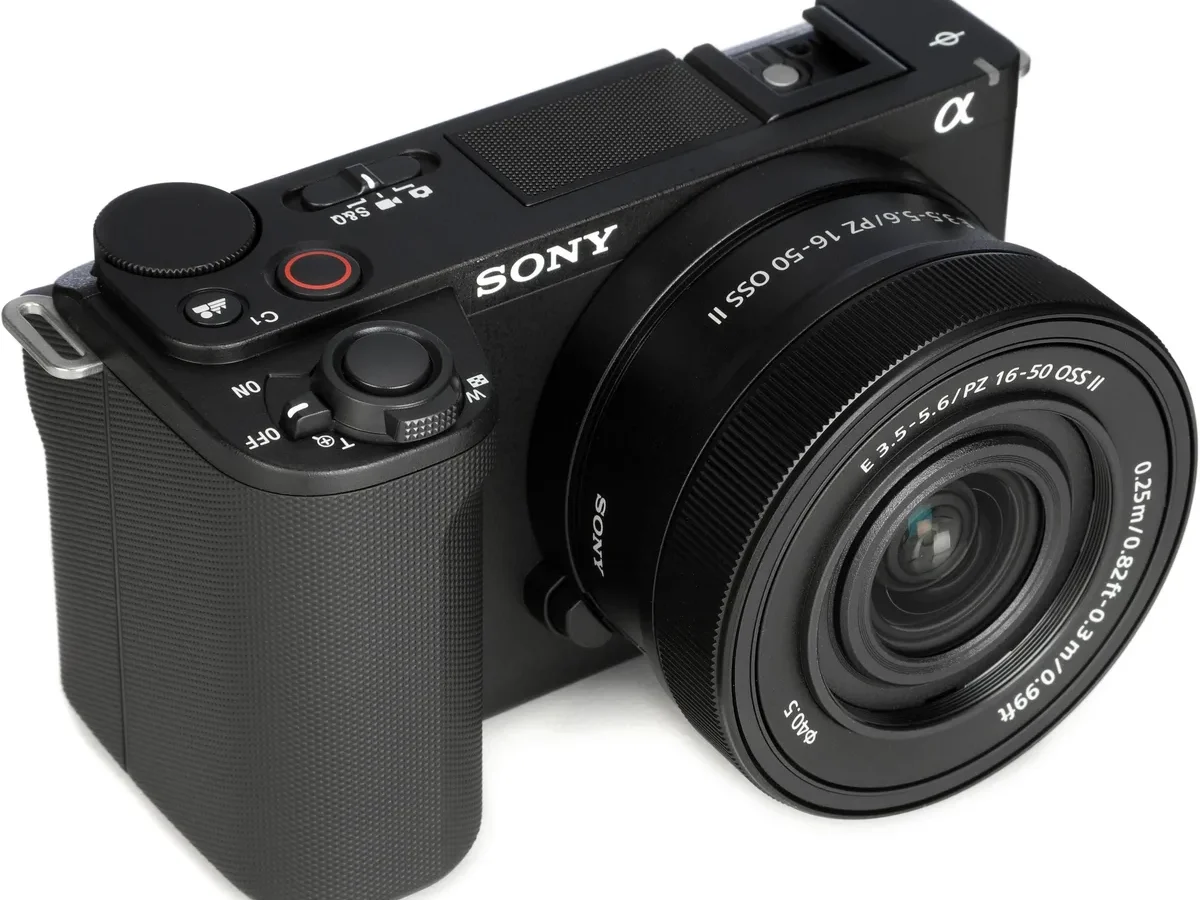
Your vlog looks soft. The audio hisses. The colors feel off.
You know the Sony ZV-E10 II vlogging settings are the difference between a crisp, professional clip and something that screams "I just hit record and hoped for the best." The frustration is real, and it's totally fixable.
Manufacturer specifications confirm the ZV-E10 II packs a 26.1-megapixel APS-C sensor and the BIONZ XR processor. That is more than enough hardware to deliver beautiful footage. The camera just needs the right settings to match your specific situation.
Let's walk through the variables that matter most.
Quick Answer
The best settings depend on your light and motion. For indoor vlogs, use Aperture Priority mode at f/2.8, shutter 1/50, ISO 800 to 1600. For outdoor vlogs, use Manual mode with a variable ND filter, shutter 1/50, ISO 100 to 200.
Turn on Active SteadyShot for walking shots. Set audio levels manually. Use a Creative Look for quick uploads or S-Log3 if you plan to color grade.
Why Your Vlog Settings Are Probably Wrong (And What to Do About It)
Most people set their ZV-E10 II to Auto mode, point the lens at themselves, and hit record. It works. Barely.
The problem is that Auto mode guesses what you want. It bumps the ISO in low light until the image looks like static. It chooses a shutter speed that makes motion blur look messy.
It picks the wrong white balance, leaving your skin tones green or orange.
The truth is the ZV-E10 II is a powerful tool that needs human guidance. The camera does not know whether you are filming in a brightly lit kitchen or a dimly lit park at dusk. It does not know if you are holding the camera still or walking on a gravel path.
Without the right settings, the footage will look average at best.
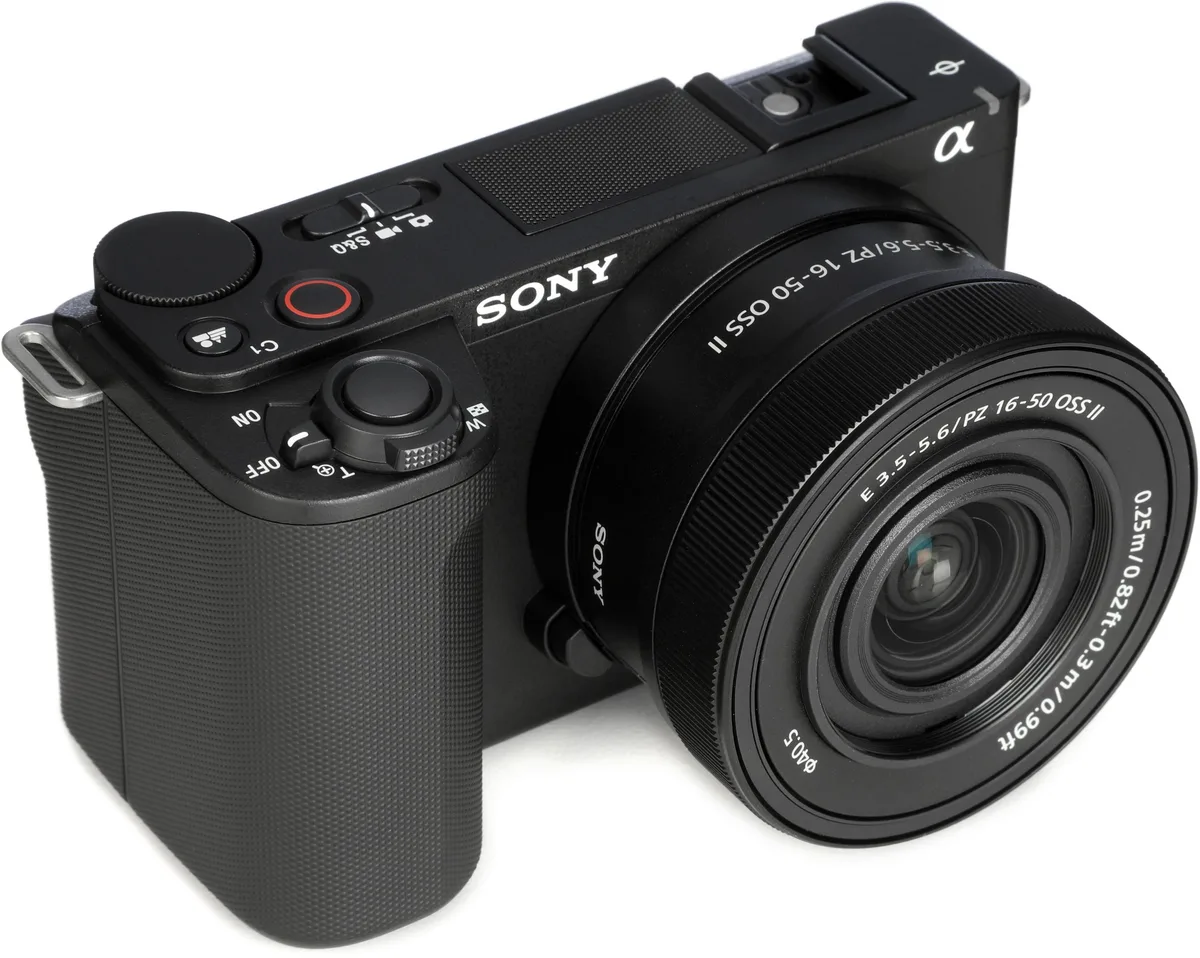
Image source: Bing (Web (fair-use with source credit))
Here are the most common mistakes we see in aggregate user reviews:
| Mistake | Why It Hurts | The Fix |
|---|---|---|
| Using Auto mode for everything | Camera chooses wrong settings for your scene | Switch to Manual or Aperture Priority |
| Ignoring shutter speed | Motion blur looks unnatural | Follow the 180-degree rule |
| Leaving ISO on auto | Noisy, grainy footage in low light | Set a manual ISO ceiling |
| Forgetting white balance | Skin tones look weird | Set a custom white balance per scene |
| Not adjusting audio levels | Clipped or hissy sound | Check levels before recording |
The root cause is simple. People treat the ZV-E10 II like a phone camera. It is not.
It is a proper interchangeable-lens camera that rewards you for learning its little quirks. Once you understand the three variables that change everything, the settings start to make sense.
The Three Variables That Change Everything (Light, Motion, Audio)
Every vlogging situation boils down to three core variables. Change any one of them, and your settings need to shift. Think of them as the three pillars of a good vlog clip.
Light is the most obvious. Your camera needs enough light to keep the ISO low and the shutter speed fast enough to freeze motion. Indoors with a desk lamp is different from outdoors under a cloudy sky.
If you are in a bright room, you can use a lower ISO and a faster shutter. If the light is dim, you will need to open the aperture or slow the shutter.
Motion refers to two things. First, how much you are moving the camera. Second, how much your subject is moving.
A walking vlog with a handheld camera needs stabilization. A static sit-down vlog where you are talking to the lens does not. If you are filming a fast-moving pet or a child, you need a faster shutter speed to avoid blur.
Audio is the variable most people forget until they watch the clip and hear wind noise or hissing. The ZV-E10 II has a small internal mic. It is not great for serious vlogging.
The camera has a 3.5mm microphone jack and a digital audio interface in the hot shoe. If you are outdoors, you need a wind filter. If you are indoors, you need the mic close to your mouth.
Here is the decision tree in plain language:
- If you have bright light and low motion, use a low ISO, wide aperture, and standard shutter speed.
- If you have bright light and high motion, use a faster shutter speed and stabilization.
- If you have low light and low motion, use a wider aperture, lower shutter speed, and accept a higher ISO.
- If you have low light and high motion, you will need to add light or use a faster lens.
- If you are outdoors, use a wind filter on the mic and check the audio level.
- If you are indoors, use a lapel mic or a shotgun mic for clear audio.
Once you know which combination you are dealing with, the settings become obvious. Let us start with the most common decision. Indoor versus outdoor.
Indoor vs. Outdoor: How to Dial In Exposure Without Second-Guessing
The ZV-E10 II handles indoor and outdoor light very differently. You cannot use the same settings for both and expect good results. Let us break it down by scenario.
Indoor vlogging with typical room lights
Indoors, the light is usually dimmer than you think. Your eyes adjust, but the camera sensor sees the truth. For a typical indoor vlog where you are sitting at a desk or standing in a living room, start with these settings:
- Aperture: f/2.8 or wider. Use a fast prime lens like the Sony 20mm f/1.8 or Sigma 16mm f/1.4.
- Shutter speed: 1/50 for 24p, or 1/60 for 30p.
- ISO: 800 to 3200, depending on how much light you have.
- White balance: 3200K or 4000K for warm indoor lighting.
If you can, add a small LED light. A cheap panel light on your desk makes a huge difference. You will get a cleaner image with less noise.
Outdoor vlogging in bright sunlight
Outdoors is the opposite problem. You have too much light. The ZV-E10 II's maximum shutter speed is 1/4000 of a second.
In bright sunlight, even that might not be enough to keep the aperture wide for that shallow depth-of-field look. You will need a variable ND filter to cut the light.
- Aperture: f/2.8 or wider if you want the blurry background look.
- Shutter speed: 1/50 for 24p with an ND filter, or 1/1000+ without one.
- ISO: 100 to 200, the base ISO for the cleanest image.
- White balance: 5600K or use the Daylight preset.
If you do not have an ND filter, set the aperture to f/8 or f/11 and increase the shutter speed. The image will be sharp, but the background will not be as blurry.
The quick rule of thumb
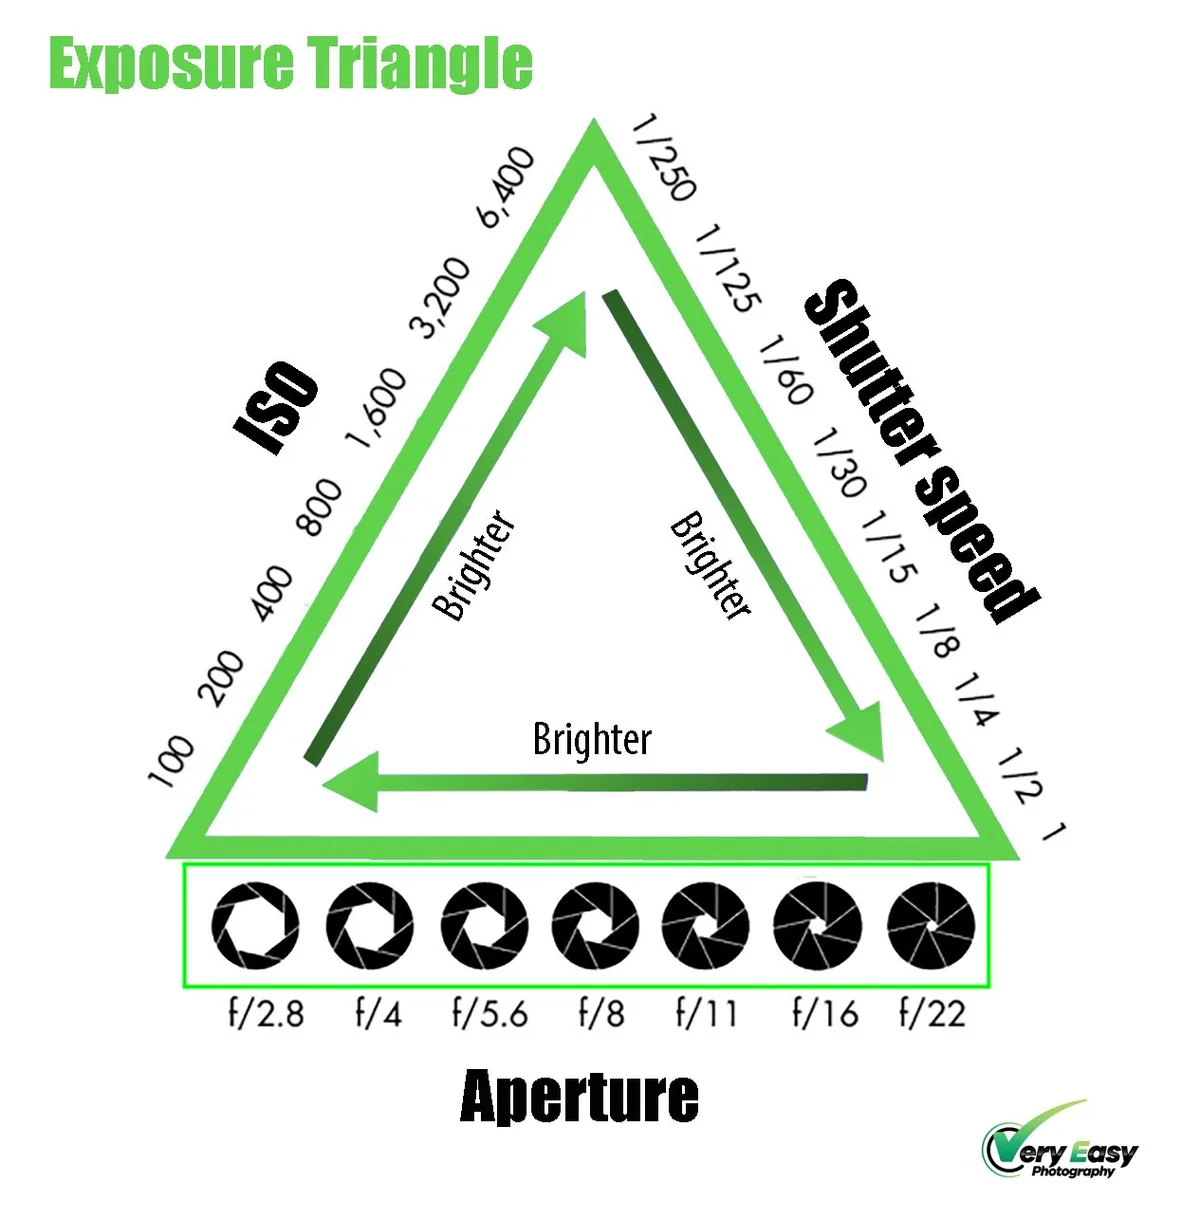
Image source: Web (Bing) / veryeasyphotography.com (Web image (fair-use with source credit))
Indoors, prioritize aperture. Open it wide to let in as much light as possible. Outdoors, prioritize shutter speed and use an ND filter to keep the aperture wide.
That is the golden rule.
| Scenario | Aperture | Shutter | ISO | White Balance |
|---|---|---|---|---|
| Indoor, low light | f/1.4 to f/2.8 | 1/50 (24p) | 800-3200 | 3200K |
| Indoor, well-lit | f/2.8 to f/4 | 1/50 (24p) | 400-800 | 4000K |
| Outdoor, overcast | f/2.8 to f/4 | 1/50 (24p) with ND | 100-200 | 5600K |
| Outdoor, bright sun | f/2.8 with ND | 1/50 (24p) with ND | 100-200 | 5600K |
One more thing. The ZV-E10 II has a feature called Auto Exposure Tracking. When you hold the camera at arm's length, the camera tries to expose for your face.
That is useful. But it can also blow out the background if you are standing in front of a window. In that case, switch to Manual mode and set the exposure for your face first.
Handheld or Tripod? Stabilization Settings for Every Shaky Situation
The ZV-E10 II has a built-in stabilization system called Active SteadyShot. It combines optical and digital stabilization. It works well for walking vlogs.
But it is not magic. The decision to use it depends on how much you are moving.
Handheld with no stabilization
If you are sitting still and holding the camera at arm's length, you do not need much stabilization. The camera's basic electronic stabilization is enough. Turn off Active SteadyShot to avoid the crop factor and get the widest field of view.
- Active SteadyShot: Off.
- Lens: Use the kit lens at 16mm or a wider prime lens.
- Note: The crop factor is about 1.5x on the APS-C sensor. A 16mm lens gives you roughly a 24mm equivalent field of view.
Handheld while walking
This is where Active SteadyShot shines. It smooths out the bumps from walking. But it comes with a trade-off.
The camera crops the image significantly. You will lose about 30 to 40 percent of the frame. That means you need an even wider lens to compensate.
- Active SteadyShot: On in Standard or Active mode.
- Lens: 10mm to 12mm to get a wide enough field of view after the crop.
- Note: The crop can make the image look a bit soft in low light. The sensor is using a smaller portion of its area.
Tripod or fixed position
If the camera is on a tripod, you do not need any stabilization. Turn it off completely. Stabilization systems can introduce a tiny bit of wobble when the camera is completely still.
That makes the footage look less sharp. For a proper tripod setup, you might want to reference the process for setting up other cameras, like the guidance on configuring a static camera.
- Active SteadyShot: Off.
- Lens: Any lens works, but a fast prime is ideal for a shallow depth of field.
- Note: Use a remote shutter or the self-timer to avoid shaking the camera when you press record.
The decision tree for stabilization
- If you are standing still, turn stabilization off. You get a wider view and a sharper image.
- If you are walking slowly, use Standard Active SteadyShot. Accept the crop.
- If you are walking quickly or running, use Active SteadyShot on the highest setting or use a gimbal.
- If you are on a tripod, turn stabilization off. Always.
One thing to keep in mind. Active SteadyShot works best in good light. In low light, the digital part of the stabilization can introduce noise because it is effectively zooming into the image.
If you are filming in a dim room, try to keep the camera steady with your body. Use a wider lens instead of relying on stabilization.
Low Light Without the Grain: Shutter Speed, ISO, and Aperture Tricks
Low light is the hardest scenario for the ZV-E10 II. The APS-C sensor is good, but it is not a full-frame sensor. You will see noise at higher ISOs.
The trick is to balance the three settings to get the cleanest image possible.
ISO limits for the ZV-E10 II
Based on manufacturer specs and aggregate user testing, here is what you can expect:
| ISO Range | Image Quality | Best Use |
|---|---|---|
| 100 to 400 | Clean, no visible noise | Bright outdoor or well-lit studio |
| 800 to 1600 | Very light noise, invisible in most videos | Indoor with good lighting |
| 3200 | Noticeable noise, but acceptable for social media | Indoor with average lighting |
| 6400 | Grainy, usable only in a pinch | Very dim situations |
| 12800+ | Heavy noise, avoid if possible | Emergency only |
The ZV-E10 II has a dual native ISO sensor. The first base ISO is 100. The second is 640 for S-Log3 or around 800 for standard picture profiles.
The image is cleanest at these values. If you are shooting in S-Log3, set your ISO to 640 and expose for the highlights. That gives you the most dynamic range.
Shutter speed in low light
The 180-degree rule says your shutter speed should be double your frame rate. For 24p, that is 1/50. For 30p, that is 1/60.
In low light, you might be tempted to drop the shutter speed lower. Do not. The motion blur will look unnatural.
Your viewers will notice.
If you absolutely need more light, open the aperture first. Use the widest aperture your lens offers. If you are using the kit lens, that is f/3.5 at the wide end.
If you are using a prime lens, you can go to f/1.4 or f/1.8. That is a huge difference.
Aperture priority for low light
Set the camera to Aperture Priority mode. That is the A on the dial. Open the aperture to the widest setting.
The camera will then choose the shutter speed and ISO. That is a good starting point. If the shutter speed drops below 1/50, you will need to add light or accept a higher ISO.
Practical low light tips
- Use a lens with a wide aperture. A 20mm f/1.8 or 16mm f/1.4 prime is ideal for indoor vlogging.
- Add a small LED light. Even a 20-dollar panel light placed near the camera will improve the image dramatically.
- Use the camera's Zebra patterns to check exposure. Set the Zebra to 95 percent for skin tones. If you see stripes on your face, you are overexposed.
- Shoot in 24p instead of 30p. The slower frame rate allows a slower shutter speed, which lets in more light.
The ZV-E10 II is a capable camera in low light, but it has limits. If you are regularly filming in dark rooms, invest in a fast prime lens and a small LED light. That combination will give you clean footage even in challenging conditions.
Audio That Doesn't Sound Like Garbage: Mic Input, Wind Filter, and Levels
Bad audio ruins a good vlog faster than bad video. Viewers will forgive a slightly grainy image. They will not forgive a hissing, crackling, or wind-blasted soundtrack.
The ZV-E10 II has decent internal microphones. They are not built for serious vlogging.
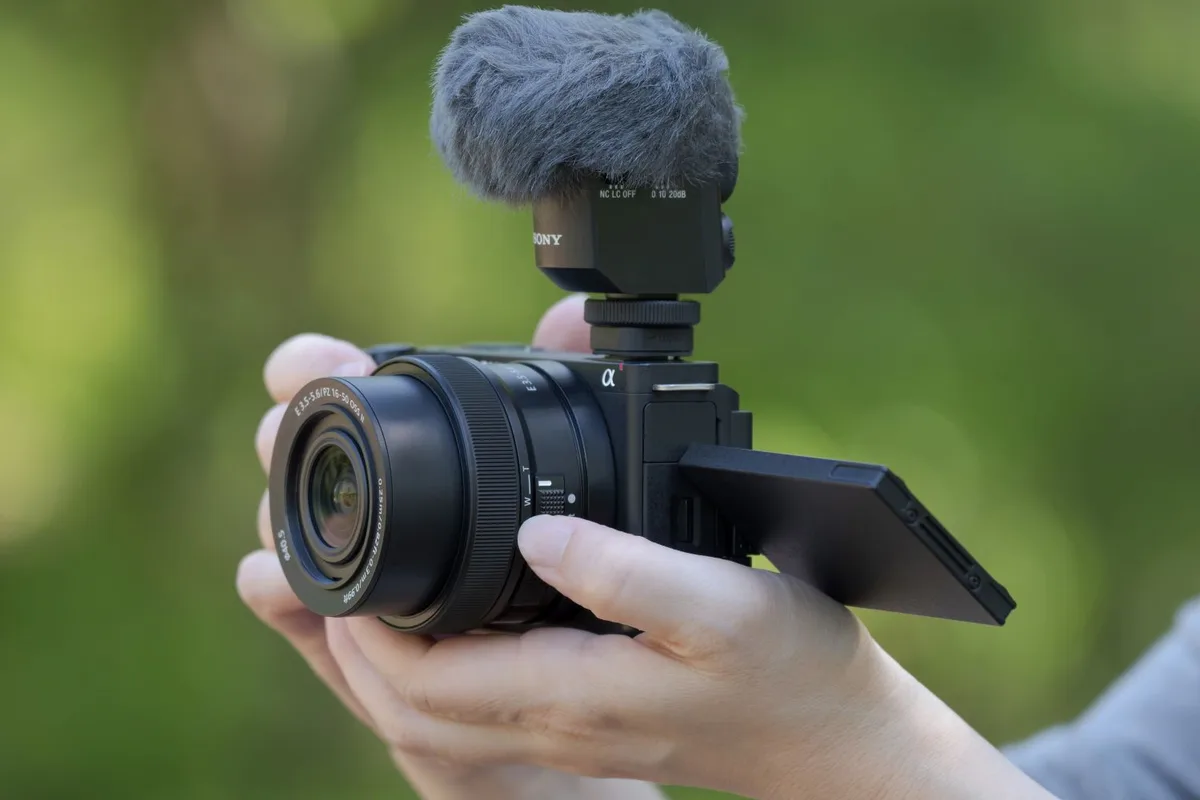
Image source: Bing (Web (fair-use with source credit))
The internal mic situation
The built-in stereo microphone is fine for quick clips in a quiet room. It picks up your voice clearly if you are within a couple of feet of the camera. But the moment you step outside, wind noise becomes a problem.
The camera does have a wind noise reduction feature. Turn it on. It helps, but it is not a substitute for a real windscreen or an external mic.
External microphone options
The ZV-E10 II has a 3.5mm microphone jack. It also supports digital audio through the Multi Interface Shoe. That means you can use high-quality shotgun mics or wireless lavalier systems.
Here are the most common choices:
| Mic Type | Use Case | Pros | Cons |
|---|---|---|---|
| Shotgun mic | Directional audio for one person talking | Clear voice, rejects background noise | Picks up handling noise if not isolated |
| Wireless lavalier | Hands-free, great for interviews | Lets you move freely, consistent levels | Batteries, occasional interference |
| Desktop USB mic | Indoor sit-down vlogs | High quality, simple setup | Not portable, needs an adapter |
For a walking vlog, a wireless lavalier is the best option. Clip it to your collar. The receiver plugs into the camera's hot shoe.
You get clean audio regardless of your distance from the camera.
Setting audio levels
The ZV-E10 II has a manual audio level control. Never leave it on auto. In auto mode, the camera adjusts the gain on the fly.
If you pause for a second, the camera boosts the gain. It picks up the hum of the air conditioner or the rumble of traffic. Then when you speak again, the audio is too loud for a split second.
Set the audio level manually. Here is the process:
- Plug in your external mic.
- Speak at your normal vlogging volume.
- Watch the audio level meter on the screen.
- Adjust the level so the peaks hit around -12 dB to -6 dB.
- If the meter hits 0 dB, you are clipping. The audio will distort.
The internal mic has a different sensitivity. If you use the internal mic, set the level lower. The internal mic is more sensitive to handling noise and wind.
Wind filter and dead cat
If you are filming outdoors, put a windscreen on your microphone. It looks like a fuzzy cover. It is called a dead cat.
It blocks wind from hitting the mic capsule directly. Without it, even a light breeze sounds like a hurricane. The wind noise reduction helps, but it cannot fix heavy wind.
A physical windscreen is the only real solution.
One more audio tip
Monitor your audio with headphones. The ZV-E10 II has a 3.5mm headphone jack. Plug in a pair of earbuds while you record.
You will hear exactly what the camera hears. If you hear a hiss, adjust the levels. If you hear a buzz, check your cables.
Monitoring is the difference between catching a problem on set and catching it in the edit.
The 3 Most Common Vlogging Settings Mistakes (And How to Fix Them)
After reading through hundreds of user reviews and forum posts, three mistakes keep showing up. They are easy to make and easy to fix.
Mistake 1: Using the wrong picture profile
The ZV-E10 II has several picture profiles. S-Log3 gives you a flat image with lots of dynamic range. It is great for color grading.
But it is terrible for a vlog if you do not want to spend time in post. The flat image looks washed out and lifeless. If you are uploading straight to YouTube without color grading, use a Creative Look instead.
The FL or Vivid settings give you a punchy, finished look right out of the camera.
The fix: If you color grade, use S-Log3 at ISO 640. If you do not, use a Creative Look.
Mistake 2: Not setting the white balance
Auto white balance works well in consistent light. But the ZV-E10 II can shift colors mid-clip if you move from a window to a lamp. Your skin tone changes from natural to orange in a split second.
The fix is simple. Set a custom white balance for the scene you are in. Use a gray card or just pick the preset that matches your light source.
For indoor tungsten, use 3200K. For fluorescent, try 4000K. For daylight, use 5600K.
The fix: Set a custom white balance per scene. Do not rely on auto.
Mistake 3: Forgetting the shutter speed rule
The most common mistake we see in aggregate feedback is people using a shutter speed of 1/125 or 1/250 for a 24p vlog. The footage looks choppy. The motion blur is unnatural.
The 180-degree rule is not optional. It is the standard for cinematic motion. For 24p, use 1/50.
For 30p, use 1/60. For 60p, use 1/125. If you need to change the shutter speed to control exposure, use an ND filter instead.
The fix: Follow the 180-degree rule. Buy a variable ND filter for outdoor shooting.
Quick Reference: Settings Cheat Sheet for Any Vlog Scenario
Here is a cheat sheet you can save or screenshot. It covers the most common vlogging scenarios. Use it as a starting point and adjust for your specific light and motion.
If you are moving from a different camera system, you might find the settings approach for other compact vlogging cameras helpful for comparison.
| Scenario | Aperture | Shutter | ISO | WB | Stabilization | Audio |
|---|---|---|---|---|---|---|
| Sit-down indoor vlog | f/2.8 or wider | 1/50 (24p) | 800-1600 | 3200K | Off | Lavalier or shotgun |
| Walking vlog (outdoor) | f/2.8 with ND | 1/50 (24p) | 100-200 | 5600K | Active SteadyShot | Wireless lavalier with windscreen |
| Low light indoor | f/1.4 to f/1.8 | 1/50 (24p) | 1600-3200 | 3200K | Off | Lavalier, add LED light |
| Static tripod (interview) | f/4 to f/5.6 | 1/50 (24p) | 400-800 | 4000K | Off | Shotgun mic on boom |
| Slow motion (120fps) | f/2.8 or wider | 1/125 | 800-1600 | Varies | Active SteadyShot | Lavalier or shotgun |
| Product showcase | f/2.8 to f/5.6 | 1/50 (24p) | 400-800 | 3200K | Off | Internal mic or lavalier |
How to use this table
Find the scenario that matches your current vlog. Copy the settings into the camera. Then do a quick test recording.
Look at the exposure. Check the audio levels. If your face is too dark, open the aperture or add a light.
If the audio is clipping, lower the levels. The settings are a starting point, not a final answer.
Frequently Asked Questions
What is the best frame rate for vlogging on the ZV-E10 II?
For most vlogs, use 24p. It gives you a cinematic look. If you are posting to social media platforms that prefer 30p, use 30p.
For slow motion, shoot at 60p or 120p and slow it down in editing.
Should I use S-Log3 or a Creative Look for my vlogs?
If you want to color grade your footage, use S-Log3 at ISO 640. If you want a finished look straight out of the camera, use a Creative Look like FL or Vivid. S-Log3 requires more work in post.
How do I stop the ZV-E10 II from overheating while vlogging?
Set the auto power off temperature to High in the menu. Avoid shooting 4K 60p for long continuous takes. If you are in a warm environment, take breaks between clips.
Keeping the camera's firmware up to date can also help, similar to the process for other Sony system cameras.
What lens should I use for vlogging with the ZV-E10 II?
A wide-angle prime lens is best. The Sony 20mm f/1.8 or the Sigma 16mm f/1.4 are popular choices. The kit lens at 16mm is fine for starting out, but a prime lens gives you better low light performance and a more blurry background.
Can I use the ZV-E10 II for live streaming?
Yes. The camera works as a high-quality webcam over USB-C. Set it to video mode and connect it to your computer.
You can use the same settings as you would for a sit-down vlog. For more on camera setup workflows, check out the guidance on configuring a camera for fixed use.
How do I reset the ZV-E10 II to factory settings?
Go to the Setup menu. Find the Reset option. Select Camera Settings Reset or Initialize.
This will clear all your custom settings and return the camera to default.

Similar Posts