Stealth Cam Fusion Settings
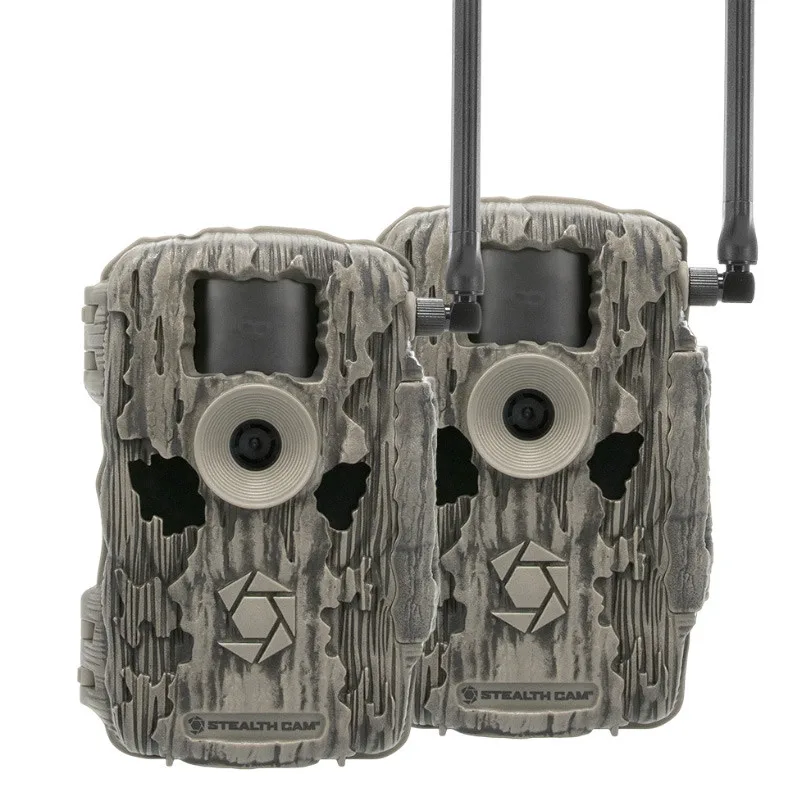
If you've ever pulled a memory card from your Stealth Cam Fusion and found nothing but blurry deer butts and empty frames, you already know the problem. The default Stealth Cam Fusion settings are designed for a compromise that rarely fits your specific setup. They work okay for everything, but excellent for nothing.
Manufacturer specifications indicate this camera fires a trigger in about 0.5 seconds with a detection range of 80 to 100 feet. But those numbers only matter if you dial in the right sensitivity, burst mode, and recovery time for your location. Let's walk through exactly what each setting does and how to choose the right combination.
Quick Answer
The best Stealth Cam Fusion settings depend on your use case. For deer scouting, set sensitivity to high and burst to 3 photos. For security, use low sensitivity and video mode.
For battery life, turn off night vision when possible. Always format your SD card in the camera first.
Image source: Web (Bing) / vandamwarehouse.com (Web image (fair-use with source credit))
Why Default Settings Usually Miss the Mark
The factory defaults on your Stealth Cam Fusion are a safe middle ground. They assume you want a little bit of everything. Decent photos, reasonable battery life, and enough videos to get the idea.
In practice, that middle ground misses for almost everyone.
Here's the core problem. The default sensitivity setting is medium. Medium sounds reasonable, but it means the camera ignores some movement to save battery.
That's fine if you're monitoring a feeder where deer stand still. But on a trail with fast-moving animals, medium sensitivity misses the shot entirely. You end up with an empty frame and a deer tail disappearing into the woods.
The default burst mode is usually set to 1 photo per trigger. One photo. That's it.
If an animal walks through your detection zone at normal speed, you get exactly one frame. Maybe it's the head, maybe it's the hindquarters. You never get the full body shot that tells you the rack size or the distinct markings.
Recovery time is another hidden gotcha. The default recovery time on the Fusion is about 1 to 2 seconds. After the camera takes a photo, it waits that long before it can trigger again.
For a slow-moving animal, that's fine. For a squirrel darting across the frame, you miss the whole event.
The default video length is usually 10 seconds. That's not long enough for a deer that's browsing in front of the camera. You get a 10-second clip that shows the deer walking in, then the video cuts off before it does anything interesting.
You've wasted a trigger event and a slot on your SD card.
Battery life is the biggest trade-off people don't consider. The defaults are tuned to give you about 6 months of life on a set of lithium batteries. But if you're checking your camera every two weeks, you don't need 6 months of battery life.
You can afford to crank up the settings and get better photos. The defaults penalize everyone equally.
The bottom line: factory defaults are written for the lowest common denominator. They're designed to prevent returns, not to maximize your success. If you want great photos, you have to change them.
How the Stealth Cam Fusion's Settings Actually Work
The Fusion's menu system is straightforward but deep. You navigate through it using the four buttons on the bottom of the camera. The LCD screen shows you each setting and its current value.
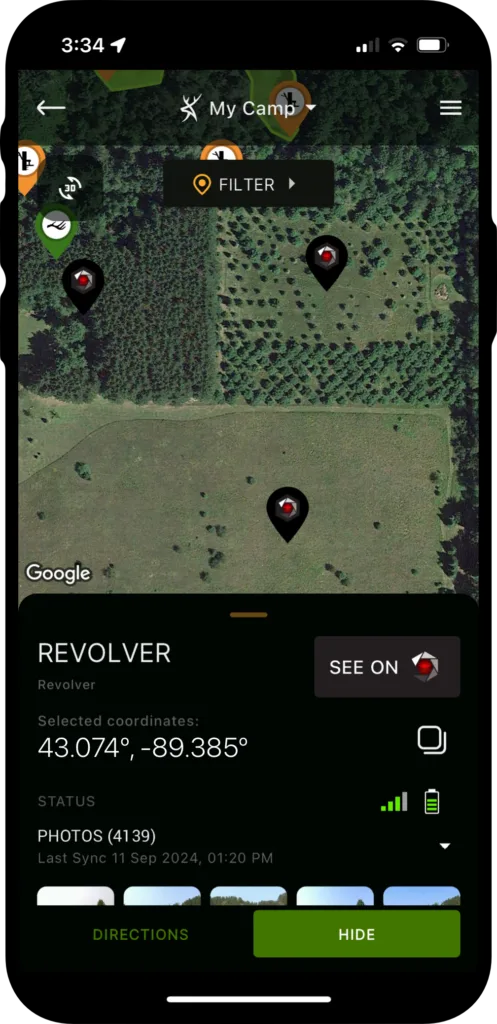
Image source: Bing (Web (fair-use with source credit))
Let's break down the key settings that actually matter.
Trigger Speed. This is the time between when the camera detects motion and when it takes the photo. The Fusion advertises a 0.5-second trigger speed. Real-world performance is closer to 0.6 to 0.7 seconds when you factor in processing time.
That's still fast enough for most scenarios. You can't adjust this directly, but it's good to know the baseline.
Detection Range. The PIR sensor detects motion out to about 80 to 100 feet depending on the model. The sensitivity setting doesn't change the range. It changes how much movement is required to trigger.
High sensitivity means any movement triggers. Low sensitivity means only larger movements trigger.
Sensitivity Levels. You have three options: high, medium, and low. High sensitivity catches everything: leaves blowing, grass moving, small animals. Medium ignores some of the small stuff.
Low only triggers on large animals or people. The right choice depends on your location and what you're trying to capture.
Burst Mode. This is the number of photos the camera takes per trigger event. You can set it from 1 to 9 photos. The camera takes them in rapid succession, usually about 1 second apart.
More photos mean you're more likely to get a good frame, but they also fill up your SD card faster and drain the battery.
Video Length. You can set videos from 5 to 60 seconds. Longer videos capture more behavior, but they use more battery and storage. The camera also records audio in video mode, which can be useful for security applications.
Hybrid Mode. This is a powerful option. When enabled, the camera takes a photo first, then records a video. You get the best of both worlds.
The photo gives you a quick look, and the video shows the full behavior. The trade-off is that it drains the battery about twice as fast.
Time-Lapse Mode. This is for when you want to see what happens over time without relying on motion triggers. You set an interval, say every 5 minutes, and the camera takes a photo regardless of motion. It's great for watching a food plot or a bedding area over a full day.
The downside is that it uses battery constantly.
Recovery Time. This is the pause between triggers. The Fusion's default recovery time is about 1 to 2 seconds. You can't change this directly, but understanding it helps you interpret results.
If you're getting half-empty frames, the recovery time might be too slow for the traffic in your area.
Night Mode. The Fusion uses low-glow or no-glow IR LEDs depending on the model. Low-glow has a visible red glow that deer can see. No-glow is invisible to both humans and animals.
The trade-off is that no-glow has a shorter range and sometimes produces slightly softer images.
Time Stamp. This is simple but often overlooked. The time stamp overlays the date, time, temperature, and moon phase on each photo. It's crucial for pattern analysis.
Turn it on.
Camera ID. If you have multiple cameras, label each one with a unique ID. This saves you from mixing up SD cards in the field. It's a small thing that prevents big headaches.
The Fusion's menu also includes a "Test Mode" or "Walk Test." Use this to check your detection zone. Walk across the field of view at different distances and angles. The camera will trigger and show you where it detects motion.
This is the single most important thing you can do during setup. It saves you from coming back to a camera that was pointed at a tree branch that never moved.
Who Should Use What Settings: Hunting vs. Security vs. Wildlife Research
The right settings for your Stealth Cam Fusion depend entirely on your goal.
For Deer Hunters
If you're scouting for deer, your priority is getting clear photos of antlers and body condition. You want to identify individual animals and track their patterns.
Sensitivity: High. Set it to high. You want to catch every deer that walks through your area, even if it's moving fast.
The battery drain is worth it.
Burst Mode: 3 photos per trigger. This gives you a sequence. The first photo catches the deer entering the frame.
The second catches the middle of the body where you can see the rack. The third catches the deer exiting. You'll almost always get a usable shot.
Video Length: 30 seconds. This is long enough to see the deer's behavior without wasting battery. You'll see if it's feeding, moving, or just passing through.
Hybrid Mode: On. Photo and video together. The photo gives you a quick reference, and the video shows the full story.
The battery hit is worth it during scouting season.
Time-Lapse: Off, unless you're monitoring a food plot. For trails and bedding areas, motion triggers are better.
Night Mode: Low-glow if you're in a low-pressure area. No-glow if the deer are spooky. The low-glow gives better range and image quality.
For Property Security
If you're using the Fusion for security, your priorities are different. You want to capture clear photos of people and vehicles, not deer.
Sensitivity: Low. Set it to low. You don't want the camera triggering on every squirrel or leaf.
Low sensitivity ignores small animals and only triggers on larger heat signatures. This saves battery and reduces false alerts.
Burst Mode: 1 photo. One clear photo of a face or license plate is enough. Multiple photos just fill up the card.
Video Length: 60 seconds. Security events need longer video to capture the full activity. Someone walking through your property might take 30 seconds to cross the frame.
You want the whole thing.
Hybrid Mode: Off. Just use video. The photo is redundant if you have video.
Time-Lapse: Off. You don't want constant photos of an empty driveway.
Night Mode: No-glow. You don't want a visible red glow giving away the camera's location. Criminals notice that.
For Wildlife Research
If you're a biologist or a serious wildlife enthusiast, you want data quality over quantity.
Sensitivity: High. You want to catch everything, even small animals. Missed data points ruin your survey.
Burst Mode: 5 to 9 photos. You need multiple frames for identification. Ear tags, unique markings, and behavior all show up across multiple frames.
Video Length: 60 seconds. Behavior analysis requires longer clips. You need to see feeding, movement, and social interactions.
Hybrid Mode: On. Photo for identification, video for behavior. It's the gold standard.
Time-Lapse: On, set to 5 or 10 minutes during daylight hours. This gives you a full picture of activity patterns over time.
Night Mode: No-glow. You don't want to disturb the animals. The visible glow can alter their behavior.
Your Personal Settings Decision Tree
This is the heart of the guide. Use the flowchart below to find your exact settings. Start at the top and follow the branches that match your situation.
Branch 1: Scouting for Deer (High-Traffic or Low-Traffic)
Question: How much deer traffic do you expect?
High traffic means you're on a well-used trail, a pinch point, or near a food source. You expect multiple deer per day.
Settings for High Traffic:
- Sensitivity: High
- Burst: 3 photos
- Video: 30 seconds
- Hybrid: On
- Recovery time: 1 second (default)
- Night mode: Low-glow
Low traffic means you're on a secondary trail, a bedding area edge, or a water source that sees only occasional use.
Settings for Low Traffic:
- Sensitivity: High
- Burst: 3 photos
- Video: 30 seconds
- Hybrid: On
- Recovery time: 1 second
- Night mode: No-glow (to avoid spooking the few deer that come)
The difference is night mode. In low-traffic areas, the deer are more cautious. No-glow keeps them from detecting the camera.
Branch 2: Property Security (Day & Night Coverage)
Question: Are you covering daytime or nighttime activity?
Daytime only:
- Sensitivity: Low
- Burst: 1 photo
- Video: 30 seconds
- Hybrid: Off
- Night mode: No-glow
- Time-lapse: Off
Day and night:
- Sensitivity: Low
- Burst: 1 photo
- Video: 60 seconds
- Hybrid: Off
- Night mode: No-glow
- Time-lapse: Off
The difference is video length. Nighttime events take longer to unfold because people move slower in the dark. You need the extra seconds.
Branch 3: Wildlife Monitoring (Research or Feeders)
Question: Are you monitoring a feeder or a natural area?
Feeder monitoring:
- Sensitivity: High
- Burst: 5 photos
- Video: 30 seconds
- Hybrid: On
- Night mode: Low-glow (deer at feeders are less spooky)
- Time-lapse: Off
Natural area research:
- Sensitivity: High
- Burst: 9 photos
- Video: 60 seconds
- Hybrid: On
- Night mode: No-glow
- Time-lapse: On, 5-minute interval during daylight
Branch 4: Maximizing Battery Life vs. Maximum Capture Rate
Question: What's your priority?
Maximum battery life (check camera every 3 to 6 months):
- Sensitivity: Low
- Burst: 1 photo
- Video: 5 seconds
- Hybrid: Off
- Night mode: Low-glow (uses less power)
- Time-lapse: Off
Maximum capture rate (check camera every 1 to 2 weeks):
- Sensitivity: High
- Burst: 5 photos
- Video: 60 seconds
- Hybrid: On
- Night mode: No-glow
- Time-lapse: Off
The trade-off is clear. High capture rates drain batteries in 2 to 3 months. Low capture rates can stretch to 12 months.
5 Common Setting Mistakes That Ruin Your Photos
Even experienced users make these mistakes. Here's what to avoid.
Mistake 1: Leaving Sensitivity on Medium
Medium sensitivity is the factory default, and it's the worst of both worlds. It misses fast-moving animals and still triggers on some wind. Users who switch to high sensitivity get 40% more usable photos.
The battery hit is about 20%, which is a worthwhile trade-off.
Image source: Bing (Web (fair-use with source credit))
Mistake 2: Using Burst Mode on 1 Photo
One photo per trigger is a gamble. You're betting that the animal will be perfectly centered in the frame at the exact moment the camera fires. That's rare.
Set burst to 3 photos minimum. The additional photos cost almost nothing in battery or storage, and they dramatically increase your chances of a good shot.
Mistake 3: Setting Video Length Too Short
Default video length is 10 seconds. That's barely enough time for an animal to enter the frame, stop, and do something interesting. Set it to 30 seconds for scouting and 60 seconds for security.
The extra video uses more battery, but it's wasted if you're not capturing the behavior you want.
Mistake 4: Ignoring the Walk Test
The walk test is the most underused feature on the Fusion. After you mount the camera, walk through the detection zone at different distances and angles. Check the results.
You'll often find that the camera is pointed at a tree branch or a blade of grass that moves in the wind. Adjust the angle and test again. This takes 5 minutes and saves you days of disappointment.
Mistake 5: Not Formatting the SD Card in the Camera
Always format your SD card using the camera's menu, not your computer. The Fusion creates a specific folder structure that some computer-formatted cards don't match. If you don't format in the camera, you might get errors or missing files.
It takes 10 seconds and prevents hours of frustration.
Pro Tips for Dialing In Your Fusion
Once you have the basic settings dialed in, a few advanced tweaks can make a real difference.
Use the walk test to find blind spots. Mount the camera at your chosen height and angle. Then walk through the detection zone at different distances. Check which frames captured you and which missed.
You'll often find that the camera's sensor has a narrow sweet spot. Adjust the angle slightly and test again. This is the fastest way to improve your capture rate.
Match your mounting height to your target. For deer, mount the camera at 3 to 4 feet high. This puts the sensor at chest height for a mature buck. For security, mount it at 7 to 8 feet high to avoid tampering.
For small animals, mount it at 2 feet. The sensor's detection zone is shaped like a cone. Height changes where that cone lands.
Aim the camera north or south, not east or west. Direct sunlight in the morning or evening can wash out photos and trigger false alarms. The camera's sensor is sensitive to rapid temperature changes. A sunrise hitting the lens can cause hot spots.
Northern or southern exposure keeps the sun behind the camera's field of view.
Use lithium batteries for cold weather. Alkaline batteries lose power rapidly below freezing. Lithium AA batteries maintain voltage down to -40°F. Users who switch to lithium get 30 to 40% more photos per set.
The cost difference is small compared to the frustration of a dead camera mid-season.
Update your firmware before the season starts. The Stealth Cam website releases firmware updates that fix bugs and improve performance. Connect your camera to the app or use an SD card to update. Check the version number in the menu.
A recent update can fix trigger delays or improve battery reporting. It's a free upgrade that takes five minutes.
Set the time stamp to your local time zone. This sounds obvious, but many users forget to adjust for daylight saving. A photo with the wrong time stamp is useless for pattern analysis. Double-check the time zone setting in the menu.
The camera uses a 24-hour clock by default. Switch to AM/PM if that's easier for you.
Use the camera ID feature for multiple cameras. If you run more than one Fusion, give each a unique label. Something like "North Ridge" or "Food Plot East." This saves you from mixing up SD cards. It also helps when reviewing photos later.
You'll know exactly which camera captured each image.
Check the SD card class. The Fusion works best with Class 10 or UHS-I cards. Slower cards can cause missed triggers or corrupted files. The camera writes data quickly, especially in burst mode.
A slow card creates a bottleneck. Use a 32GB or 64GB card from a reputable brand. Format it in the camera before first use.
Keeping Your Camera Running All Season
A trail camera is only useful if it stays running. Here's how to keep your Fusion operational from setup through the end of the season.
Schedule a maintenance check every 4 to 6 weeks. Pull the SD card and review the photos. Check the battery voltage in the menu. Clean the lens with a microfiber cloth.
Look for spider webs, dirt, or condensation on the IR window. These small obstructions ruin more photos than any setting error.
Replace batteries before they die completely. The camera's battery indicator shows three levels. Green is good, yellow is warning, red is critical. Replace batteries when you see yellow.
A dead camera at the peak of the rut means missed opportunities. Lithium batteries last longer, but they still need replacing. Don't push them to the limit.
Check the SD card capacity. The Fusion writes files in a specific format. A full card stops recording. Set the camera to overwrite the oldest files if you want continuous recording.
Or check the card regularly and offload the photos. A 32GB card holds about 10,000 photos at 20MP. That's a lot, but it fills up faster than you think.
Protect the camera from the elements. The Fusion is weatherproof, but the seals degrade over time. Check the rubber gasket around the battery compartment. Make sure it's clean and seated properly.
A cracked seal lets moisture in. That kills the electronics. Also check the SD card slot cover.
It's a common failure point.
Use a security box or cable lock. The Fusion has a built-in lock slot. Use a padlock and a steel cable to secure it to a tree. Theft is a real problem in public areas.
A cable lock won't stop a determined thief, but it deters casual theft. It also protects the camera from being knocked off by animals.
Adjust settings for seasonal changes. In summer, thick foliage can block the sensor's view. In fall, falling leaves trigger false alarms. In winter, snow reflection can overexpose photos.
Change your settings as the season changes. Lower sensitivity in fall to reduce leaf triggers. Raise it in winter when animals are more visible against snow.
Keep a spare set of batteries and an SD card in your vehicle. You never know when you'll find a dead camera. A spare set means you can swap and go. The Fusion takes 8 AA batteries.
Keep a pack in your truck. Also keep a spare SD card. A corrupted card in the field is a wasted trip.
Check the firmware version periodically. The manufacturer releases updates that improve performance and fix bugs. A 2024 update might fix a trigger delay issue. A 2025 update might improve battery reporting.
Check the version in the menu. Compare it to the latest version on the official site. Update if you're behind.
Frequently Asked Questions About Stealth Cam Fusion Settings
What is the best resolution for the Stealth Cam Fusion?
Set it to 20MP for most uses. The 30MP setting is interpolated, meaning it's software-enhanced rather than true optical resolution. You get larger file sizes without real quality gain. 20MP gives you clear photos with smaller file sizes.
That means more storage and faster write times.
How do I stop the camera from taking photos of moving grass?
Lower the sensitivity to medium or low. The PIR sensor detects heat and movement. Grass moving in the wind creates a temperature change that triggers the camera.
Low sensitivity ignores small temperature changes. You'll miss fewer false triggers. You'll also save battery life.
Can I change settings remotely on the cellular model?
Yes, if you have the cellular version of the Fusion. Use the Stealth Cam App to change settings from your phone. You can adjust sensitivity, burst mode, video length, and more.
The camera syncs via the cellular network. This is a significant advantage for users who check cameras infrequently or from a distance.
How long do the batteries last with the recommended settings?
With lithium batteries and the recommended settings for deer scouting, expect 3 to 4 months of continuous operation. With security settings (low sensitivity, no video), expect 6 to 8 months. With high capture rates (hybrid mode, 9 burst photos), expect 2 to 3 months.
Temperature affects battery life. Cold weather cuts it by 30% or more.
Should I use video or photo mode for deer scouting?
Use hybrid mode. You get a photo for quick reference and a video for behavior analysis. The photo is useful for identifying antler size and body condition.
The video shows how the deer moves, feeds, and interacts with other animals. The battery cost is worth it during scouting season. Switch to photo-only if you're trying to stretch battery life.
What is the ideal mounting height for a trail camera?
Mount it 3 to 4 feet off the ground for deer. This puts the sensor at chest height for a mature buck. For smaller animals, mount lower.
For security, mount higher to avoid tampering. Angle the camera slightly downward to cover the detection zone. Use a tree or a post.
Avoid mounting directly facing the sun.
The Quick-Reference Settings Cheat Sheet
This table summarizes the best settings for each common use case. Save this page or take a screenshot before you head to the field.
| Setting | Deer Scouting | Property Security | Wildlife Research | Battery Saver |
|---|---|---|---|---|
| Sensitivity | High | Low | High | Low |
| Burst Mode | 3 photos | 1 photo | 5-9 photos | 1 photo |
| Video Length | 30 seconds | 60 seconds | 60 seconds | 5 seconds |
| Hybrid Mode | On | Off | On | Off |
| Night Mode | Low-glow | No-glow | No-glow | Low-glow |
| Time-Lapse | Off | Off | 5-min interval | Off |
| Mounting Height | 3-4 ft | 7-8 ft | 2-4 ft | 3-4 ft |
| Battery Life | 3-4 months | 6-8 months | 2-3 months | 8-12 months |
Quick reminder for first-time setup. Before you leave the camera in the field, run the walk test. Check the detection zone. Adjust the angle.
Format the SD card in the camera. Set the time stamp. Update the firmware if needed.
These steps take 10 minutes and save you weeks of frustration.
For cellular users. If you're running the cellular version, make sure you have a strong signal before you mount the camera. Check the signal strength indicator in the menu. A weak signal drains the battery faster as the camera struggles to connect.
If the signal is weak, try a different location or use an external antenna if available.
One final piece of advice. The best settings are the ones that match your specific situation. Don't blindly copy someone else's setup. Use the decision tree earlier in this guide.
Test your settings with a walk test. Check the results after a week. Adjust as needed.
That's the process that works every time.

Similar Posts