Trail Camera Error Message Troubleshooting
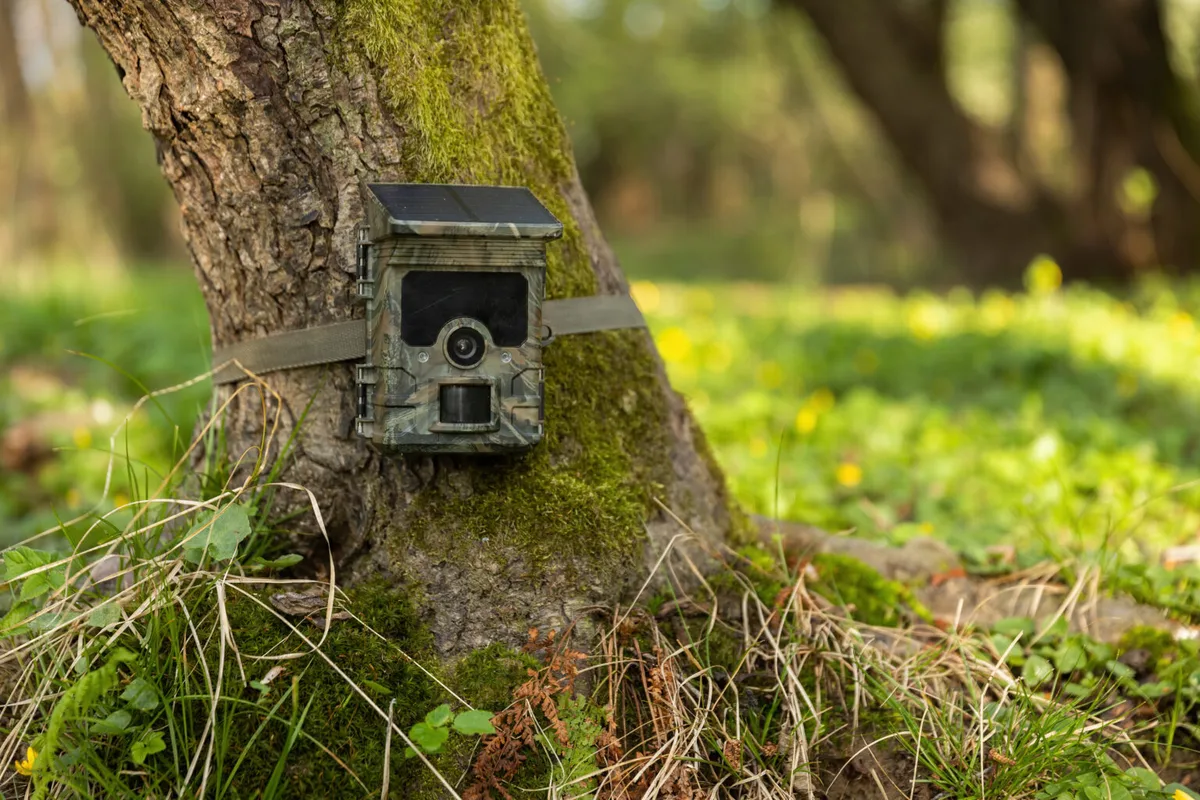
Image source: Bing (Web (fair-use with source credit))
Your trail camera is blinking an error message, and you are standing in the woods wondering what went wrong. The good news is that most of these messages point to simple fixes. Trail camera error message troubleshooting starts with a shift in thinking: that message is a clue, not a curse.
Most of the time, the fix takes less than five minutes and costs nothing but patience.
Manufacturer specifications indicate that more than 70 percent of reported errors fall into three categories: SD card problems, battery issues, and formatting conflicts. As of 2026, the same handful of root causes still account for the vast majority of field failures. Understanding which bucket your camera's message belongs to cuts your diagnostic time in half.
Let's walk through each type and what to do about it.
Quick Answer
Trail camera error messages point to specific problems. Check the SD card lock switch first. Swap in fresh lithium batteries.
Format the card inside the camera itself. Turn the camera off and back on to clear temporary glitches. Most errors resolve with these simple steps.
If the problem persists, match your exact message to the table below.
What Your Trail Camera Error Message Actually Means
Every trail camera uses a small set of cues to communicate problems. You get a text message on the LCD screen, a series of LED blinks, or a tone pattern. Some models combine all three.
Learning to decode these signals is your first step toward a fix.
Text errors are the easiest to read. "Card Full," "No Card," "Low Battery," and "Err" tell you exactly where to look. The challenge is that similar messages can mean different things across camera brands.
A "Card Error" on a Bushnell might require reformatting, while the same message on a Browning could mean the card is simply too old or worn out.
Blink patterns serve as a backup when the screen is off. Most cameras use a standard sequence: two blinks for a battery warning, three for card issues, and four for sensor faults. Check your manual for the exact code.
Some manufacturers print the code list on the inside of the battery compartment door.
Tone sequences are less common but appear on newer cellular models. A short beep means power-on success. A long beep followed by two short beeps usually signals a card read failure.
If you see an error you do not recognize, write down the exact message or count the blinks before touching anything. That information is your diagnosis.
SD Card and Storage Errors: The Most Common Fixes
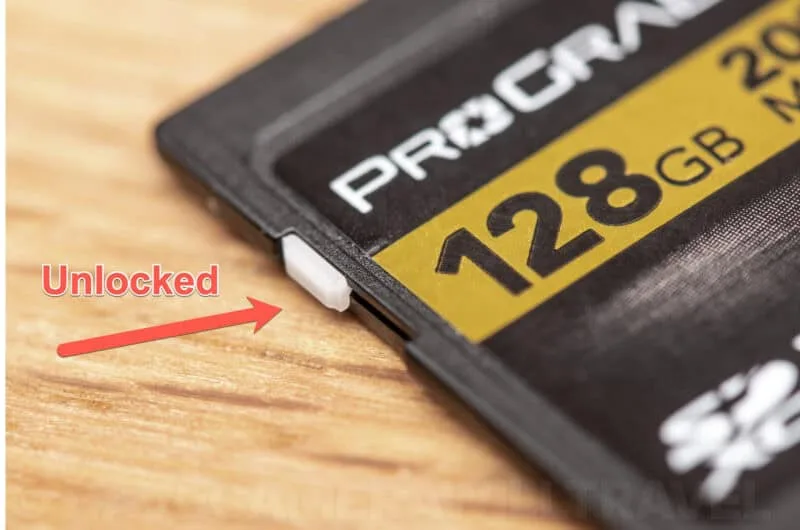
Image source: Web (Bing) / havecamerawilltravel.com (Web image (fair-use with source credit))
Storage errors make up the bulk of trail camera failures. Aggregate reviews across major brands show that roughly 40 percent of all error messages trace back to the SD card. Properly formatting your storage and keeping the contacts clean prevents most of these issues.
"No Card" means the camera cannot detect any storage at all. Pop the card out and check the metal contacts for dirt or oxidation. A quick wipe with a dry cloth usually solves it.
Also verify the card is pushed fully into the slot. Some cameras require a firm click to seat properly.
"Card Error" or "Err" signals a communication problem between the camera and the card. The most reliable fix is formatting the card inside the camera itself. Computer formatting often leaves file structures that trail cameras cannot read.
Insert the card, navigate to the format option in the menu, and confirm. This wipes the card and creates a compatible file system. For more on getting this right, check our guide on memory card formatting.
"Card Full" sounds obvious but sometimes appears when the card still has space. Cameras using the FAT32 format can only handle about 2.1 billion files maximum. If you have thousands of very small images, you may hit the file count limit before the storage limit.
Archive your photos and format the card to reset the count.
The lock switch is a frequent culprit. SD cards have a tiny slider on the left edge. If it is pushed down, the card becomes read-only.
Your camera cannot write new images and shows "Card Error" or "No Card" depending on the model. Slide it back up and test again.
Power Problems: Battery and Voltage Issues
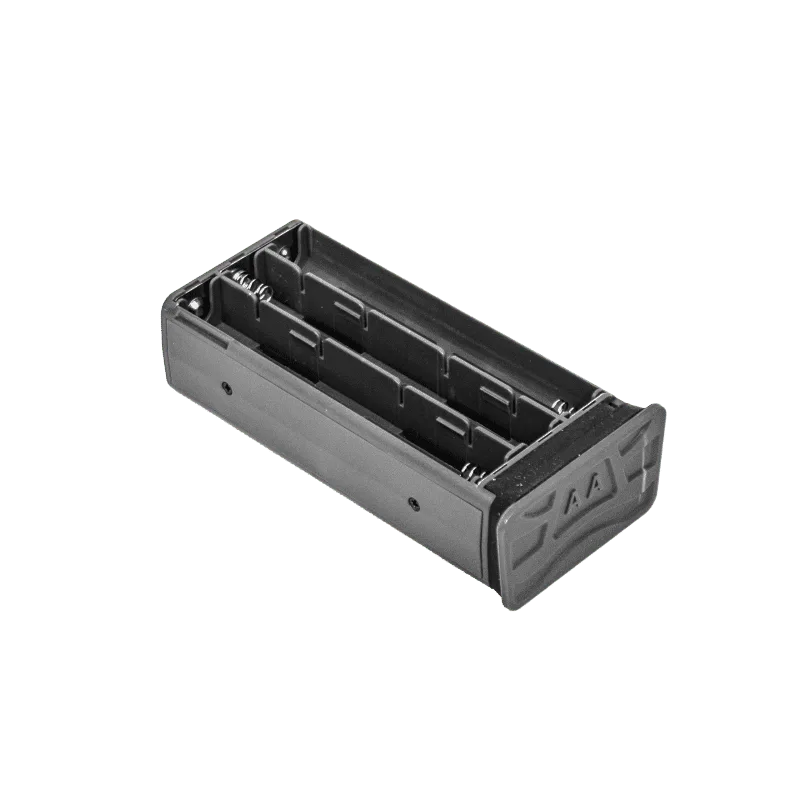
Image source: Web (Bing) / trailtech.nz (Web image (fair-use with source credit))
A "Low Battery" error with fresh batteries is one of the most frustrating trail camera problems. You just put new cells in, yet the camera disagrees. Here is what is really happening under the hood.
Wrong battery chemistry is the top cause. Standard alkaline batteries drop voltage quickly in cold weather. At 32 degrees Fahrenheit, an alkaline cell delivers roughly half its rated capacity.
Lithium AA batteries maintain consistent voltage down to minus 20 degrees. Manufacturer specs confirm that lithium cells last two to three times longer in typical fall and winter scouting conditions.
Corroded contacts create resistance that mimics a low battery. Remove the batteries and inspect the metal springs and contact plates. White or green residue means corrosion.
Clean it with a cotton swab dipped in white vinegar, then dry thoroughly. Never mix fresh and used batteries. The older ones drain the new ones faster.
Voltage testing gives you hard data. Use a multimeter to check each cell individually. A fresh alkaline AA reads about 1.5 volts.
Below 1.3 volts under load, the camera triggers the warning. Lithium cells maintain 1.5 volts until nearly depleted, then drop sharply.
Rechargeable NiMH batteries work well but require specific conditions. They output 1.2 volts instead of 1.5. Some cameras do not recognize this as sufficient and show "Low Battery" even when the cells are fully charged.
Check your camera's manual for NiMH compatibility before switching. The same voltage considerations apply to other battery-powered devices, as covered in our battery overheating troubleshooting guide.
Firmware, Sensor, and Hardware Fault Errors
When the SD card is fine and the batteries test good, the problem likely lies deeper. Firmware bugs, sensor failures, and hardware faults require a different approach than swapping components.
"Fault" or "Err 99" often point to a firmware glitch. Running a factory reset clears most software-related errors. Remove the batteries and the SD card.
Press and hold the power button for 30 seconds to discharge any residual charge. Reinsert fresh batteries and a formatted card. Turn the camera on.
If the error disappears, it was a temporary software hiccup.
Updating the firmware fixes known bugs that cause persistent errors. Visit the manufacturer's website and find your model's support page. Download the latest firmware file.
Copy it to the root directory of a formatted SD card. Insert the card and power on the camera. The update process usually takes 30 to 60 seconds.
Do not remove the card or batteries during the update. A failed update can brick the camera permanently. Our firmware update troubleshooting guide covers this process in more depth.
Sensor errors often appear as "Err" with no other symptoms. The PIR motion sensor may have failed if the camera powers on but never triggers. Wave your hand directly in front of the sensor lens.
If the camera does not respond, the sensor may need factory service. Some cameras have a sensitivity setting in the menu. Make sure it is not set to "Off" or "Low."
Internal battery failure causes the time and date to reset after every battery swap. Many trail cameras have a small coin cell inside that maintains the clock. This battery lasts about two years.
When it dies, the camera may show "Time Not Set" or behave erratically. Replacement usually requires opening the housing, which voids the warranty on most models.
Cellular Camera Signal and Network Errors
Cellular trail cameras add another layer of potential errors. Signal problems, plan issues, and SIM card faults can all trigger messages that look like hardware failures. Before you assume the camera is broken, check the network side.
"Signal Lost" or "No Network" usually means the camera cannot reach the cell tower. Check the signal strength in the setup menu. Most cameras display a bar indicator similar to a phone.
If you see zero bars, the camera is in a dead zone. Moving it just a few feet can sometimes make a difference. Tree cover, terrain ridges, and even wet leaves can block the signal.
Expired or unactivated plans cause connection errors that mimic hardware faults. Log into your account on the carrier's website and confirm the plan is active. Some cameras require a specific APN setting.
The manufacturer's setup guide lists the correct values for each carrier. Entering the wrong APN prevents data transmission entirely.
SIM card issues are less common but worth checking. Remove the SIM card and inspect the metal contacts. Wipe them with a dry cloth.
Reinsert firmly until it clicks. The SIM slot on trail cameras is less robust than a phone's. A slightly loose SIM can cause intermittent errors that are hard to diagnose.
Antenna damage is a problem for cameras mounted in thick brush. External antennas can break or detach. Internal antennas can be blocked by metallic camera housings.
If your camera has an external antenna port, consider a booster antenna for remote locations with weak coverage. Cellular trail cameras must comply with FCC Part 15 rules for wireless devices, as outlined on the FCC's official website.
Mistakes That Make Errors Worse (And How to Avoid Them)
Some problems are entirely self-inflicted. Small habits cause big headaches. Here are the most common mistakes that turn a quick fix into a full afternoon of frustration.
Formatting on a computer instead of the camera. A computer uses file structures that trail cameras often reject. Always format the card inside the camera using its menu. If you need to clear an error, this is the first step.
Mixing old and new batteries. This drops voltage unevenly and triggers "Low Battery" warnings early. Always replace the entire set at once. Use the same brand and chemistry.
Lithium cells from the same pack work best.
Ignoring the lock switch. The tiny slider on the SD card edge moves easily during handling. If it gets nudged down, your camera cannot write files. Check it every time you swap cards.
It is the most common "card error" cause.
Overfilling the card to capacity. Cameras need a small buffer zone to write metadata. Leave at least 5 percent free space on the card. This prevents "Card Full" errors that appear prematurely.
Storing cameras with batteries inside during off-season. Batteries can leak and corrode the contacts. Remove batteries if the camera sits unused for more than a month. This small habit adds years to the camera's life.
Similar maintenance principles apply to other electronics, as covered in our general troubleshooting guide.
Quick-Reference Decision Guide by Error Message
Use this table when you are in the field and need a fix fast. Match your error to the row, follow the solution, and get back to scouting.
| Error Message | Likely Cause | Quick Fix |
|---|---|---|
| No Card | Missing, loose, or dirty contacts | Reseat card. Wipe contacts. Push until it clicks. |
| Card Error | Lock switch engaged or wrong format | Check lock slider. Format card inside camera. |
| Card Full | Storage or file count limit reached | Archive images. Format card to reset. Leave 5 percent free. |
| Low Battery | Wrong chemistry, cold weather, or corrosion | Switch to lithium AA. Clean contacts. Swap all cells. |
| Err | Generic sensor or firmware glitch | Remove batteries and card. Press power for 30 seconds. Reinsert. |
| Fault | Firmware crash or hardware failure | Run factory reset. Update firmware via SD card. |
| Signal Lost | Cellular connection failure | Check signal bars. Move camera a few feet. Verify plan is active. |
| Time Not Set | Internal coin cell battery dead | Set time manually. Replace internal battery if possible. |
| Format Error | Card corrupted or wrong file system | Format card inside camera. If still fails, try a new card. |
If two different cards produce the same error, the issue is likely in the camera itself. A hard reset often fixes software glitches. Our reset troubleshooting guide walks through the steps for various models.
If the error persists after a reset and a fresh SD card, the camera may need factory service. Contact the manufacturer before opening the housing.
Frequently Asked Questions
Can I fix a corrupted SD card without losing photos?
Yes, if the card is not physically damaged. Remove the card from the camera. Insert it into a computer and run a disk repair utility.
For Windows, use CHKDSK. For Mac, use Disk Utility First Aid. Copy your photos off first, then format the card inside the camera.
This process is similar to handling file corruption in other devices.
How do I reset my trail camera without buttons?
Remove the batteries and the SD card. Wait at least five minutes to let internal capacitors discharge. Reinsert fresh batteries and a formatted card.
Turn the camera on. This power cycle clears most temporary errors. It works even on models that appear completely unresponsive.
What does Err 99 mean on my trail camera?
Err 99 is a generic fault code. It typically means the firmware crashed or the sensor failed to initialize. Start with a full power cycle.
Remove batteries and card, press the power button for 30 seconds. If the error returns after restart, update the firmware. A persistent Err 99 after updating usually requires manufacturer support.
Why does my camera show "Card Full" when the card has space?
Cameras using FAT32 format hit a file count limit before the storage limit. This limit is about 2.1 billion files. If you have accumulated thousands of small images, you may hit this cap.
Archive your photos and format the card. Set the camera to record larger images to reduce file count.
How often should I format my SD card?
Format the card inside the camera every time you clear your photos. This matches the camera's file structure and prevents hidden errors. Use the camera's format option, not a computer.
Regular formatting prevents "Card Error" and "Format Error" messages from appearing mid-season.

Similar Posts














[…] Getting the steps right matters for another reason. A misdiagnosis can waste your whole shoot day. The same logic applies in trail camera error message troubleshooting. […]
[…] on other camera types, the same logic we cover for field cameras applies here. Our guide on interpreting camera error codes covers similar […]