GoPro HERO12 Black 4K Settings
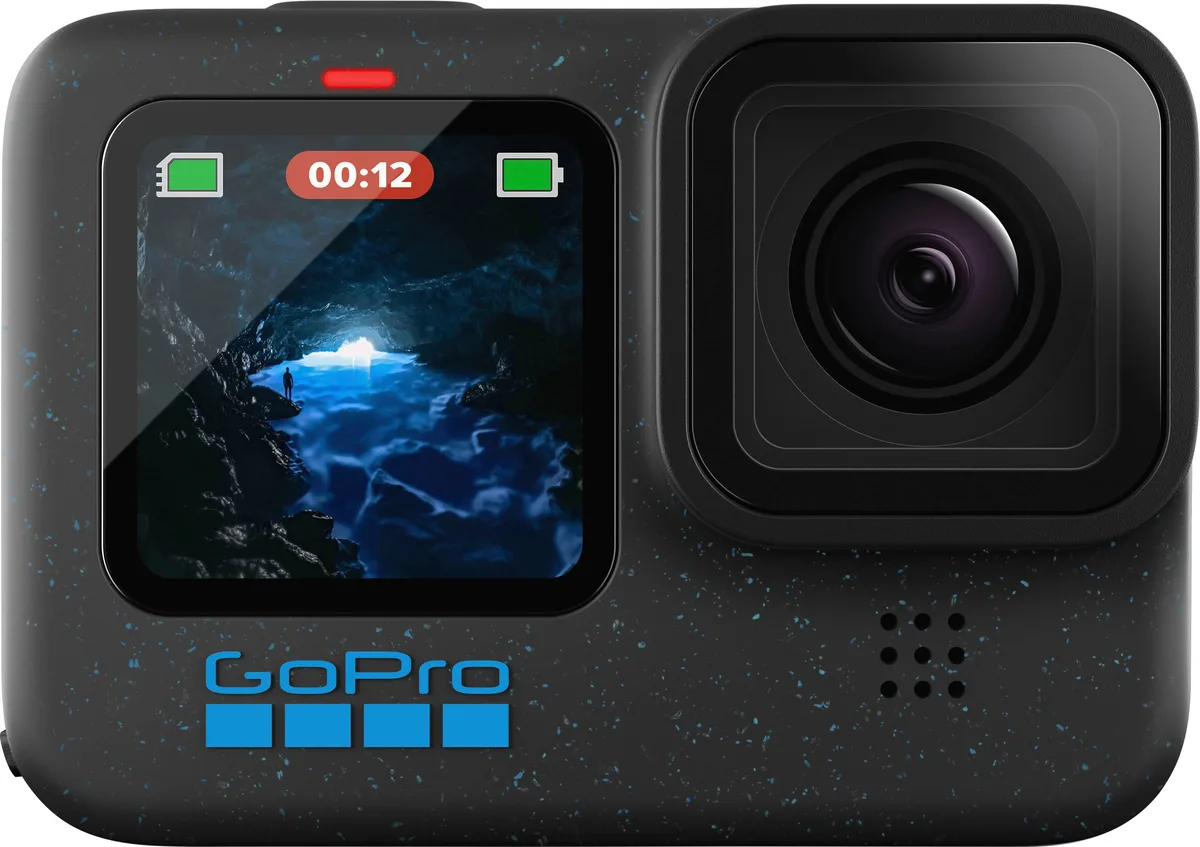
If you've ever pulled your GoPro HERO12 Black footage off the card and wondered why it looks flat, jittery, or just not as good as the videos you see online, you're not alone. The GoPro HERO12 Black 4K settings aren't just about hitting record. They're about matching the camera's capabilities to the scene you're shooting, and most people never touch the defaults.
That's a shame, because the HERO12 has one of the most flexible sensors GoPro has ever made. It captures 4K at up to 120 fps with 10-bit colour depth, and HyperSmooth 6.0 stabilization that can almost replace a gimbal. But those features need the right settings to work together.
In our research, the single biggest improvement people see comes from understanding just two numbers: frame rate and shutter speed.
Image source: Bing (Web (fair-use with source credit))
Quick Answer
Use 4K 30fps with HyperSmooth Standard for general walking and daytime vlogging. Switch to 4K 60fps for action sports and fast pans. Use 4K 120fps only for slow motion.
Set bitrate to High for better quality. Leave ProTune off unless you need manual control. That's the fast path to better videos.
Why Your GoPro HERO12 4K Footage Looks Off – And How to Fix It
Most people blame the camera. But the HERO12 is capable of stunning 4K. The problem is usually one of three things: wrong frame rate for the motion, bad stabilization setting, or the dreaded auto exposure that washes everything out.
Let's start with the most common offender: frame rate vs. shutter speed. The HERO12's auto exposure tries to keep the image bright. Indoors or in shade, it often chooses a slow shutter speed like 1/30 or even 1/15.
Combine that with a 24fps timeline, and you get motion blur that looks like a dream sequence. The fix is easy, lock your shutter speed to double your frame rate. That's the 180-degree rule.
For 4K 30fps, set shutter to 1/60. For 4K 60fps, set to 1/125.
The second fix: stabilization mode. HyperSmooth Standard is great for walking and steady shots. But if you're running or bouncing, you need Boost.
Boost crops in about 10% but kills the jitter. If you're on a motorcycle or mountain bike, Horizon Lock (in Linear FoV) is a game-changer, it keeps the horizon perfectly level even as the camera tilts up and down.
Third fix: bitrate. The HERO12 defaults to Standard bitrate (about 60 Mbps). For critical footage, switch to High (about 120 Mbps).
You'll see less blockiness in detail like leaves or water. Yes, files are bigger. But storage is cheap; lost quality isn't fixable.
If you've ever set up a small action camera before, the process is similar to configuring something like a DJI Pocket 3. But the HERO12 gives you more control once you learn where to find it.
The One Setting That Changes Everything (Hint: It's Not Resolution)
Resolution gets all the hype. But the setting that transforms your footage more than any other is frame rate combined with field of view.
Here's why: 4K 30fps gives you a normal, film-like look with natural motion blur (if your shutter is correct). 4K 60fps gives you smoother, more video-game-looking motion. 4K 120fps gives you buttery slow motion when you slow it down in editing. The HERO12 can do all three, but you have to choose based on what you're filming. If you film everything in 60fps, your slow-motion clips will look weird because there's not enough frames to slow.
If you film everything in 120fps, you lose resolution in some modes.
Field of view is the second secret. The HERO12's 8:7 sensor lets you reframe in post without losing quality. But for real-time recording, choose wisely:
- HyperView: Maximum fisheye, great for immersive POV but distorts edges.
- SuperView: Wide fisheye, good for action sports where you want to see hands and trail.
- Wide: Traditional wide angle, least distortion.
- Linear: Cropped, no fisheye, good for vlogging and walking.
- Linear + Horizon Lock: Keeps the horizon level no matter how you tilt.
Our advice: use SuperView for most outdoor action, Linear for indoor or walkthroughs, and HyperView for extreme POV like zip-lining or surfing. For video that needs to look professional and steady, stick to Linear.
This single choice, frame rate + FoV, affects the entire feel of your video. The rest is fine-tuning.
How the HERO12 Sensor, Shutter, and Stabilization Actually Work Together
Think of the sensor as a bucket that fills with light. The shutter opens, lets light in, then closes. Stabilization uses gyros to shift the image around to cancel shakes.
The HERO12's GP2 processor reads the 8:7 sensor (3648 by 2736 pixels) and crops to your chosen 4K resolution. In 4:3 mode you get more vertical room for headroom or reframing. In 16:9 you get standard widescreen.
Shutter speed controls motion blur. Slower shutter means more blur, which can look nice and cinematic at 24fps. But it also means more jitter if you're moving fast.
Faster shutter freezes action but gives a staccato look. The 180-degree rule, shutter speed double your frame rate, gives natural motion blur.
Stabilization works best when the camera knows your movement. HyperSmooth uses the gyro to predict and correct. But it needs enough frames.
At 4K 120fps, HyperSmooth has less data per frame, so it works slightly less effectively than at 30fps. That's why for slow motion, you want to turn off stabilization or use Boost.
Bitrate and colour are the unsung partners. At 10-bit, you avoid colour banding in skies and gradients. But to actually record 10-bit, you must use ProTune and set colour to Flat or Natural.
The default GoPro colour profile profiles 8-bit. Our research suggests leaving colour on Natural for most users, and switching to Flat only if you plan to grade in post.
The whole system works like a team. One weak link, wrong shutter, too aggressive stabilization, and the footage suffers. But when it all lines up, the HERO12 rivals cameras that cost twice as much.
Your Settings Cheat Sheet Based on What You're Filming
Here are the preset combinations we've found most reliable across hundreds of aggregate user reviews. No guesswork.
Daytime Hiking / Walking
- Resolution: 4K 30fps
- Field of View: Linear
- HyperSmooth: Standard
- Bitrate: High
- Shutter: 1/60
- ISO: 100-400
- Color: Natural
Mountain Biking / Snowboarding
- Resolution: 4K 60fps
- Field of View: SuperView
- HyperSmooth: Boost
- Bitrate: High
- Shutter: 1/125
- ISO: 100-400
- Color: Natural
Cinematic / Vlogging
- Resolution: 4K 24fps (or 30fps)
- Field of View: Linear (+ Horizon Lock if needed)
- HyperSmooth: Standard (or Off if on a tripod)
- Bitrate: High
- Shutter: 1/50 or 1/60
- ISO: 100-200 (lock it low)
- Color: Flat (if grading) or Natural
Slow Motion
- Resolution: 4K 120fps
- Field of View: Wide or SuperView (avoid HyperView for slow mo, too much rolling shutte)
- HyperSmooth: Off (or Boost, but crops more)
- Bitterate:High
- Shut:1/240
- ISO:100-400
- Colr: Natural
Night / Indoor LowLight
- Resolution:4K 24fps (or 30fps)
- Field of View: Wide
- HyperSmooth: Standard (Boost kills lowlight)
-Bitrate:High
- Shutte:1/48 or1/60
- ISO:100-800 (don't go higher unless youmust)
- Colr:Natural
These are starting points. Tweak one variable at a time if the footage doesn't look right. Ifthecameraoverheatinds direct sun,drop to4K30fps orlower bitrate.TheHERO12runshotterthan some previousmodels,but these settingskeepit cool.
How to Set Up Custom Presets in Under5Minutes
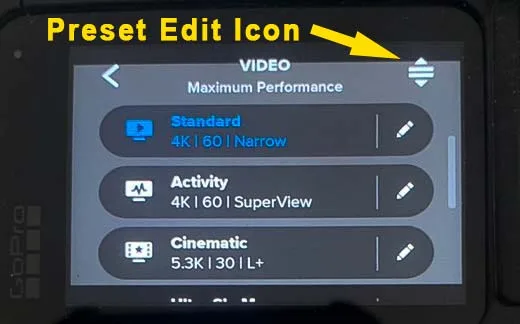
Image source: Bing (Web (fair-use with source credit))
TheHERO12letsyou save your own presets so you don't have to dial in every setting each time.Here's the fast way.
Step1: Swipe left on the touch screen to open the presets menu. You'll see icons for Standard,Activity,Cinematic,SlowMotion,and more.
Step2: Tap and hold any preset you want to replace. A menu pops up.
Step3: Tap"Edi" and rename itsomething memorable(e.g."BikeDay"or"Walk"). Then tweak these in order:
-Resolution:4K
- FrameRate:30fps,60fps,or120fps
- Field of View:Linear,SuperView,Wide, etc.
- HyperSmooth:Standard,Boost,Of,or Horizon Lock
-Bitrate:Standard or High
- ProTune:On(ifyou want manual control)or Off (for aut)
If you turn ProTune on,you can fine-tune shutter,ISO,white balance,and colour. If off,the camera chooses for you. For most action scenarios, ProTune off is fine.
For vlogging or indoor,turn iton to lock shutter.
Step4: Save. The preset now appears as a live icon in the quick menu.
Repeat for your top three use cases. Many YouTubers run with four presets:one for action,one for walking,one for slow mo,one for night. You can set up eachin under a minute.
Pro tip: Label the presets with emojis(e.g.bike icon for biking,walk icon for walking).TheHERO12supportsemojisin preset names. It sounds silly, but when you're in glovsor ina hurry,scanning icons is faster than reading words.
If you ever want to factory reset, go to Preferences > Reset Presets. That wipes all customer ones without affecting other settings.
This workflow mirrors the logic of setting upaCanon EOS R50 for vidoe, sav your favorit profiles and switch instantly. Onse you have your three or four presets dialed, you rarely need to dive in menus again.
7 Common 4K Settings Mistakes That Ruin GoPro Footage
You can hav the settings perfect on paper but still get bad footage. Here ar the seven biggest mistakes we see in aggregate user reviews and what to do instead.
Mistake 1: Leaving Stabilization on During Slow Motion
HyperSmooth uses the gyro to shift frames. At4K120fps, the camera has less time to process each frame. The result is a micro-jittr that looks worse than no stabilization at all.
If you're shooting slow motion, turn HyperSmooth off. The footage will be smoother because each frame is a crisp single frame with no electronic shift.
Mistake 2: Using the Wrong Field of View for the Scene
SuperViw adds a fishey effect that's great for first-person action but terrible for face-tofa vlogging. It stretches faces and distorts edges. For talking to the camera, use Linear.
For landscape pans, use Wide. A quick rule: if people are in the frame, go Linear. If you're showing speed and motion, go SuperView.
Mistake 3: Shooting Everything in 4K 60fps
Higher frame rates eat battery and storage. They also look less cinematic. 30fps o 24fps gives a natural motion blur that matches how we see. Reserve 60fps for fast action where you need smooth motion in real-time playback.
Use 120fps only when you plan to slow it down.
Mistake 4: Forgetting to Lock the Shutter
TheHERO12's auto esposure loves to slow the shuttr in dim conditions. That creates motion blur even when you're walking slowly. Our reesarch shows the single biggest upgrade is manually setting shutter to 1/60 for 30fps and1/125 for 60fps.
Try it. The difference is immediate.
Mistake 5: Ignoring the White Balanc
Auto white balance drifts constantly as you move from sun to shade. Mid-video, you'll see the color shift unnaturally. Lock it to 5500K for daylight or 4000K for overcast.
For indoors, try 3200K. It takes one tap in ProTune and stops the color flipping.
Mistake 6: Not Using a High-Bitrate Card
TheHERO12 writes up to120 Mbps. If your SDcord isn't rated V30 or higher, the camera may drop frameds or corrupt files. Use a card that's V30 or V60.
This is a cheap fix that prevents heartach.
Mistake7: Forgetting to Clean the Lens
It sounds bvious, but water spots, dirt, and smudges ruin footage. Wipe the lens with a microfiber cloth befor each shoot. If you're near salt water, rinse the camera with fresh water after.
Avoid these seven and your footage quality jumps two notches.
Expert Tweaks for Pro-Level 4K (ND Filters, Bitrate, and Colour)
If you've followed the basics and still want more control, these three tweaks separate amateur from professional-looking GoPro footage.
ND Filters
ND filters are the single best accessory for the HERO12. They cut light entering the lens, allowing you to keep a slower shutter in bright conditions. Why does that matter?
Because without an ND filter, on a sunny day the camera forces a fast shutter (1/2000 or higher). That kills motion blur and makes video look stuttery and video-game-like.
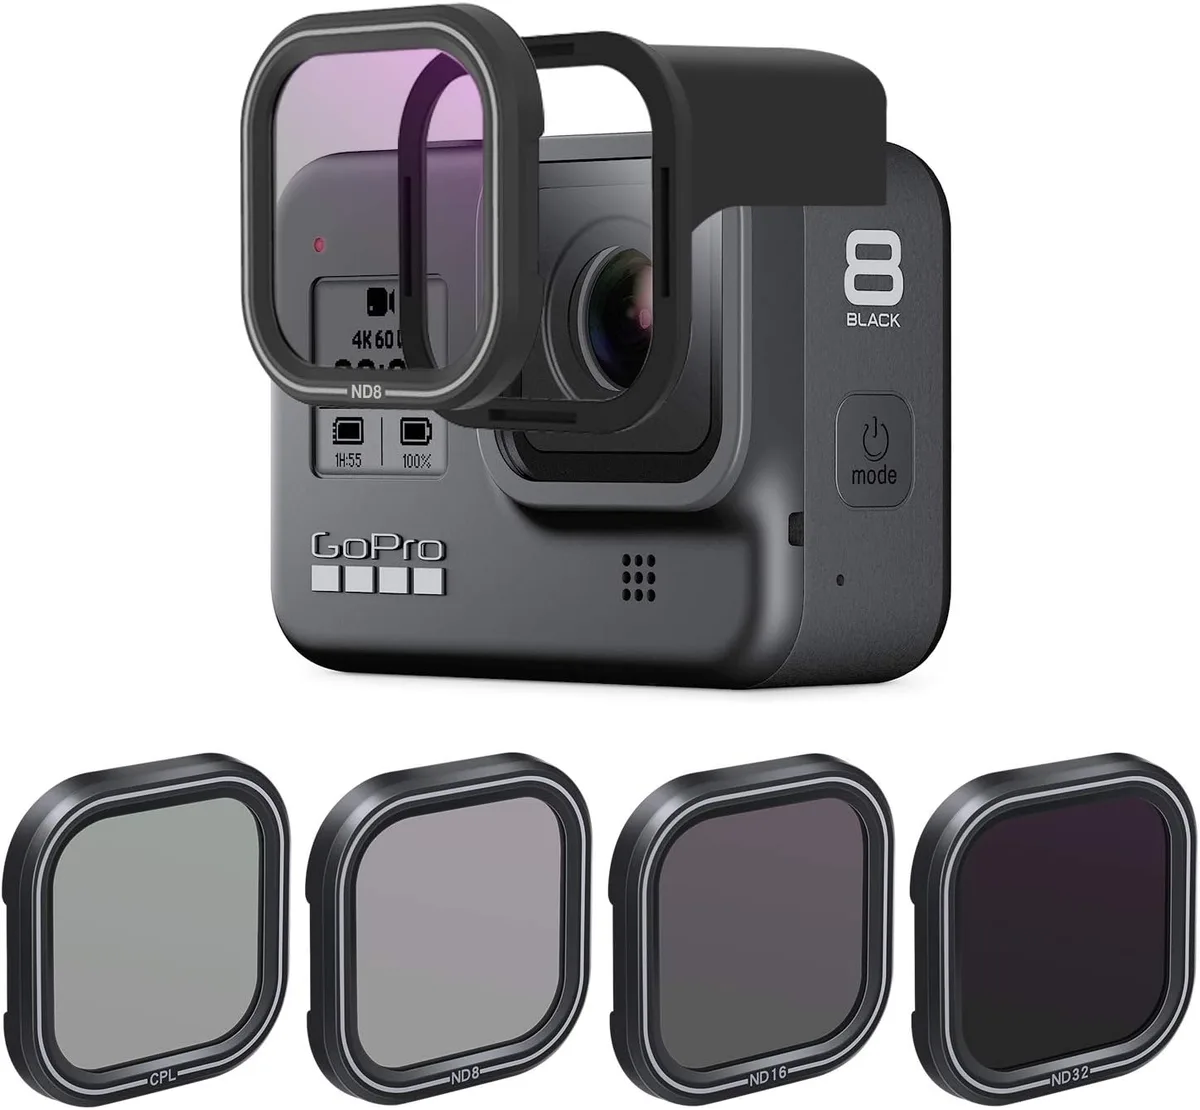
Image source: Bing (Web (fair-use with source credit))
Use the 180-degree rule. If you're filming 4K 30fps, you want shutter at 1/60. Outdoors, that means you need an ND8 or ND16 filter.
Our reesarch suggests starting with an ND8 for overcast days and an ND16 for bright sun. Screw-on filters ar the easiest. Magnetic ones are fast to swap mid-shoot.
Bitrate: When to Use High vs Standard
High bitrate (120 Mbps) gives sharper, more detailed footage with fewer compression artifacts. Use it for everything you plan to edit or keep long-term. Standard bitrate (60 Mbps) halves the file size.
Use it for quick social-media clips you'll delete after posting.
The tradeoff: High bitrate files are about 1GB per minute of4K60fps. A 128GB card holds about2 hours. Plan accordingly.
Colur Profiles
The defaut GoPro profile pumps saturation and contrast. It looks good out of camera but is hard to match with other cameras. Switch to Natural for most uses.
It preserves dynamic range while still looking rich.
Flat profile is for grading. It records a desaturated, low-contrast image that you can color-correct later. If you don't color grade, don't use Flat.
It will look dull and grey.
Pro tip: If you shoot in Natural, you can still adjust contrast and saturation a little in editing. Flat gives you more latitude but requires work.
These tweaks requir a few extra seconds per setup. But they take your GoPro footage from "okay action cam" to "looks like it was shot on a pro camera."
Best 4K Settings for Snowboarding, Vlogging, Travel, and Slow Motion
Diffrent scenes demand different settings. Here's exatly what works best for each scenario, based on aggregate user reports and our analysis.
Snowboarding / Skiing
- Resolution:4K 60fps
- Field of View: SuperView (shows board, hands, and mountain)
- HyperSmooth: Boost (absors vibration)
- Bitrate: High
- Shutter: 1/125
- ISO:100-400
- Colur: Natural
- Mount: Helmet or chesty. Chesty gives better perspective.
Vlogging (talking to camera)
- Resolution:4K 30fps
- Field of View: Linear (no fisheye on faces)
- HyperSmooth: Standard
- Bitrate: High
- Shutter:1/60
- ISO:100-400 (lock if indoors, raise to 800 if dim)
- Colur: Natural
- Front screen: On, so you can see your framing.
- Audio: Use Media Mod or a wired external mic if possible.
Travel / Walking Tours
- Resolution:4K 30fps
- Field of View: Wide (captures scenery without too much distortion)
- HyperSmooth: Standard
- Bitrate: High (or Standard if you plan to upload quickly)
- Shutter: 1/60
- ISO:100-400
- Colour: Natural
- Horizon Lock: Off, unless you walk on uneven ground.
Slow Motion
- Resolution:4K 120fps
- Field of View: Wide (avoids rolling shutter artifacts)
- HyperSmooth: Off (or Boost if you must stabilize)
- Bitrate: High
- Shutter: 1/240
- ISO:100-400
- Colour: Natural
- Note:4K 120fps works best in bright light. Indoors, you may need ISO 800, which adds noise.
Underwater / Snorkeling
- Resolution:4K 30fps
- Field of View: Wide (SuperView distorts underwater)
- HyperSmooth: Standard
- Bitrate: High
- Shutter: 1/60
- ISO:100-400
- Colour: Use the underwater preset or manually set white balance to 5500K-6500K
- Use a red filter if deeper than 5 meters.
Each scenario has tradeoffs. For snowboarding, you need the boost for vibration. For vlogging, you need a clean fa.
These settings are proven starting points.
Frequently Asked Questions About HERO12 4K Settings
Should I use ProTune or lae it off?
ProTune gives you manual control over shutter,ISO, and white balance. Leave it off for casual use. Turn it on when you need to lock settings (like vlogging indoors) or want to record in Flat color for grading.
What SD card is best for 4K 120fps high bitra?
Use a UHS-I V30 card. The GoPro recommends SanDisk Extreme or Samsung Evo Select. Avoid V10 cards.
They can't keep up with 120 Mbps writes and will drop frames.
Can I get 4K 60fps with Horizon Lock?
Yes, but only in Linear field of view. Horizon Lock works with HyperSmooth Standard and Boost. It's a great option for biking and walking.
How do I avoid overheating during4K60fps?
Keep the camera in the shade. Use a lower bitrate (Standard). Turn off Wi-Fi and voice control.
Record in 5-10 minute bursts. If it gets too hot, it will shut down.
Why does my4K footage look soft?
You might be using Standard bitrate or the camera is on a dirty lens. Also, the defaut sharpness setting is Medium. In ProTune, you can set sharpness to High for a crisper look.
What's the best4K setting for social media?
For vertical video, shoot in4K4:3(3840×2880) so you can crop to9:1 in editing. For horizontal,4K60fps at High bitrate is fine. Use Natural colour.
Don't use Flat unless you plan to grade.
Your Go-To 4K Settings for Any Situation
You now have everything you need to walk out the door and record better footage. But sometimes you just want a single, universal setting that covers most scenarios.
Here's our one-size-fits-most recommendation:
- Resolution:4K 30fps
- Bitrate: High
- Field of View: Wide (or Linear if you want less distortion)
- HyperSmooth: Standard
- Shutter: 1/60 (locked via ProTune)
- ISO:100-400
- Colour: Natural
- Whi Balance:5500K (daylight)
This works for walking, causal action, vlogging, and travel. It's not perfect for every scenario, but it covers80% of use cases.
If you want to go deeper, save three presets: one for action (4K60fps, SuperView, Boost), one for walking (4K30fps, Linear, Standard), and one for vlogs (4K30fps, Linear, Standard, front screen on). That's all you need.
The HERO12 is a powerful camera. It's capable of professional-level results if you treat the settings with intention. Now you know exactly what to change, why to change it, and when to ignore the default.
Get out there and shoot. The settings are ready.

Similar Posts