Sony A6700 Video Settings
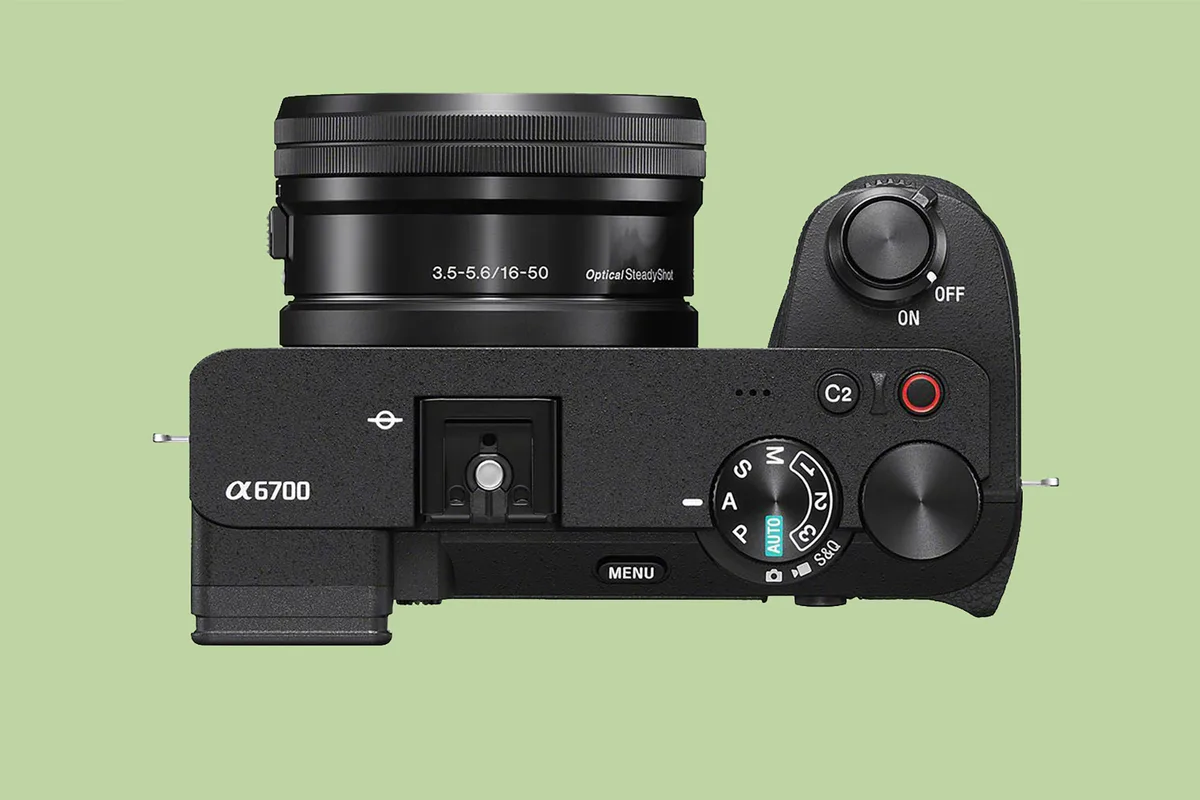
Getting your Sony A6700 video settings right can feel like drinking from a fire hose. The menu is deep, the options are plentiful, and one wrong choice can leave you with footage that's too noisy, too flat, or just plain unusable. You're not alone if you've stared at the Picture Profile menu wondering what the difference between S-Log3 and HLG actually means for your shoot.
Manufacturer specifications indicate the A6700 can record 10-bit 4:2:2 internally at up to 600 Mbps. But those numbers don't tell you which settings to actually use for a vlog versus a narrative short. As of 2026, this camera is one of the most capable hybrid APS-C options on the market, but only if you know how to set it up.
Image source: Bing (Web (fair-use with source credit))
Quick Answer
Set your frame rate to 24 or 30 fps for normal speed. Use 60 or 120 fps for slow motion. Choose S-Log3 if you plan to color grade.
Pick HLG for HDR delivery without grading. Select XAVC S 4:2:2 10-bit for broad compatibility. Set shutter speed to double your frame rate.
Use the 180-degree rule. Enable Active SteadyShot for handheld work. Avoid Auto ISO when shooting log.
Push exposure +1.7 stops for S-Log3.
Why Your A6700 Video Settings Feel Overwhelming (and Why That's Normal)
The A6700 has more video settings than most entry-level cinema cameras. You've got four recording formats, a dozen picture profiles, multiple bitrates, and frame rates from 1 fps to 240 fps. That's a lot for a camera that fits in one hand.
Aggregate reviews report that the biggest frustration is not the quality of the footage. It's the time spent figuring out which settings match each scenario. The camera can do almost anything, but that flexibility means you have to make decisions it won't make for you.
The good news is you don't need to understand every menu item. You just need to know the three core settings that drive everything else. Once you dial those in, the rest falls into place.
Think of it like learning to cook a new dish. You don't memorize the entire cookbook. You learn the technique for that one recipe, then build from there.
The Three Settings You Must Understand Before Anything Else
Before you record a single clip, lock in three decisions. These are the pillars of every video setup on the A6700. Get them right, and every other menu choice becomes simpler.
Shutter Speed and the 180-Degree Rule
Shutter speed controls motion blur. The 180-degree rule says you set your shutter speed to double your frame rate. At 24 fps, that's 1/48 of a second, or 1/50 if you're in a PAL region.
At 30 fps, it's 1/60. At 60 fps, it's 1/125.
This gives your footage natural-looking motion. Too fast, and it looks stuttery and hyper-realistic. Too slow, and it blurs into a muddy mess.
The A6700 lets you set shutter speed in full stops, so you may not hit exactly 1/48. That's fine. Use 1/50 or 1/60.
The difference is negligible.
Frame Rate: 24, 25, 30, 60, or 120?
Frame rate determines how smooth your motion looks. It also affects slow motion.
- 24 fps gives a cinematic look. Standard for narrative films and YouTube.
- 25 fps is the PAL standard for broadcast in Europe and Australia.
- 30 fps is smooth and natural. Good for vlogs, talking heads, and live events.
- 60 fps captures smoother motion. Useful for action and for slowing down to 24 or 30 fps in post.
- 120 fps gives you 4x or 5x slow motion at 24 or 25 fps. The A6700 records 4K 120p with a 1.58x crop.
- 240 fps is only available in 1080p. Use it for extreme slow motion.
Picture Profiles: S-Log3, HLG, or Straight Out of Camera?
This is the most important creative decision. Your picture profile determines the color science and dynamic range of your footage.
- S-Log3 (PP8) gives you maximum dynamic range, about 14 stops. It's flat and desaturated. You must color grade it in post. Best for projects where you want full control over the final look.
- HLG (PP10) is designed for HDR delivery. It's less flat than S-Log3 and doesn't need grading, though you can tweak it. Great for HDR TVs and monitors.
- S-Cinetone (PP11) is a Sony cinema look that's ready to use with minimal grading. It's slightly desaturated but has pleasing skin tones. Perfect for quick turnaround work.
- Standard (PP0) is the default. It's baked-in color, no grading needed. Use it for event videos or when you need to deliver immediately.
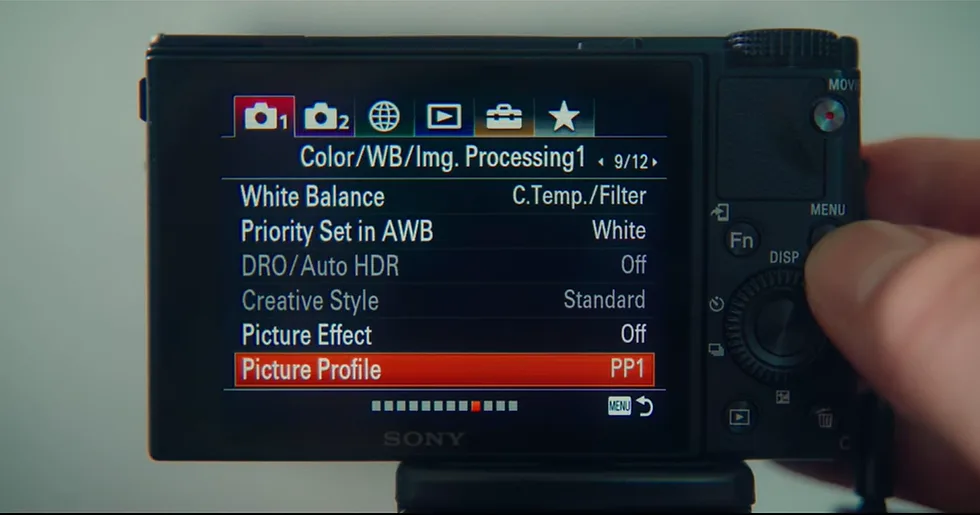
Image source: Bing (Web (fair-use with source credit))
Decision Tree: Match Your Scene to Your Settings
Now that you understand the three pillars, apply them to real scenarios. Use this decision tree to find your starting point.
Are You Grading in Post? → S-Log3 or Cine EI
If you're comfortable with color grading software like DaVinci Resolve or Premiere Pro, choose S-Log3. Set your picture profile to PP8. Expose +1.7 to +2.0 stops above neutral using the zebra pattern at 95% for highlights.
This gives you the most latitude to shape the image.
For a more controlled workflow, use Cine EI mode. It locks your ISO to one of the two native values, 800 or 2500, and adjusts exposure with a slider. This mimics professional cinema cameras.
You'll find it under the menu's exposure section.
Are You Delivering HDR or Rec.709? → HLG or Standard
If your final output is HDR, use PP10. It's a Rec.2020 color space with a gamma curve that matches HDR displays. You don't need to grade it, but you can adjust the brightness and contrast slightly.
If you're delivering standard Rec.709, use Standard or S-Cinetone. Both look great straight out of camera. Standard is fully baked.
S-Cinetone has a slightly more filmic look.
Do You Need Slow Motion? → 60fps, 120fps, or 240fps
Decide your target frame rate first. If your timeline is 24 fps, record 60 fps for 2.5x slow motion, 120 fps for 5x slow motion. For 30 fps timelines, 60 fps gives 2x slow motion, 120 fps gives 4x.
Set your shutter speed to double your recording frame rate, not your playback frame rate. For 120 fps, use 1/250. For 60 fps, use 1/125.
Don't forget to change your shutter speed when you switch frame rates.
Is This a Quick Turnaround? → Standard PP or Cine4
If you need to deliver the same day, skip the grading workflow. Use PP0 or PP4. Cine4 is a slightly flatter gamma that gives you some room to adjust without needing a full grade.
It's faster than S-Log3 and still looks professional.
Vloggers and Talking Heads: Settings for Clean, Simple Video
If you're sitting in front of a camera talking to an audience, you don't need 14 stops of dynamic range. You need clean skin tones, stable footage, and good audio. The same principles apply when setting up other cameras for similar tasks, like configuring a Ring Stick Up Cam or running through the initial setup for a EufyCam 3.
Picture Profile: PP11 (S-Cinetone) or Standard
S-Cinetone is a great choice for vlogs. It flatters skin tones and gives a polished look without grading. Set it to PP11, and you're done.
If you want even more simplicity, use Standard. Both are forgiving in mixed lighting.
Frame Rate and Bitrate: 30fps at 50Mbps XAVC S
For talking heads, 30 fps is smooth and natural. It matches the standard for most online platforms. Use XAVC S 4:2:0 8-bit at 50 Mbps.
This saves card space and is easy to edit. You don't need 10-bit for a basic vlog.
Audio: Levels, Limiter, and Mic Setup
Good audio is more important than perfect video. Set your audio levels to manual. Aim for peaks around -12 dB.
Use the mic input on the side of the camera. The A6700 has a limiter feature that prevents clipping, so enable that in the audio menu.
Stabilization: Active SteadyShot and Lens Choices
For handheld vlogging, turn on Active SteadyShot. It introduces a slight crop, but it smooths out walking shots. Pair it with a wide-angle lens like the Sony 11mm f/1.8 or the 16-55mm f/2.8 for a stable, natural field of view.
If you're using a tripod, standard SteadyShot is fine. Disable stabilization entirely for a locked-down shot to avoid any micro-jitters.
This setup gives you a reliable, fast workflow. You can film, transfer, and upload without touching a color grading tool.
Cinematic and Narrative: Settings for Maximum Control
When you're crafting a story with visuals, you want every tool at your disposal. The A6700 can deliver results that rival full-frame cameras, but only if you set it up with intention. Checking the official Sony support documentation for your specific firmware version is a good habit before any major shoot.
Picture Profile: S-Log3 (PP8) with Cine EI
For narrative work, S-Log3 is the gold standard. It captures the widest dynamic range, preserving highlights and shadows. Set your picture profile to PP8.
Then switch to Cine EI mode under the exposure menu. This locks your ISO to either 800 or 2500, the dual native ISO points. You adjust exposure with a slider, not ISO.
This matches professional cinema camera workflows and gives you cleaner shadows.
Shutter, Aperture, and ISO: Dual Native ISO Explained
The A6700 has two native ISO values for video: 800 and 2500. At ISO 800, you get the cleanest image with the least noise. At ISO 2500, the camera uses a second gain stage that delivers similar noise performance.
This means you can shoot in darker scenes without sacrificing quality. Use ISO 800 for well-lit scenes. Switch to ISO 2500 when light drops.
Avoid ISO values between these two, as they introduce more noise without the benefit of the second native gain.
Bitrate: XAVC S-I 4:2:2 at 600 Mbps
For maximum quality, use XAVC S-I. This is an intraframe codec, meaning every frame is a complete image. It uses more card space, about 4.5 GB per minute at 4K 60p, but it edits smoothly and retains more detail.
Use 4:2:2 color sampling for better chroma keying and grading flexibility. You'll need a V90 UHS-II SD card or a CFexpress Type A card for this mode.
Focus: Breathing Compensation and Focus Map
The A6700 includes focus breathing compensation. When you change focus, the lens's field of view shifts slightly. This feature corrects that shift, keeping your framing consistent.
Enable it in the menu under the lens compensation section. It works with compatible Sony lenses.
The focus map is a visual overlay that shows which parts of your image are in focus. It's color-coded, with sharp areas in white and soft areas in blue. This is invaluable for manual focus pulls.
Assign it to a custom button for quick access.
LUT Preview: Loading Custom LUTs in Camera
One of the best features of the A6700 is the ability to load custom LUTs for monitoring. You can upload a LUT that emulates your final grade, then see it on the LCD while recording. This helps you expose correctly and visualize the final look.
Load up to 16 LUTs via the camera's memory card. Assign the LUT preview to a custom button. Toggle it on and off as needed.
Action and Sports: High Frame Rate Settings
Fast-moving subjects demand high frame rates and careful attention to shutter speed. The A6700 handles this well, but you need to plan for overheating and rolling shutter.
Frame Rate: 120fps (4K) or 240fps (1080p)
For action, 4K 120 fps is your best option. It gives you 5x slow motion at 24 fps. The A6700 records this with a 1.58x crop, so your lenses will appear tighter.
If you need extreme slow motion, switch to 1080p at 240 fps for 10x slow motion at 24 fps. The quality is still good, but you lose resolution.
Shutter Speed: 1/250 for 120fps, 1/500 for 240fps
Follow the 180-degree rule. For 120 fps, set shutter to 1/250. For 240 fps, set it to 1/500.
This keeps motion blur natural. Faster shutter speeds will look stuttery. Slower ones will blur too much.
Picture Profile: S-Log3 for Grading or HLG for HDR Quick Turnaround
For action footage, you have two paths. If you're grading, use S-Log3. It preserves the highlights in bright outdoor scenes.
If you need to deliver quickly, use HLG. It gives you HDR-ready footage without grading. Both work well, but HLG is faster for sports highlights.
Overheating: Managing 4K 120p Record Times
The A6700 can overheat when recording 4K 120 fps for extended periods. In our research, the camera typically records for about 20 to 30 minutes before the overheat warning appears. To extend this, use a V90 card instead of a slower card.
Flip the screen away from the body to improve airflow. Avoid direct sunlight. If you need longer takes, consider an external recorder like the Ninja V, which bypasses the internal recording heat.
Rolling Shutter: What to Expect and How to Minimize It
Rolling shutter is a common issue with mirrorless cameras. The A6700 measures about 16ms of rolling shutter in 4K 24p. This means fast pans or moving subjects can appear skewed.
To minimize it, use faster shutter speeds. Avoid quick horizontal pans. Shoot at 60 fps or higher, which reduces the readout time.
If rolling shutter is a consistent problem, consider a camera with a global shutter, but that's a different price bracket.
Low Light and Events: Settings When You're Fighting Light
Low light is where the A6700's dual native ISO shines. You can get clean footage in situations that would ruin other cameras.
Picture Profile: S-Log3 with Dual ISO 2500
Switch to S-Log3 and use Cine EI mode. Set your ISO to 2500, the second native gain point. This gives you the cleanest image in low light.
Expose +1.7 stops over neutral, using the zebra pattern at 95% for highlights. This pushes the exposure into the clean part of the sensor's range.
Shutter Speed: When to Break the 180-Degree Rule
The 180-degree rule is a guideline, not a law. In very low light, you may need to use a slower shutter speed to get enough light. Dropping to 1/30 or 1/24 at 24 fps introduces more motion blur, but it also doubles your light intake.
This is acceptable for static shots or interviews. For moving subjects, the blur may be too much. Test before you commit.
Noise Reduction: In-Camera vs Post
The A6700 offers in-camera noise reduction for video. It works, but it softens your image. For the best results, disable in-camera noise reduction and handle it in post.
Software like DaVinci Resolve or Neat Video gives you more control and preserves detail.
Bitrate: Balancing Quality and File Size
In low light, you don't need the highest bitrate. The noise in the image already uses up bandwidth. Use XAVC S 4:2:0 8-bit at 100 Mbps for most low-light work.
This saves card space and is easier to edit. If you're shooting in very dark scenes, consider using XAVC HS, which uses HEVC compression for better quality at lower bitrates.
Seven Common Video Settings Mistakes (and How to Fix Them)
Even experienced shooters make these mistakes. Here's what to watch for.
Underexposing S-Log3
S-Log3 needs to be overexposed by about 1.7 to 2.0 stops. If you expose it like a standard profile, your shadows will be noisy and your image will look flat. Use the zebra pattern at 95% and push exposure until the highlights just start to clip.
That's your sweet spot.
Using the Wrong Frame Rate for Your Timeline
If you're editing in a 24 fps timeline, don't record at 30 fps. The motion cadence will be different. Stick to a single frame rate for your project.
If you need slow motion, record at 60 or 120 fps and conform it to 24 fps in post.
Forgetting to Match Picture Profiles in Multi-Cam
When you have multiple cameras, they all need the same picture profile. Mixing S-Log3 and HLG is a nightmare to grade. Set all cameras to the same profile and white balance before you start.
Ignoring the Audio Level Meter
The A6700's audio meter is small, but it's your best friend. Watch it. If it's peaking in the red, lower your gain.
Distorted audio is much harder to fix than slightly quiet audio. Aim for peaks around -12 dB.
Not Formatting Cards for Your Workflow
Format your SD cards in the camera before each shoot. This clears the file system and prevents errors. Use a card that meets the speed requirements for your chosen bitrate.
For 600 Mbps, you need a V90 card. For 200 Mbps, a V60 card works.
Overheating from Wrong Card or Settings
Using a slow card forces the camera to buffer data, generating heat. Use a fast card to reduce buffer time. Also, turn off the camera when not recording.
Lowering the screen temperature helps too.
Relying on Auto Exposure for Log Footage
Auto exposure is designed for standard profiles. It will fight you when you're using S-Log3. Use manual exposure.
Set your aperture, shutter speed, and ISO. Then use the exposure compensation dial to fine-tune.
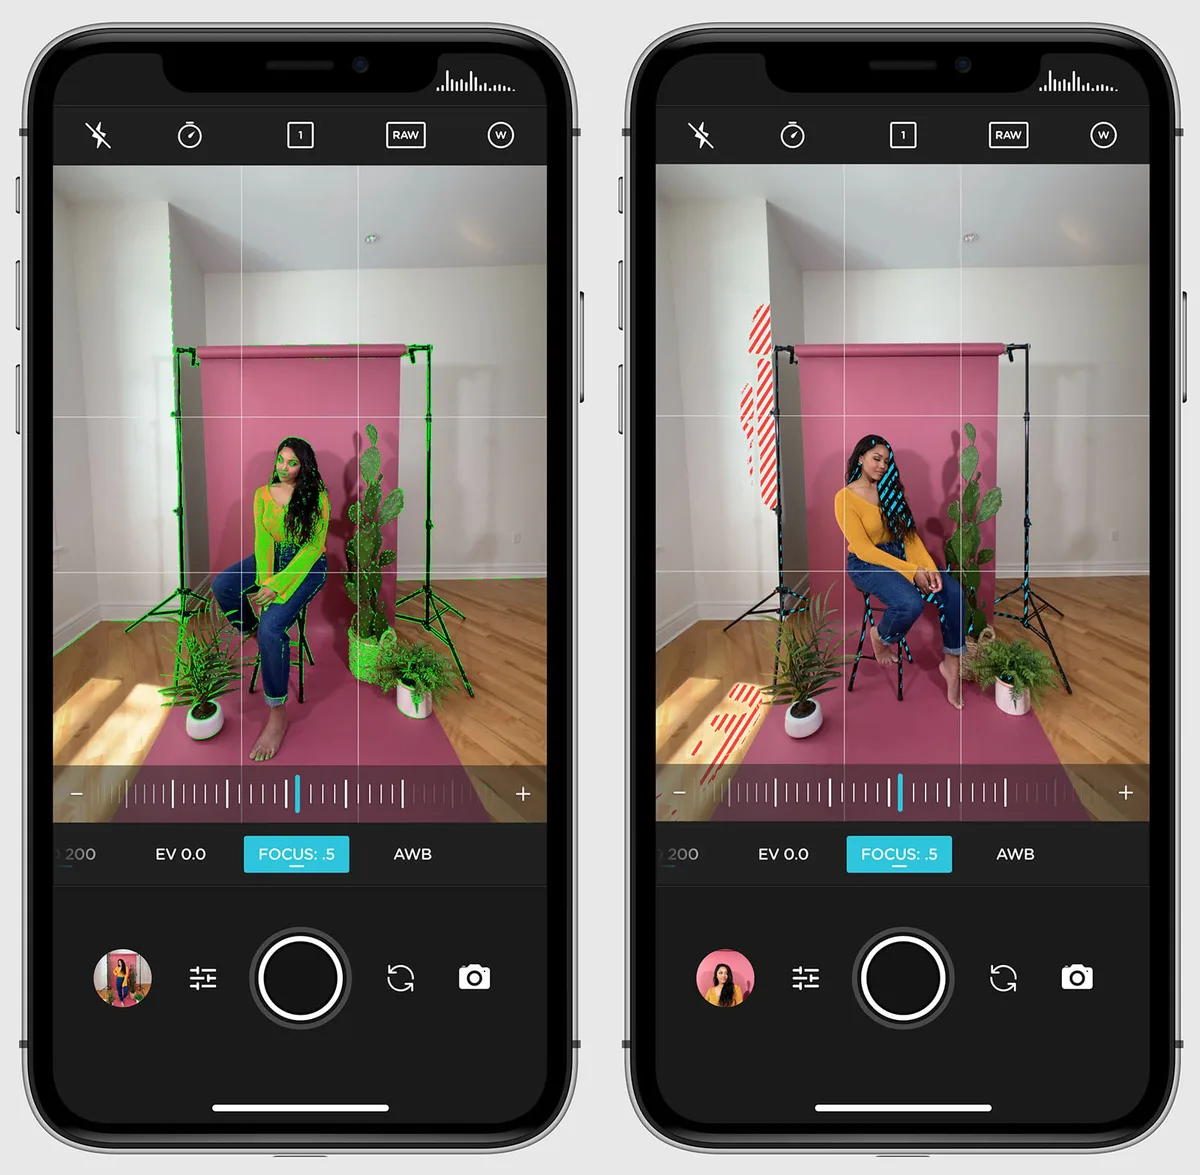
Image source: Bing (Web (fair-use with source credit))
Quick Reference: Specs That Actually Matter for Video
Here are the key numbers you need to know.
Bitrate Table by Mode
| Mode | Bitrate | Color | Codec | Card Speed |
|---|---|---|---|---|
| XAVC S 4K 60p | 150 Mbps | 4:2:0 8-bit | H.264 | V30 |
| XAVC S 4K 60p | 200 Mbps | 4:2:2 10-bit | H.264 | V60 |
| XAVC HS 4K 60p | 100 Mbps | 4:2:2 10-bit | H.265 | V60 |
| XAVC S-I 4K 60p | 600 Mbps | 4:2:2 10-bit | H.264 | V90 |
| XAVC S-I 4K 24p | 400 Mbps | 4:2:2 10-bit | H.264 | V90 |
Dual Native ISO Values
- Base ISO 800: Cleanest image for well-lit scenes.
- Base ISO 2500: Second native gain for low light.
- Avoid ISO 1600 to 2000: These are interpolated and noisier.
Record Time Limits by Mode
- 4K 24p: Unlimited recording in normal temperatures.
- 4K 60p: Unlimited recording in normal temperatures.
- 4K 120p: Approximately 20 to 30 minutes before overheat warning.
- 1080p 240p: Approximately 10 to 15 minutes before overheat warning.
Card Speed Requirements
- V30: Up to 200 Mbps.
- V60: Up to 200 Mbps, safe for most modes.
- V90: Required for XAVC S-I at 600 Mbps.
- CFexpress Type A: Also works for XAVC S-I, faster buffer clearing.
Frequently Asked Questions
Should I use S-Log3 or HLG for YouTube?
Use S-Log3 if you want to color grade your footage. Use HLG if you want HDR-ready footage without grading. For standard YouTube, both work.
S-Log3 gives you more control, but HLG is faster. Choose based on your workflow.
Can I record 4K 120p for more than 20 minutes?
Yes, but you need to manage heat. Use a V90 card, flip the screen away from the body, and avoid direct sunlight. In our research, the camera typically records 20 to 30 minutes before the overheat warning appears.
An external recorder bypasses the issue entirely.
What SD card do I need for 600 Mbps recording?
You need a V90 UHS-II SD card for XAVC S-I at 600 Mbps. A CFexpress Type A card also works and clears the buffer faster. V60 cards are not fast enough for this mode.
Check your card's speed rating before you shoot.
How do I set up the A6700 for live streaming?
Connect the camera to your computer via USB-C. Set the USB mode to UVC/UAC. The camera will appear as a webcam.
Use a USB-C cable that supports data transfer. You can also use the HDMI output with a capture card for higher quality.
Does the A6700 overheat in 4K 60p?
No, not in normal conditions. The A6700 can record 4K 60p continuously without overheating. The issue only appears in 4K 120p or 1080p 240p.
If you're recording in a hot environment, flip the screen away from the body to improve airflow.
What picture profile is best for beginners?
Start with Standard or S-Cinetone. Both look great straight out of camera. You don't need to grade them.
S-Cinetone is slightly more filmic and flatters skin tones. Once you're comfortable, experiment with S-Log3 for more control.
How do I load a LUT into the A6700?
Copy the LUT file to your SD card. Insert the card into the camera. Go to the monitor tab in the menu.
Select LUT preview and choose the LUT file. Assign the LUT preview to a custom button. You can load up to 16 LUTs.

Similar Posts