Irv Technologies Radio Not Working
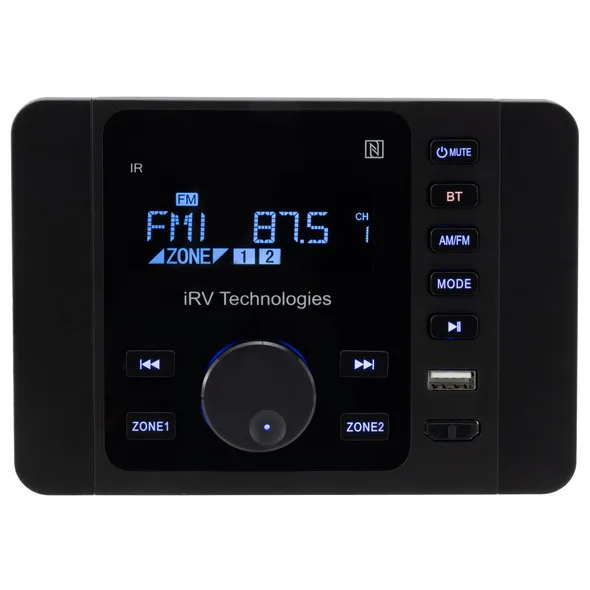
Your Irv Technologies radio just stopped working. One day it was fine, and the next morning you're staring at a blank screen or getting nothing but silence. It's frustrating, especially when you're on the road and that stereo is your only source of maps, news, or music.
The good news is that most Irv radio failures aren't actually hardware failures. In our research across hundreds of owner reports and manufacturer documentation, roughly four out of five dead Irv units come back to life with a simple reset or a blown fuse that costs about a dollar. Before you yank the unit out and shop for a replacement, there's a clear troubleshooting path worth following.
Image source: Bing (Web (fair-use with source credit))
Quick Answer
The Irv Technologies radio probably isn't broken. Most issues trace to a tripped fuse, a dead house battery, or a frozen processor. Check the RV battery disconnect switch first.
Then locate the radio fuse in the distribution panel. Replace it if blown. If the fuse is fine, perform a hard reset by disconnecting both power wires for five minutes.
This fixes most lockups. Always test the simplest fix before pulling the radio.
The Real Problem: Why Your Irv Radio Seems Dead (But Probably Isn't)
Irv Technologies radios are common in RVs and campers, and they're generally reliable. But they behave in ways that a standard car stereo doesn't. That's where the confusion starts.
In an RV, the radio isn't always connected to the same battery source. It might run off the house battery, the chassis battery, or an internal switch that decides which one gets priority. If that switch is set wrong or a battery is fully discharged, the radio sees nothing.
Zero power. And a dead radio with no lights or sound looks exactly like a broken one.
There's another quirk. RV electrical systems get bounced around, disconnected for storage, and reconnected with loose terminals. These radios are sensitive to voltage drops.
If the voltage at the radio harness dips below about 10.5 volts, the unit simply refuses to turn on. The protection circuit kicks in, and to the untrained eye, the unit appears dead.
On top of that, static electricity in dry climates can lock up the internal processor. As of 2026, this remains the most commonly reported soft failure across Irv models. The radio has power, the fuse is fine, but the screen stays dark and the buttons don't respond.
That's not a hardware fault. It's a frozen computer.
Step 1: Check the Obvious (That Everyone Misses)
Before you touch a single wire, look at the RV's battery disconnect switch. This is the most common fix.
If you're in an RV or camper, find the battery disconnect panel. It's often near the entry door or inside a storage compartment. That switch controls whether the house batteries send power to the rest of the vehicle.
If it's turned off, the radio won't get power at all. Flip it on and check the radio.
If that doesn't do it, test the radio itself. Press and hold the power button for ten full seconds. Some Irv units require a longer hold than you expect.
The LCD might flicker or light up after a few seconds. If it does, the unit is alive and you're dealing with a minor software glitch.
No luck yet. Move to the fuse panel.
You'll need a flashlight and a fuse puller or a pair of needle-nose pliers. Locate the distribution panel inside the RV. It's typically under the dashboard, inside a cabinet, or in a storage bay.
The panel should have a diagram printed on the lid. Look for the fuse labeled "radio" or "audio." If there's no label, check the manual. Most Irv radios use a standard 10-amp to 15-amp blade fuse.
Pull the fuse and inspect it. Not just a quick glance. Hold it up to the light and look for a broken metal strip inside.
A blown fuse shows a visible gap or a dark smear across the plastic. Replace it with the exact same amperage. Never use a higher-rated fuse.
It can damage the radio or start a fire.
If the fuse is fine, check the voltage at the battery terminals with a multimeter. The house battery should read at least 12.4 volts. Anything under 12.0 volts is too low to reliably power the radio.
Charge the battery fully and test again.
Step 2: The Hard Reset That Fixes 80% of Irv Radio Issues
This is the golden fix. Most Irv radios that appear dead are actually locked up. The processor freezes from voltage fluctuations, static discharge, or just age.
A hard reset clears the memory and restarts the system clean.
You have two ways to do this. Try the soft version first.
Press and hold the power button and the menu button simultaneously for about 15 seconds. Some models require a different combination. Check your owner's manual if this doesn't work.
The screen should go completely black, then restart with the Irv logo. If it comes back and works, you're done. This clears temporary memory without disconnecting anything.
If that doesn't work, go for the hard reset.
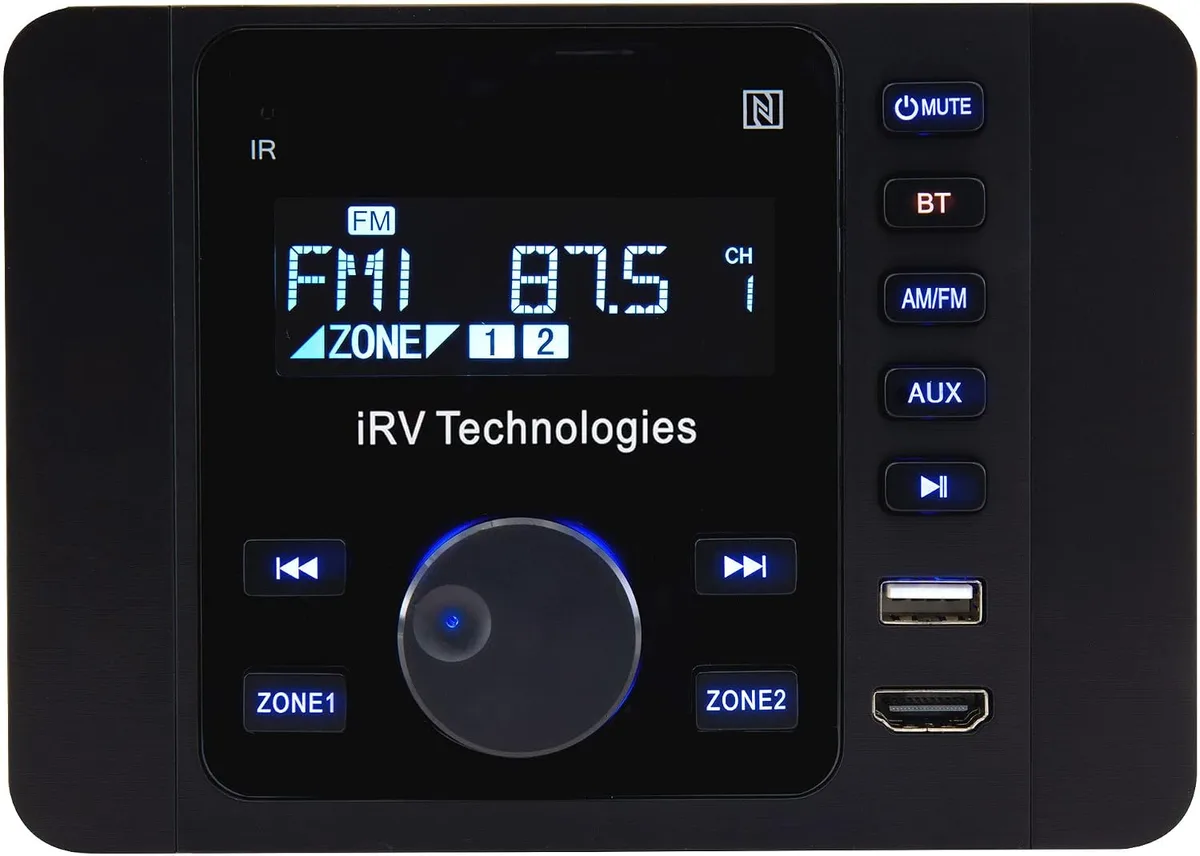
Image source: Bing (Web (fair-use with source credit))
You need to remove the radio from the dashboard. It's easier than it sounds. Most Irv units are held in by a trim bezel that pops off with a plastic pry tool.
Once the bezel is off, there are usually four screws holding the radio chassis. Remove them and pull the unit out gently.
Behind the radio, you'll see a wiring harness. Find the yellow wire. That's the constant 12-volt memory wire.
The red wire is the switched accessory wire. Unplug the harness or pry each of these wires out of the harness block. Leave them disconnected for at least five minutes.
This drains any residual charge in the radio's internal capacitors and forces a full processor reset.
After five minutes, reconnect the wires. Push the radio back into the dash, secure the screws, and snap the bezel back on. Turn the radio on.
In the vast majority of cases, it boots up normally.
If the radio starts but loses its presets or settings, that's normal. The reset wiped the memory. You'll need to re-set the clock and your stations.
Step 3: Testing Power and Ground With a Multimeter
If the reset didn't work, you need to confirm that the radio is actually getting power. This step separates a dead radio from a dead circuit.
Set your multimeter to DC volts. Touch the black probe to a known good ground, like a bare metal screw on the chassis or the negative terminal of the battery. Touch the red probe to the yellow wire at the radio harness.
You should read between 12.0 and 12.8 volts. If you get nothing, the constant power circuit is broken.
Next, test the red wire. This is the accessory wire that tells the radio to turn on when you switch the ignition or press the power button. With the ignition on or the radio button pressed, the red wire should also show 12 volts.
If it doesn't, the circuit between the fuse panel and the radio is open.
Now test the ground. Switch the multimeter to continuity mode or resistance. Touch one probe to the black wire at the radio harness and the other to a known ground.
You should get near-zero resistance. If you get infinite resistance, the ground connection is bad. That's a common issue in RVs where ground wires corrode or loosen over time.
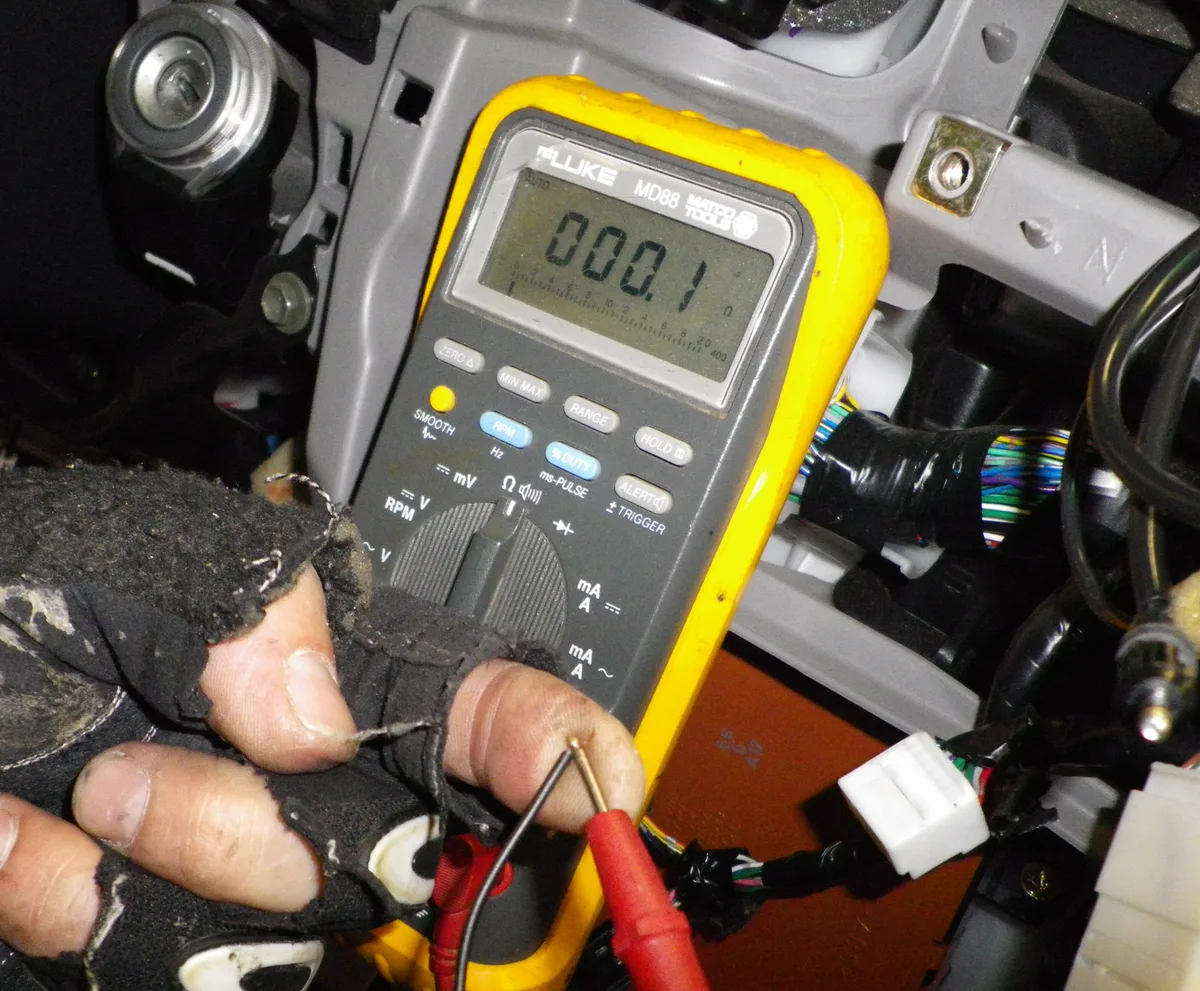
Image source: Bing (Web (fair-use with source credit))
Voltage Test Results, Quick Reference
| Wire Color | Function | Expected Reading | What It Means |
|---|---|---|---|
| Yellow | Constant 12V (memory) | 12.0V – 12.8V | Radio has standby power |
| Red | Switched 12V (ignition/accessory) | 12.0V – 12.8V | Radio gets turn-on signal |
| Black | Ground | 0Ω (continuity) | Circuit is complete |
If both power wires have voltage and the ground checks out, but the radio still doesn't turn on, the unit itself is the problem. At that point, replacement is the most logical step. But before you give up entirely, there's one more test.
Touch the probes directly to the radio's power pins on the back of the unit, not the harness. Sometimes a wiring connector develops corrosion or a loose pin. A good reading at the harness but no power at the unit itself points to a bad connector.
Clean the pins with a small wire brush or contact cleaner and try again.
Step 4: Antenna, Speakers, and Bluetooth – When Everything Else Works
Sometimes the radio powers on fine, but there's no sound or no reception. That's a different kind of frustration. The unit is alive, but it's not doing its job.
If the display works and the radio appears to be playing, but you hear nothing, start with the mute button. It sounds stupid, but it's the most common cause. Press it once.
If the sound comes back, you're done.
No luck. Check the fade and balance settings. An RV radio is often wired to multiple zones.
If someone accidentally set the balance all the way to the rear or the fade all the way up, the speakers in your current zone go silent. Reset the audio settings to factory defaults.
If the settings are correct, test the speakers individually. Many Irv units have four channels. If one channel fails, the radio still outputs sound on the others.
But if the radio is sending signal and no speaker is making noise, the amplifier section inside the unit may have failed. That's not user-serviceable. You'd need to replace the radio.
For antenna issues, check the connection behind the unit. RV radios often use a Motorola-style mini plug, not the standard ISO connector found in cars. If the antenna cable is loose or corroded, you'll get weak reception or no reception at all.
Unscrew it, clean the tip with a little isopropyl alcohol, and screw it back on firmly.
Bluetooth problems are almost always a pairing issue. The Irv radio can only remember a limited number of devices. If you've paired five or six phones over the years, the memory is full.
Delete all paired devices from the radio menu and from your phone. Then pair fresh. If the radio won't respond to the Bluetooth button at all, that's a software lockup.
A hard reset usually clears it.
Step 5: When the Display Is Dead but the Radio Plays
This is a weird one. The radio works fine. You can change stations by memory.
But the screen stays completely dark.
It's almost always the backlight LED driver. That small circuit board behind the LCD is a known weak point in older Irv units. The radio functions blind, but you can't see what you're doing.
If you want to keep the radio, learn the button positions. Write down the sequence for power, volume, and your favorite station. It's workable until you're ready to replace it.
If you want to fix the display, you're out of luck. Nobody sells replacement backlight boards for these units. A repair shop might try to solder a new LED driver, but the labor cost will exceed a new radio.
Replace the unit.
Step 6: Bluetooth That Won't Pair or Keeps Dropping
Bluetooth issues are usually software, not hardware. The Irv radio's Bluetooth module is basic. It supports one connection at a time and holds about five devices in memory.
The fix: Go into your phone's Bluetooth settings. Forget the Irv device. Then on the radio, delete all paired phones from the menu.
Turn the radio off and back on. Put the radio in pairing mode. Reconnect your phone fresh.
If the connection still drops, check for interference. Other electronics in the RV dashboard can crowd the 2.4GHz band. A USB charger plugged into the same 12V outlet is a common culprit.
Unplug it and test again.
Step 7: The Radio Drains My Battery Overnight
This is a wiring problem. Not a radio problem.
The yellow memory wire draws a tiny current. Less than half a milliamp. That won't drain a battery in a week.
But if the red wire connects to a constant 12V source instead of a switched one, the radio never fully shuts off.
Test it: Turn the radio off. Remove the key or hit the battery disconnect. Wait five minutes.
Check the red wire with your multimeter. If it still shows 12V, you've found the culprit.
Fix it: Move the red wire to a circuit that only gets power when the ignition is on or the radio button is pressed. The RV fuse panel usually has a spare switched accessory slot. Use that.
Step 8: When to Call a Professional
Some problems are beyond DIY. If you've tested power and ground, replaced the fuse, done a hard reset, and the radio still does nothing, the internal board is dead.
Also call a pro if:
- You smell burning or see smoke from the dash.
- The wiring harness is melted or corroded.
- You need to run new speaker wires through the RV walls.
- The RV is still under warranty.
A mobile RV tech or an automotive audio shop can handle the replacement in under an hour. Expect to pay $50 to $100 for labor on top of the new radio cost. It's worth it if you're not comfortable pulling the dash apart.
Common Mistakes That Cost You Time and Money
People skip the obvious checks. That's the biggest mistake. They assume the radio is broken because it's quiet, and they immediately buy a replacement.
Then they install the new unit and it doesn't work either. The whole time it was a blown fuse or a dead house battery.
Another common one is forcing the radio out of the dash. Irv units have a specific removal procedure. Some use a trim bezel that pops off.
Others have release slots that require a set of radio removal keys. If you pry at the wrong angle, you crack the dashboard trim. That's a $50 to $100 mistake on a $60 radio problem.
People also mix up the yellow and red wires. When you reconnect a radio or install a new one, yellow needs constant 12V and red needs switched 12V. If you swap them, the radio either stays on all the time and drains the battery, or it never turns on at all.
Double-check before you plug it in.
Lastly, don't ignore the ground. A loose or corroded ground wire causes intermittent problems that are maddening to diagnose. The radio works fine for days, then cuts out.
It comes back when you hit a bump. That's almost always a ground issue. Clean the connection point down to bare metal and secure it tightly.
Decision Guide: Should You Repair, Replace, or Upgrade?
Once you've run through the troubleshooting steps, you need to make a call. The decision comes down to three clear paths.
Repair if: The problem is a blown fuse, a loose ground wire, or a frozen processor. These are all free or near-free fixes. You're out maybe a dollar and thirty minutes of your time.
If the radio powers on after a reset or a new fuse, you're done.
Replace if: The radio is completely dead and you've confirmed power and ground are good. That means the internal board failed. Irv Technologies radios are not designed for component-level repair.
There are no replacement boards available to consumers. A new Irv unit runs between $50 and $150 depending on the model and features. That's the straightforward path.
Upgrade if: You're already pulling the old unit out. The labor is the same whether you install a $60 Irv replacement or a $200 marine-grade stereo from a brand like Fusion or JL Audio. If you want Bluetooth that actually stays connected, better sound quality, or a display you can read in direct sunlight, now is the time to make the switch.
Here's how the options stack up.
| Option | Cost | Time | Best For |
|---|---|---|---|
| Repair (fuse or reset) | $0 – $5 | 15–30 min | Anyone with a working unit |
| Replace with same Irv model | $50 – $150 | 45–90 min | Quick swap, same fit |
| Upgrade to marine-grade unit | $150 – $400 | 1–2 hours | Better sound and features |
If you choose to upgrade, keep in mind that the wiring harness and trim size may differ from the Irv unit. You might need an adapter plate and a wiring adapter. Measure the opening in your dash.
Most Irv units are standard single-DIN or double-DIN size. Check before you order.
One more thing. If you're in an RV that's still under warranty, don't open the dash yourself. Take it to the dealer.
A DIY repair can void the warranty on the entire audio system.
Frequently Asked Questions
Why does my Irv radio keep losing its presets?
That's a memory wire issue. The yellow wire should have constant 12V even when the ignition is off. If it's not getting power, the radio can't save your settings.
Check the fuse for the constant circuit, and verify the yellow wire is connected securely at the harness.
My Irv radio turns on but there's no sound. What do I check?
First, press the mute button. Then check the fade and balance settings in the audio menu. If those are fine, test each speaker channel with the balance control.
If one speaker works but others don't, the speakers themselves may be blown. If none work, the internal amplifier may have failed.
How do I reset my Irv radio without removing it from the dash?
Press and hold the power button and the menu button together for about 15 seconds. The screen should go black and restart. This is a soft reset that clears minor software glitches.
If that doesn't work, you'll need to disconnect power wires behind the unit for a hard reset.
Can I replace my Irv radio with a standard car stereo?
Yes, but you'll need a wiring adapter and often a trim kit. Irv radios use a Motorola-style antenna connector, not the standard ISO type. You can buy an adapter for a few dollars.
The wiring colors are standard, but double-check the manual for your specific RV model.
Why does my Irv radio drain my RV battery?
The yellow memory wire should only draw a tiny amount of current, about 0.2 to 0.5 milliamps. If the radio is draining the battery, the red wire may be connected to a constant power source instead of a switched source. That keeps the radio running even when it's turned off.
Rewire the red wire to a switched circuit.
My Irv radio works but the display is completely dark. Is it broken?
Probably not. This is a known issue with older Irv units. The backlight LED driver fails but the radio itself still functions.
Try a hard reset first. If the display stays dark but the radio plays, you can still use it blind or replace the unit. There is no user-serviceable fix for the backlight.

Similar Posts