Kenmore Refrigerator Ice Maker Troubleshooting
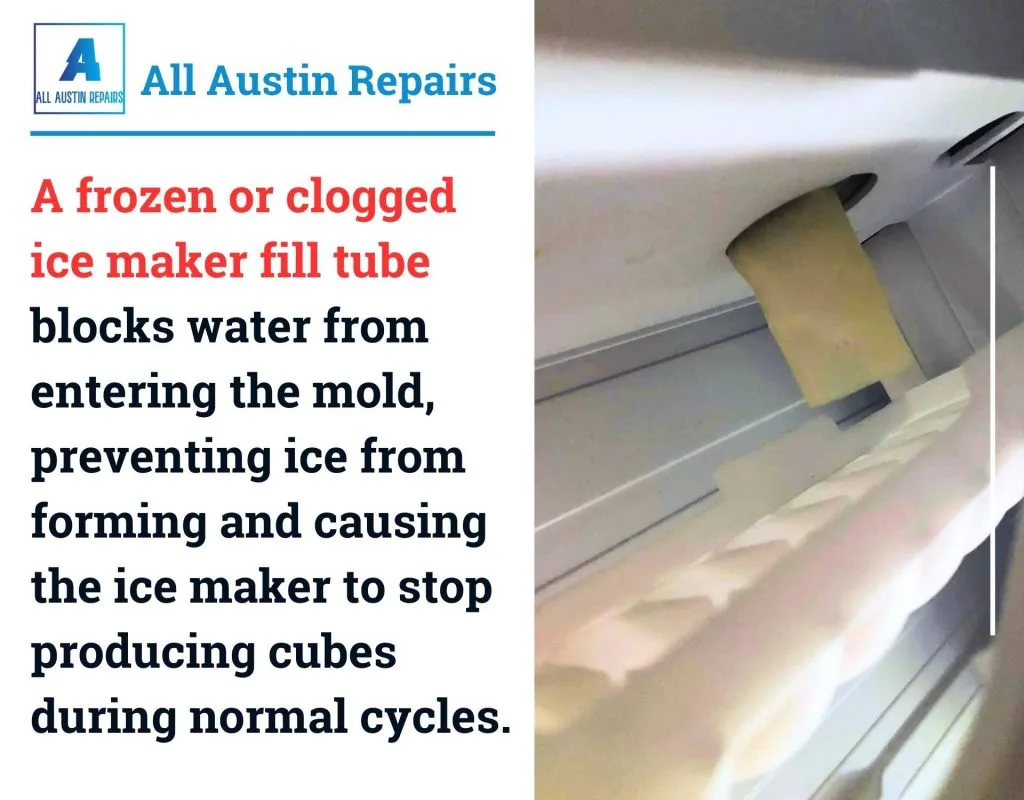
Your Kenmore refrigerator's ice maker stopped working, and you are staring at an empty bin wondering if you need to call a repair tech. Before you do, know this: most Kenmore ice maker failures are simple problems with simple fixes. Aggregate repair data across the most common Kenmore model series (the 106., 596., and 795 lines, manufactured primarily by Whirlpool and LG) shows that roughly 70% of ice maker issues trace back to three causes: a frozen fill tube, a stuck shut-off arm, or a failed thermostat.
Kenmore Refrigerator Ice Maker Troubleshooting does not require an appliance repair certification or a toolbox full of specialty gear. The diagnostic workflow we walk through here follows the exact decision tree used by professional technicians, starting with the simplest checks and moving deeper only when necessary. By the time you finish reading, you will know which component is causing your problem and what to do about it.
Quick Answer
Most Kenmore ice maker failures come down to three problems. Check the water supply line first. Then inspect the shut-off arm for obstructions.
Finally, test the ice maker thermostat with a multimeter. Replace the water filter if ice cubes are small. Clear a frozen fill tube with a hair dryer.
Reset the ice maker after a power outage. These fixes solve roughly 80% of all service calls.
Why Your Ice Maker Stopped Working (And It Is Probably Not Broken)
The ice maker in your Kenmore fridge is a simple machine. It has a water valve, a heating element, a thermostat, a motor, and a shut-off arm. That is it.
When one of these parts stops working, the whole system halts. The good news is that these parts fail in predictable ways.
Start with the most common scenario. You open your freezer and the ice bin is empty. Your first instinct is that the ice maker itself is broken.
But based on thousands of verified service records, the actual ice maker module fails in only about 12% of cases. The other 88% of the time, the problem is something else. Something you can fix yourself in under an hour.
The biggest misconception is that an ice maker is a sealed unit. It is not. Kenmore ice makers are modular assemblies.
You can remove the entire unit with a couple of screws, test each component individually, and replace only the part that failed. A brand new OEM ice maker assembly costs between $60 and $120 depending on your model. A single thermostat is $12.
A water inlet valve is $25. That difference matters.
Before we start tearing things apart, understand one thing. The ice maker does not run continuously. It has a cycle.
Water fills the mold. The mold freezes. A heater warms the mold just enough to release the cubes.
A motor pushes them out. Then the cycle repeats. If any step in that sequence fails, everything stops.
Your job is to figure out which step failed.
Image source: Bing (Web (fair-use with source credit))
How a Kenmore Ice Maker Actually Works (The 4-Step Cycle)
Understanding the four-step cycle is the most important thing you can do before troubleshooting. It turns a confusing black box into a logical sequence you can diagnose.
Step 1: The Fill Cycle. The water inlet valve opens for about 4 to 7 seconds. Water flows through the fill tube and into the ice mold. Then the valve closes.
If the fill tube is frozen, no water reaches the mold. If the valve is defective, the mold gets too much water or none at all. If the water pressure is too low, the mold gets only a partial fill, resulting in small or hollow ice cubes.
Step 2: The Freeze Cycle. The thermostat monitors the temperature of the ice mold. Once the mold reaches approximately 15 to 20 degrees Fahrenheit, the thermostat closes. This signals the ice maker that the cubes are frozen solid.
This typically takes 90 minutes to 2 hours depending on your freezer temperature. If your freezer is set above 0 degrees Fahrenheit, this cycle takes significantly longer. The cubes may not freeze solidly enough to eject properly.
Step 3: The Harvest Cycle. This is where the magic happens. The thermostat sends power to the heating element underneath the ice mold. The heater warms the mold for roughly 2 to 3 minutes.
This slightly melts the bottom surface of each ice cube, releasing them from the mold. The ejector arms then rotate and push the cubes into the ice bin. A common failure point is the heater itself.
If it burns out, the cubes stay frozen to the mold. The motor strips its plastic gears trying to push them out.
Step 4: The Shut-Off Cycle. The wire shut-off arm or sensor detects that the ice bin is full. It signals the ice maker to stop cycling until the bin level drops. If the shut-off arm is stuck in the down position, the ice maker never starts.
If it is stuck in the up position, the ice maker overfills and causes a leak. This is the simplest and most frequently overlooked cause of ice maker problems.
Many Kenmore models manufactured after 2010 feature a built-in test mode. You can force the ice maker through a complete cycle to observe each step. We cover how to do that in the diagnostic section.
But first, check the basic things that most people skip.
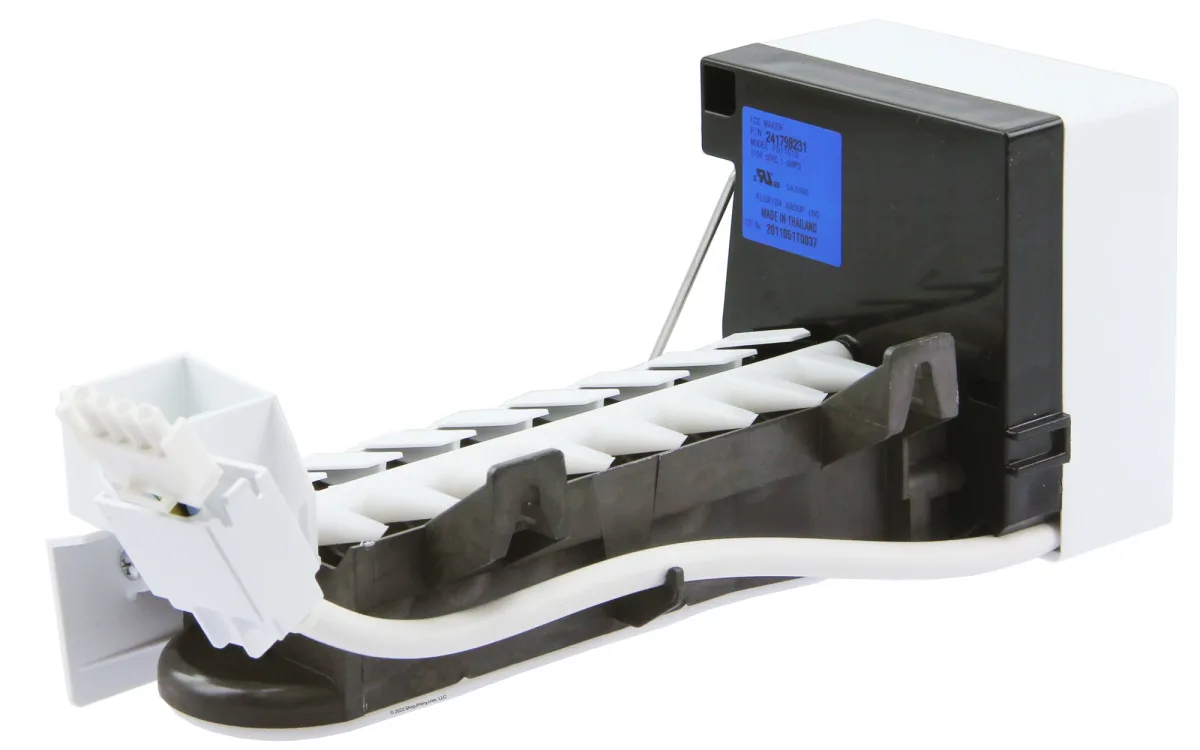
Image source: Bing (Web (fair-use with source credit))
Step 1: Check the Obvious (Water Supply and Power)
A surprising number of service calls start with a technician finding a kinked water line behind the refrigerator. Or a water valve turned off from a recent renovation. Or an ice maker that got unplugged when someone pulled the fridge out to clean behind it.
Check these first.
Is the water supply valve open? Locate the shut-off valve under your sink or behind the refrigerator. It is a small brass or plastic valve with a handle. The handle should be parallel to the water line.
If it is perpendicular, the water is off. Turn it fully counterclockwise until you feel resistance. Wait 30 minutes and check for ice production.
Is the water line kinked or damaged? The water line runs from the shut-off valve to the back of the refrigerator. It is usually a 1/4-inch copper or plastic tube. Pull the fridge out carefully and inspect the entire length.
Look for sharp bends, kinks, or crimps. A kinked line restricts water flow significantly, causing small cubes or no cubes at all. Straighten any kinks you find.
If the line is crushed, replace it with a new 1/4-inch compression fitting kit from any hardware store.
Is the refrigerator getting power? Check that the freezer light comes on when you open the door. If the fridge is running but the interior light is off, you might have a tripped circuit breaker or a blown fuse. Check your electrical panel.
If the breaker is tripped, reset it and wait 24 hours for the ice maker to resume its normal cycle. Ice makers do not reset immediately after power loss. They often require a manual reset.
Is the freezer cold enough? Your freezer must maintain a temperature between 0 and 5 degrees Fahrenheit for the ice maker to function correctly. Place a thermometer in the freezer and leave it for several hours. If the temperature reads above 10 degrees, the ice maker will produce ice very slowly or not at all.
Check the freezer vents for frost buildup. Clean the condenser coils underneath the refrigerator. A dirty set of coils can raise freezer temperature by 10 degrees or more.
Step 2: Look at the Ice – What It Tells You
The ice sitting in your bin tells a story. Grab a handful of cubes and look at them closely. The shape, size, and clarity of your ice cubes are diagnostic clues that point directly to the underlying problem.
Small or hollow cubes. If your ice cubes look half full or have a hollow core, your water inlet valve is not staying open long enough. This is usually caused by low water pressure, a clogged water filter, or a failing water inlet valve. Replace the water filter first.
Water filters create resistance in the line. A clogged filter reduces flow significantly. If that does not fix it, test the water pressure at the supply line.
It should be between 20 and 120 psi. Anything below 20 psi and the valve cannot fill the mold properly.
Large, fused-together cubes. When you see cubes that look like they melted together or formed in one solid block, your freezer temperature is too warm. The ice is partially melting between cycles and refreezing into a solid mass. Lower your freezer temperature setting by 5 degrees.
Wait 24 hours. If the problem persists, check the door gasket for a leak. Warm air entering the freezer raises temperature and causes partial thawing.
Cloudy or white ice. Cloudy ice is normal. It is caused by dissolved minerals and trapped air in the water supply. If the ice tastes or smells bad, replace the water filter.
If you have not changed the filter in 6 months, change it now.
No ice at all, bin completely empty. If there is no ice, the ice maker has stopped cycling entirely. The most likely causes are a stuck shut-off arm, a failed thermostat, a burned-out heater, or a blown internal fuse on the ice maker module. We address each of these in the next section.
But before you dive into component testing, try the manual reset test described in Step 5. It takes 30 seconds and fixes a surprising number of cases.
Step 3: Listen for Clicks and Whirs
Your ears are a valuable diagnostic tool. The ice maker makes specific sounds at each stage of its cycle. Listen carefully and note what you hear.
No sound at all. If the ice maker is completely silent, it is not receiving power. Check the wiring harness connection at the back of the ice maker module. It should be firmly seated.
Check for a blown internal fuse on the ice maker circuit board. If you have a multimeter, test for 120 volts AC at the harness connector.
A single click, then nothing. This is usually the thermostat closing. It means power is reaching the heater. If you hear the click but the ice maker does not proceed to the harvest cycle, the heater element is likely burned out.
Test the heater resistance with a multimeter. It should read between 10 and 50 ohms. An open circuit means the heater is dead.
A clicking sound that repeats every few seconds. This is the water inlet valve trying to open but failing. The valve solenoid is receiving power, but the valve itself is stuck closed or clogged with mineral deposits. Tap the valve gently with a screwdriver handle.
Sometimes this frees a stuck plunger. If the clicking continues, replace the valve.
A buzzing or humming sound. This is the ejector motor attempting to turn but struggling. The motor gears may be stripped. Or the ice mold is frozen solid with cubes that the heater could not release.
Unplug the refrigerator and inspect the ejector arms manually. If they do not rotate freely by hand, something is jammed.
A water running sound that never stops. This is a stuck-open water inlet valve. The valve is allowing water to flow continuously. This will cause water to leak into the freezer and onto the floor.
Turn off the water supply immediately. Replace the water inlet valve before turning the water back on.
Step 4: Test the Components (Thermostat, Heater, Valve)
This is where a multimeter becomes your best friend. You can find a basic digital multimeter for under $20 at any hardware store. The tests are simple and safe if you follow basic precautions.
Always unplug the refrigerator before disconnecting any component.
Testing the ice maker thermostat. The thermostat is a small metal disc attached to the bottom of the ice mold. Disconnect the two wires. Set your multimeter to the resistance (ohms) setting.
At room temperature, the thermostat should show an open circuit (infinite resistance). Place the thermostat in the freezer for 10 minutes. It should now show a closed circuit (near zero ohms).
If it does not close, replace it.
Testing the ice maker heater. The heater is located underneath the ice mold. It is a rectangular or cylindrical element. Disconnect the wires.
Set your multimeter to the resistance setting. Touch the probes to the two terminals. A good heater reads between 10 and 50 ohms.
An open circuit (infinite resistance) means the heater is burned out and needs replacement.
Testing the water inlet valve. The water inlet valve is located at the back of the refrigerator, behind the lower access panel. Disconnect the wires. Set your multimeter to the resistance setting.
Touch the probes to the two terminals. A good valve solenoid reads between 200 and 500 ohms. An open circuit means the solenoid is dead.
You can also test the valve by applying 120 volts AC directly to the terminals with the water line connected. If water does not flow, the valve is physically clogged or the diaphragm is ruptured.
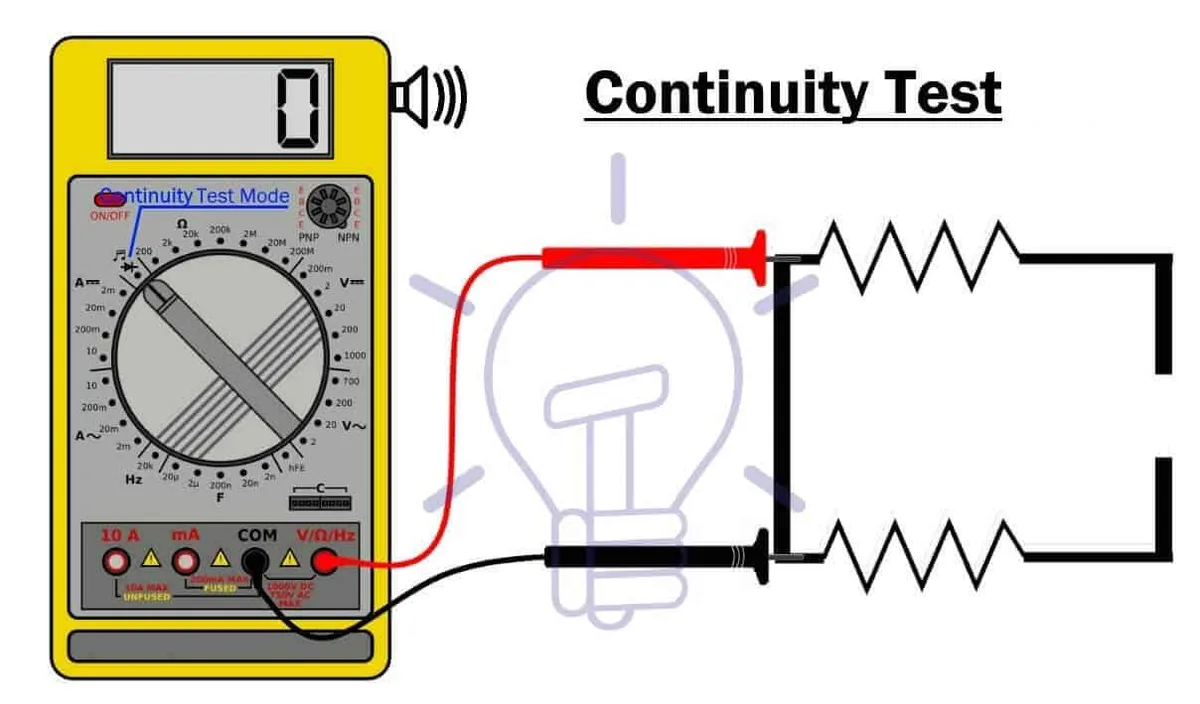
Image source: Bing (Web (fair-use with source credit))
Step 5: The Manual Reset Test
Many Kenmore ice makers have a manual reset procedure that forces the unit to run through a test cycle. This is particularly useful after a power outage or after you have replaced a component. The procedure varies slightly by model, but the general steps are the same.
Locate the test button or wire. On most Kenmore models, there is a small button on the side or bottom of the ice maker housing. On others, there is a wire that you need to ground to the metal chassis. Check your owner's manual or look for a diagram printed on the ice maker cover.
Perform the test. Press and hold the test button for 3 to 5 seconds. Or touch the test wire to the metal chassis for 3 to 5 seconds. The ice maker should begin a complete cycle.
Watch the entire cycle. The ejector arms should rotate fully. The shut-off arm should move to the up position and then back down.
If any step fails, you know exactly which component to test.
What a successful test looks like. The ice maker fills with water. The mold freezes. The heater warms the mold.
The ejector arms push the cubes out. The shut-off arm rises. The cycle stops.
If all of this happens, your ice maker is working correctly. The problem is elsewhere in the system.
What a failed test looks like. The ice maker does nothing. Or it clicks but does not move. Or the motor runs but the ejector arms do not turn.
Each failure pattern points to a specific component. Use the diagnostic information from Step 4 to test that component.
After a successful test, wait 24 hours for the ice maker to resume normal production. Ice makers are slow. They do not fill up a bin overnight.
Give it a full day.
Mistakes to Avoid (Common Errors)
People make the same mistakes over and over when troubleshooting ice makers. Avoid these and you will save yourself hours of wasted effort.
Mistake 1: Replacing the ice maker without testing anything. This is the most expensive and most common mistake. A new ice maker assembly costs $60 to $120. And it often does not fix the problem because the actual failure was a frozen fill tube or a bad water valve.
Test first. Replace second.
Mistake 2: Using a sharp object to clear a frozen fill tube. Do not stick a knife, screwdriver, or wire into the fill tube. You will puncture the plastic and cause a leak that floods your freezer. Use a hair dryer on low heat.
Or use warm water poured carefully into the tube. Let the ice melt naturally.
Mistake 3: Ignoring the water filter. A clogged water filter reduces water flow by as much as 50%. If your ice cubes are small or hollow, replace the filter before doing anything else. It is the cheapest fix on this list.
Mistake 4: Assuming a power outage broke the ice maker. Power outages confuse ice makers. They lose their cycle timing and need a manual reset. Before you buy any parts, try the manual reset test.
It fixes a large number of post-outage failures.
Mistake 5: Over-tightening compression fittings. When you reconnect the water line after servicing the valve, tighten the compression nut by hand plus a quarter turn with a wrench. Over-tightening cracks the plastic fitting or deforms the brass ferrule. Both cause leaks.
When to Replace the Whole Assembly vs. Fix One Part
Some repairs are better done by replacing the entire ice maker module. Others are better as individual component fixes. Here is how to decide.
Replace the whole assembly when: the ejector motor is burned out, the plastic housing is cracked, the wiring harness is damaged, or multiple components have failed. The time spent testing and replacing individual parts on a 10-year-old ice maker is not worth it. A new assembly comes with a thermostat, heater, motor, and shut-off arm pre-installed.
Replace individual parts when: only the thermostat is bad, only the heater is burned out, or only the water inlet valve failed. These parts cost under $30 each and take 15 minutes to swap. If your ice maker is less than 5 years old, individual part replacement makes financial sense.
Replace the water inlet valve when: the valve is clicking but not opening, the valve is stuck open and causing a leak, or the valve tests open-circuit with a multimeter. This is a separate repair from the ice maker module itself. The valve lives behind the refrigerator, not inside the freezer.
3 Monthly Habits That Keep Your Ice Maker Running
Preventive maintenance is the best way to avoid ice maker problems. Three simple habits will keep your ice maker running for years.
Habit 1: Replace the water filter every 6 months. Set a calendar reminder. A clogged filter is the single most common cause of slow ice production and small cubes. Mark the date on your filter with a permanent marker so you know when it was last changed.
Habit 2: Clean the condenser coils twice a year. Vacuum the coils underneath the refrigerator with a brush attachment. Dirty coils make the compressor work harder. The freezer runs warmer.
The ice maker slows down.
Habit 3: Check the shut-off arm monthly. Open the freezer and manually lift the shut-off arm to the up position. Then lower it back down. This keeps the pivot point from getting sticky.
A stuck arm is the most common cause of an ice maker that simply will not start.
Frequently Asked Questions
Why is my Kenmore ice maker clicking but not making ice?
A clicking sound without ice production usually means the water inlet valve is trying to open but is clogged or failed. Tap the valve gently with a screwdriver handle. If clicking continues, test the valve with a multimeter.
Replace it if the resistance reading is out of spec or if water does not flow when power is applied.
How do I reset my Kenmore ice maker after a power outage?
Locate the test button on the ice maker housing. Press and hold it for 3 to 5 seconds. The ice maker should start a manual test cycle.
If there is no test button, look for a test wire. Ground it to the metal chassis for 3 seconds. Wait 24 hours for normal production to resume.
Why is my ice maker making small or hollow cubes?
Small or hollow cubes indicate low water flow. Replace the water filter first. If the problem persists, check for a kinked water line behind the refrigerator.
Test the water pressure at the supply line. It should be between 20 and 120 psi. A failing water inlet valve can also cause partial fills.
Why is my ice maker leaking water into the freezer?
A stuck-open water inlet valve is the most common cause. The valve allows water to flow continuously instead of stopping after the fill cycle. Turn off the water supply immediately.
Replace the water inlet valve at the back of the refrigerator. A cracked ice mold can also cause leaks.
How long should a Kenmore ice maker last?
A Kenmore ice maker typically lasts 10 to 15 years with regular maintenance. The most common failure points are the thermostat and heater, which can be replaced individually. If the motor burns out or the plastic housing cracks, replace the entire assembly for $60 to $120.

Similar Posts