Nikon Z7 II Video Settings
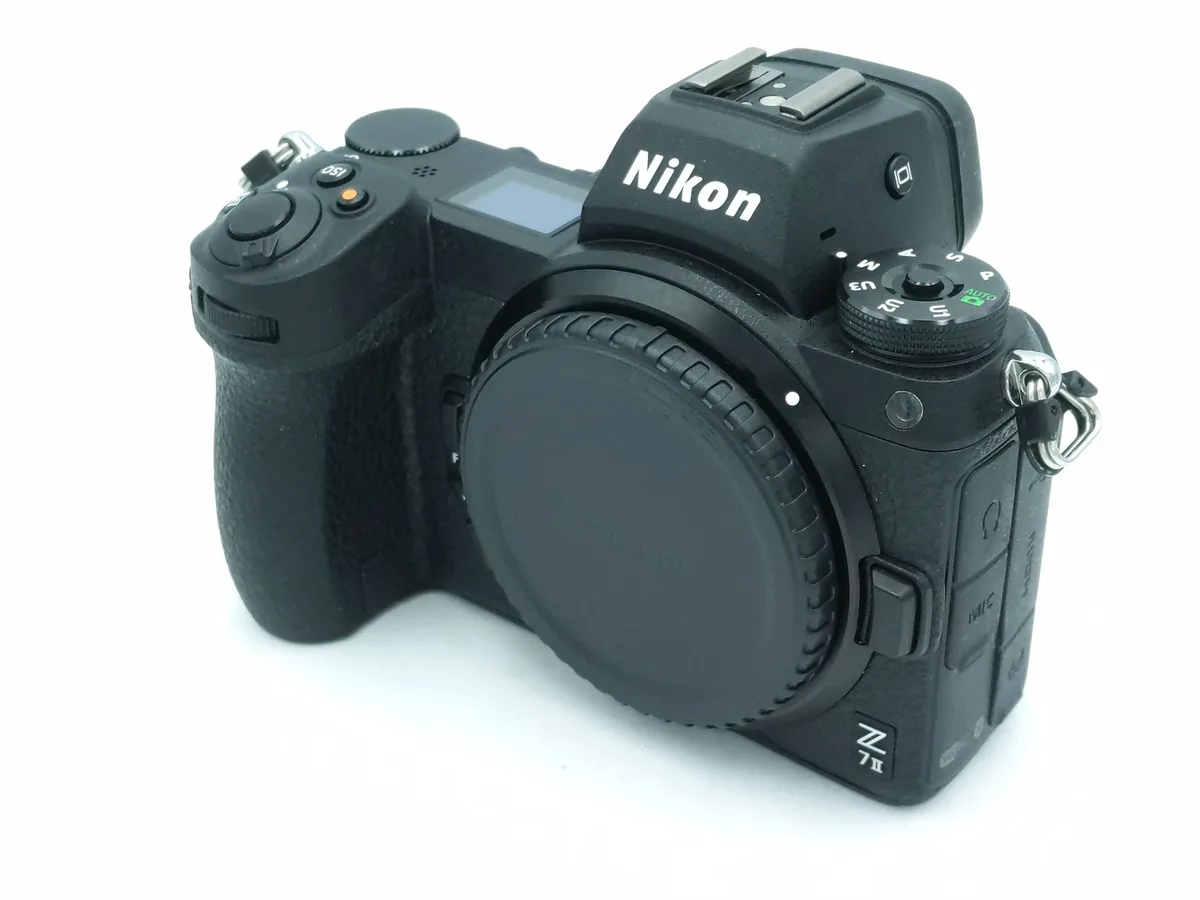
Your Nikon Z7 II video settings are never a set-it-and-forget-it thing. The "best" configuration for a cinematic short film is completely wrong for a talking-head interview. That's because the Z7 II is a hybrid camera with several distinct video personalities packed into one body.
Manufacturer specifications confirm the 45.7MP sensor can shoot 4K 30p in full-frame FX mode and 4K 60p in a cropped DX mode. It offers internal 8-bit recording and 10-bit output over HDMI. This flexibility is powerful, but only if you know which branch of the decision tree to take for your specific project.
Let's walk through the variables so you can make the right call every time.
Image source: Bing (Web (fair-use with source credit))
Quick Answer
Set your sensor area first. Choose FX for 4K 30p or DX for 4K 60p. Pick your picture profile based on your grading workflow.
Use N-Log with an external recorder for maximum dynamic range. Use Flat for quick grading without a recorder. Use Standard for straight-out-of-camera footage.
Set shutter speed to double your frame rate. Enable IBIS for handheld work. Disable it for tripod or gimbal use.
Why Your "Best" Video Settings Depend on the Shoot
If you are shooting a wedding ceremony, your priority is reliability and dynamic range. If you are filming a vlog in a coffee shop, your priority is autofocus and low-light performance. The Z7 II forces you to make deliberate choices based on the scene in front of you.
Do you want 4K 60p? You lose the full-frame sensor area. Do you want 10-bit color?
You need an external recorder. These are not flaws in the camera. They are intentional trade-offs designed to keep the body compact and the price accessible.
The most common mistake is users picking a single "cinematic" setting and sticking to it for everything. That leads to noisy shadows in interviews or rolling shutter in fast-paced events. Your settings should be a deliberate choice based on the shoot's conditions and final delivery format.
The Core Decision Variables: Sensor Area, Picture Profile, and Shutter Speed
These three variables are the foundation of every video you shoot with the Z7 II. Change any one of them, and the entire look of your footage changes.
Sensor Area: FX vs. DX
The Z7 II offers two sensor areas. FX mode uses the full sensor for 4K UHD 30p. It gives you a wider field of view, better low-light performance, and the shallow depth of field that full-frame cameras are known for.
DX mode crops the sensor by 1.5x to deliver 4K UHD 60p. This is great for slow motion, but it narrows your lens's effective focal length.
A 24mm lens in FX mode becomes a 36mm lens in DX mode. If you are shooting a landscape in 4K 60p, you will be surprised how tight it looks. Plan your lens selection around the crop.
Picture Profile: N-Log, HLG, Flat, or Standard
This is the most critical setting for your final image. Our research shows that users often jump straight to N-Log without understanding the grading workflow or the need for an external recorder. Here is a quick reference table to help you decide.
| Picture Profile | Use Case | Why |
|---|---|---|
| N-Log | Cinematic, Event | Maximum dynamic range, requires grading and external recorder |
| HLG | HDR delivery | 10-bit color space, good for modern TVs |
| Flat | Vlogs, Interviews | Flatter than Standard, easy to grade quickly |
| Standard | YouTube, social media | Straight out of camera, no grading needed |
Shutter Speed: The 180-Degree Rule
Shutter speed should generally be double your frame rate. 24p means 1/50th of a second. 30p means 1/60th. 60p means 1/125th. 120p means 1/250th. This gives you the natural motion blur that human eyes expect.
Breaking this rule is possible for creative effect. A faster shutter speed creates a staccato, jarring look. A slower shutter speed creates excessive blur.
But the 180-degree rule is the foundation of professional-looking video.
Cinematic and Event Work: N-Log, External Recorder, and Dual-Slot Safety
This is the branch for wedding videographers, documentary filmmakers, and short-film creators. You need the highest dynamic range and the most color information in post. You also need reliability.
The N-Log and External Recorder Workflow
The Z7 II cannot record 10-bit video internally. It is limited to 8-bit 4:2:0. To unlock the camera's real potential, you need an external recorder.
The Atomos Ninja V is the most popular choice. It gives you 10-bit 4:2:2 N-Log or ProRes RAW.
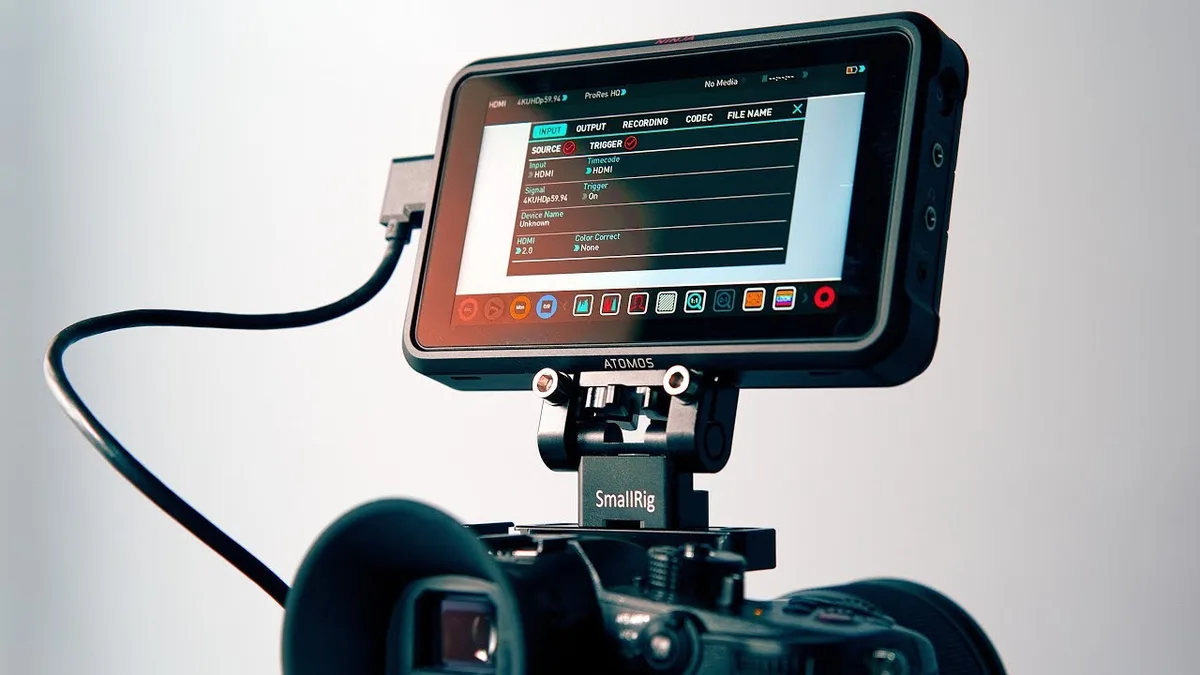
Image source: Bing (Web (fair-use with source credit))
The setup is straightforward. Set Picture Control to N-Log. Set HDMI output to 10-bit.
Set the external recorder to match the camera's frame rate and resolution. Expose to the right (ETTR) using the histogram or zebras at 95%. In post, you apply a LUT to convert N-Log to Rec.709 and grade from there.
Dual-Slot Safety for Events
For paid work, card failure is a nightmare. The Z7 II has dual slots. Set the second slot to "Backup" in the video menu.
This writes the same footage to both cards simultaneously. It halves your recording time, but it is worth it for a wedding ceremony.
Make sure you are using high-speed CFexpress or XQD cards in the primary slot. UHS-II SD cards in the secondary slot are fine for backup, but they are slower to clear. Keep your cards formatted and your firmware updated.
You can follow the same process outlined in our firmware update guide to stay current.
Low Light, Interviews, and Vlogs: Flat Profile, IBIS, and Autofocus Tips
This branch is for run-and-gun shooters, solo YouTubers, and anyone working in challenging lighting conditions. The priority is speed, stabilization, and clean audio. You do not have time for a complex grade.
Picture Profile: Flat or Neutral
N-Log is noisy in low light and requires careful exposure. For interviews and vlogs, use the Flat picture profile. It gives you more flexibility than Standard without the noise floor of N-Log.
You can add a quick contrast curve in post without needing a full grade.
Neutral is also a good option if you do not want to grade at all. It dials down the contrast and sharpening compared to Standard, giving you a more natural look straight out of camera.
IBIS and Autofocus
The Z7 II's in-body image stabilization (IBIS) is excellent. For handheld work, enable IBIS and set it to "Normal" mode. For tripod or gimbal work, turn it off to avoid drift.
The stabilization is so good that you can often leave the tripod at home for interviews.
For autofocus, use Wide-Area AF (L) for face and eye tracking. It is sticky and reliable. If the subject turns away, the camera will hunt.
Switch to manual focus for static shots or interviews. The focus peaking feature makes manual focus easy.
Audio is King
Viewers will forgive slightly soft video. They will not forgive bad audio. Use an external microphone and monitor audio levels in the camera.
Set the audio input to manual and keep levels peaking around -12dB.
The Z7 II has a microphone input, but no headphone jack on the body. You need the optional adapter or an external recorder to monitor audio. This is a known limitation.
You can work around it by using a recorder with its own monitoring, similar to how you would set up a reliable monitoring system for a dash cam.
Slow Motion: 120p, Shutter Speed, and the Crop Trade-Off
Everyone loves slow motion. The Z7 II has two distinct paths for it. Each path has its own strengths and weaknesses.
1080p 120fps (Full-Frame)
The Z7 II can shoot 1080p at 120 frames per second in full-frame FX mode. This is a 4x slow motion at 30p or 5x at 24p. The image quality is good, and you keep the full frame.
Shutter speed should be 1/250.
This is the best option for everyday slow motion. It is easier to light and focus. The 1080p resolution is perfectly fine for social media and web delivery.
4K 60p (DX Crop)
If you want 4K slow motion, you must switch to DX mode. This crops the sensor by 1.5x. A 24mm lens becomes a 36mm lens.
A 50mm lens becomes a 75mm lens. This is a significant change in your field of view.
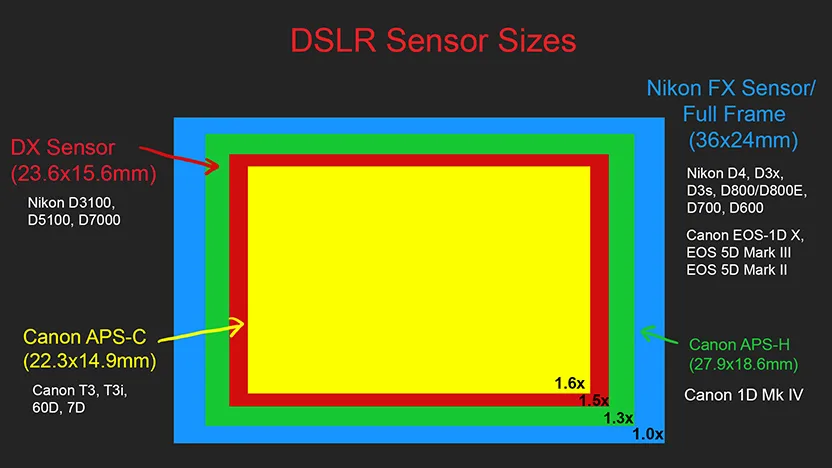
Image source: Bing (Web (fair-use with source credit))
When to Use Each
Use 1080p 120fps for everyday slow motion. It is easier to light and focus. Use 4K 60p DX when you need the resolution for reframing in post or when you want the extra reach of the crop.
Plan your lens selection around the crop. If you are shooting a landscape in 4K 60p, you will be surprised how tight it looks. Many shooters prefer to keep a wider lens on hand specifically for DX mode.
Common Mistakes That Ruin a Z7 II Video Clip
Even experienced shooters make these errors. The good news is they are all avoidable once you know what to look for.
Forgetting the DX Crop
You switch to 4K 60p and frame your shot perfectly. Later you realize the lens is suddenly tighter than you expected. The DX crop is 1.5x.
A 50mm lens becomes a 75mm lens. This mistake is permanent in-camera.
The fix is simple. Check your sensor area setting before every new shoot. If you need 4K 60p, frame your shot with the crop in mind.
Use a wider lens than you think you need.
Exposing N-Log Incorrectly
N-Log is designed to be underexposed by default. It has a base ISO of 800. If you expose it like a Standard profile, your shadows will be noisy and your highlights will clip.
Use the histogram and zebras. Set zebras to 95% for highlight warnings. Expose to the right (ETTR) without clipping.
Your footage should look bright and flat. In post, you bring it back down.
Ignoring Audio
The Z7 II has no headphone jack on the body. This is a known limitation. You can monitor audio through the HDMI output or use an external recorder.
Many shooters forget to check audio levels until post. By then it is too late. Always record a test clip and check levels.
Set the input to manual and keep peaks around -12dB.
Rolling Shutter During Fast Pans
The Z7 II has a CMOS sensor. Fast pans cause rolling shutter. The image skews and looks unnatural.
This is more noticeable at 4K 60p in DX mode.
Slow down your pans. Use a gimbal for smooth movement. If you need fast pans, consider a camera with a faster readout speed.
Not Updating Firmware
Nikon releases firmware updates that fix bugs and improve performance. The Z7 II has received several updates since launch. Check your firmware version against the latest on Nikon's support site.
The process is straightforward. Download the file, copy it to a formatted card, and run the update in the camera menu. You can follow a similar routine to the one described for keeping your gear's firmware current.
Real-World Scenario: A Documentary Shoot from Start to Finished Edit
Let's walk through a real shoot. This helps you see how the decision tree works in practice.
The Setup
You are filming a 10-minute documentary interview in a dimly lit community center. The subject is sitting by a window. You have one LED panel and a lavalier microphone.
You need usable footage in two hours.
The Decision
You choose the interview branch. Picture profile is Flat. Sensor area is FX for full-frame low-light performance.
Frame rate is 24p for a cinematic look. Shutter speed is 1/50th.
ISO is 1600. The Z7 II handles this well. You set autofocus to Wide-Area AF (L) with face detection.
You enable IBIS in Normal mode.
The Execution
You record a test clip. The audio peaks at -12dB. The exposure is correct.
You start the interview.
The subject turns their head. The autofocus hunts for a moment. You switch to manual focus and use focus peaking.
The rest of the interview is sharp.
The Post-Production
You import the footage. You apply a light grade to the Flat profile. You add a contrast curve and a slight color temperature adjustment.
The final clip looks clean and natural.
The choice of Flat profile over N-Log saved you time. You did not need an external recorder. You did not need to grade a log profile.
The footage was ready to deliver in 30 minutes. If you had chosen N-Log, you would have needed more light and more time in post. The decision tree helped you choose the right branch for the constraints.
Frequently Asked Questions
Can I get 10-bit color without an external recorder?
No. The Z7 II is limited to 8-bit 4:2:0 internal recording. To get 10-bit 4:2:2 or ProRes RAW, you need an external recorder like the Atomos Ninja V.
This is a hardware limitation of the camera.
What is the best video setting for low light?
Use the Flat picture profile. Set ISO to 1600 or 3200. Use FX sensor area for the best light gathering.
Shutter speed at 1/50th for 24p. Enable IBIS for handheld stability. Avoid N-Log as it raises the noise floor.
Does the Z7 II overheat during long recordings?
The Z7 II has a magnesium alloy body that dissipates heat well. It does not have a recording time limit. In practice, it can record for over 30 minutes without overheating.
Direct sunlight and high ambient temperatures can cause thermal warnings.
How do I reset the video settings to default?
Go to the Setup menu. Select "Reset all settings." This clears all custom settings including video profiles. To reset only video settings, use the "Reset video settings" option in the video menu.
This is faster than clearing everything.
Your Decision Guide: Pick Your Branch, Then Optimize
Here is the final decision tree. Use it before every shoot.
| Scenario | Sensor Area | Picture Profile | Frame Rate | Shutter | External Recorder |
|---|---|---|---|---|---|
| Cinematic narrative | FX | N-Log | 24p | 1/50th | Yes |
| Wedding / event | FX | N-Log | 30p | 1/60th | Yes (dual slot) |
| Interview / vlog | FX | Flat | 24p | 1/50th | No |
| Low light | FX | Flat | 24p | 1/50th | No |
| Slow motion | DX | Flat | 60p or 120p | 1/125th or 1/250th | No |
| Social media | FX | Standard | 30p | 1/60th | No |
How to Use This Table
Find your scenario in the left column. Follow the settings across the row. These are your starting points.
Adjust based on your specific conditions.
If you are shooting a cinematic narrative, you need N-Log and an external recorder. That is the highest quality branch. If you are shooting an interview, you can skip the external recorder and use Flat.
Save time and storage.
No single setting works for everything. The Z7 II is a versatile tool, but it demands deliberate choices. The decision tree removes the guesswork.
You show up prepared. You shoot with confidence. You deliver great footage every time.

Similar Posts